取引先担当者カード
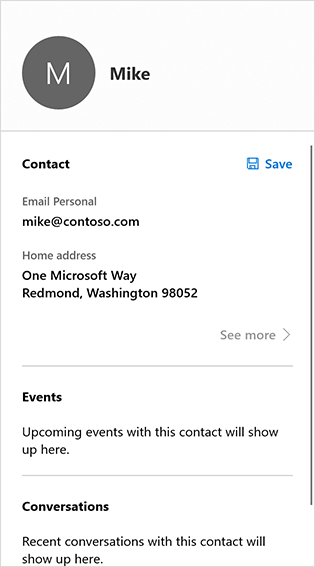
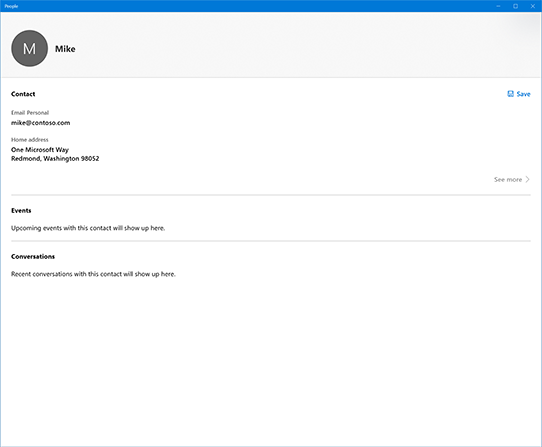
連絡先カードには、Contact (個人や企業を表すために Windows によって使用されるメカニズム) で使用されている名前、電話番号、住所などの連絡先情報が表示されます。 連絡先カードでは、ユーザーが連絡先情報を編集することもできます。 コンパクトな連絡先カード、または追加情報を含む完全な連絡先カードを表示することを選択できます。
重要な API: ShowContactCard メソッド、ShowFullContactCard メソッド、IsShowContactCardSupported メソッド、Contact クラス
連絡先カードを表示するには、次の 2 つの方法があります。
- 簡易非表示のポップアップに表示される標準の連絡先カードとして、ユーザーが外部をクリックすると連絡先カードが消えます。
- より多くのスペースを占有し、軽く無視できない完全な連絡先カードとして、ユーザーはそれを閉じるには 閉じる をクリックする必要があります。


これは適切なコントロールですか?
連絡先の連絡先情報を表示する場合は、連絡先カードを使用します。 連絡先の名前と画像のみを表示する場合は、 人の画像コントロールを使用します。
標準の連絡先カードを表示する
通常、ユーザーが何かをクリックしたため、連絡先カードが表示されます。ボタンや 人の画像コントロール。 要素を非表示にしたくありません。 非表示にしないようにするには、要素の場所とサイズを記述する Rect を作成する必要があります。
これを行うユーティリティ関数を作成しましょう。後で使用します。
// Gets the rectangle of the element
public static Rect GetElementRectHelper(FrameworkElement element)
{
    // Passing "null" means set to root element.
    GeneralTransform elementTransform = element.TransformToVisual(null);
    Rect rect = elementTransform.TransformBounds(new Rect(0, 0, element.ActualWidth, element.ActualHeight));
    return rect;
}
ContactManager.IsShowContactCardSupported メソッドを呼び出して、連絡先カードを表示できるかどうかを判断します。 サポートされていない場合は、エラー メッセージを表示します。 (この例では、クリック イベントに応答して連絡先カードを表示することを前提としています)。
// Contact and Contact Managers are existing classes
private void OnUserClickShowContactCard(object sender, RoutedEventArgs e)
{
    if (ContactManager.IsShowContactCardSupported())
    {
手順 1 で作成したユーティリティ関数を使用して、イベントを発生したコントロールの境界を取得します (そのため、連絡先カードではカバーされません)。
Rect selectionRect = GetElementRect((FrameworkElement)sender);表示する Contact オブジェクトを取得します。 この例では単純な連絡先を作成するだけですが、実際の連絡先をコードで取得する必要があります。
            // Retrieve the contact to display
            var contact = new Contact();
            var email = new ContactEmail();
            email.Address = "jsmith@contoso.com";
            contact.Emails.Add(email);
連絡先カードを表示するには ShowContactCard メソッドを呼び出します。
        ContactManager.ShowFullContactCard(
            contact, selectionRect, Placement.Default);
    }
}
完全なコード例を次に示します。
// Gets the rectangle of the element
public static Rect GetElementRect(FrameworkElement element)
{
    // Passing "null" means set to root element.
    GeneralTransform elementTransform = element.TransformToVisual(null);
    Rect rect = elementTransform.TransformBounds(new Rect(0, 0, element.ActualWidth, element.ActualHeight));
    return rect;
}

// Display a contact in response to an event
private void OnUserClickShowContactCard(object sender, RoutedEventArgs e)
{
    if (ContactManager.IsShowContactCardSupported())
    {
        Rect selectionRect = GetElementRect((FrameworkElement)sender);

        // Retrieve the contact to display
        var contact = new Contact();
        var email = new ContactEmail();
        email.Address = "jsmith@contoso.com";
        contact.Emails.Add(email);

        ContactManager.ShowContactCard(
            contact, selectionRect, Placement.Default);
    }
}
連絡先カード全体を表示する
完全な連絡先カードを表示するには、ShowContactCard の代わりに ShowFullContactCard メソッド呼び出します。
private void onUserClickShowContactCard()
{

    Contact contact = new Contact();
    ContactEmail email = new ContactEmail();
    email.Address = "jsmith@hotmail.com";
    contact.Emails.Add(email);


    // Setting up contact options.
    FullContactCardOptions fullContactCardOptions = new FullContactCardOptions();

    // Display full contact card on mouse click.
    // Launch the People’s App with full contact card
    fullContactCardOptions.DesiredRemainingView = ViewSizePreference.UseLess;


    // Shows the full contact card by launching the People App.
    ContactManager.ShowFullContactCard(contact, fullContactCardOptions);
}
"実際の" 連絡先の取得
この記事の例では、単純な連絡先を作成します。 実際のアプリでは、おそらく既存の連絡先を取得する必要があります。 手順については、 Contacts と予定表に関する記事を参照してください。
関連記事
Windows developer
