演習 - クラウドネイティブ アプリをデプロイする Azure DevOps パイプラインを作成する
マネージャーから、Azure Pipelines を使用するように会社の eShop アプリの CI/CD を変更することを求められています。 ここで、製品サービスをビルドしてデプロイするための Azure DevOps パイプラインを作成します。
Azure DevOps パイプラインを作成する
重要
開始する前に、Azure DevOps アカウントを持っている必要があります。 お持ちでない場合は、dev.azure.com で無料で作成できます。
- dev.azure.com にサインインします。
- [+ New project] を選択します。
- [プロジェクト名] に、「eShop デプロイ」と入力します。
- [表示] は [プライベート] に設定したままにし、[作成] を選択します。
- 左側で、[パイプライン] を選択し、[パイプラインの作成] を選びます。
- [接続] ページ の [コードの場所] で、[GitHub] を選択します。
- メッセージが表示されたら、GitHub にサインインし、Azure Pipelines から GitHub アカウントにアクセスすることを承認します。
- [リポジトリの選択] で、フォークしたリポジトリを選びます。
- [構成] ページで、[Azure Kubernetes Service へのデプロイ] オプションを選択します。
- [Azure Kubernetes Service へのデプロイ] ペインで、自分の Azure サブスクリプションを選び、[続行] を選択します。
- メッセージが表示されたら、Azure サブスクリプションにログインします。
- [クラスター] では、前のユニットで作成した AKS クラスター aks-eshop を選択します。
- [名前空間] では、[既存] を選択したままにし、[既定値] を選択します。
- [コンテナー レジストリ] では、前のユニットで作成した Azure Container Registry (acseshop186748394 など) を選択します。
- [イメージ名] に、「productservice」と入力します。
- [サービス ポート] に、「8080」と入力します。
- [Validate and configure] を選択します。
パイプライン YAML ファイルを確認する
Azure Pipelines では、YAML ファイルを使用して、アプリをビルドしてデプロイする手順を定義します。 YAML ファイルは GitHub リポジトリに格納され、指定した情報に基づいて自動的に作成されます。
YAML ファイルを確認しましょう。
trigger:
- main

resources:
- repo: self

variables:

  # Container registry service connection established during pipeline creation
  dockerRegistryServiceConnection: '3bcbb23c-6fca-4ff0-8719-bfbdb64a89b1'
  imageRepository: 'productservice'
  containerRegistry: 'acseshop186748394.azurecr.io'
  dockerfilePath: '**/Dockerfile'
  tag: '$(Build.BuildId)'
  imagePullSecret: 'acseshop18674839414442d34-auth'

  # Agent VM image name
  vmImageName: 'ubuntu-latest'


stages:
- stage: Build
  displayName: Build stage
  jobs:
  - job: Build
    displayName: Build
    pool:
      vmImage: $(vmImageName)
    steps:
    - task: Docker@2
      displayName: Build and push an image to container registry
      inputs:
        command: buildAndPush
        repository: $(imageRepository)
        dockerfile: $(dockerfilePath)
        containerRegistry: $(dockerRegistryServiceConnection)
        tags: |
          $(tag)

    - upload: manifests
      artifact: manifests

- stage: Deploy
  displayName: Deploy stage
  dependsOn: Build

  jobs:
  - deployment: Deploy
    displayName: Deploy
    pool:
      vmImage: $(vmImageName)
    environment: 'PhilStollerymod9cloudnativeexercisecode-1959.default'
    strategy:
      runOnce:
        deploy:
          steps:
          - task: KubernetesManifest@0
            displayName: Create imagePullSecret
            inputs:
              action: createSecret
              secretName: $(imagePullSecret)
              dockerRegistryEndpoint: $(dockerRegistryServiceConnection)

          - task: KubernetesManifest@0
            displayName: Deploy to Kubernetes cluster
            inputs:
              action: deploy
              manifests: |
                $(Pipeline.Workspace)/manifests/deployment.yml
                $(Pipeline.Workspace)/manifests/service.yml
              imagePullSecrets: |
                $(imagePullSecret)
              containers: |
                $(containerRegistry)/$(imageRepository):$(tag)
trigger と resources セクションでは、パイプラインを実行する必要があるタイミングを定義します。 この場合、変更がリポジトリのメイン ブランチにコミットされると、パイプラインが実行されます。
variables セクションでは、パイプラインで使用される変数を定義します。 変数は、Azure Container Registry と、使用する Dockerfile を定義するために使用されます。
その後、YAML では、ubuntu-latest エージェントを使用するビルド ジョブが定義されます。 このジョブでは、Docker タスクを使用してイメージをビルドし、Azure Container Registry にプッシュします。
最後のステージでは、更新された製品サービスを AKS にデプロイします。 このジョブでは、KubernetesManifest タスクを使用してイメージを AKS にデプロイします。
パイプラインを実行する
[パイプライン YAML をレビューする] ページの右上にある [保存および実行] を選択します。 [保存および実行] ペインで、次の操作を行います。
- [このコミットのブランチを新規作成] を選びます。
- その他のオプションはすべて既定値のままにします。
- [保存および実行] を選択します。
パイプラインの監視とトラブルシューティングを行う
Azure Pipelines は、Azure DevOps ポータルから監視および管理されます。 作成したパイプラインの実行の出力を見てみましょう。
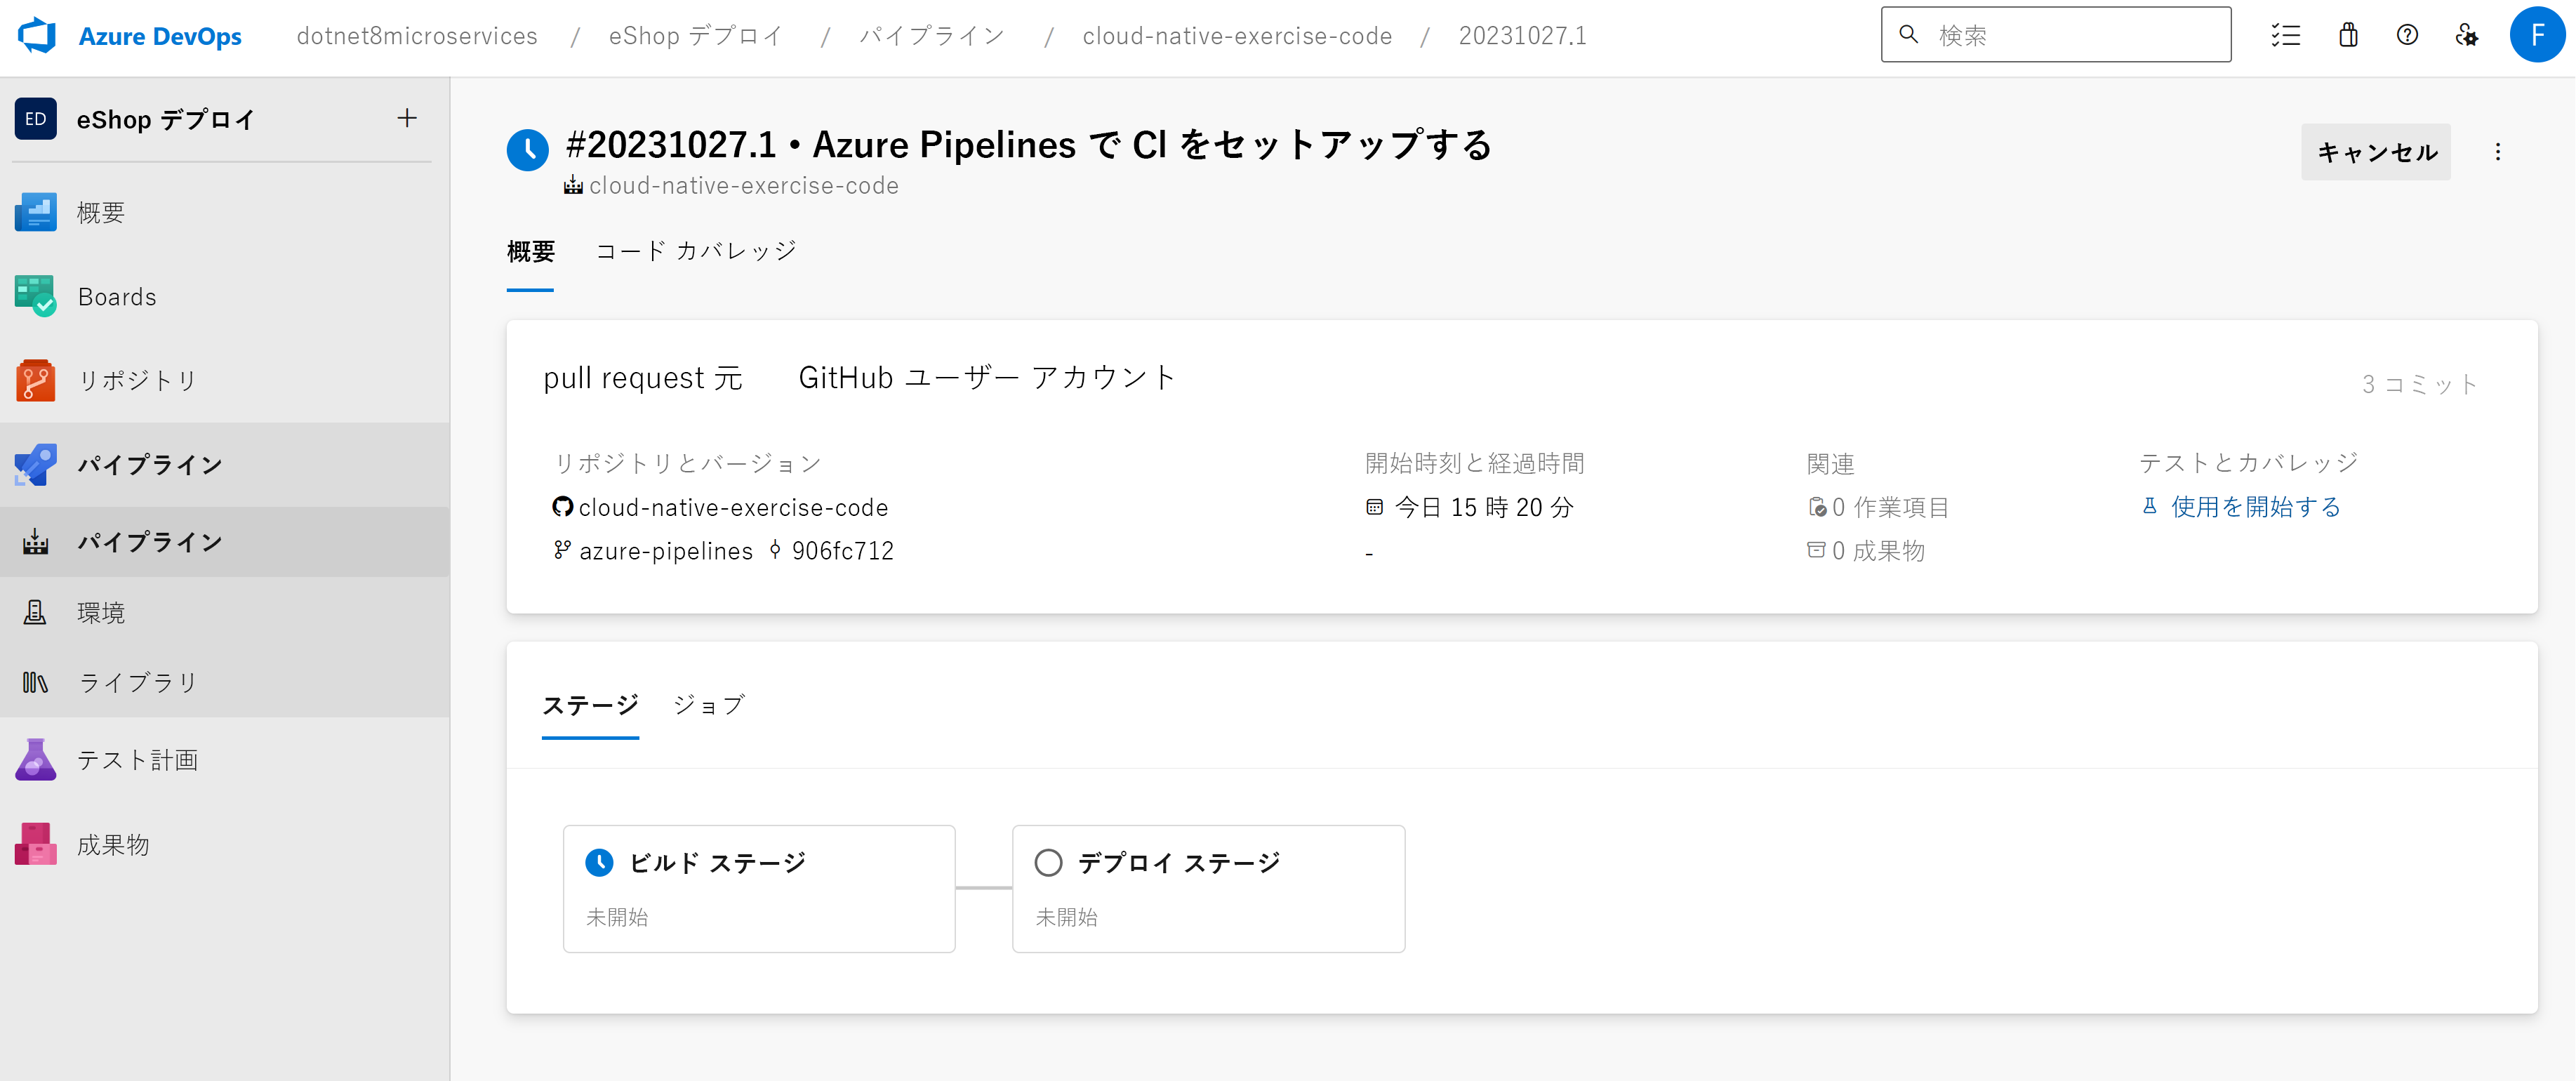
概要ページには、実行中のパイプラインのすべてのステージが表示されます。 ステージを選択すると、手順の詳細を表示できます。 しばらくすると、パイプラインが失敗したことがわかります。 [ビルド] ステージを選択します。
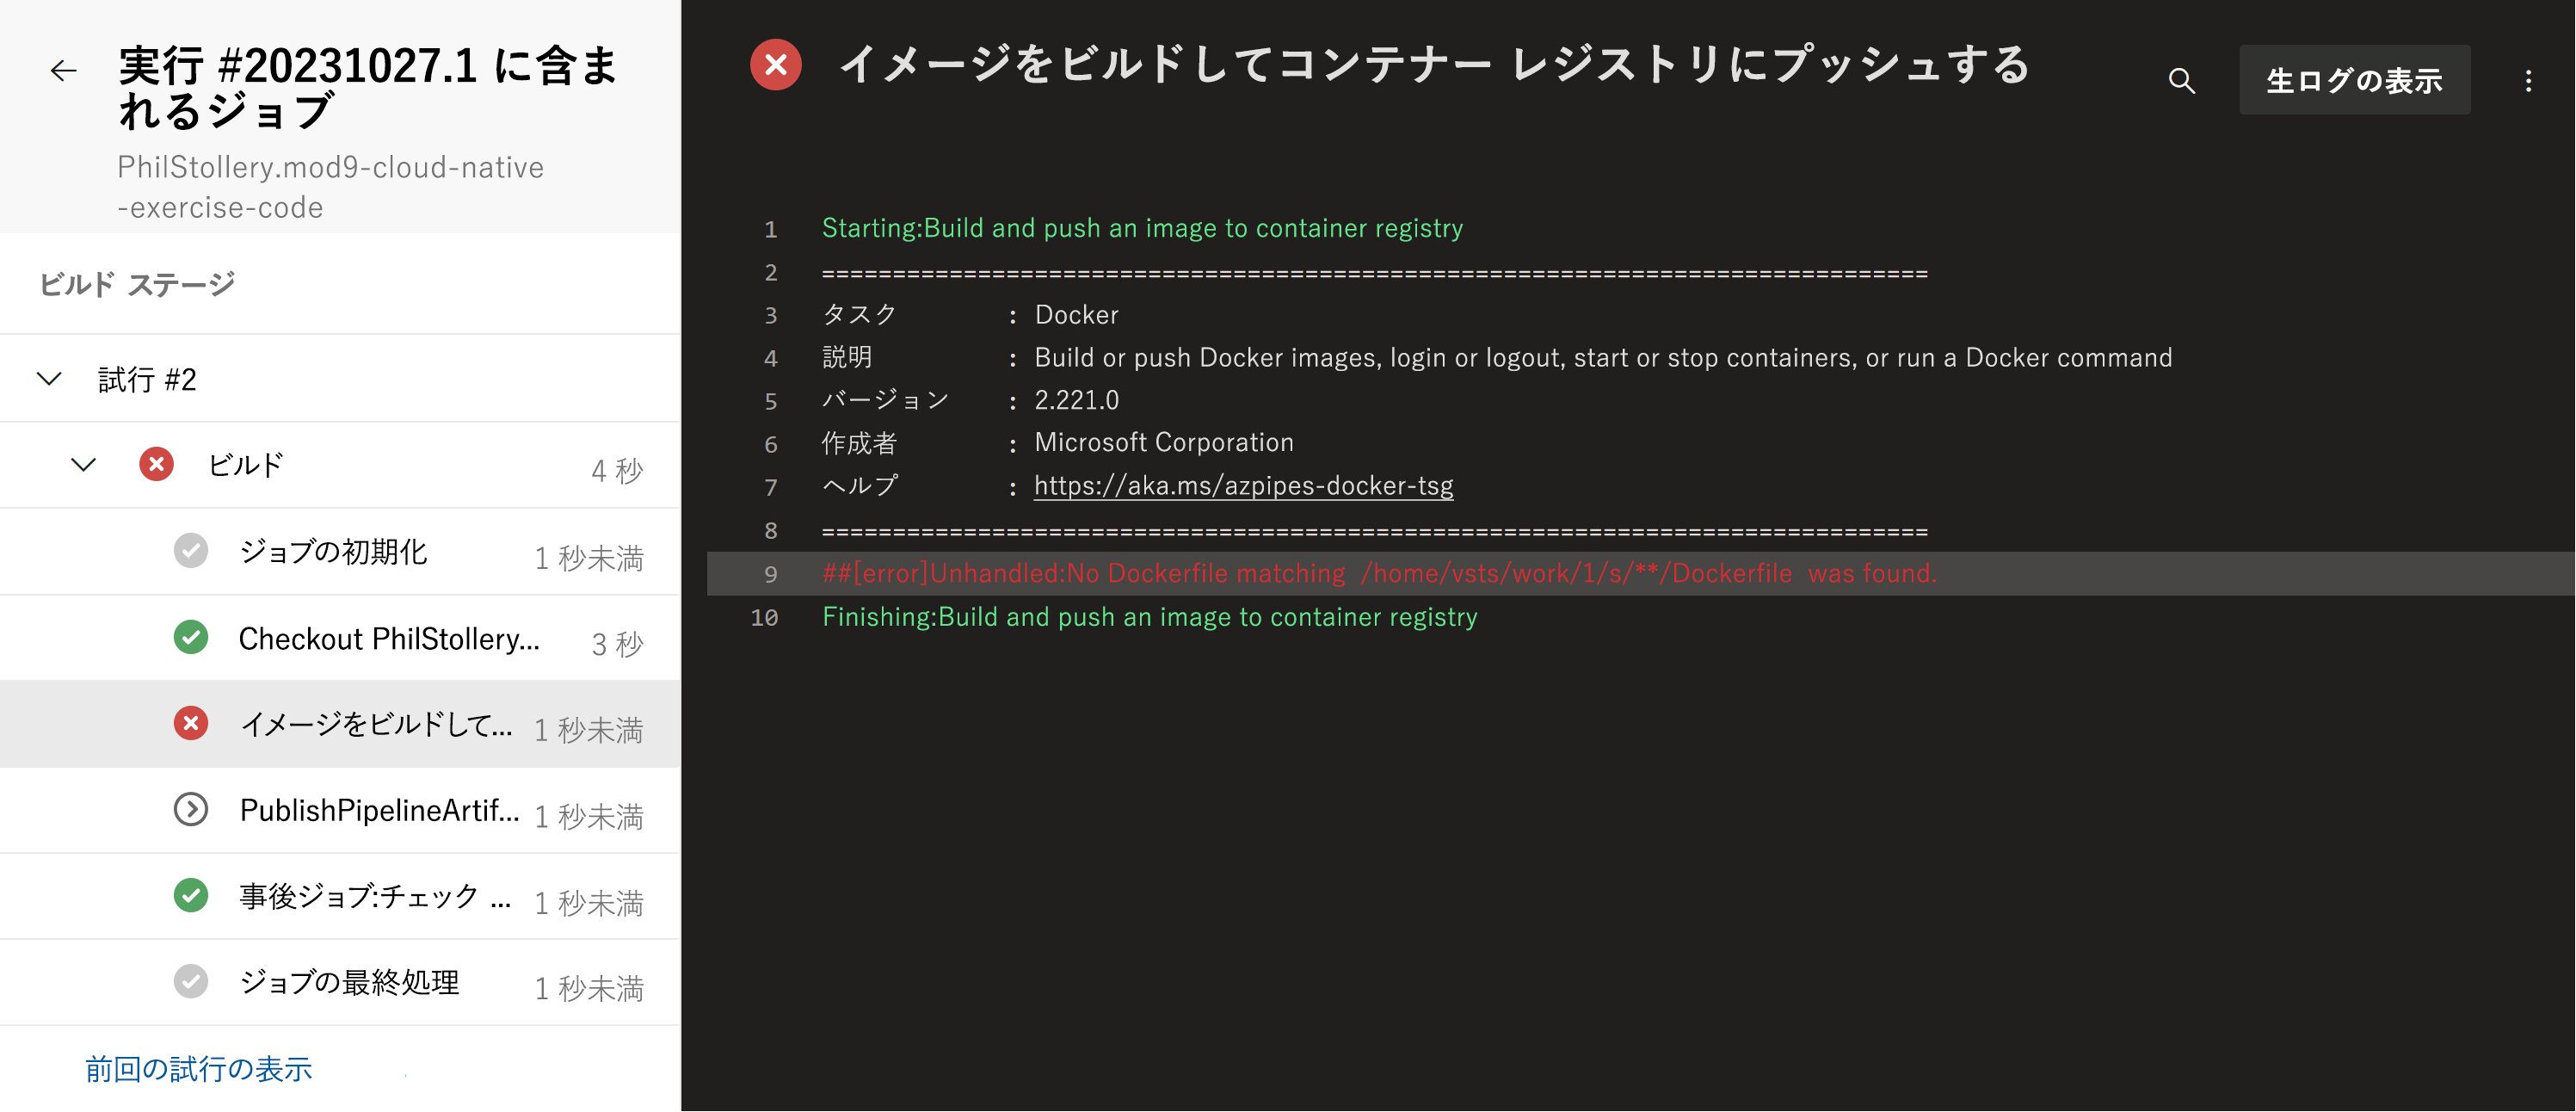
ビルド ステージでは、ビルドが失敗したことがわかります。 [イメージをビルドし、Azure Container Registry にプッシュする] 手順を選択します。 ログ ファイルのエラーは次のとおりです。
##[error]Unhandled: No Dockerfile matching /home/vsts/work/1/s/**/Dockerfile was found.
エラーを修正する
DevOps で、パイプラインの概要ページに戻ります。 作成したパイプラインを編集してエラーを修正します。
右上にある [その他の操作] メニューを選択し、[パイプラインの編集] を選びます。
YAML ファイルの 17 行目では、使用する Dockerfile が定義されています。既定では、パイプラインでリポジトリのルートに Dockerfile という名前のファイルがあることが想定されます。
eShop では、DockerfileProducts という名前の製品サービスに別の Docker ファイルが使用されます。 17 行目を次のように編集します。
dockerfilePath: '**/DockerfileProducts.acr'[保存] を選択します。
[保存] ペインで、[保存] を選択します。
[実行] を選択し、[パイプラインの実行] ペインで、[実行] を選びます。
ビルド ステージの完了を確認します。 デプロイ ステージは、選択して実行を許可するまで一時停止します。
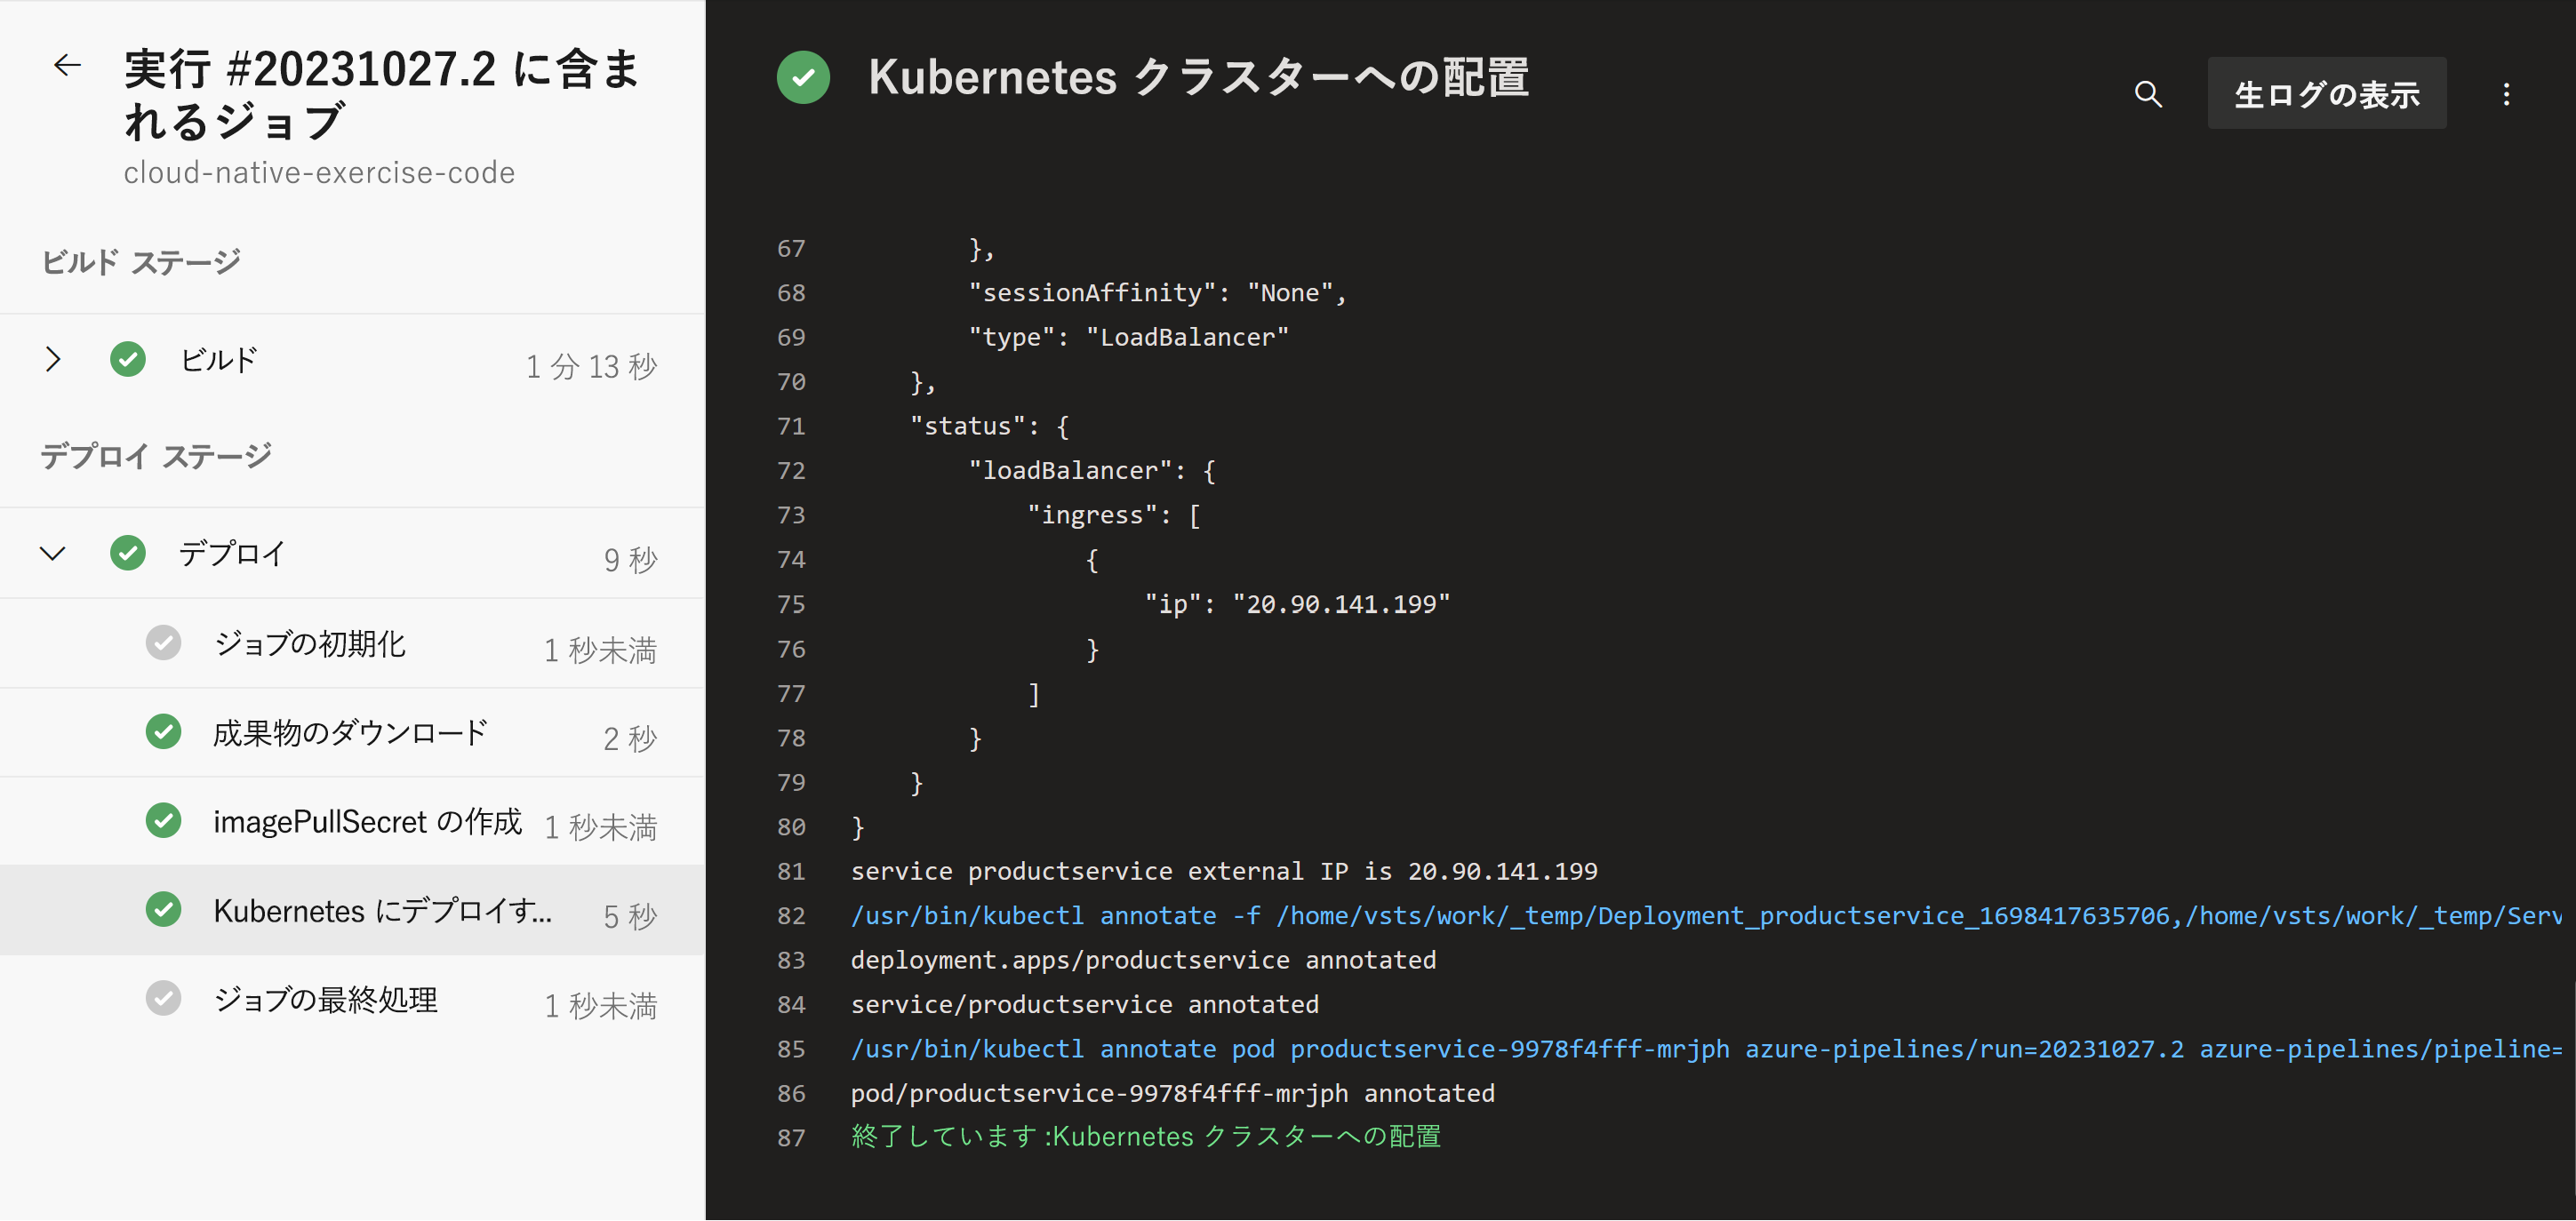
パイプラインが正常に完了しました。 [デプロイ] ステージを選択して、手順を表示します。


