チュートリアル: Xamarin.Android でのローカル通知の使用
このチュートリアルでは、Xamarin.Android アプリケーションでローカル通知を使用する方法について説明します。 ローカル通知の作成と発行の基本を示します。 ユーザーが通知領域で通知をクリックすると、2 番目のアクティビティが開始します。
概要
このチュートリアルでは、ユーザーがアクティビティのボタンをクリックしたときに通知を生成する Android アプリケーションを作成します。 ユーザーが通知をクリックすると、ユーザーが最初のアクティビティでボタンをクリックした回数を表示する 2 番目のアクティビティが起動します。
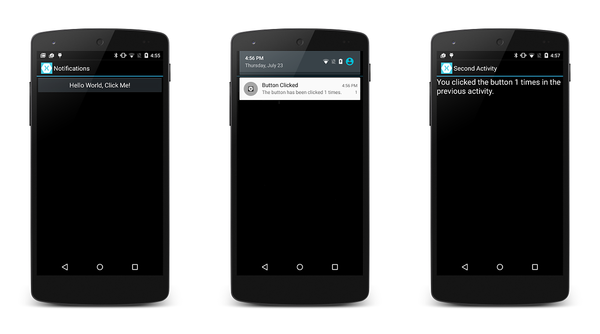
次のスクリーンショットは、このアプリケーションの例をいくつか示しています。
Note
このガイドでは、Android サポート ライブラリから NotificationCompat API に焦点を当てます。 これらの API により、Android 4.0 (API レベル 14) との下位互換性が最大限に確保されます。
プロジェクトの作成
まず、Android アプリ テンプレートを使用して新しい Android プロジェクトを作成しましょう。 このプロジェクトを LocalNotifications と呼ぶことにしましょう。 (Xamarin.Android プロジェクトの作成に慣れていない場合は、「Hello, Android」を参照してください。)
通知チャネルを作成するときに使用される 2 つの追加の文字列リソースが含まれるように、リソース ファイルの values/Strings.xml を編集します。
<?xml version="1.0" encoding="utf-8"?>

<resources>
  <string name="Hello">Hello World, Click Me!</string>
  <string name="ApplicationName">Notifications</string>

  <string name="channel_name">Local Notifications</string>
  <string name="channel_description">The count from MainActivity.</string>
</resources>
Android.Support.V4 NuGet パッケージを追加する
このチュートリアルでは、ローカル通知を作成するために NotificationCompat.Builder を使用します。 ローカル通知で説明されているように、NotificationCompat.Builder を使用するには、プロジェクトに Android サポート ライブラリ v4 NuGet を含める必要があります。
次に、MainActivity.cs を編集し、次の using ステートメントを追加して、コードで Android.Support.V4.App の型を使用できるようにします。
using Android.Support.V4.App;
また、Android.App バージョンではなくTaskStackBuilder の Android.Support.V4.App バージョンを使用していることをコンパイラに明確にする必要があります。 あいまいさを解決するには、次の using ステートメントを追加します。
using TaskStackBuilder = Android.Support.V4.App.TaskStackBuilder;
通知チャネルを作成する
次に、通知チャネルを作成する MainActivity にメソッドを追加します (必要な場合)。
void CreateNotificationChannel()
{
    if (Build.VERSION.SdkInt < BuildVersionCodes.O)
    {
        // Notification channels are new in API 26 (and not a part of the
        // support library). There is no need to create a notification
        // channel on older versions of Android.
        return;
    }

    var name = Resources.GetString(Resource.String.channel_name);
    var description = GetString(Resource.String.channel_description);
    var channel = new NotificationChannel(CHANNEL_ID, name, NotificationImportance.Default)
                  {
                      Description = description
                  };

    var notificationManager = (NotificationManager) GetSystemService(NotificationService);
    notificationManager.CreateNotificationChannel(channel);
}
OnCreate メソッドを更新して次の新しいメソッドを呼び出します。
protected override void OnCreate(Bundle bundle)
{
    base.OnCreate(bundle);
    SetContentView(Resource.Layout.Main);

    CreateNotificationChannel();
}
通知 ID を定義する
通知と通知チャネルには一意の ID が必要です。 MainActivity.cs を編集し、次の静的インスタンス変数を MainActivity クラスに追加しましょう。
static readonly int NOTIFICATION_ID = 1000;
static readonly string CHANNEL_ID = "location_notification";
internal static readonly string COUNT_KEY = "count";
通知を生成するコードを追加する
次に、ボタン Click イベント用の新しいイベント ハンドラーを作成する必要があります。 次のメソッドを MainActivity に追加します。
void ButtonOnClick(object sender, EventArgs eventArgs)
{
    // Pass the current button press count value to the next activity:
    var valuesForActivity = new Bundle();
    valuesForActivity.PutInt(COUNT_KEY, count);

    // When the user clicks the notification, SecondActivity will start up.
    var resultIntent = new Intent(this, typeof(SecondActivity));

    // Pass some values to SecondActivity:
    resultIntent.PutExtras(valuesForActivity);

    // Construct a back stack for cross-task navigation:
    var stackBuilder = TaskStackBuilder.Create(this);
    stackBuilder.AddParentStack(Class.FromType(typeof(SecondActivity)));
    stackBuilder.AddNextIntent(resultIntent);

    // Create the PendingIntent with the back stack:
    var resultPendingIntent = stackBuilder.GetPendingIntent(0, (int) PendingIntentFlags.UpdateCurrent);

    // Build the notification:
    var builder = new NotificationCompat.Builder(this, CHANNEL_ID)
                  .SetAutoCancel(true) // Dismiss the notification from the notification area when the user clicks on it
                  .SetContentIntent(resultPendingIntent) // Start up this activity when the user clicks the intent.
                  .SetContentTitle("Button Clicked") // Set the title
                  .SetNumber(count) // Display the count in the Content Info
                  .SetSmallIcon(Resource.Drawable.ic_stat_button_click) // This is the icon to display
                  .SetContentText($"The button has been clicked {count} times."); // the message to display.

    // Finally, publish the notification:
    var notificationManager = NotificationManagerCompat.From(this);
    notificationManager.Notify(NOTIFICATION_ID, builder.Build());

    // Increment the button press count:
    count++;
}
MainActivity の OnCreate メソッドは、通知チャネルを作成し、ボタンの Click イベントに ButtonOnClick メソッドを割り当てる呼び出しを行う必要があります (テンプレートによって提供されるデリゲート イベント ハンドラーを置き換えます)。
protected override void OnCreate(Bundle bundle)
{
    base.OnCreate(bundle);
    SetContentView(Resource.Layout.Main);

    CreateNotificationChannel();

    // Display the "Hello World, Click Me!" button and register its event handler:
    var button = FindViewById<Button>(Resource.Id.MyButton);
    button.Click += ButtonOnClick;
}
2 番目のアクティビティを作成する
ここで、ユーザーが通知をクリックしたときに Android に表示される別のアクティビティを作成する必要があります。 SecondActivity という名前の別の Android アクティビティをプロジェクトに追加します。 SecondActivity.cs を開き、その内容を次のコードに置き換えます。
using System;
using Android.App;
using Android.OS;
using Android.Widget;

namespace LocalNotifications
{
    [Activity(Label = "Second Activity")]
    public class SecondActivity : Activity
    {
        protected override void OnCreate(Bundle bundle)
        {
            base.OnCreate(bundle);

            // Get the count value passed to us from MainActivity:
            var count = Intent.Extras.GetInt(MainActivity.COUNT_KEY, -1);

            // No count was passed? Then just return.
            if (count <= 0)
            {
                return;
            }

            // Display the count sent from the first activity:
            SetContentView(Resource.Layout.Second);
            var txtView = FindViewById<TextView>(Resource.Id.textView1);
            txtView.Text = $"You clicked the button {count} times in the previous activity.";
        }
    }
}
SecondActivity 用のリソース レイアウトも作成する必要があります。 新しい Android レイアウト ファイルを Second.axml というプロジェクトに追加します。 Second.axml を編集し、次のレイアウト コードを貼り付けます。
<?xml version="1.0" encoding="utf-8"?>
<LinearLayout xmlns:android="http://schemas.android.com/apk/res/android"
    android:orientation="vertical"
    android:layout_width="fill_parent"
    android:layout_height="fill_parent"
    android:minWidth="25px"
    android:minHeight="25px">
    <TextView
        android:text=""
        android:textAppearance="?android:attr/textAppearanceLarge"
        android:layout_width="fill_parent"
        android:layout_height="wrap_content"
        android:id="@+id/textView1" />
</LinearLayout>
通知アイコンを追加する
最後に、通知が起動されたときに通知領域に表示される小さなアイコンを追加しましょう。 このアイコンをプロジェクトにコピーするか、独自のカスタム アイコンを作成できます。 アイコン ファイルに ic_stat_button_click.png という名前を付け、Resources/drawable フォルダーにコピーします。 このアイコン ファイルをプロジェクトに含めるには、必ず [追加] > [既存アイテム...] を使用してください。
アプリケーションの実行
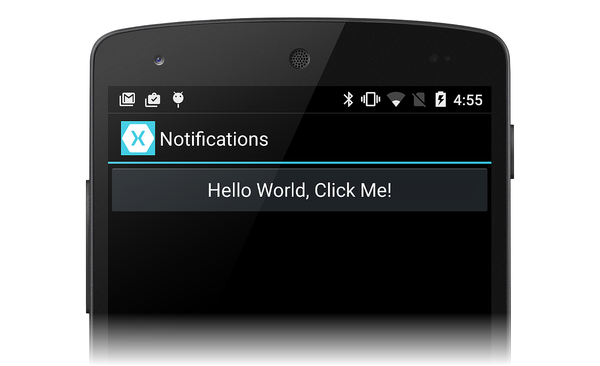
アプリケーションをビルドして実行します。 次のスクリーンショットのように、最初のアクティビティが表示されます。
ボタンをクリックすると、通知領域に通知の小さなアイコンが表示されます。
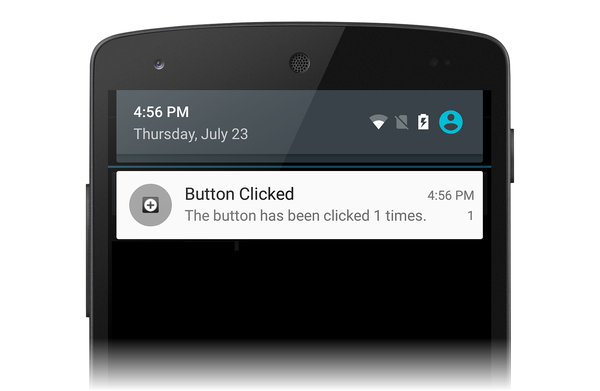
下にスワイプして通知ドロワーを公開すると、通知が表示されます。
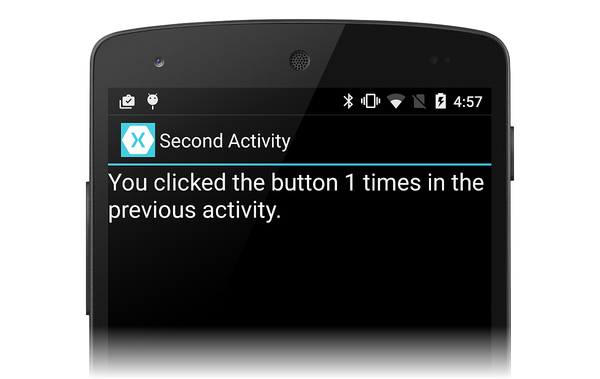
通知をクリックすると消え、他のアクティビティが起動されます。これは、次のスクリーンショットのようになります。
お疲れさまでした。 この時点で、Android ローカル通知のチュートリアルを完了し、参照できる実際のサンプルがあります。 ここに紹介した以外にも、通知に関する多くの情報があるため、詳細な情報が必要な場合は、通知に関する Google のドキュメントをご覧ください。
まとめ
このチュートリアルでは、通知の作成と表示に NotificationCompat.Builder を使用しました。 ここでは、通知を使用したユーザー操作に応答する方法として、2 番目のアクティビティを開始する方法の基本的な例を示し、最初のアクティビティから 2 番目のアクティビティへのデータの転送について説明しました。


