Refresh a Windows 7 computer with Windows 10
Applies to:
- Windows 10
This article will show you how to use MDT Lite Touch Installation (LTI) to upgrade a Windows 7 computer to a Windows 10 computer using the online computer refresh process. The computer refresh scenario is a reinstallation of an updated operating system on the same computer. You can also use this procedure to reinstall the same OS version. In this article, the computer refresh will be done while the computer is online. MDT also supports an offline computer refresh. For more info on that scenario, see the USMTOfflineMigration property on the MDT resource page.
For the purposes of this article, we'll use three computers: DC01, MDT01, and PC0001.
- DC01 is a domain controller for the contoso.com domain.
- MDT01 is domain member server that hosts your deployment share.
- PC0001 is a domain member computer running a previous version of Windows that is going to be refreshed to a new version of Windows 10, with data and settings restored. The example used here is a computer running Windows 7 SP1.
Both DC01 and MDT01 are running Windows Server 2019; however any supported version of Windows Server can be used. For more information on the setup for this article, see Prepare for deployment with MDT.

The computers used in this article.
The computer refresh process
A computer refresh isn't the same as an in-place upgrade because a computer refresh involves exporting user data and settings then wiping the device before installing a fresh OS and restoring the user's data and settings.
For a computer refresh with MDT, you use the User State Migration Tool (USMT), which is part of the Windows Assessment and Deployment Kit (ADK) for Windows 10, to migrate user data and settings. To complete a computer refresh, you will:
- Back up data and settings locally, in a backup folder.
- Wipe the partition, except for the backup folder.
- Apply the new operating system image.
- Install other applications.
- Restore data and settings.
During the computer refresh, USMT uses a feature called Hard-Link Migration Store. When you use this feature, the files are linked in the file system, which allows for fast migration, even when there's many files.
Note
In addition to the USMT backup, you can enable an optional full Windows Imaging (WIM) backup of the machine by configuring the MDT rules. If you do this, a .wim file is created in addition to the USMT backup. The .wim file contains the entire volume from the computer and helpdesk personnel can extract content from it if needed. Please note that this is a data WIM backup only. Using this backup to restore the entire computer is not a supported scenario.
Multi-user migration
By default, ScanState in USMT backs up all profiles on the machine, including local computer profiles. If you have a computer that has been in your environment for a while, it likely has several domain-based profiles on it, including those of former users. You can limit which profiles are backed up by configuring command-line switches to ScanState (added as rules in MDT).
For example, the following line configures USMT to migrate only domain user profiles and not profiles from the local SAM account database: ScanStateArgs=/ue:*\* /ui:CONTOSO\*
Note
You also can combine the preceding switches with the /uel switch, which excludes profiles that have not been accessed within a specific number of days. For example, adding /uel:60 will configure ScanState (or LoadState) not to include profiles that haven't been accessed for more than 60 days.
Support for additional settings
In addition to the command-line switches that control which profiles to migrate, XML templates control exactly what data is being migrated. You can control data within and outside the user profiles.
Multicast
Multicast is a technology designed to optimize simultaneous deployment to multiple devices. If you have a limited number of simultaneous deployments, you should disable multicast which was configured in a previous procedure in this guide. Disabling multicast will speed up deployment there are only a few computers. You'll need to update the deployment share after changing this setting.
Refresh a Windows 7 SP1 client
In this section, we assume that you've already performed the prerequisite procedures in the following articles, so that you have a deployment share named MDTProduction$ on MDT01:
- Prepare for deployment with MDT
- Create a Windows 10 reference image
- Deploy a Windows 10 image using MDT
It's also assumed that you have a domain member client computer named PC0001 in your environment running Windows 7, 8.1 or 10 that is ready for a refresh to the latest version of Windows 10. For demonstration purposes, we'll be refreshing a Windows 7 SP1 PC to Windows 10, version 1909.
Upgrade (refresh) a Windows 7 SP1 client
Important
Domain join details specified in the deployment share rules will be used to rejoin the computer to the domain during the refresh process. If the Windows 7 client is domain-jonied in a different OU than the one specified by MachineObjectOU, the domain join process will initially fail and then retry without specifying an OU. If the domain account that is specified (ex: MDT_JD) has permissions limited to a specific OU then the domain join will ultimately fail, the refresh process will proceed, and the client computer object will be orphaned in Active Directory. In the current guide, computer objects should be located in Contoso > Computers > Workstations. Use the Active Directory Users and Computers console to review the location of computer objects and move them if needed. To diagnose MDT domain join errors, see ZTIDomainJoin.log in the C:\Windows\Temp\DeploymentLogs directory on the client computer.
On PC0001, sign in as contoso\Administrator and start the Lite Touch Deploy Wizard by opening \\MDT01\MDTProduction$\Scripts\Litetouch.vbs.
Complete the deployment guide using the following settings:
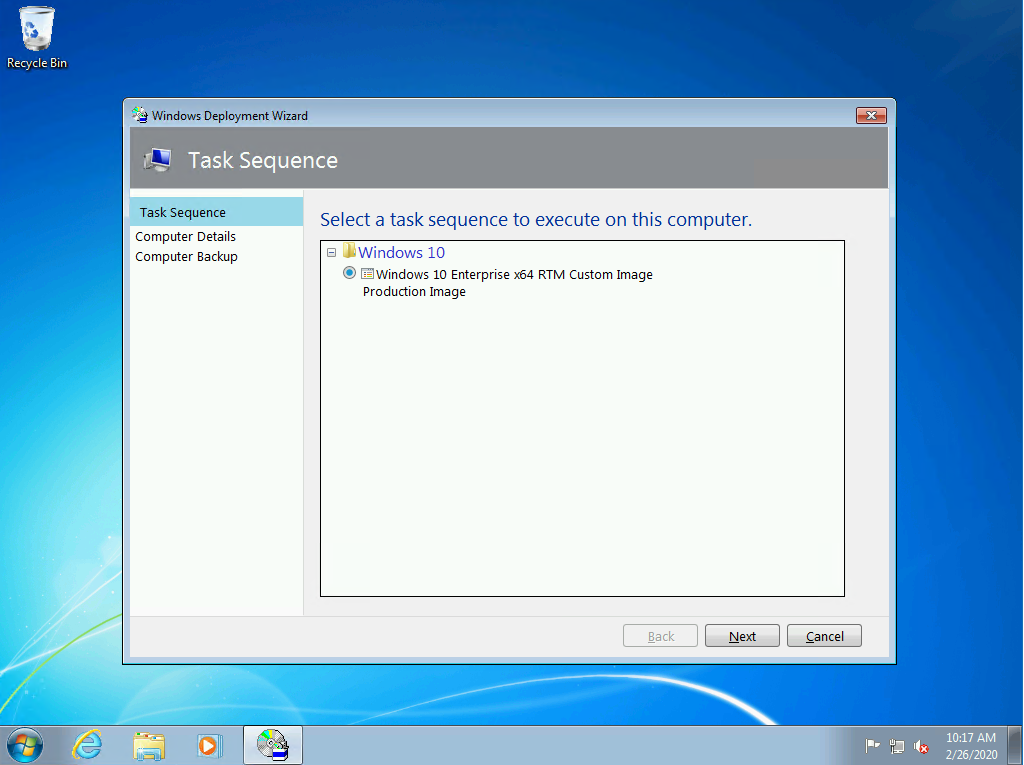
Select a task sequence to execute on this computer: Windows 10 Enterprise x64 RTM Custom Image
Computer name: <default>
Specify where to save a complete computer backup: Don't back up the existing computer
Note
Skip this optional full WIM backup that we are choosing not to perform. The USMT backup will still run.
Select one or more applications to install: Install - Adobe Reader

Setup starts and performs the following actions:
- Backs up user settings and data using USMT.
- Installs the Windows 10 Enterprise x64 operating system.
- Installs any added applications.
- Updates the operating system using your local Windows Server Update Services (WSUS) server.
- Restores user settings and data using USMT.
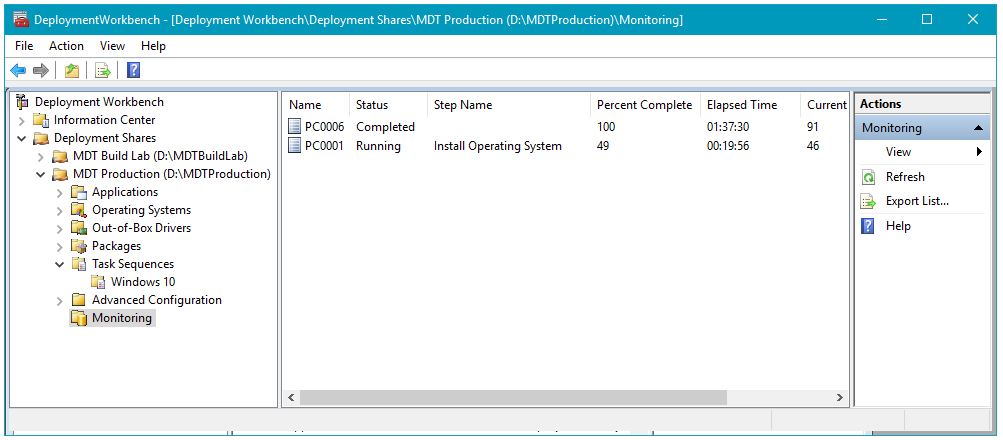
You can monitor progress of the deployment using the deployment workbench on MDT01. See the following example:

After the refresh process completes, sign in to the Windows 10 computer and verify that user accounts, data and settings were migrated.