Remote Debugging ASP.NET on a Remote IIS Computer
Note
This article applies to Visual Studio 2015. If you're looking for the latest Visual Studio documentation, see Visual Studio documentation. We recommend upgrading to the latest version of Visual Studio. Download it here
You can deploy an ASP.NET Web application to a Windows Server computer with IIS, and set it up for remote debugging. This guide explains how to set up and configure a Visual Studio 2015 MVC 4.5.2 application, deploy it to IIS, and attach the remote debugger from Visual Studio.
These procedures have been tested on these server configurations:
- Windows Server 2012 R2 and IIS 10
- Windows Server 2008 R2 and IIS 7.5
Most of the information in this article also applies to remote debugging an ASP.NET Core application, except that deployment of ASP.NET core apps is different and requires extra steps. To deploy an ASP.NET Core app to IIS, You will need to complete all sections of this article.
Prerequisites: install the remote debugger on the Windows Server computer
For instructions about how to download the remote debugger to the Windows Server computer, see Remote Debugging.
To do remote debugging of ASP.NET applications, you can either run the remote debugger application as an Administrator or start the remote debugger as a service. Details about how to run the remote debugger as a service can be found in Remote Debugging.
Once it is installed, make sure the remote debugger is running on the target machine. (If it's not, search for Remote Debugger in the Start menu. ) The remote debugger window looks like this. (4020 is the default port number)

Create the application on the Visual Studio computer
Create a new MVC ASP.NET application. (File / New / Project, then select Visual C# / Web / ASP.NET Web Application . In the ASP.NET 4.5.2 templates section, select MVC. Make sure that Host in Cloud is not selected under the Azure section. Name the project MyMVC.)
Open the HomeController.cs file, and set a breakpoint in the
About()method.In the Solution Explorer, right-click the project node and select Publish.
For Select a publish target, select Custom and name the profile MyMVC. Click Next.
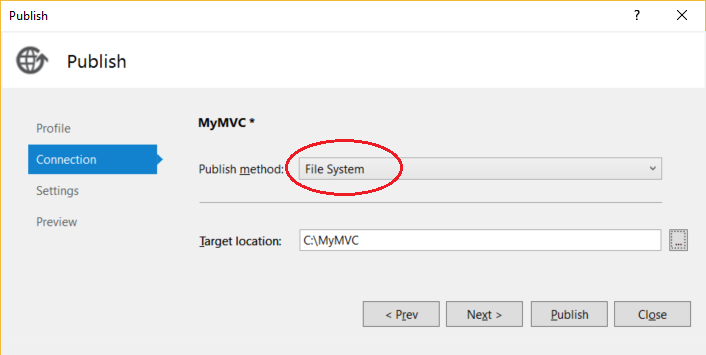
On the Connection tab, set the Publish method field to File System and the Target location field to a local directory. Click Next.

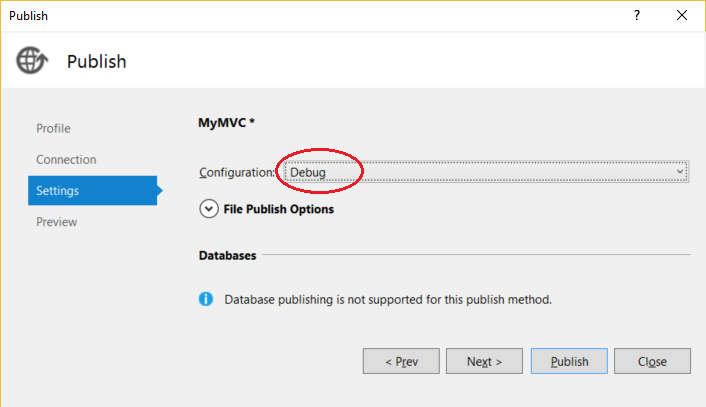
Set the configuration to Debug. Click Publish.

The application should be published to the local directory.
Deploy the ASP.NET application on the Windows Server remote computer
This section assumes that the Windows Server computer already has IIS enabled. On Windows Server 2012 R2, see IIS Configuration to enable IIS. (You can skip other sections of this article unless you are trying to deploy an ASP.NET Core app. For ASP.NET Core, follow the steps in the article to deploy the app instead of the steps described here.)
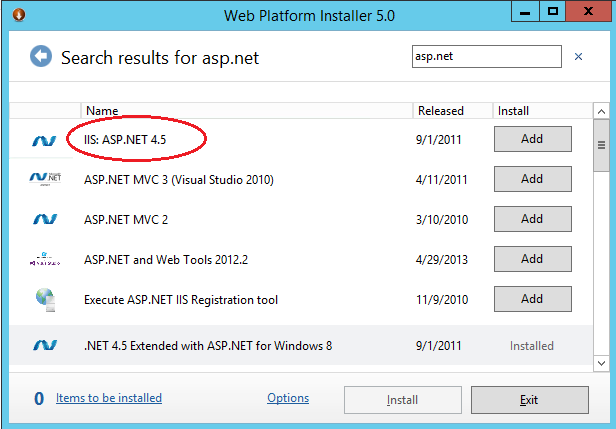
Install ASP.NET Use the Web Platform Components to install ASP.NET 4.5 (from the Server node in Windows Server 2012 R2, choose Get New Web Platform Components and then search for ASP.NET)

On Windows Server 2008 R2, install ASP.NET 4 instead using this command: C:\Windows\Microsoft.NET\Framework(64)\v4.0.30319\aspnet_regiis.exe -ir
Copy the ASP.NET project directory from the Visual Studio computer to a local directory (which we'll call C:\Publish) on the Windows Server computer. You can copy the project manually, use Xcopy, Web Deploy, Robocopy, Powershell, or other options.
Caution
If you need to make changes to the code or rebuild, you must republish and repeat this step. The executable you copied to the remote machine must exactly match your local source and symbols.
Make sure that the web.config file lists the correct version of the .NET Framework. For example, the .NET Framework version installed by default on Windows Server 2008 R2 is 4.0.30319, but we created an ASP.NET 4.5.2 version. If an ASP.NET 4.0 app is running on the Windows Server computer, you need to change the version:
<system.web>
    <authentication mode="None" />
    <compilation debug="true" targetFramework="4.0.30319" />
    <httpRuntime targetFramework="4.0.30319" />
  </system.web>
Open the Internet Information Services (IIS) Manager and go to Sites.
Right-click the Default Web Site node and select Add Application.
Set the Alias field to MyMVC and the Application pool field to ASP.NET v4.0 (ASP.NET 4.5 is not an option for the Application pool). Set the Physical path to C:\Publish (where you copied the ASP.NET project directory).
Note
For ASP.NET Core apps, set the Application pool field to No Managed Code.
Test the deployment by right-clicking Default Web Site and select Browse. If you successfully deployed the app, you will see the web page.
Attach to the ASP.NET application from the Visual Studio computer
On the Visual Studio computer, open the MyMVC solution.
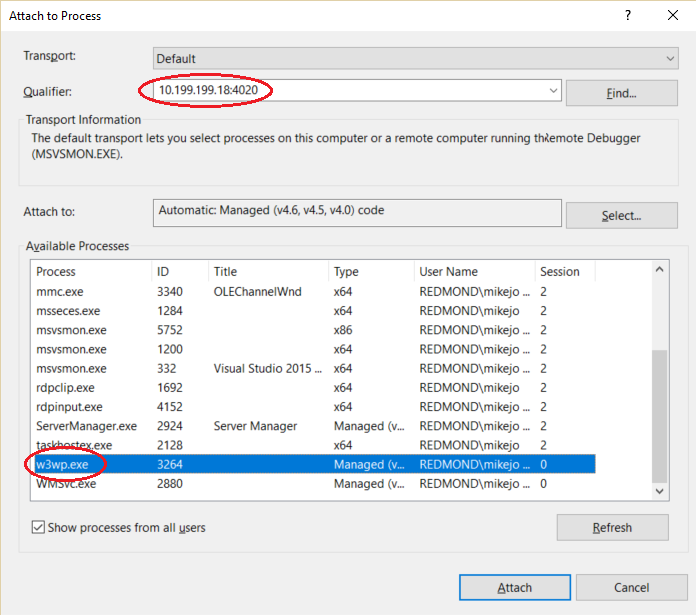
In Visual Studio, click Debug / Attach to Process (Ctrl + Alt + P).
Set the Qualifier field to <remote computer name>:4020.
Click Refresh. You should see some processes appear in the Available Processes window.
If you don't see any processes, try using the IP address instead of the remote computer name (the port is required). Use
ipconfigin a command line to get the IPv4 address.Check Show processes from all users.
Look for w3wp.exe and click Attach.
To quickly find the process name, type the first letter of the process.
Note
For an ASP.NET Core app, choose the dnx.exe process instead of w3wp.exe. (This process name may change in an upcoming release.)

Open the remote computer's website. In a browser, go to http://<remote computer name>.
You should see the ASP.NET web page.
In the ASP.NET web page, click the link to the About page.
The breakpoint should be hit in Visual Studio.