チュートリアル:Electron デスクトップ アプリでユーザーのサインインと Microsoft Graph API の呼び出しを行う
このチュートリアルでは、ユーザーのサインインを行い、PKCE による認可コード フローを使用して Microsoft Graph を呼び出す Electron デスクトップ アプリケーションを構築します。 構築するデスクトップ アプリでは、Node.js 用の Microsoft Authentication Library (MSAL) を使用します。
このチュートリアルでは、次の手順に従います。
- Azure portal でアプリケーションを登録する
- Electron デスクトップ アプリ プロジェクトを作成する
- アプリに認証ロジックを追加する
- Web API を呼び出すメソッドを追加する
- アプリの登録の詳細を追加する
- アプリケーションをテストする
前提条件
- Node.js
- Electron
- Visual Studio Code または別のコード エディター
アプリケーションを登録する
まず、Microsoft ID プラットフォームへのアプリケーションの登録に関するページの手順に従って、アプリを登録します。
アプリの登録には、次の設定を使用します。
- 名前:
ElectronDesktopApp(推奨) - サポートされているアカウントの種類: 組織のディレクトリ内のみのアカウント (シングル テナント)
- プラットフォームの種類:モバイル アプリケーションとデスクトップ アプリケーション
- リダイレクト URI:
http://localhost
プロジェクトを作成する
アプリケーションをホストするフォルダーを作成します (例: ElectronDesktopApp)。
最初に、ターミナル内のプロジェクト ディレクトリに移動し、次の
npmコマンドを実行します。npm init -y npm install --save @azure/msal-node @microsoft/microsoft-graph-client isomorphic-fetch bootstrap jquery popper.js npm install --save-dev electron@20.0.0次に、App という名前のフォルダーを作成します。 このフォルダー内に、UI として機能する index.html という名前のファイルを作成します。 そこに、次のコードを追加します。
<!DOCTYPE html> <html lang="en"> <head> <meta charset="UTF-8"> <meta name="viewport" content="width=device-width, initial-scale=1.0, shrink-to-fit=no"> <meta http-equiv="Content-Security-Policy" content="script-src 'self'" /> <title>MSAL Node Electron Sample App</title> <!-- adding Bootstrap 4 for UI components --> <link rel="stylesheet" href="../node_modules/bootstrap/dist/css/bootstrap.min.css"> </head> <body> <nav class="navbar navbar-expand-lg navbar-dark bg-primary"> <a class="navbar-brand">Microsoft identity platform</a> <div class="btn-group ml-auto dropleft"> <button type="button" id="signIn" class="btn btn-secondary" aria-expanded="false"> Sign in </button> <button type="button" id="signOut" class="btn btn-success" hidden aria-expanded="false"> Sign out </button> </div> </nav> <br> <h5 class="card-header text-center">Electron sample app calling MS Graph API using MSAL Node</h5> <br> <div class="row" style="margin:auto"> <div id="cardDiv" class="col-md-6" style="display:none; margin:auto"> <div class="card text-center"> <div class="card-body"> <h5 class="card-title" id="WelcomeMessage">Please sign-in to see your profile and read your mails </h5> <div id="profileDiv"></div> <br> <br> <button class="btn btn-primary" id="seeProfile">See Profile</button> </div> </div> </div> </div> <!-- importing bootstrap.js and supporting js libraries --> <script src="../node_modules/jquery/dist/jquery.js"></script> <script src="../node_modules/popper.js/dist/umd/popper.js"></script> <script src="../node_modules/bootstrap/dist/js/bootstrap.js"></script> <!-- importing app scripts | load order is important --> <script src="./renderer.js"></script> </body> </html>次に、main.js という名前のファイルを作成し、次のコードを追加します。
/*
 * Copyright (c) Microsoft Corporation. All rights reserved.
 * Licensed under the MIT License.
 */

const path = require("path");
const { app, ipcMain, BrowserWindow } = require("electron");

const AuthProvider = require("./AuthProvider");
const { IPC_MESSAGES } = require("./constants");
const { protectedResources, msalConfig } = require("./authConfig");
const getGraphClient = require("./graph");

let authProvider;
let mainWindow;

function createWindow() {
    mainWindow = new BrowserWindow({
        width: 800,
        height: 600,
        webPreferences: { preload: path.join(__dirname, "preload.js") },
    });

    authProvider = new AuthProvider(msalConfig);
}

app.on("ready", () => {
    createWindow();
    mainWindow.loadFile(path.join(__dirname, "./index.html"));
});

app.on("window-all-closed", () => {
    app.quit();
});

app.on('activate', () => {
    // On OS X it's common to re-create a window in the app when the
    // dock icon is clicked and there are no other windows open.
    if (BrowserWindow.getAllWindows().length === 0) {
        createWindow();
    }
});


// Event handlers
ipcMain.on(IPC_MESSAGES.LOGIN, async () => {
    const account = await authProvider.login();

    await mainWindow.loadFile(path.join(__dirname, "./index.html"));

    mainWindow.webContents.send(IPC_MESSAGES.SHOW_WELCOME_MESSAGE, account);
});

ipcMain.on(IPC_MESSAGES.LOGOUT, async () => {
    await authProvider.logout();

    await mainWindow.loadFile(path.join(__dirname, "./index.html"));
});

ipcMain.on(IPC_MESSAGES.GET_PROFILE, async () => {
    const tokenRequest = {
        scopes: protectedResources.graphMe.scopes
    };

    const tokenResponse = await authProvider.getToken(tokenRequest);
    const account = authProvider.account;

    await mainWindow.loadFile(path.join(__dirname, "./index.html"));

    const graphResponse = await getGraphClient(tokenResponse.accessToken)
        .api(protectedResources.graphMe.endpoint).get();

    mainWindow.webContents.send(IPC_MESSAGES.SHOW_WELCOME_MESSAGE, account);
    mainWindow.webContents.send(IPC_MESSAGES.SET_PROFILE, graphResponse);
});
上記のコード スニペットでは、Electron メイン ウィンドウ オブジェクトを初期化し、Electron ウィンドウとやり取りするためのイベント ハンドラーをいくつか作成します。 また、構成パラメーターをインポートし、サインイン、サインアウト、トークンの取得を処理するための authProvider クラスを初期化して、Microsoft Graph API を呼び出します。
同じフォルダー (App) 内に、renderer.js という名前の別のファイルを作成し、次のコードを追加します。
// Copyright (c) Microsoft Corporation. All rights reserved.
// Licensed under the MIT License

/**
 * The renderer API is exposed by the preload script found in the preload.ts
 * file in order to give the renderer access to the Node API in a secure and
 * controlled way
 */
const welcomeDiv = document.getElementById('WelcomeMessage');
const signInButton = document.getElementById('signIn');
const signOutButton = document.getElementById('signOut');
const seeProfileButton = document.getElementById('seeProfile');
const cardDiv = document.getElementById('cardDiv');
const profileDiv = document.getElementById('profileDiv');

window.renderer.showWelcomeMessage((event, account) => {
    if (!account) return;

    cardDiv.style.display = 'initial';
    welcomeDiv.innerHTML = `Welcome ${account.name}`;
    signInButton.hidden = true;
    signOutButton.hidden = false;
});

window.renderer.handleProfileData((event, graphResponse) => {
    if (!graphResponse) return;

    console.log(`Graph API responded at: ${new Date().toString()}`);
    setProfile(graphResponse);
});

// UI event handlers
signInButton.addEventListener('click', () => {
    window.renderer.sendLoginMessage();
});

signOutButton.addEventListener('click', () => {
    window.renderer.sendSignoutMessage();
});

seeProfileButton.addEventListener('click', () => {
    window.renderer.sendSeeProfileMessage();
});

const setProfile = (data) => {
    if (!data) return;

    profileDiv.innerHTML = '';

    const title = document.createElement('p');
    const email = document.createElement('p');
    const phone = document.createElement('p');
    const address = document.createElement('p');

    title.innerHTML = '<strong>Title: </strong>' + data.jobTitle;
    email.innerHTML = '<strong>Mail: </strong>' + data.mail;
    phone.innerHTML = '<strong>Phone: </strong>' + data.businessPhones[0];
    address.innerHTML = '<strong>Location: </strong>' + data.officeLocation;

    profileDiv.appendChild(title);
    profileDiv.appendChild(email);
    profileDiv.appendChild(phone);
    profileDiv.appendChild(address);
}
レンダラー メソッドは、preload.js ファイル内にある事前読み込みスクリプトによって公開され、レンダラーが安全かつ制御された方法で Node API にアクセスできるようにします。
次に、新規の preload.js ファイルを作成し、次のコードを追加します。
// Copyright (c) Microsoft Corporation. All rights reserved.
// Licensed under the MIT License

const { contextBridge, ipcRenderer } = require('electron');

/**
 * This preload script exposes a "renderer" API to give
 * the Renderer process controlled access to some Node APIs
 * by leveraging IPC channels that have been configured for
 * communication between the Main and Renderer processes.
 */
contextBridge.exposeInMainWorld('renderer', {
    sendLoginMessage: () => {
        ipcRenderer.send('LOGIN');
    },
    sendSignoutMessage: () => {
        ipcRenderer.send('LOGOUT');
    },
    sendSeeProfileMessage: () => {
        ipcRenderer.send('GET_PROFILE');
    },
    handleProfileData: (func) => {
        ipcRenderer.on('SET_PROFILE', (event, ...args) => func(event, ...args));
    },
    showWelcomeMessage: (func) => {
        ipcRenderer.on('SHOW_WELCOME_MESSAGE', (event, ...args) => func(event, ...args));
    },
});
この事前読み込みスクリプトは、メイン プロセスとレンダラー プロセス間の通信用に構成された IPC チャネルを適用して、レンダラー プロセスに一部の Node APIs への制御されたアクセスを提供するレンダラー API を公開します。
最後に、アプリケーションのイベントを記述するための文字列定数を格納する constants.js という名前のファイルを作成します。
/*
 * Copyright (c) Microsoft Corporation. All rights reserved.
 * Licensed under the MIT License.
 */

const IPC_MESSAGES = {
    SHOW_WELCOME_MESSAGE: 'SHOW_WELCOME_MESSAGE',
    LOGIN: 'LOGIN',
    LOGOUT: 'LOGOUT',
    GET_PROFILE: 'GET_PROFILE',
    SET_PROFILE: 'SET_PROFILE',
}

module.exports = {
    IPC_MESSAGES: IPC_MESSAGES,
}
これで、Electron アプリのシンプルな GUI と対話が作成できました。 チュートリアルの残りの部分を完了すると、このプロジェクトのファイルとフォルダーの構造は次のようになります。
ElectronDesktopApp/
├── App
│   ├── AuthProvider.js
│   ├── constants.js
│   ├── graph.js
│   ├── index.html
|   ├── main.js
|   ├── preload.js
|   ├── renderer.js
│   ├── authConfig.js
├── package.json
アプリに認証ロジックを追加する
App フォルダーに、AuthProvider.js という名前のファイルを作成します。 AuthProvider.js ファイルに、MSAL Node を使用して、ログイン、ログアウト、トークンの取得、アカウントの選択、および関連する認証タスクを処理する認証プロバイダー クラスを含めます。 そこに、次のコードを追加します。
/*
 * Copyright (c) Microsoft Corporation. All rights reserved.
 * Licensed under the MIT License.
 */

const { PublicClientApplication, InteractionRequiredAuthError } = require('@azure/msal-node');
const { shell } = require('electron');

class AuthProvider {
    msalConfig
    clientApplication;
    account;
    cache;

    constructor(msalConfig) {
        /**
         * Initialize a public client application. For more information, visit:
         * https://github.com/AzureAD/microsoft-authentication-library-for-js/blob/dev/lib/msal-node/docs/initialize-public-client-application.md
         */
        this.msalConfig = msalConfig;
        this.clientApplication = new PublicClientApplication(this.msalConfig);
        this.cache = this.clientApplication.getTokenCache();
        this.account = null;
    }

    async login() {
        const authResponse = await this.getToken({
            // If there are scopes that you would like users to consent up front, add them below
            // by default, MSAL will add the OIDC scopes to every token request, so we omit those here
            scopes: [],
        });

        return this.handleResponse(authResponse);
    }

    async logout() {
        if (!this.account) return;

        try {
            /**
             * If you would like to end the session with AAD, use the logout endpoint. You'll need to enable
             * the optional token claim 'login_hint' for this to work as expected. For more information, visit:
             * https://learn.microsoft.com/azure/active-directory/develop/v2-protocols-oidc#send-a-sign-out-request
             */
            if (this.account.idTokenClaims.hasOwnProperty('login_hint')) {
                await shell.openExternal(`${this.msalConfig.auth.authority}/oauth2/v2.0/logout?logout_hint=${encodeURIComponent(this.account.idTokenClaims.login_hint)}`);
            }

            await this.cache.removeAccount(this.account);
            this.account = null;
        } catch (error) {
            console.log(error);
        }
    }

    async getToken(tokenRequest) {
        let authResponse;
        const account = this.account || (await this.getAccount());

        if (account) {
            tokenRequest.account = account;
            authResponse = await this.getTokenSilent(tokenRequest);
        } else {
            authResponse = await this.getTokenInteractive(tokenRequest);
        }

        return authResponse || null;
    }

    async getTokenSilent(tokenRequest) {
        try {
            return await this.clientApplication.acquireTokenSilent(tokenRequest);
        } catch (error) {
            if (error instanceof InteractionRequiredAuthError) {
                console.log('Silent token acquisition failed, acquiring token interactive');
                return await this.getTokenInteractive(tokenRequest);
            }

            console.log(error);
        }
    }

    async getTokenInteractive(tokenRequest) {
        try {
            const openBrowser = async (url) => {
                await shell.openExternal(url);
            };

            const authResponse = await this.clientApplication.acquireTokenInteractive({
                ...tokenRequest,
                openBrowser,
                successTemplate: '<h1>Successfully signed in!</h1> <p>You can close this window now.</p>',
                errorTemplate: '<h1>Oops! Something went wrong</h1> <p>Check the console for more information.</p>',
            });

            return authResponse;
        } catch (error) {
            throw error;
        }
    }

    /**
     * Handles the response from a popup or redirect. If response is null, will check if we have any accounts and attempt to sign in.
     * @param response
     */
    async handleResponse(response) {
        if (response !== null) {
            this.account = response.account;
        } else {
            this.account = await this.getAccount();
        }

        return this.account;
    }

    /**
     * Calls getAllAccounts and determines the correct account to sign into, currently defaults to first account found in cache.
     * https://github.com/AzureAD/microsoft-authentication-library-for-js/blob/dev/lib/msal-common/docs/Accounts.md
     */
    async getAccount() {
        const currentAccounts = await this.cache.getAllAccounts();

        if (!currentAccounts) {
            console.log('No accounts detected');
            return null;
        }

        if (currentAccounts.length > 1) {
            // Add choose account code here
            console.log('Multiple accounts detected, need to add choose account code.');
            return currentAccounts[0];
        } else if (currentAccounts.length === 1) {
            return currentAccounts[0];
        } else {
            return null;
        }
    }
}

module.exports = AuthProvider;
上記のコード スニペットでは、まず、構成オブジェクト (msalConfig) を渡すことによって MSAL Node PublicClientApplication を初期化しました。 次に、メイン モジュール (main.js) によって呼び出される login、logout、getToken の各メソッドを公開しました。 login と getToken で、MSAL Node acquireTokenInteractive パブリック API を使用して ID とアクセス トークンを取得します。
Microsoft Graph SDK を追加する
graph.js という名前のファイルを作成します。 graph.js ファイルには、MSAL Node によって取得されたアクセス トークンを使用して、Microsoft Graph API 上のデータへのアクセスを容易にするために、Microsoft Graph SDK クライアントのインスタンスが含まれます。
const { Client } = require('@microsoft/microsoft-graph-client');
require('isomorphic-fetch');

/**
 * Creating a Graph client instance via options method. For more information, visit:
 * https://github.com/microsoftgraph/msgraph-sdk-javascript/blob/dev/docs/CreatingClientInstance.md#2-create-with-options
 * @param {String} accessToken
 * @returns
 */
const getGraphClient = (accessToken) => {
    // Initialize Graph client
    const graphClient = Client.init({
        // Use the provided access token to authenticate requests
        authProvider: (done) => {
            done(null, accessToken);
        },
    });

    return graphClient;
};

module.exports = getGraphClient;
アプリの登録の詳細を追加する
トークンを取得するときに使用されるアプリ登録の詳細を格納するための環境ファイルを作成します。 これを行うには、サンプル (ElectronDesktopApp) のルート フォルダー内に authConfig.js という名前のファイルを作成し、次のコードを追加します。
/*
 * Copyright (c) Microsoft Corporation. All rights reserved.
 * Licensed under the MIT License.
 */

const { LogLevel } = require("@azure/msal-node");

/**
 * Configuration object to be passed to MSAL instance on creation.
 * For a full list of MSAL.js configuration parameters, visit:
 * https://github.com/AzureAD/microsoft-authentication-library-for-js/blob/dev/lib/msal-node/docs/configuration.md
 */
const AAD_ENDPOINT_HOST = "Enter_the_Cloud_Instance_Id_Here"; // include the trailing slash

const msalConfig = {
    auth: {
        clientId: "Enter_the_Application_Id_Here",
        authority: `${AAD_ENDPOINT_HOST}Enter_the_Tenant_Info_Here`,
    },
    system: {
        loggerOptions: {
            loggerCallback(loglevel, message, containsPii) {
                console.log(message);
            },
            piiLoggingEnabled: false,
            logLevel: LogLevel.Verbose,
        },
    },
};

/**
 * Add here the endpoints and scopes when obtaining an access token for protected web APIs. For more information, see:
 * https://github.com/AzureAD/microsoft-authentication-library-for-js/blob/dev/lib/msal-browser/docs/resources-and-scopes.md
 */
const GRAPH_ENDPOINT_HOST = "Enter_the_Graph_Endpoint_Here"; // include the trailing slash

const protectedResources = {
    graphMe: {
        endpoint: `${GRAPH_ENDPOINT_HOST}v1.0/me`,
        scopes: ["User.Read"],
    }
};


module.exports = {
    msalConfig: msalConfig,
    protectedResources: protectedResources,
};
これらの詳細には、Azure アプリ登録ポータルから取得した値を入力します。
Enter_the_Tenant_Id_hereは、次のいずれかにする必要があります。- ご自分のアプリケーションで "この組織のディレクトリ内のアカウント" がサポートされる場合は、この値をテナント ID またはテナント名に置き換えます。 たとえば、「
contoso.microsoft.com」のように入力します。 - アプリケーションで "任意の組織のディレクトリ内のアカウント" がサポートされる場合は、この値を
organizationsに置き換えます。 - アプリケーションで "任意の組織のディレクトリ内のアカウントと個人用の Microsoft アカウント" がサポートされる場合は、この値を
commonに置き換えます。 - "個人用の Microsoft アカウントのみ" にサポートを制限するには、この値を
consumersに置き換えます。
- ご自分のアプリケーションで "この組織のディレクトリ内のアカウント" がサポートされる場合は、この値をテナント ID またはテナント名に置き換えます。 たとえば、「
Enter_the_Application_Id_Here:登録したアプリケーションのアプリケーション (クライアント) ID。Enter_the_Cloud_Instance_Id_Here:アプリケーションが登録されている Azure クラウド インスタンス。- メイン ("グローバル") Azure クラウドの場合は、「
https://login.microsoftonline.com/」と入力します。 - 各国のクラウド (中国など) の場合は、「各国のクラウド」に適切な値が記載されています。
- メイン ("グローバル") Azure クラウドの場合は、「
Enter_the_Graph_Endpoint_Hereは、アプリケーションが通信する必要がある、Microsoft Graph API のインスタンスです。- グローバル Microsoft Graph API エンドポイントの場合は、この文字列の両方のインスタンスを
https://graph.microsoft.com/に置き換えます。 - 各国のクラウドのデプロイにおけるエンドポイントの場合は、Microsoft Graph のドキュメントで「各国のクラウドでのデプロイ」を参照してください。
- グローバル Microsoft Graph API エンドポイントの場合は、この文字列の両方のインスタンスを
アプリをテストする
これでアプリケーションの作成が完了し、Electron デスクトップ アプリを起動して、アプリの機能をテストする準備ができました。
- プロジェクト フォルダーのルート内から次のコマンドを実行して、アプリを起動します。
electron App/main.js
- アプリケーションのメイン ウィンドウには、index.html ファイルの内容と [サインイン] ボタンが表示されるはずです。
サインインとサインアウトをテストする
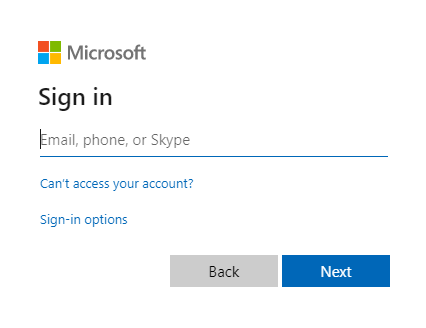
index.html ファイルが読み込まれたら、 [サインイン] を選択します。 Microsoft ID プラットフォームにサインインするように求められます。

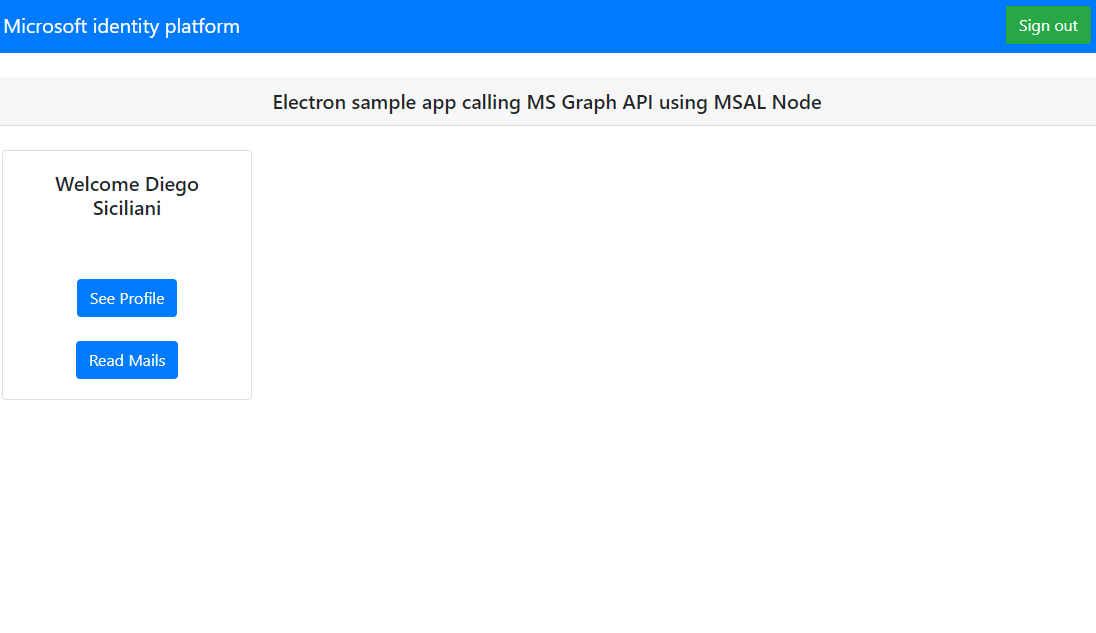
要求されたアクセス許可に同意すると、Web アプリケーションにはユーザー名が表示されます。これは、ログインが成功したことを示しています。

Web API 呼び出しをテストする
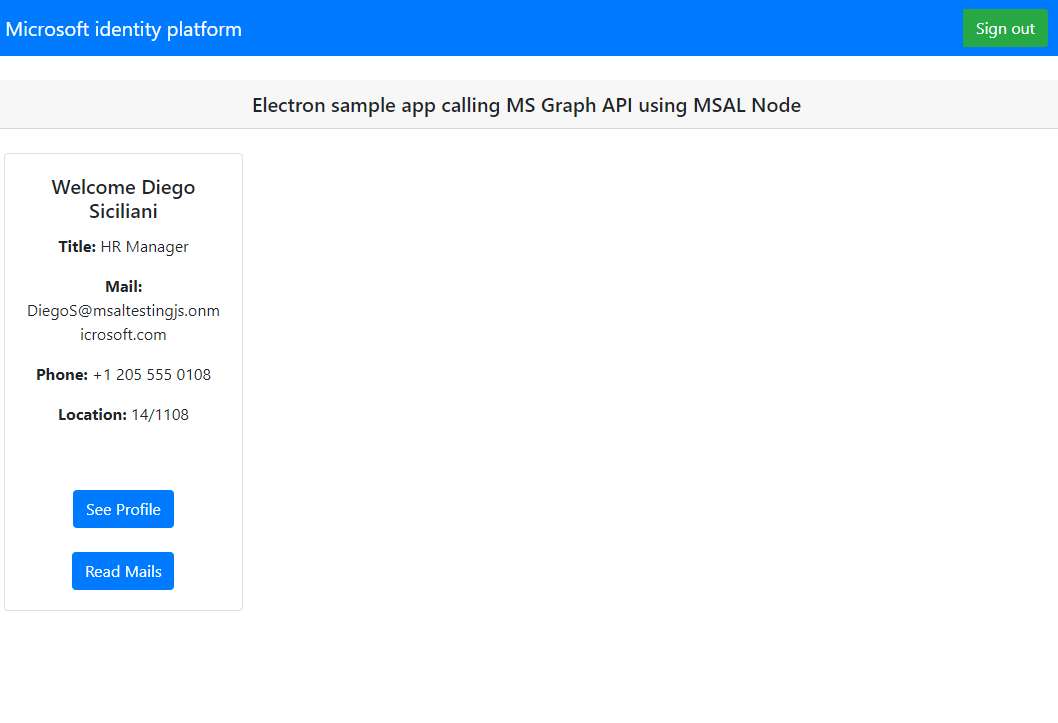
サインインした後、[See Profile] を選択して、Microsoft Graph API への呼び出しからの応答で返されるユーザー プロファイル情報を表示します。 同意すると、応答で返されたプロファイル情報が表示されます。

アプリケーションの動作
ユーザーが初めて [サインイン] ボタンを選択すると、MSAL Node の acquireTokenInteractive メソッドが呼び出されます。 このメソッドは、Microsoft ID プラットフォーム エンドポイントを使用してユーザーをサインインにリダイレクトし、ユーザーの資格情報を検証して、認証コードを取得します。次に、そのコードを ID トークン、アクセス トークン、更新トークンに交換します。 MSAL Node では、将来使用するためにこれらのトークンもキャッシュに入れます。
ID トークンには、表示名など、ユーザーについての基本的な情報が含まれています。 アクセス トークンの有効期間は限られており、24 時間後に有効期限が切れます。 保護されたリソースにアクセスするためにこれらのトークンを使用する予定がある場合は、アプリケーションの有効なユーザーに対してトークンが発行されたことを保証するために、バックエンド サーバーでトークンを検証する "必要があります"。
このチュートリアルで作成したデスクトップ アプリでは、アクセス トークンを要求ヘッダーのベアラー トークン (RFC 6750) として使用して、Microsoft Graph API への REST 呼び出しを行います。
Microsoft Graph API には、ユーザーのプロファイルを読み取るための user.read スコープが必要です。 既定では、このスコープは、Azure portal に登録されているすべてのアプリケーションに自動的に追加されます。 Microsoft Graph の他の API や、バックエンド サーバーのカスタム API には、追加のスコープが必要な場合があります。 たとえば、Microsoft Graph API では、ユーザーのメールを一覧表示するために Mail.Read スコープが必要です。
スコープを追加すると、追加したスコープに対して追加の同意を求めるメッセージがユーザーに表示される場合があります。
ヘルプとサポート
サポートが必要な場合、問題をレポートする場合、またはサポート オプションについて知りたい場合は、開発者向けのヘルプとサポートに関するページを参照してください。
次の手順
Microsoft ID プラットフォームでの Node.js および Electron デスクトップ アプリケーションの開発についてさらに詳しく知りたい場合は、複数のパートで構成される次のシナリオ シリーズを参照してください。