Configure entity maps
Entity maps are at the highest level in the mapping process. They let you map one entity concept to multiple FHIR (Fast Health Interoperability Resources) resources. Entity maps help the Dataverse healthcare APIs move data between Dataverse entity records and FHIR resources, and send the correct data to remote FHIR endpoints.
The data integration toolkit provides an extensive collection of default maps built to conform to the HL7 FHIR specification. Entity maps deploy as Dataverse records and are highly configurable to accommodate your various solution requirements.
For more information and examples, see Overview of entity maps and Entity map examples.
Entity map fields
Entity maps map the FHIR resource to a Dataverse entity (table), but each entity map includes more configuration options.
| Field name | Description |
|---|---|
| Disable | Flag indicating whether the entity map is disabled. If the value is set to True, the Dataverse healthcare API skips the entity map when processing a message for the selected Azure FHIR resource type. |
| Enable Write Back to FHIR | When writeback is enabled, this flag indicates whether the field value should be included when posting FHIR resources to the system. |
| Azure FHIR Resource | A lookup operation to the related FHIR resource type being mapped to the Dataverse table. For example, the Dataverse table Account is mapped to the FHIR resource Organization. |
| Supported Messages | When Enable Write Back to FHIR is set to True, this field indicates what type of operations are supported when posting data back to the FHIR service. Supported values are Create, Update, or both. |
| Expand | Flag indicating whether the entity map is for an expansion table, and not a root level FHIR resource. Each expansion map has the same Azure FHIR resource value, but only one root level entity map can be specified for each Azure FHIR resource. |
Manage entity map records
You can perform record level updates to the default entity maps deployed with Microsoft Cloud for Healthcare.
Disable an entity map
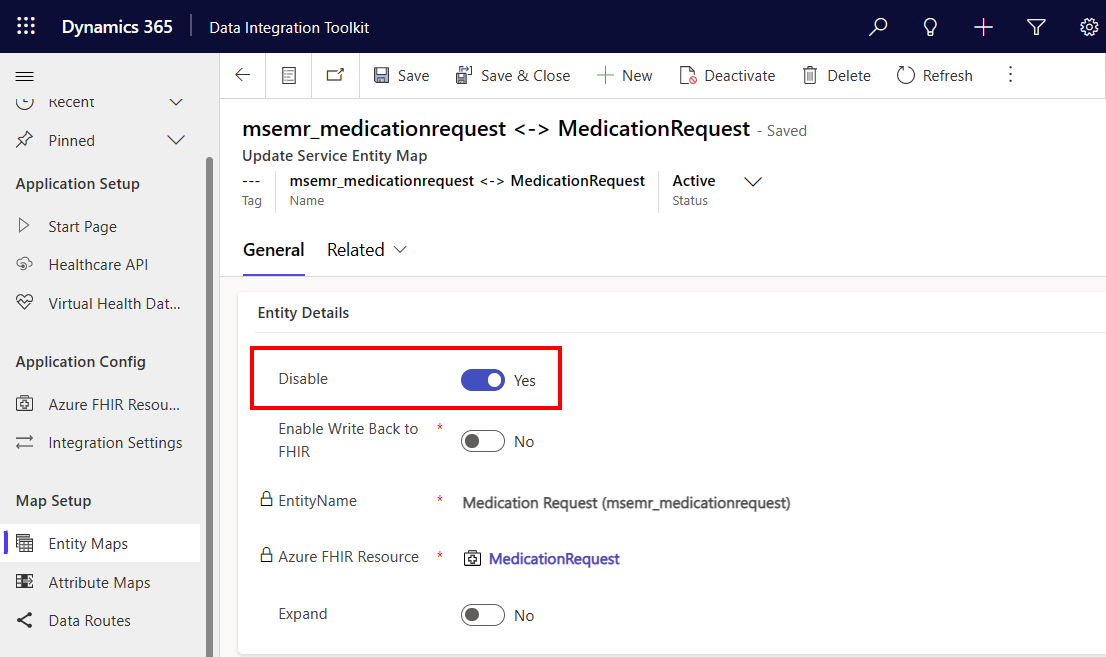
If you don't need an entity map from the data integration toolkit, you can disable it. For example, you might not need the MedicationRequest records synchronized and stored in the EMR (Electronic Medical Record) system.
Important
You can't delete an entity map that's part of the data integration toolkit, because they're solution aware. To delete it, you need to delete the whole solution. We recommend disabling the map, or archiving it.
Under Map Setup, select Entity Maps.
Select the entity that you want to disable.
Select Yes as the value for Disable, and then select Save.

Create an entity map
Creating entity maps makes the data integration toolkit more extensible. For example, to create a new entity map for patients, start by naming the new entity. In this example, the Azure FHIR resource is named Patient and the Dataverse entity is named Contact.
Under Map Setup, select Entity Maps, and then select + New.
For EntityName, select Contact.
For Azure FHIR Resource, type or select Patient.
For the Disable field, select No.
For Enable Write Back to FHIR, select Yes.
Setting the value to Yes means that changes in Dataverse write back to FHIR. If you select No, FHIR writes all this information into Dataverse, and none of the updates flow back into the FHIR system.
For Supported Messages, select the valid actions for the data to flow back to the FHIR system. You can select Create, or Update, or both.
- If you select Create, a record is also created in FHIR when a record is created in Dataverse.
- If you select Update, each record change in Dataverse is also updated in FHIR.
For this example that uses the Contact entity, select only Update.
Select Save.
The system captures changes in Azure FHIR when the Contact entity is updated.
For more information on configuring writeback, see Overview of writeback for Dataverse healthcare APIs.
Important
We recommend that you don't create new patients in Dataverse. Always add new patients in your FHIR system, and let the Dataverse healthcare APIs create the corresponding Dataverse records.
Patients are the core resource (entity) in FHIR. Every other resource in FHIR relates to the Patient resource or entity. FHIR systems automatically assign a unique ID when you add a new patient. This ID attribute is read-only. If you try to create a new patient record in Dataverse, Dataverse can't assign a value to the Patient ID attribute in FHIR. So, the Dataverse healthcare APIs can't write the data changes to your FHIR system.
When you add a new patient in your EMR system, the data change flows to the Azure FHIR server, and then to Dataverse. Then, you can add related records, such as encounters, appointments, and observations.
Manage related attribute maps
Entity map records include related attribute map records that define how to map each Dataverse field value from the inbound FHIR resource. The entity map form includes JSON tooling to create and validate element maps for the related attribute maps. This JSON tool has several features to help you create and test attribute maps easily.
Generate element maps
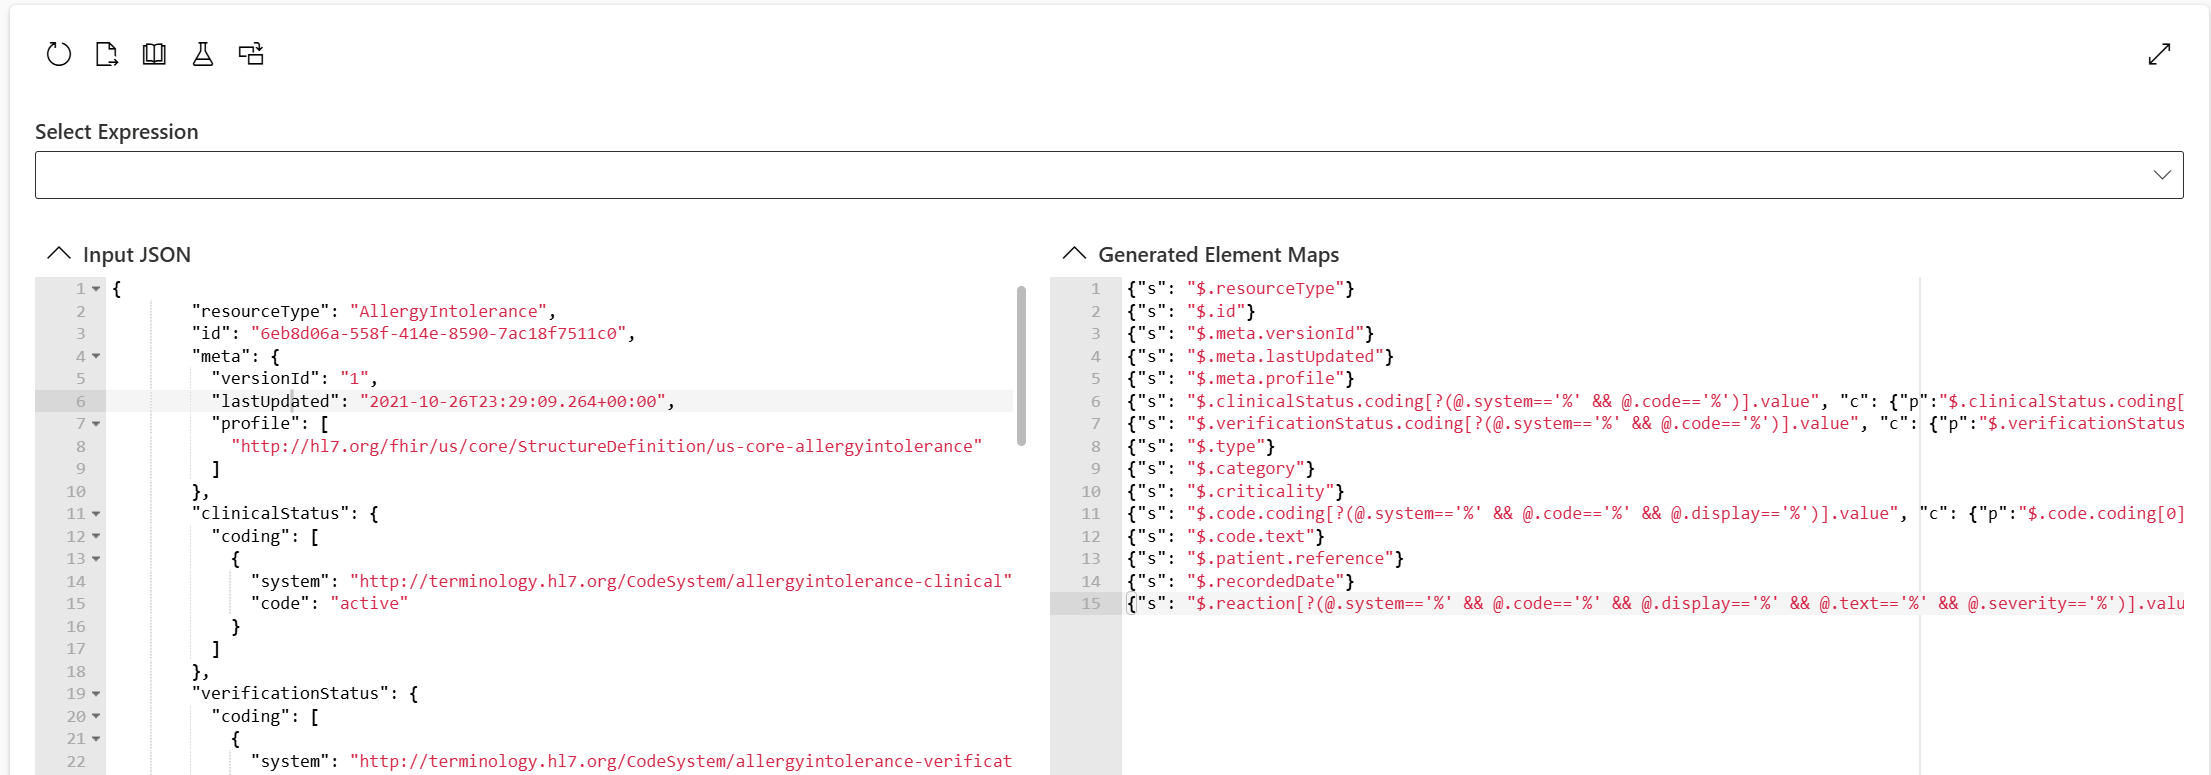
You can provide a sample FHIR resource to the JSON tool to generate element map JSON for each node in the resource. Here's an example:
Select Generate Maps to generate maps on the provided sample. The resulting maps include the correct element map syntax for the given FHIR element. In this example, the AllergyIntolerance FHIR resource generates many sample element map values. You can then copy these values into the respective attribute maps.
Evaluate element map JSONPath
After you provide the sample FHIR JSON, use the sample to test and validate your existing maps.
In the Select Path dropdown, select from the element map values in the existing attribute map records for the corresponding entity map. After you select the element map value, the JSON tool evaluates the JSONPath against the sample and provides the results.
Test and validate maps
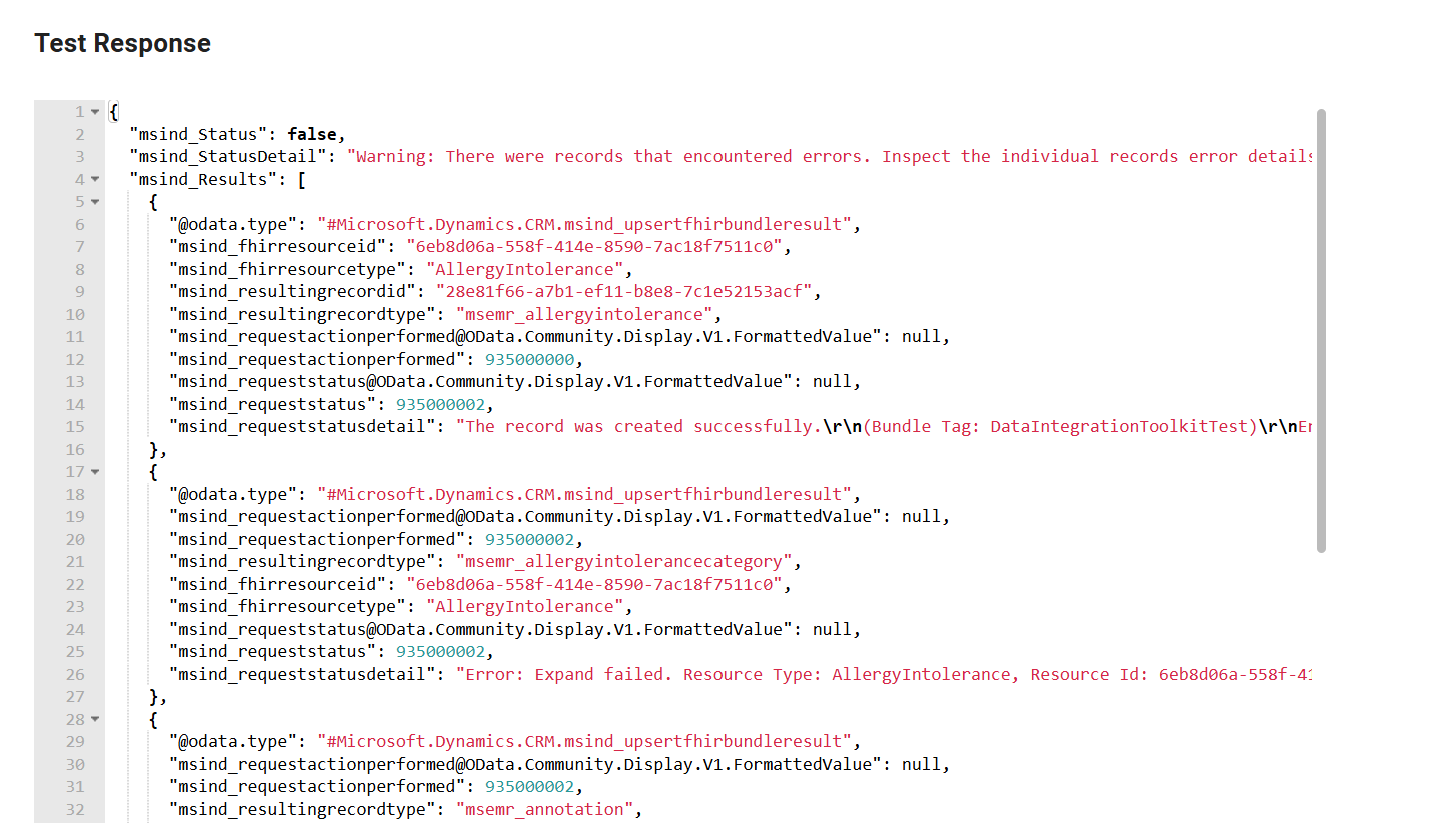
You can use the JSON tool to run a comprehensive test with a sample FHIR resource and validate your maps within the data integration toolkit.
Select Run Test from the toolbar to perform a Dataverse healthcare API call using the provided sample. The results pane displays the API call output as if run from code or an Azure Logic App. In this example, the tool creates the AllergyIntolerance record but also reports warnings.
To run these tests, ensure you enable the required maps and provide valid data in the bundle. For example, the AllergyIntolerance sample references a Patient record. So, the reference you provide should be a valid patient in Dataverse. Otherwise, the results pane displays errors.
Add maps to solution
After your maps are ready, you can add them to a solution for deployment to other environments. Select Add Maps to Solution and choose the required solution to automatically add the entity map and its related attribute maps.
You can then export and import the solution into downstream systems for validation and final publishing.


