チュートリアル: ユーザー コントロールでのドラッグ アンド ドロップの有効化
このチュートリアルでは、Windows Presentation Foundation (WPF) でドラッグ アンド ドロップのデータ転送 (受信) に参加できるカスタム ユーザー コントロールを作成する方法について学習します。
このチュートリアルでは、円の図形を表すカスタムの WPF UserControl を作成します。 また、ドラッグ アンド ドロップによるデータ転送を有効にする機能をコントロールに実装します。 たとえば、ある円コントロールから別の円コントロールにドラッグすると、塗りつぶし色のデータがソースの円からターゲットの円にコピーされます。 円コントロールから TextBox にドラッグすると、塗りつぶし色の文字列表現が TextBox にコピーされます。 さらに、2 つのパネル コントロールと TextBox を含む小さなアプリケーションを作成して、ドラッグ アンド ドロップ機能をテストします。 ドロップされた円データをパネルで処理できるようにするコードを作成します。これにより、ユーザーはあるパネルの子コレクションから別のパネルに円を移動またはコピーできるようになります。
このチュートリアルでは、次の作業について説明します。
カスタム ユーザー コントロールを作成する。
ユーザー コントロールをドラッグ ソースとして有効にする。
ユーザー コントロールをドラッグ ターゲットとして有効にする。
ユーザー コントロールからドロップされたデータをパネルで受信できるようにする。
必須コンポーネント
このチュートリアルを完了するには Visual Studio が必要です。
アプリケーション プロジェクトを作成する
このセクションでは、2 つのパネルと TextBox で構成されるメイン ページを含むアプリケーション インフラストラクチャを作成します。
Visual Basic または Visual C# で、
DragDropExampleという名前の WPF アプリケーション プロジェクトを作成します。 詳細については、「チュートリアル:初めての WPF デスクトップ アプリケーション」を参照してください。MainWindow.xaml を開きます。
Grid の開始タグと終了タグの間に次のマークアップを追加します。
このマークアップは、テスト アプリケーションのユーザー インターフェイスを作成します。
<Grid.ColumnDefinitions>
    <ColumnDefinition />
    <ColumnDefinition />
</Grid.ColumnDefinitions>
<StackPanel Grid.Column="0"
            Background="Beige">
    <TextBox Width="Auto" Margin="2"
             Text="green"/>
</StackPanel>
<StackPanel Grid.Column="1"
            Background="Bisque">
</StackPanel>
新しいユーザー コントロールをプロジェクトに追加する
このセクションでは、新しいユーザー コントロールをプロジェクトに追加します。
[プロジェクト] メニューで、 [ユーザー コントロールの追加] を選択します。
[新しい項目の追加] ダイアログ ボックスで、名前を
Circle.xamlに変更し、 [追加] をクリックします。Circle.xaml とその分離コードがプロジェクトに追加されます。
Circle.xaml を開きます。
このファイルには、ユーザー コントロールのユーザー インターフェイス要素が含まれています。
次のマークアップをルート Grid に追加し、UI として青色の円を含む単純なユーザー コントロールを作成します。
<Ellipse x:Name="circleUI"
         Height="100" Width="100"
         Fill="Blue" />
Circle.xaml.cs または Circle.xaml.vb を開きます。
C# で、パラメーターなしのコンストラクターの後に次のコードを追加して、コピー コンストラクターを作成します。 Visual Basic で、次のコードを追加して、パラメーターなしのコンストラクターとコピー コンストラクターの両方を作成します。
ユーザー コントロールをコピーできるようにするために、分離コード ファイルにコピー コンストラクター メソッドを追加します。 単純な円形のユーザー コントロールの場合、ユーザー コントロールの塗りつぶしとサイズのみをコピーします。
public Circle(Circle c)
{
    InitializeComponent();
    this.circleUI.Height = c.circleUI.Height;
    this.circleUI.Width = c.circleUI.Height;
    this.circleUI.Fill = c.circleUI.Fill;
}
Public Sub New() ' This call is required by the designer. InitializeComponent() End Sub Public Sub New(ByVal c As Circle) InitializeComponent() Me.circleUI.Height = c.circleUI.Height Me.circleUI.Width = c.circleUI.Height Me.circleUI.Fill = c.circleUI.Fill End Sub
ユーザー コントロールをメイン ウィンドウに追加する
MainWindow.xaml を開きます。
Window の開始タグで、次の XAML を追加して、現在のアプリケーションへの XML 名前空間参照を作成します。
xmlns:local="clr-namespace:DragDropExample"最初の StackPanelで、次の XAML を追加して、最初のパネルの円ユーザー コントロールの 2 つのインスタンスを作成します。
<local:Circle Margin="2" />
<local:Circle Margin="2" />
パネルの完全な XAML は、次のようになります。
<StackPanel Grid.Column="0"
            Background="Beige">
    <TextBox Width="Auto" Margin="2"
             Text="green"/>
    <local:Circle Margin="2" />
    <local:Circle Margin="2" />
</StackPanel>
<StackPanel Grid.Column="1"
            Background="Bisque">
</StackPanel>
ユーザー コントロールでドラッグ ソース イベントを実装する
このセクションでは、OnMouseMove メソッドをオーバーライドして、ドラッグ アンド ドロップ操作を開始します。
ドラッグが開始されたら (マウス ボタンが押されて、マウスが移動されたら)、DataObjectに転送されるデータをパッケージ化します。 この場合、円コントロールは、3 つのデータ項目 (塗りつぶし色の文字列表現、高さの double 表現、それ自体のコピー) をパッケージ化します。
ドラッグ アンド ドロップ操作を開始する手順
Circle.xaml.cs または Circle.xaml.vb を開きます。
次の OnMouseMove オーバーライドを追加して、MouseMove イベントのクラス処理を提供します。
protected override void OnMouseMove(MouseEventArgs e)
{
    base.OnMouseMove(e);
    if (e.LeftButton == MouseButtonState.Pressed)
    {
        // Package the data.
        DataObject data = new DataObject();
        data.SetData(DataFormats.StringFormat, circleUI.Fill.ToString());
        data.SetData("Double", circleUI.Height);
        data.SetData("Object", this);

        // Initiate the drag-and-drop operation.
        DragDrop.DoDragDrop(this, data, DragDropEffects.Copy | DragDropEffects.Move);
    }
}
Protected Overrides Sub OnMouseMove(ByVal e As System.Windows.Input.MouseEventArgs) MyBase.OnMouseMove(e) If e.LeftButton = MouseButtonState.Pressed Then ' Package the data. Dim data As New DataObject data.SetData(DataFormats.StringFormat, circleUI.Fill.ToString()) data.SetData("Double", circleUI.Height) data.SetData("Object", Me) ' Inititate the drag-and-drop operation. DragDrop.DoDragDrop(Me, data, DragDropEffects.Copy Or DragDropEffects.Move) End If End Subこの OnMouseMove オーバーライドは、次のタスクを実行します。
マウスの移動中にマウスの左ボタンが押されたかどうかを確認します。
円データを DataObject にパッケージ化します。 この場合、円コントロールは、3 つのデータ項目 (塗りつぶし色の文字列表現、高さの double 表現、それ自体のコピー) をパッケージ化します。
静的 DragDrop.DoDragDrop メソッドを呼び出して、ドラッグ アンド ドロップ操作を開始します。 次の 3 つのパラメーターを DoDragDrop メソッドに渡します。
dragSource- このコントロールへの参照。data- 前のコードで作成された DataObject。
F5 キーを押してアプリケーションをビルドし、実行します。
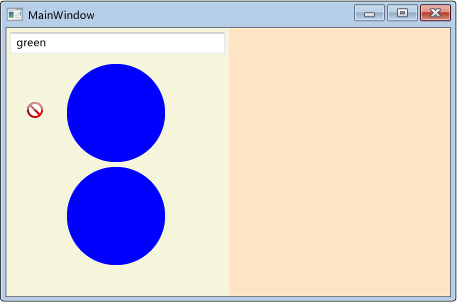
いずれかの円コントロールをクリックしてパネル、もう一方の円、TextBox にドラッグします。 TextBoxにドラッグすると、カーソルが変化して移動を示すようになります。
円を TextBoxにドラッグしながら、Ctrl キーを押します。 カーソルが変化してコピーを示すようになる方法にご注意ください。
円を TextBox にドラッグ アンド ドロップします。 円の塗りつぶし色の文字列表現が TextBox に追加されます。

既定では、カーソルは、ドラッグ アンド ドロップ操作中に変化して、データのドロップによる効果を示します。 GiveFeedback イベントを処理して、別のカーソルを設定することによって、ユーザーに表示するフィードバックをカスタマイズできます。
ユーザーにフィードバックを表示する
Circle.xaml.cs または Circle.xaml.vb を開きます。
次の OnGiveFeedback オーバーライドを追加して、GiveFeedback イベントのクラス処理を提供します。
protected override void OnGiveFeedback(GiveFeedbackEventArgs e)
{
    base.OnGiveFeedback(e);
    // These Effects values are set in the drop target's
    // DragOver event handler.
    if (e.Effects.HasFlag(DragDropEffects.Copy))
    {
        Mouse.SetCursor(Cursors.Cross);
    }
    else if (e.Effects.HasFlag(DragDropEffects.Move))
    {
        Mouse.SetCursor(Cursors.Pen);
    }
    else
    {
        Mouse.SetCursor(Cursors.No);
    }
    e.Handled = true;
}
Protected Overrides Sub OnGiveFeedback(ByVal e As System.Windows.GiveFeedbackEventArgs) MyBase.OnGiveFeedback(e) ' These Effects values are set in the drop target's ' DragOver event handler. If e.Effects.HasFlag(DragDropEffects.Copy) Then Mouse.SetCursor(Cursors.Cross) ElseIf e.Effects.HasFlag(DragDropEffects.Move) Then Mouse.SetCursor(Cursors.Pen) Else Mouse.SetCursor(Cursors.No) End If e.Handled = True End Subこの OnGiveFeedback オーバーライドは、次のタスクを実行します。
F5 キーを押してアプリケーションをビルドし、実行します。
いずれかの円コントロールをパネル、もう一方の円、TextBox にドラッグします。 今度は、カーソルが、OnGiveFeedback で指定したカスタム カーソルになることにご注意ください。

TextBox からテキスト
greenを選択します。テキスト
greenを円コントロールにドラッグします。 既定のカーソルは、ドラッグ アンド ドロップ操作の効果を示すために表示されていることにご注意ください。 フィードバック カーソルは、常にドラッグ ソースによって設定されます。
ユーザー コントロールにドロップ ターゲット イベントを実装する
このセクションでは、ユーザー コントロールがドロップ ターゲットであり、ユーザー コントロールをドロップ ターゲットとして有効にするメソッドをオーバーライドし、ドロップされたデータを処理することを指定します。
ユーザー コントロールをドロップ ターゲットとして有効にする手順
Circle.xaml を開きます。
UserControl の開始タグで、AllowDrop プロパティを追加し、それを
trueに設定します。<UserControl x:Class="DragDropWalkthrough.Circle" xmlns="http://schemas.microsoft.com/winfx/2006/xaml/presentation" xmlns:x="http://schemas.microsoft.com/winfx/2006/xaml" xmlns:mc="http://schemas.openxmlformats.org/markup-compatibility/2006" xmlns:d="http://schemas.microsoft.com/expression/blend/2008" mc:Ignorable="d" d:DesignHeight="300" d:DesignWidth="300" AllowDrop="True">
AllowDrop が true に設定され、ドラッグ ソースのデータが円ユーザー コントロールにドロップされると、OnDrop メソッドが呼び出されます。 このメソッドでは、ドロップされたデータを処理し、データを円に適用します。
ドロップされたデータを処理する手順
Circle.xaml.cs または Circle.xaml.vb を開きます。
次の OnDrop オーバーライドを追加して、Drop イベントのクラス処理を提供します。
protected override void OnDrop(DragEventArgs e)
{
    base.OnDrop(e);

    // If the DataObject contains string data, extract it.
    if (e.Data.GetDataPresent(DataFormats.StringFormat))
    {
        string dataString = (string)e.Data.GetData(DataFormats.StringFormat);

        // If the string can be converted into a Brush,
        // convert it and apply it to the ellipse.
        BrushConverter converter = new BrushConverter();
        if (converter.IsValid(dataString))
        {
            Brush newFill = (Brush)converter.ConvertFromString(dataString);
            circleUI.Fill = newFill;

            // Set Effects to notify the drag source what effect
            // the drag-and-drop operation had.
            // (Copy if CTRL is pressed; otherwise, move.)
            if (e.KeyStates.HasFlag(DragDropKeyStates.ControlKey))
            {
                e.Effects = DragDropEffects.Copy;
            }
            else
            {
                e.Effects = DragDropEffects.Move;
            }
        }
    }
    e.Handled = true;
}
Protected Overrides Sub OnDrop(ByVal e As System.Windows.DragEventArgs) MyBase.OnDrop(e) ' If the DataObject contains string data, extract it. If e.Data.GetDataPresent(DataFormats.StringFormat) Then Dim dataString As String = e.Data.GetData(DataFormats.StringFormat) ' If the string can be converted into a Brush, ' convert it and apply it to the ellipse. Dim converter As New BrushConverter If converter.IsValid(dataString) Then Dim newFill As Brush = converter.ConvertFromString(dataString) circleUI.Fill = newFill ' Set Effects to notify the drag source what effect ' the drag-and-drop operation had. ' (Copy if CTRL is pressed; otherwise, move.) If e.KeyStates.HasFlag(DragDropKeyStates.ControlKey) Then e.Effects = DragDropEffects.Copy Else e.Effects = DragDropEffects.Move End If End If End If e.Handled = True End Subこの OnDrop オーバーライドは、次のタスクを実行します。
GetDataPresent メソッドを使用して、ドラッグされたデータに文字列オブジェクトが含まれているかどうかを確認します。
文字列データがある場合、GetData メソッドを使用して、それを抽出します。
BrushConverter を使用して、文字列の Brush への変換を試みます。
Drop イベントを処理済みとしてマークします。 このイベントを受信する他の要素に、イベントが円ユーザー コントロールで処理されたことを認識させるために、ドロップ イベントを処理済みとしてマークする必要があります。
F5 キーを押してアプリケーションをビルドし、実行します。
TextBox で、テキスト
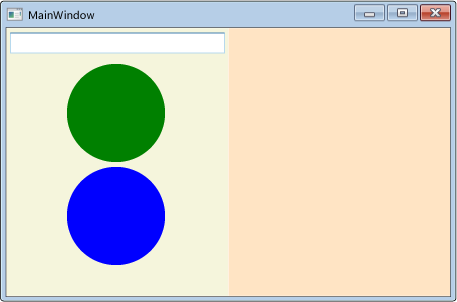
greenを選択します。そのテキストを円コントロールにドラッグしてドロップします。 円が青色から緑色に変化します。

TextBox にテキスト
greenを入力します。TextBoxで、テキスト
greを選択します。それを円コントロールにドラッグしてドロップします。 カーソルが変化して、ドロップが許可されていることを示しますが、円の色は変化していないことに注目してください。これは、
greが有効な色ではないためです。緑色の円コントロールをドラッグして青色の円コントロールにドロップします。 円が青色から緑色に変化します。 表示されるカーソルが、TextBox または円のどちらがドラッグ ソースであるかによって異なることにご注意ください。
要素をドロップ ターゲットとして有効にするために必要な手順は、AllowDrop プロパティを true に設定して、ドロップされたデータを処理することだけです。 しかし、より優れたユーザー エクスペリエンスを提供するには、DragEnter、DragLeave、DragOver の各イベントも処理する必要があります。 これらのイベントでは、データがドロップされる前に、チェックを実行して、ユーザーに追加のフィードバックを表示することができます。
データが円ユーザー コントロールにドラッグされると、コントロールは、ドラッグされているデータを処理できるかどうかをドラッグ ソースに通知する必要があります。 コントロールがデータの処理方法を認識していない場合、ドロップを拒否する必要があります。 このためには、DragOver イベントを処理して、Effects プロパティを設定します。
データのドロップが許可されていることを確認する手順
Circle.xaml.cs または Circle.xaml.vb を開きます。
次の OnDragOver オーバーライドを追加して、DragOver イベントのクラス処理を提供します。
protected override void OnDragOver(DragEventArgs e)
{
    base.OnDragOver(e);
    e.Effects = DragDropEffects.None;

    // If the DataObject contains string data, extract it.
    if (e.Data.GetDataPresent(DataFormats.StringFormat))
    {
        string dataString = (string)e.Data.GetData(DataFormats.StringFormat);

        // If the string can be converted into a Brush, allow copying or moving.
        BrushConverter converter = new BrushConverter();
        if (converter.IsValid(dataString))
        {
            // Set Effects to notify the drag source what effect
            // the drag-and-drop operation will have. These values are
            // used by the drag source's GiveFeedback event handler.
            // (Copy if CTRL is pressed; otherwise, move.)
            if (e.KeyStates.HasFlag(DragDropKeyStates.ControlKey))
            {
                e.Effects = DragDropEffects.Copy;
            }
            else
            {
                e.Effects = DragDropEffects.Move;
            }
        }
    }
    e.Handled = true;
}
Protected Overrides Sub OnDragOver(ByVal e As System.Windows.DragEventArgs) MyBase.OnDragOver(e) e.Effects = DragDropEffects.None ' If the DataObject contains string data, extract it. If e.Data.GetDataPresent(DataFormats.StringFormat) Then Dim dataString As String = e.Data.GetData(DataFormats.StringFormat) ' If the string can be converted into a Brush, allow copying or moving. Dim converter As New BrushConverter If converter.IsValid(dataString) Then ' Set Effects to notify the drag source what effect ' the drag-and-drop operation will have. These values are ' used by the drag source's GiveFeedback event handler. ' (Copy if CTRL is pressed; otherwise, move.) If e.KeyStates.HasFlag(DragDropKeyStates.ControlKey) Then e.Effects = DragDropEffects.Copy Else e.Effects = DragDropEffects.Move End If End If End If e.Handled = True End Subこの OnDragOver オーバーライドは、次のタスクを実行します。
F5 キーを押してアプリケーションをビルドし、実行します。
TextBoxで、テキスト
greを選択します。テキストを円コントロールにドラッグします。 今度は、カーソルがドロップを許可しないことを示すように変化することに注目してください。これは、
greが有効な色ではないためです。
さらに、ドロップ操作のプレビューを適用して、ユーザー エクスペリエンスを向上させることができます。 この円ユーザー コントロールの場合、OnDragEnter メソッドと OnDragLeave メソッドをオーバーライドします。 データがコントロールにドラッグされると、現在の背景 Fill はプレースホルダー変数に保存されます。 次に、文字列がブラシに変換されて、円の UI を表示する Ellipse に適用されます。 データがドロップされずに円からドラッグされると、元の Fill 値が円に再度適用されます。
ドラッグ アンド ドロップ操作の効果をプレビューする手順
Circle.xaml.cs または Circle.xaml.vb を開きます。
Circle クラスで、
_previousFillという名前の Brush プライベート変数を宣言し、それをnullに初期化します。public partial class Circle : UserControl { private Brush _previousFill = null;Public Class Circle Private _previousFill As Brush = Nothing次の OnDragEnter オーバーライドを追加して、DragEnter イベントのクラス処理を提供します。
protected override void OnDragEnter(DragEventArgs e)
{
    base.OnDragEnter(e);
    // Save the current Fill brush so that you can revert back to this value in DragLeave.
    _previousFill = circleUI.Fill;

    // If the DataObject contains string data, extract it.
    if (e.Data.GetDataPresent(DataFormats.StringFormat))
    {
        string dataString = (string)e.Data.GetData(DataFormats.StringFormat);

        // If the string can be converted into a Brush, convert it.
        BrushConverter converter = new BrushConverter();
        if (converter.IsValid(dataString))
        {
            Brush newFill = (Brush)converter.ConvertFromString(dataString.ToString());
            circleUI.Fill = newFill;
        }
    }
}
Protected Overrides Sub OnDragEnter(ByVal e As System.Windows.DragEventArgs) MyBase.OnDragEnter(e) _previousFill = circleUI.Fill ' If the DataObject contains string data, extract it. If e.Data.GetDataPresent(DataFormats.StringFormat) Then Dim dataString As String = e.Data.GetData(DataFormats.StringFormat) ' If the string can be converted into a Brush, convert it. Dim converter As New BrushConverter If converter.IsValid(dataString) Then Dim newFill As Brush = converter.ConvertFromString(dataString) circleUI.Fill = newFill End If End If e.Handled = True End Subこの OnDragEnter オーバーライドは、次のタスクを実行します。
次の OnDragLeave オーバーライドを追加して、DragLeave イベントのクラス処理を提供します。
protected override void OnDragLeave(DragEventArgs e)
{
    base.OnDragLeave(e);
    // Undo the preview that was applied in OnDragEnter.
    circleUI.Fill = _previousFill;
}
Protected Overrides Sub OnDragLeave(ByVal e As System.Windows.DragEventArgs) MyBase.OnDragLeave(e) ' Undo the preview that was applied in OnDragEnter. circleUI.Fill = _previousFill End Subこの OnDragLeave オーバーライドは、次のタスクを実行します。
F5 キーを押してアプリケーションをビルドし、実行します。
TextBox で、テキスト
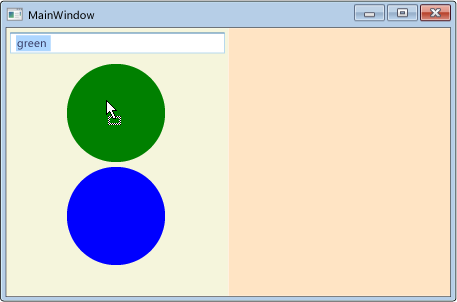
greenを選択します。テキストを円コントロールにドラッグします。ドロップはしません。 円が青色から緑色に変化します。

テキストを円コントロールからドラッグします。 円が緑色から青色に戻ります。
ドロップされたデータをパネルで受信できるようにする
このセクションでは、円ユーザー コントロールをホストするパネルが、ドラッグされた円データのドラッグ ターゲットとして機能できるようにします。 円を一方のパネルからもう一方のパネルに移動できるようにする、またはCtrl キーを押したまま円をドラッグ アンド ドロップして円コントロールのコピーを作成できるようにするコードを実装します。
MainWindow.xaml を開きます。
次の XAML に示すように、各 StackPanel で、DragOver イベントと Drop イベントのハンドラーを追加します。 DragOver イベント ハンドラーに
panel_DragOverという名前を指定し、Drop イベント ハンドラーにはpanel_Dropという名前を指定します。既定では、パネルはドロップ ターゲットではありません。 有効にするには、両方のパネルに AllowDrop プロパティを追加して、値を
trueに設定します。<StackPanel Grid.Column="0" Background="Beige" AllowDrop="True" DragOver="panel_DragOver" Drop="panel_Drop"> <TextBox Width="Auto" Margin="2" Text="green"/> <local:Circle Margin="2" /> <local:Circle Margin="2" /> </StackPanel> <StackPanel Grid.Column="1" Background="Bisque" AllowDrop="True" DragOver="panel_DragOver" Drop="panel_Drop"> </StackPanel>MainWindows.xaml.cs または MainWindow.xaml.vb を開きます。
DragOver イベント ハンドラーに次のコードを追加します。
private void panel_DragOver(object sender, DragEventArgs e)
{
    if (e.Data.GetDataPresent("Object"))
    {
        // These Effects values are used in the drag source's
        // GiveFeedback event handler to determine which cursor to display.
        if (e.KeyStates == DragDropKeyStates.ControlKey)
        {
            e.Effects = DragDropEffects.Copy;
        }
        else
        {
            e.Effects = DragDropEffects.Move;
        }
    }
}
Private Sub panel_DragOver(ByVal sender As System.Object, ByVal e As System.Windows.DragEventArgs) If e.Data.GetDataPresent("Object") Then ' These Effects values are used in the drag source's ' GiveFeedback event handler to determine which cursor to display. If e.KeyStates = DragDropKeyStates.ControlKey Then e.Effects = DragDropEffects.Copy Else e.Effects = DragDropEffects.Move End If End If End Subこの DragOver イベント ハンドラーは、次のタスクを実行します。
ドラッグされたデータに、円ユーザー コントロールによって DataObject にパッケージ化され、DoDragDropの呼び出しで渡された "Object" データが含まれていることを確認します。
"Object" データがある場合、Ctrl キーが押されたかどうかを確認します。
Ctrl キーが押されていた場合、Effects プロパティを Copy に設定します。 それ以外の場合は、Effects プロパティを Move に設定します。
Drop イベント ハンドラーに次のコードを追加します。
private void panel_Drop(object sender, DragEventArgs e)
{
    // If an element in the panel has already handled the drop,
    // the panel should not also handle it.
    if (e.Handled == false)
    {
        Panel _panel = (Panel)sender;
        UIElement _element = (UIElement)e.Data.GetData("Object");

        if (_panel != null && _element != null)
        {
            // Get the panel that the element currently belongs to,
            // then remove it from that panel and add it the Children of
            // the panel that its been dropped on.
            Panel _parent = (Panel)VisualTreeHelper.GetParent(_element);

            if (_parent != null)
            {
                if (e.KeyStates == DragDropKeyStates.ControlKey &&
                    e.AllowedEffects.HasFlag(DragDropEffects.Copy))
                {
                    Circle _circle = new Circle((Circle)_element);
                    _panel.Children.Add(_circle);
                    // set the value to return to the DoDragDrop call
                    e.Effects = DragDropEffects.Copy;
                }
                else if (e.AllowedEffects.HasFlag(DragDropEffects.Move))
                {
                    _parent.Children.Remove(_element);
                    _panel.Children.Add(_element);
                    // set the value to return to the DoDragDrop call
                    e.Effects = DragDropEffects.Move;
                }
            }
        }
    }
}
Private Sub panel_Drop(ByVal sender As System.Object, ByVal e As System.Windows.DragEventArgs) ' If an element in the panel has already handled the drop, ' the panel should not also handle it. If e.Handled = False Then Dim _panel As Panel = sender Dim _element As UIElement = e.Data.GetData("Object") If _panel IsNot Nothing And _element IsNot Nothing Then ' Get the panel that the element currently belongs to, ' then remove it from that panel and add it the Children of ' the panel that its been dropped on. Dim _parent As Panel = VisualTreeHelper.GetParent(_element) If _parent IsNot Nothing Then If e.KeyStates = DragDropKeyStates.ControlKey And _ e.AllowedEffects.HasFlag(DragDropEffects.Copy) Then Dim _circle As New Circle(_element) _panel.Children.Add(_circle) ' set the value to return to the DoDragDrop call e.Effects = DragDropEffects.Copy ElseIf e.AllowedEffects.HasFlag(DragDropEffects.Move) Then _parent.Children.Remove(_element) _panel.Children.Add(_element) ' set the value to return to the DoDragDrop call e.Effects = DragDropEffects.Move End If End If End If End If End Subこの Drop イベント ハンドラーは、次のタスクを実行します。
Drop イベントが既に処理されたかどうかを確認します。 たとえば、円が別の円にドロップされ、その円で Drop イベントが処理される場合、円を含むパネルにそれを処理させる必要はありません。
Drop イベントが処理されていない場合、Ctrl キーが押されたかどうかを確認します。
Drop が発生したときに Ctrl キーが押されていた場合、円コントロールのコピーを作成し、それを StackPanel の Children コレクションに追加します。
Ctrl キーが押されていない場合、円をその親パネルの Children コレクションから、ドロップされたパネルの Children コレクションに移動します。
移動操作またはコピー操作のどちらが実行されたかを DoDragDrop メソッドに通知するように Effects プロパティを設定します。
F5 キーを押してアプリケーションをビルドし、実行します。
TextBox からテキスト
greenを選択します。そのテキストを円コントロールにドラッグしてドロップします。
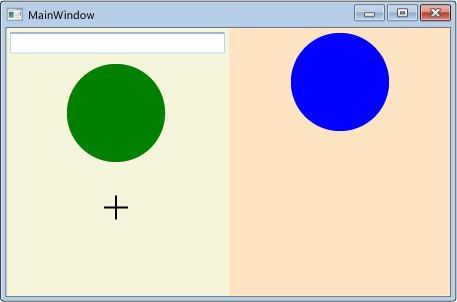
円コントロールを左側のパネルから右側のパネルにドラッグしてドロップします。 円は、左側のパネルの Children コレクションから削除され、右側のパネルの Children コレクションに追加されます。
Ctrl キーを押したまま、円コントロールを、現在表示されているパネルからもう一方のパネルにドラッグしてドロップします。 円がコピーされ、そのコピーが、受け取り側のパネルの Children コレクションに追加されます。

関連項目
.NET Desktop feedback
