チュートリアル: ASP.NET Core で .NET Aspire メッセージング統合を使用する
多くの場合、クラウドネイティブ アプリには、メッセージング キューやトピック、サブスクリプションなどの機能を提供するスケーラブルなメッセージング ソリューションが必要です。 .NET Aspire 統合により、Azure Service Busなどのさまざまなメッセージング プロバイダーに接続するプロセスが簡略化されます。 このチュートリアルでは、.NET Aspire 統合を使用して Azure Service Bus に接続して通知システムを作成する ASP.NET Core アプリを作成します。 送信されたメッセージは、サブスクライバーが使用するために Service Bus トピックに送信されます。 次の方法について学習します。
- .NET Aspire 統合を使用するように設定された基本的な .NET アプリを作成する
- Azure Service Bus に接続するための .NET Aspire 統合を追加する
- .NET .NET Aspire 統合機能を構成して使用してデータを送受信する
前提 条件
.NET .NET Aspireを使用するには、次のものがローカルにインストールされている必要があります。
- .NET 8.0 または .NET 9.0
- OCI 準拠のコンテナー ランタイム。次に例を示します。
- Docker デスクトップ または Podman. 詳細については、「コンテナーランタイム」を参照してください。
- 次のような統合開発者環境 (IDE) またはコード エディター。
- Visual Studio 2022 バージョン 17.9 以上 (オプション)
-
Visual Studio Code (省略可能)
- C# Dev Kit: 拡張機能 (省略可能)
- JetBrains Rider、.NET.NET Aspire プラグイン(オプション)
詳細については、
上記の前提条件に加えて、Azure CLI をインストールする必要もあります。 Azure CLI をインストールするには、Azure CLI インストールガイドの指示に従ってください。
Azure Service Bus アカウントを設定する
このチュートリアルでは、トピックとサブスクリプションが構成された Azure Service Bus 名前空間にアクセスする必要があります。 次のいずれかのオプションを使用して、必要なリソースを設定します。
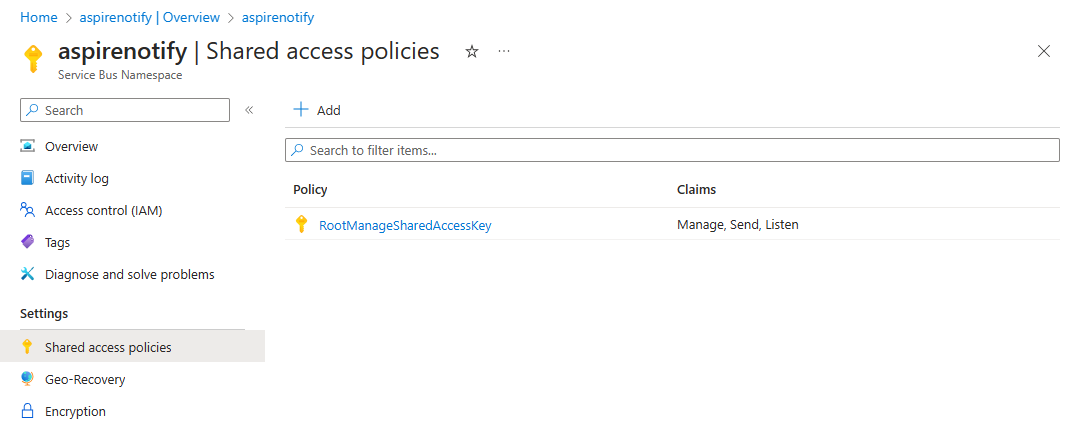
- Azure ポータルの: トピックとサブスクリプションを使用して Service Bus アカウントを作成します。
また:
Azure CLI: Azure CLI または CloudShell で次のコマンドを実行して、必要な Azure Service Bus リソースを設定します。
az group create -n <your-resource-group-name> --location eastus
az servicebus namespace create -g <your-resource-group-name> --name <your-namespace-name> --location eastus
az servicebus topic create -g <your-resource-group-name> --namespace-name <your-namespace-name> --name notifications
az servicebus topic subscription create -g <your-resource-group-name> --namespace-name <your-namespace-name> --topic-name notifications --name mobile
手記
your-resource-group-name と your-namespace-name のプレースホルダーを、それぞれ独自の値に置き換えます。 Service Bus 名前空間名は、Azure全体でグローバルに一意である必要があります。
Azure 認証
このクイック スタートは、パスワードレス認証または接続文字列を使用して完了できます。 パスワードレス接続では、Active Directory とロールベースのアクセス制御 (RBAC) Azure 使用して Service Bus 名前空間に接続します。 コード、構成ファイル、またはセキュリティで保護されたストレージ (Azure Key Vaultなど) にハードコーディングされた接続文字列を含める心配はありません。
接続文字列を使用して Service Bus 名前空間に接続することもできますが、実際のアプリケーションや運用環境ではパスワードなしのアプローチをお勧めします。 詳細については、
Service Bus 名前空間で、Visual Studio または Azure CLI にログインしたユーザー アカウントに次のロールを割り当てます。
- Service Bus データ所有者: Azure RBAC ロールを割り当てる
サンプル ソリューションを作成する
新しい .NET Aspire スターター アプリケーションを作成するには、Visual Studio、Visual Studio Code、または .NET CLI のいずれかを使用できます。
Visual Studio には、いくつかの初期セットアップ構成を処理する .NET Aspire テンプレートが用意されています。 このクイックスタートのプロジェクトを作成するには、次の手順を実行します。
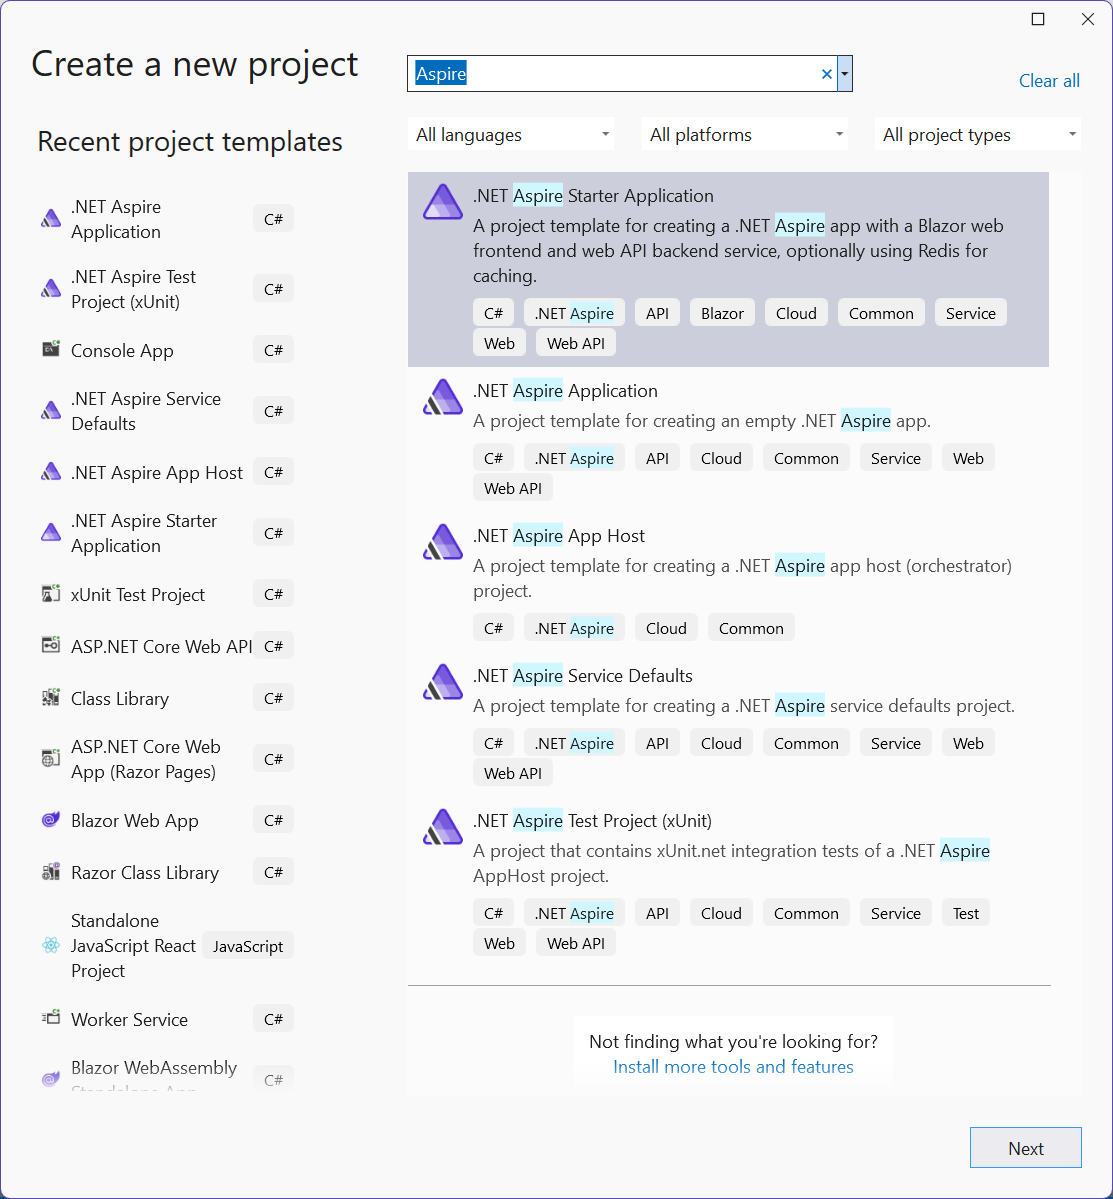
Visual Studioの上部にある [ファイル]>[新しい>プロジェクト] に移動します。
ダイアログ ウィンドウで、Aspire を検索し、.NET.NET Aspire [スターター アプリ] を選択します。 次を選択します。
[新しいプロジェクトの構成] 画面で、次の手順を実行します。
- プロジェクト名 AspireSampleの を入力します。
- 値の
は既定値のままにし、[次へ] 選択します。
追加情報 画面で、次の手順を実行します。
- .NET 9.0 (Standard Term Support) が選択されていることを確認します。
キャッシュに がオンになっていることを確認し、を作成するを使用する (サポートされているコンテナー ランタイムが必要) を選択します。 - 必要に応じて、[テスト プロジェクト
作成] を選択できます。 詳細については、「最初の テストを記述する」について を参照してください。
Visual Studio は、.NET Aspireを使用するように構成された新しいソリューションを作成します。
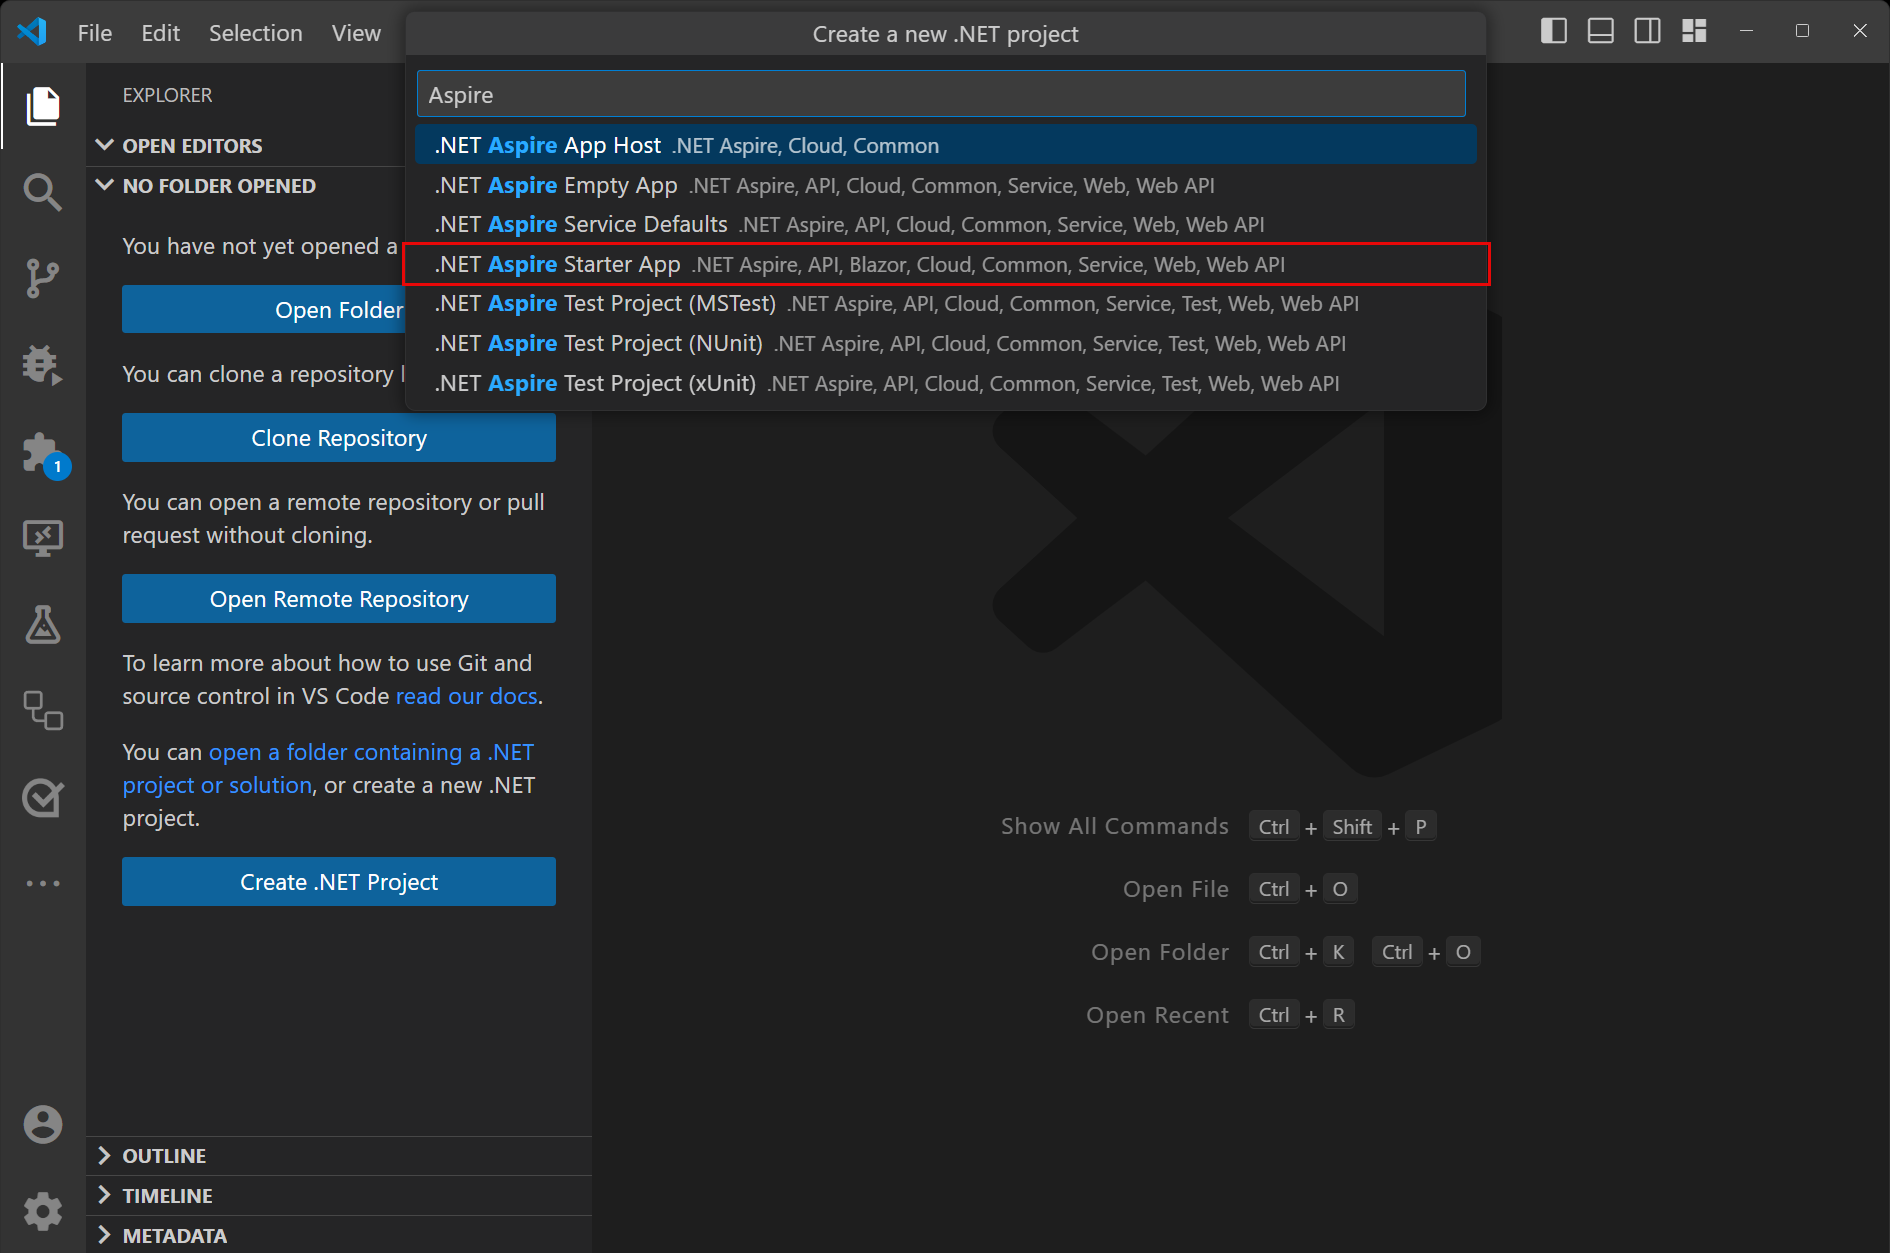
Visual Studio Code には、いくつかの初期セットアップ構成を処理する .NET Aspire プロジェクト テンプレートが用意されています。 このクイックスタートのプロジェクトを作成するには、次の手順を実行します。
.NET
.NET Aspire テンプレートまだインストールしていない場合は、次の dotnet new install コマンドを実行します。
dotnet new install Aspire.ProjectTemplates
上記の .NET CLI コマンドを使用すると、.NET Aspire テンプレートを使用できるようになります。 テンプレートから .NET.NET Aspire スターター アプリを作成するには、次の dotnet new コマンドを実行します。
dotnet new aspire-starter --use-redis-cache --output AspireSample
詳細については、dotnet newを参照してください。 .NET CLI は、.NET Aspireを使用するように構成された新しいソリューションを作成します。
Worker Service プロジェクトを追加する
次に、Worker Service プロジェクトをソリューションに追加して、Azure Service Busとの間でメッセージを取得および処理します。
- ソリューション エクスプローラーで、ソリューション ノード
最上位レベルを右クリックし、 [新しいプロジェクト 追加] を選択します。 - Worker Service テンプレートを検索して選択し、[次へ]を選択します。
プロジェクト名 に「AspireSample.WorkerService 」と入力し、[次へ]選択します。 -
追加情報 画面で、次の手順を実行します。
- .NET 9.0 が選択されていることを確認します。
- オーケストレーション に参加
オンになっていることを確認し、[の作成] 選択します。
Visual Studio ソリューションにプロジェクトを追加し、AspireSample.AppHost プロジェクトの Program.cs ファイルを新しいコード行で更新します。
builder.AddProject<Projects.AspireSample_WorkerService>(
    "aspiresample-workerservice");
Visual Studio ツールは、新しいプロジェクトを IDistributedApplicationBuilder オブジェクトに登録するためにこのコード行を追加しました。これにより、後で調べるオーケストレーション機能が有効になります。
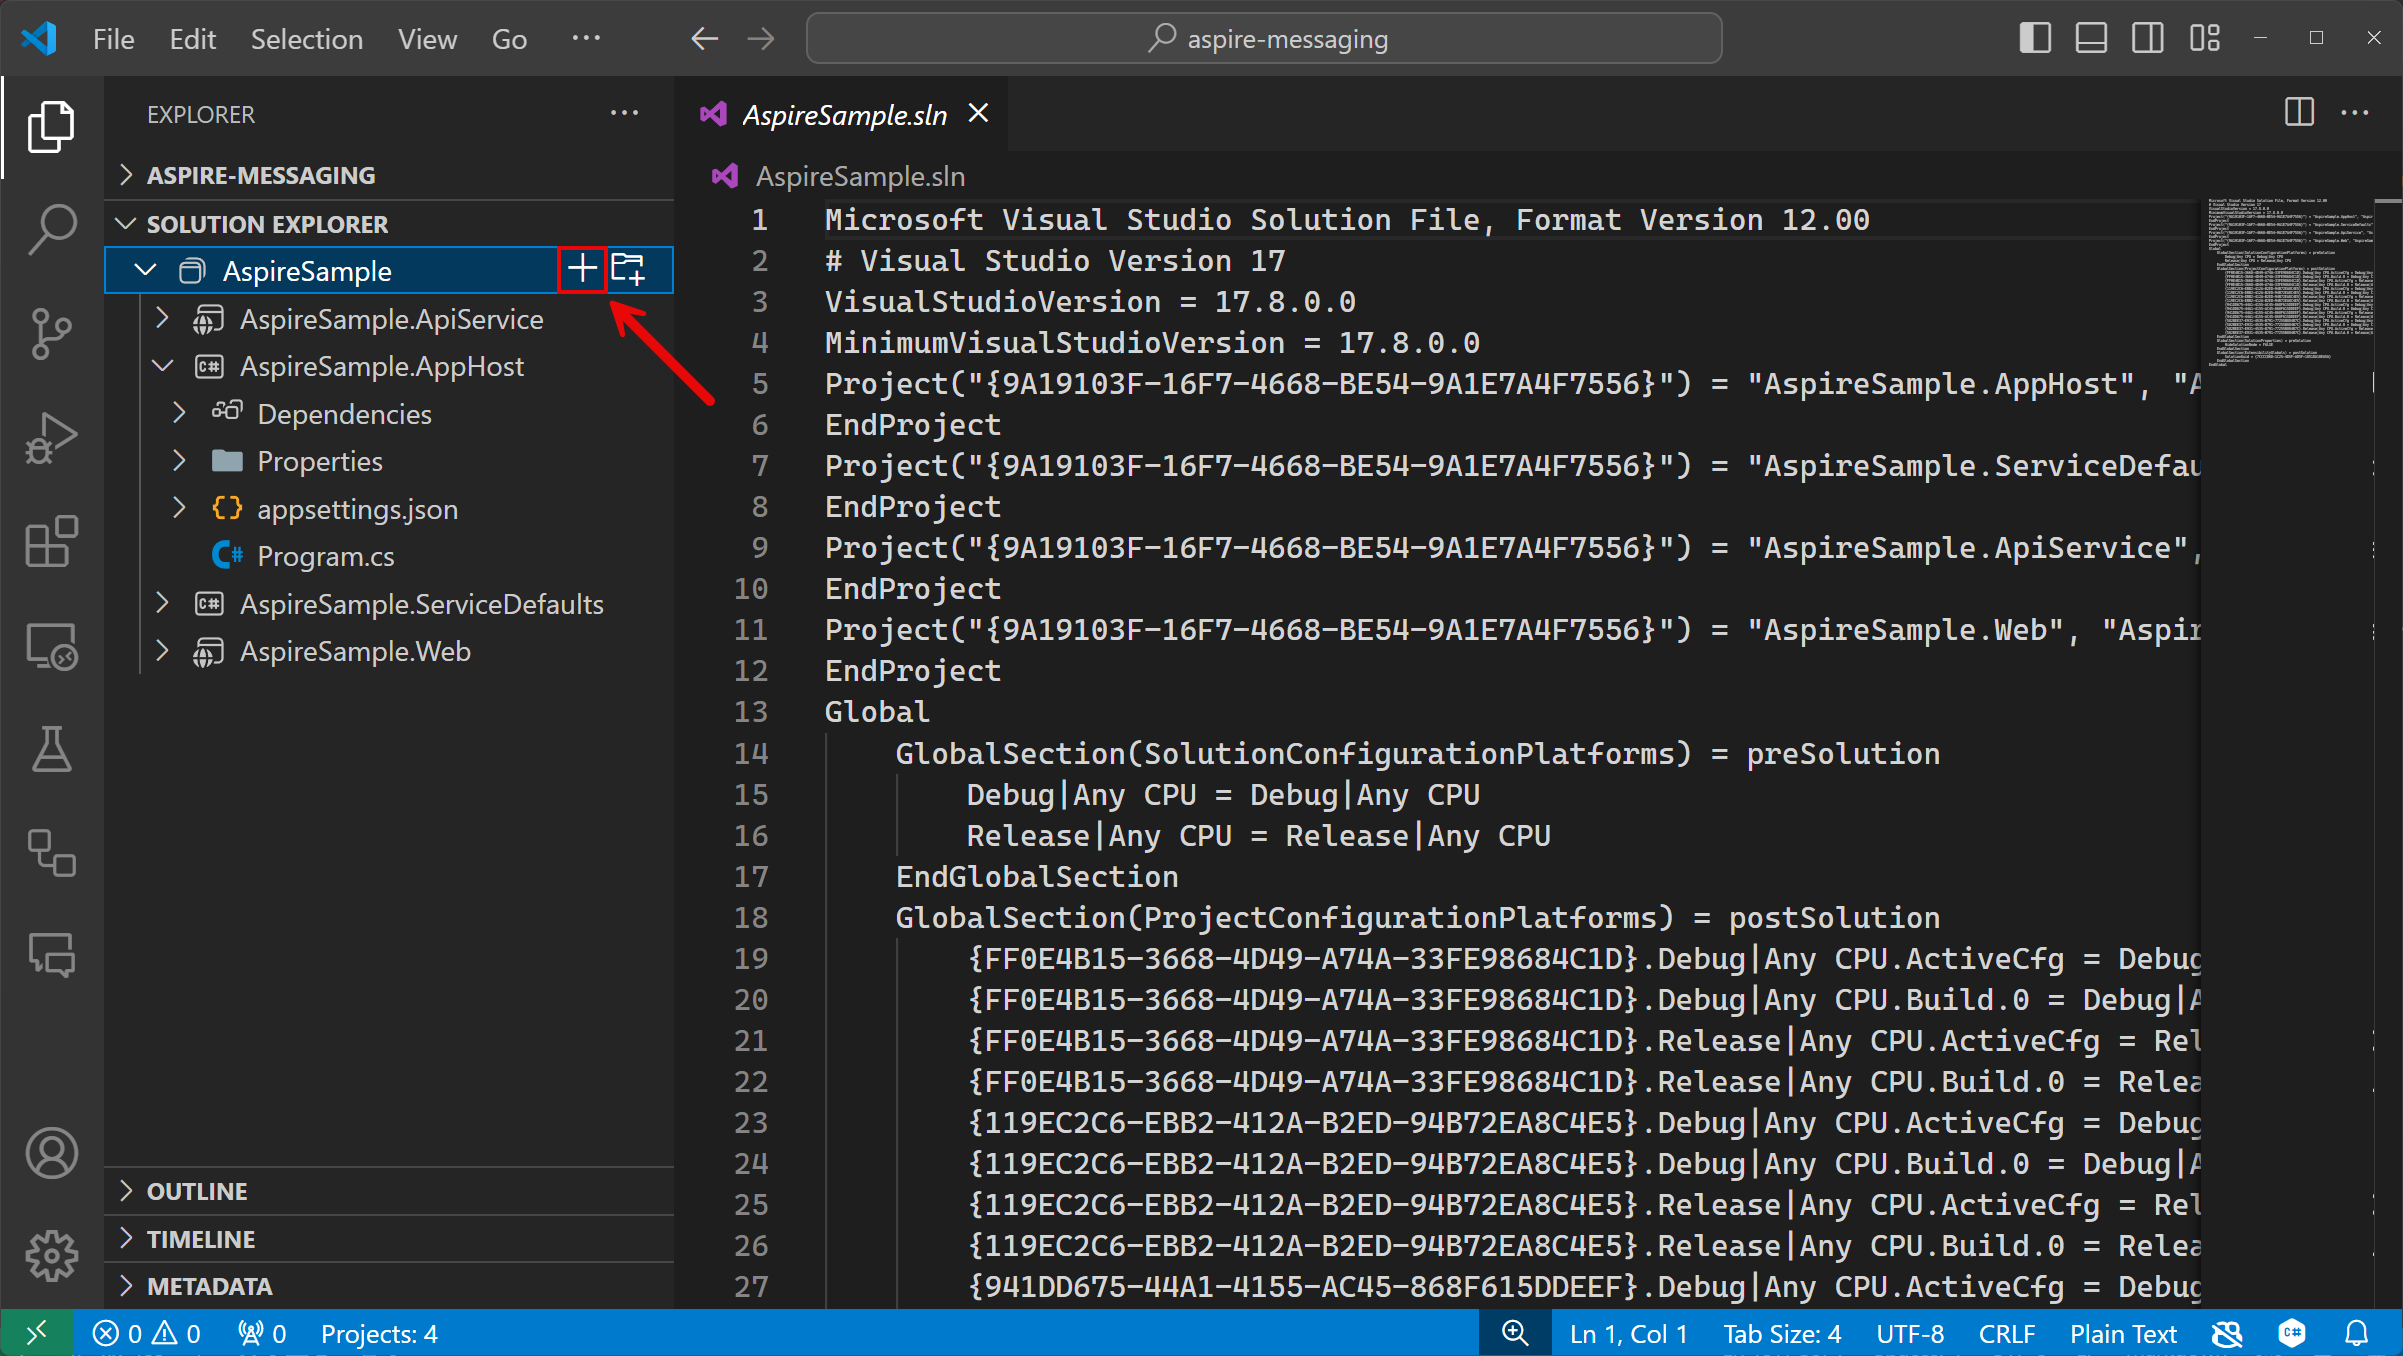
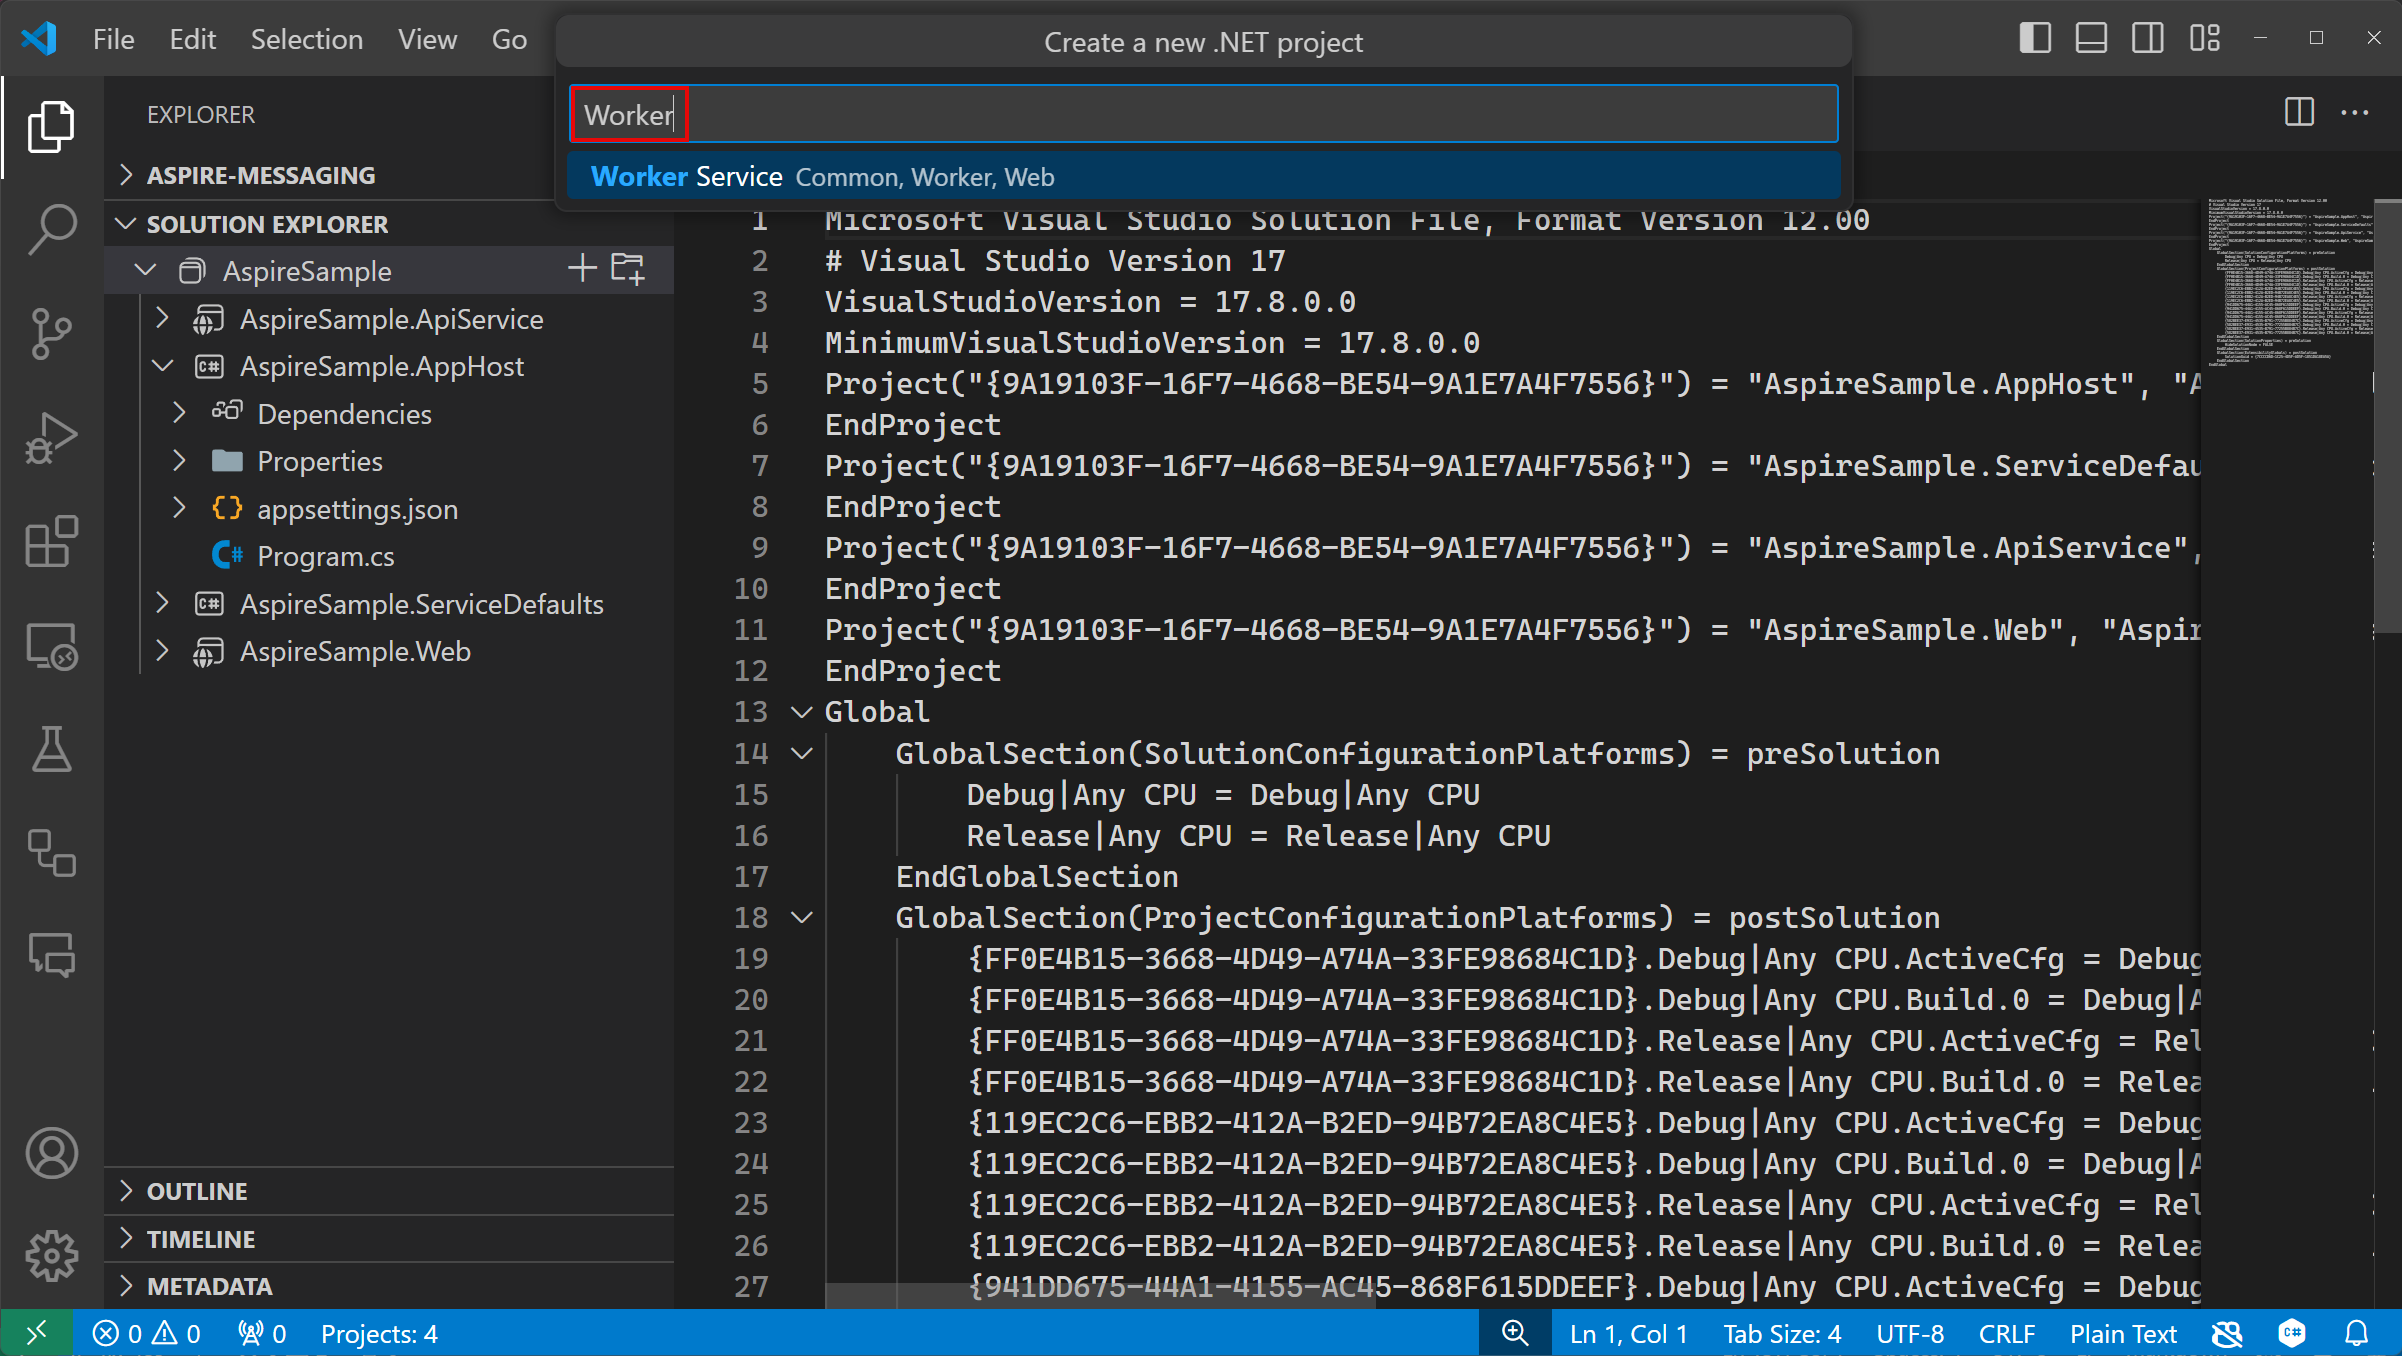
のソリューション エクスプローラー から、ソリューション名の横にある ボタンを選択して、新しいプロジェクトをソリューションに追加します。 プロジェクト テンプレートをフィルター処理するには、検索ボックスに「worker
」と入力し、見つかった テンプレートを選択します。 Worker Service テンプレートを選択し、プロジェクト名として AspireSample.WorkerServiceを入力します。
[既定 ディレクトリ を選択して、ソリューションと同じディレクトリにプロジェクトを作成します。
[プロジェクト
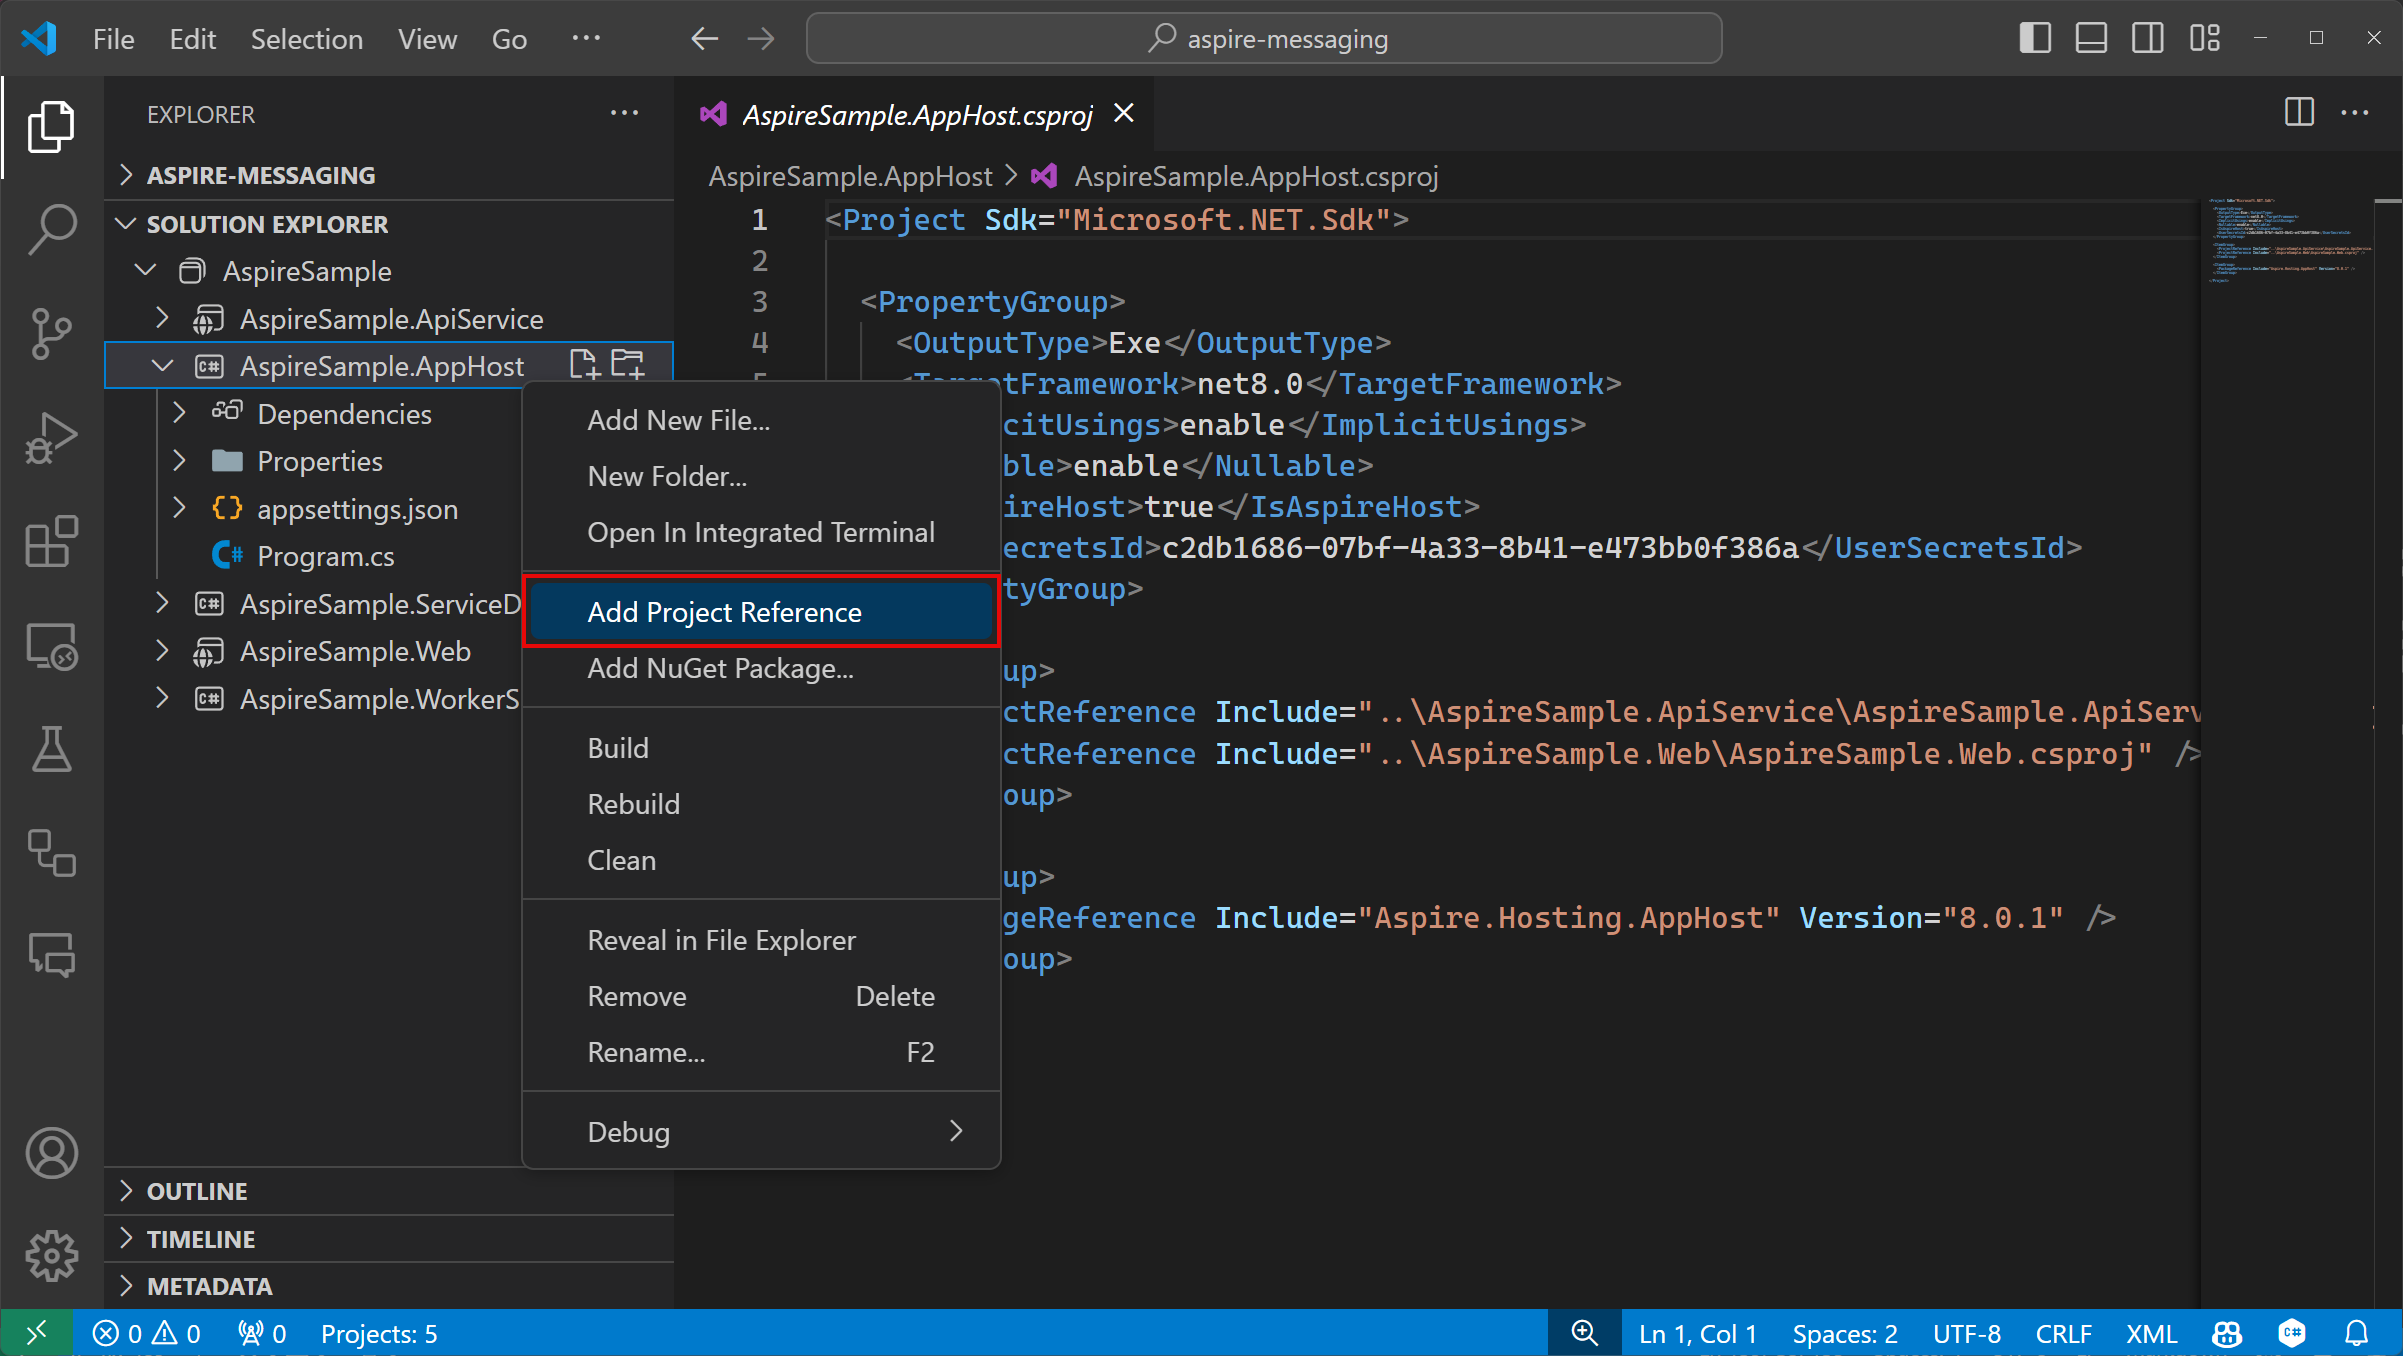
作成] を選択して、プロジェクトをソリューションに追加します。 ソリューション エクスプローラー での AspireSample.AppHost プロジェクトを右クリックし、[プロジェクト参照の追加]選択します。 builder.Build().Run();の呼び出しの前に、次のコード行を AspireSample.AppHost プロジェクトの Program.cs ファイルに追加します。builder.AddProject<Projects.AspireSample_WorkerService>( "aspiresample-workerservice");
アプリのルート ディレクトリで、dotnet new コマンドを使用して、新しい Worker Service アプリを作成します。
dotnet new worker --name AspireSample.WorkerServicedotnet slnコマンドを使用して、ソリューションにプロジェクトを追加します。dotnet sln AspireSample.sln add AspireSample.WorkerService/AspireSample.WorkerService.csprojdotnet addコマンドを使用して、.AppHost プロジェクトと .WorkerService プロジェクトの間にプロジェクト参照を追加します。dotnet add AspireSample.AppHost/AspireSample.AppHost.csproj reference AspireSample.WorkerService/AspireSample.WorkerService.csprojbuilder.Build().Run();の呼び出しの前に、次のコード行を AspireSample.AppHost プロジェクトの Program.cs ファイルに追加します。builder.AddProject<Projects.AspireSample_WorkerService>( "aspiresample-workerservice");
完成したソリューション構造は、最上位のディレクトリが -messaging
└───📂 aspire-messaging
     ├───📂 AspireSample.WorkerService
     │    ├───📂 Properties
     │    │    └─── launchSettings.json
     │    ├─── appsettings.Development.json
     │    ├─── appsettings.json
     │    ├─── AspireSample.WorkerService.csproj
     │    ├─── Program.cs
     │    └─── Worker.cs
     ├───📂 AspireSample.ApiService
     │    ├───📂 Properties
     │    │    └─── launchSettings.json
     │    ├─── appsettings.Development.json
     │    ├─── appsettings.json
     │    ├─── AspireSample.ApiService.csproj
     │    └─── Program.cs
     ├───📂 AspireSample.AppHost
     │    ├───📂 Properties
     │    │    └─── launchSettings.json
     │    ├─── appsettings.Development.json
     │    ├─── appsettings.json
     │    ├─── AspireSample.AppHost.csproj
     │    └─── Program.cs
     ├───📂 AspireSample.ServiceDefaults
     │    ├─── AspireSample.ServiceDefaults.csproj
     │    └─── Extensions.cs
     ├───📂 AspireSample.Web
     │    ├───📂 Components
     │    │    ├───📂 Layout
     │    │    │    ├─── MainLayout.razor
     │    │    │    ├─── MainLayout.razor.css
     │    │    │    ├─── NavMenu.razor
     │    │    │    └─── NavMenu.razor.css
     │    │    ├───📂 Pages
     │    │    │    ├─── Counter.razor
     │    │    │    ├─── Error.razor
     │    │    │    ├─── Home.razor
     │    │    │    └─── Weather.razor
     │    │    ├─── _Imports.razor
     │    │    ├─── App.razor
     │    │    └─── Routes.razor
     │    ├───📂 Properties
     │    │    └─── launchSettings.json
     │    ├───📂 wwwroot
     │    │    ├───📂 bootstrap
     │    │    │    ├─── bootstrap.min.css
     │    │    │    └─── bootstrap.min.css.map
     │    │    ├─── app.css
     │    │    └─── favicon.png
     │    ├─── appsettings.Development.json
     │    ├─── appsettings.json
     │    ├─── AspireSample.Web.csproj
     │    ├─── Program.cs
     │    └─── WeatherApiClient.cs
     └─── AspireSample.sln
.NET .NET Aspire 統合を API に追加する
.NET Aspire Azure Service Bus 統合を AspireSample.ApiService アプリに追加します。
ソリューション エクスプローラーで、の AspireSample.ApiService.csproj ファイルをダブルクリックして、その XML ファイルを開きます。
<ItemGroup>要素に次の<PackageReference>項目を追加します。<ItemGroup> <PackageReference Include="Aspire.Azure.Messaging.ServiceBus" Version="8.0.1" /> </ItemGroup>
dotnet add package Aspire.Azure.Messaging.ServiceBus
AspireSample.ApiService プロジェクトの Program.cs ファイルで、AddAzureServiceBusClient 拡張メソッドの呼び出しを追加します。AddServiceDefaultsへの既存の呼び出しを置き換えます。
// Add service defaults & Aspire integrations.
builder.AddServiceDefaults();
builder.AddAzureServiceBusClient("serviceBusConnection");
詳細については、AddAzureServiceBusClientを参照してください。
このメソッドは、次のタスクを実行します。
- Azure Service Busに接続するための DI コンテナーに ServiceBusClient を登録します。
- 対応する正常性チェック、ログ記録、および各サービスのテレメトリを自動的に有効にします。
同じプロジェクトの appsettings.json ファイルに、対応する接続情報を追加します。
{
  // Existing configuration is omitted for brevity.
  "ConnectionStrings": {
    "serviceBusConnection": "{your_namespace}.servicebus.windows.net"
  }
}
手記
サービス URI 内 {your_namespace} を、実際の Service Bus 名前空間の名前に置き換えてください。
API エンドポイントを作成する
API は、データを受信して Service Bus トピックに発行し、サブスクライバーにブロードキャストするためのエンドポイントを提供する必要があります。 Service Bus トピックにメッセージを送信するには、次のエンドポイントを AspireSample.ApiService プロジェクトに追加します。 Program.cs ファイルのすべての内容を次の C# コードに置き換えます。
using Azure.Messaging.ServiceBus;

var builder = WebApplication.CreateBuilder(args);

// Add service defaults & Aspire integrations.
builder.AddServiceDefaults();
builder.AddAzureServiceBusClient("serviceBusConnection");

// Add services to the container.
builder.Services.AddProblemDetails();

var app = builder.Build();

// Configure the HTTP request pipeline.
app.UseExceptionHandler();

app.MapPost("/notify", static async (ServiceBusClient client, string message) =>
{
    var sender = client.CreateSender("notifications");

    // Create a batch
    using ServiceBusMessageBatch messageBatch =
        await sender.CreateMessageBatchAsync();

    if (messageBatch.TryAddMessage(
            new ServiceBusMessage($"Message {message}")) is false)
    {
        // If it's too large for the batch.
        throw new Exception(
            $"The message {message} is too large to fit in the batch.");
    }

    // Use the producer client to send the batch of
    // messages to the Service Bus topic.
    await sender.SendMessagesAsync(messageBatch);

    Console.WriteLine($"A message has been published to the topic.");
});

app.MapDefaultEndpoints();

app.Run();
.NET Aspire 統合を Worker Service に追加する
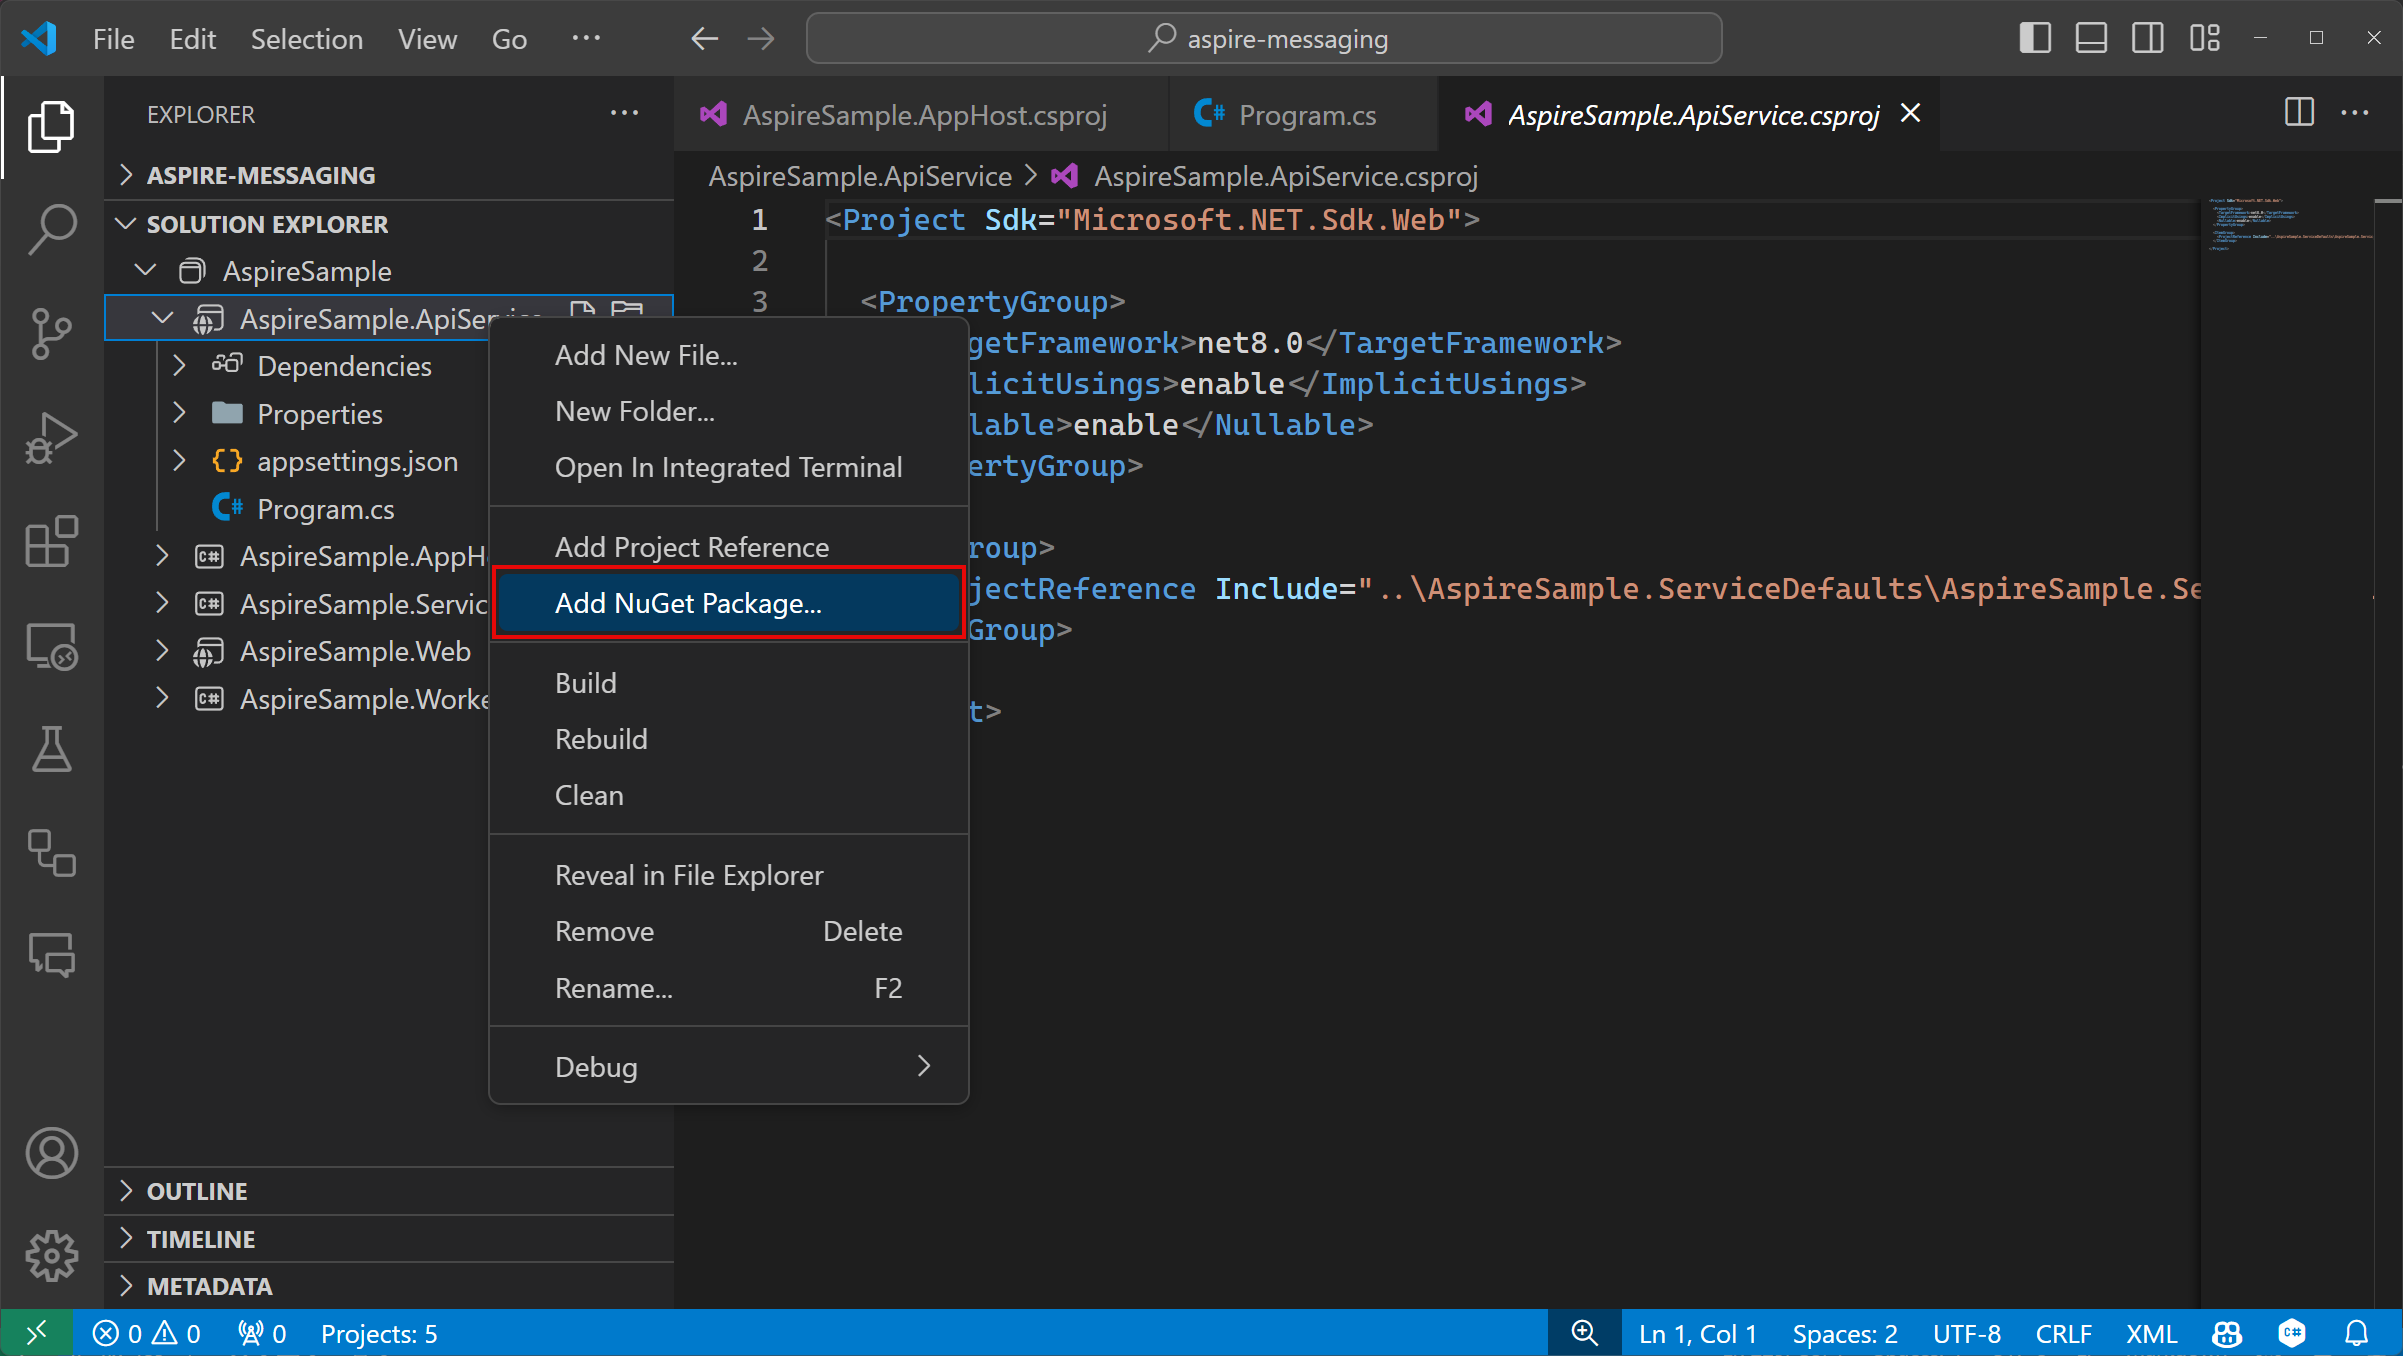
.NET Aspire Azure Service Bus 統合を AspireSample.WorkerService プロジェクトに追加します。 Aspireを追加したときと同じ手順に従います。Azure.Messaging.ServiceBus NuGet パッケージを AspireSample.ApiService プロジェクトに追加します。 追加されたら、Service Bus トピックからのメッセージを処理するように worker サービスを構成できます。
AspireSample.WorkerService プロジェクトの Program.cs ファイルで、既存のコードを次のように置き換えます。
using AspireSample.WorkerService;

var builder = Host.CreateApplicationBuilder(args);

builder.AddAzureServiceBusClient("serviceBusConnection");

builder.Services.AddHostedService<Worker>();

var host = builder.Build();
host.Run();
AddAzureServiceBusClient メソッドは、次のタスクを実行します。
- Azure Service Busに接続するための DI コンテナーに ServiceBusClient を登録します。
- 対応する正常性チェック、ログ記録、および各サービスのテレメトリを自動的に有効にします。
AspireSample.WorkerService プロジェクトの appsettings.json ファイルに、対応する接続情報を追加します。
{
  // Existing configuration is omitted for brevity.
  "ConnectionStrings": {
    "serviceBusConnection": "{your_namespace}.servicebus.windows.net"
  }
}
手記
サービス URI {your_namespace} は、必ず独自の Service Bus 名前空間の名前に置き換えてください。
サブスクライバーからのメッセージを処理する
messages キューに新しいメッセージが配置されると、ワーカー サービスはメッセージを取得、処理、および削除する必要があります。 次のコードに一致するように、Worker.cs クラスを更新します。
using Azure.Messaging.ServiceBus;

namespace AspireSample.WorkerService;

public sealed class Worker(
    ILogger<Worker> logger,
    ServiceBusClient client) : BackgroundService
{
    protected override async Task ExecuteAsync(CancellationToken stoppingToken)
    {
        while (!stoppingToken.IsCancellationRequested)
        {
            var processor = client.CreateProcessor(
                "notifications",
                "mobile",
                new ServiceBusProcessorOptions());

            // Add handler to process messages
            processor.ProcessMessageAsync += MessageHandler;

            // Add handler to process any errors
            processor.ProcessErrorAsync += ErrorHandler;

            // Start processing
            await processor.StartProcessingAsync();

            logger.LogInformation("""
                Wait for a minute and then press any key to end the processing
                """);

            Console.ReadKey();

            // Stop processing
            logger.LogInformation("""

                Stopping the receiver...
                """);

            await processor.StopProcessingAsync();

            logger.LogInformation("Stopped receiving messages");
        }
    }

    async Task MessageHandler(ProcessMessageEventArgs args)
    {
        string body = args.Message.Body.ToString();

        logger.LogInformation("Received: {Body} from subscription.", body);

        // Complete the message. messages is deleted from the subscription.
        await args.CompleteMessageAsync(args.Message);
    }

    // Handle any errors when receiving messages
    Task ErrorHandler(ProcessErrorEventArgs args)
    {
        logger.LogError(args.Exception, "{Error}", args.Exception.Message);

        return Task.CompletedTask;
    }
}
アプリをローカルで実行してテストする
これで、サンプル アプリをテストする準備ができました。 API に送信されたデータが Azure Service Bus トピックに送信され、サブスクライバー ワーカー サービスによって使用されることを確認します。
プロジェクトを起動します。 [デバッグの開始] ボタン 選択するか、F5押します。 .NET .NET Aspire ダッシュボード アプリがブラウザーで開きます。
プロジェクトを起動します。 [デバッグの開始] ボタン 選択するか、F5押します。 .NET .NET Aspire ダッシュボード アプリがブラウザーで開きます。
-
dotnet run --project AspireSample.AppHostを実行して、.NET.NET Aspire プロジェクトを起動します。 .NET .NET Aspire ダッシュボード アプリがブラウザーで開きます。
リソース ページの apiservice 行で、
weatherforecastエンドポイントを開く エンドポイント のリンクを見つけます。 HTTPS ポート番号をメモします。.NET .NET Aspire ダッシュボードで、のアスパイアサンプル-ワーカーサービス プロジェクトのログを表示します。
ターミナル ウィンドウで、
curlコマンドを使用して、API にテスト メッセージを送信します。curl -X POST -H "Content-Type: application/json" https://localhost:{port}/notify?message=hello%20aspire{port} は、前のポート番号に置き換えてください。
aspiresample-workerservice ログに戻して切り替えます。 出力ログにテスト メッセージが出力されます。
おめでとうございます! Aspire 統合を使用して Azure Service Bus に接続する ASP.NET Core API を作成して構成しました。
リソースのクリーンアップ
作成した Azure リソースが不要になったら、次の Azure CLI コマンドを実行してリソース グループを削除します。 リソース グループを削除すると、その中に含まれるリソースも削除されます。
az group delete --name <your-resource-group-name>
詳細については、
.NET Aspire
