チュートリアル: .NET Aspire に SQL Server データベースを使用して Azure プロジェクトを配置する
このチュートリアルでは、ASP.NET Coreへのデプロイ用に SQL Server Database を使用して Azure アプリを構成する方法について説明します。 .NET Aspire では、SQL Serverで異なるデータベース サービスをプロビジョニングする複数の Azure 統合構成が提供されます。 次の方法について学習します。
- ASP.NET Core .NET Aspire 統合を使用するように構成された基本的な SQL Server アプリを作成する
- Azure SQL Database をプロビジョニングするようにアプリを構成する
- コンテナー化された SQL Server データベースをプロビジョニングするようにアプリを構成する
手記
このドキュメントでは、.NET Aspireに SQL Server リソースをプロビジョニングしてデプロイするための Azure 構成に特に焦点を当てています。 完全な Azure Container Apps デプロイ プロセスの詳細については、.NET チュートリアルを参照してください。
前提 条件
.NET .NET Aspireを使用するには、次のものがローカルにインストールされている必要があります。
- .NET 8.0 または .NET 9.0
- OCI 準拠のコンテナー ランタイム。次に例を示します。
- デスクトップ または
、 。 詳細については、コンテナー ランタイムを参照してください。
- デスクトップ または
- 次のような統合開発者環境 (IDE) またはコード エディター。
- Visual Studio 2022 バージョン 17.9 以降 (省略可能)
-
Visual Studio Code (省略可能)
- C# Dev Kit: 拡張 (省略可能)
- JetBrains Rider と .NET.NET Aspire プラグイン (省略可能)
詳細については、
サンプル ソリューションを作成する
- Visual Studioの上部にある [ファイル]>[新しい>プロジェクト] に移動します。
- ダイアログ ウィンドウで、Aspire を検索し、[.NET.NET Aspire - スターター アプリケーション] を選択します。 次を選択します。
- [新しいプロジェクトの構成] 画面で、次の手順を実行します。
- の プロジェクト名を AspireSQLに入力します。
- 残りの値は既定値のままにして、[次へ]をクリックします。
-
追加情報 画面で、次の手順を実行します。
9.0 選択します。
Visual Studio は、ASP.NET Coreを使用するように構成された新しい .NET Aspire ソリューションを作成します。 このソリューションは、次のプロジェクトで構成されます。
- AspireSQL.Web: サービスの既定値に依存する Blazor プロジェクト。
- AspireSQL.ApiService: サービスの既定値に依存する API プロジェクト。
- AspireSQL.AppHost: アプリのさまざまなプロジェクトとサービスに接続して構成するように設計されたオーケストレーター プロジェクト。 オーケストレーターはスタートアップ プロジェクトとして設定する必要があります。
- AspireSQL.ServiceDefaults: ソリューション内のプロジェクト間で再利用できる構成を保持するための共有クラス ライブラリです。
SQL Server 展開用にアプリを構成する
.NET Aspire には、SQL Serverでの Azure 展開を効率化するための 2 つの組み込み構成オプションが用意されています。
- SQL Server を使用してコンテナー化された Azure Container Apps データベースをプロビジョニングする
- Azure SQL Database インスタンスをプロビジョニングする
.NET .NET Aspire 統合をアプリに追加する
目的のホスティング サービスの .NET プロジェクトに適切な .NET Aspire 統合を追加します。
📦 Aspire.Hosting.Azure.Sql NuGet パッケージを AspireSQL.AppHost プロジェクトに追加してください。
dotnet add package Aspire.Hosting.Azure.Sql
AppHost プロジェクトを構成する
目的の SQL データベース サービス用に AspireSQL.AppHost プロジェクトを構成します。
Program.cs プロジェクトの ファイルの内容を次のコードに置き換えます。
var builder = DistributedApplication.CreateBuilder(args);

var apiService = builder.AddProject<Projects.AspireSql_ApiService>("apiservice");

// Provisions an Azure SQL Database when published
var sqlServer = builder.AddAzureSqlServer("sqlserver")
                       .AddDatabase("sqldb");

builder.AddProject<Projects.AspireSql_Web>("webfrontend")
    .WithExternalHttpEndpoints()
    .WithReference(apiService)
    .WaitFor(apiService);

builder.Build().Run();
上記のコードは、SQL Server Container リソースをアプリに追加し、sqldataという名前のデータベースへの接続を構成します。
PublishAsAzureSqlDatabase メソッドを使用すると、Azure Developer CLI や Visual Studio などのツールによって、デプロイ プロセス中に Azure SQL Database リソースが作成されます。
アプリをデプロイする
Azure Developer CLI (azd) などのツールは、デプロイを効率化するための .NET AspireSQL Server 統合構成をサポートします。
azd は、これらの設定を活用して、適切に構成されたリソースをプロビジョニングします。
テンプレートを初期化する
新しいターミナル ウィンドウを開き、.NET.NET Aspire ソリューションのディレクトリに
cdします。azd initコマンドを実行して、azdを使用してプロジェクトを初期化します。このコマンドにより、ローカル ディレクトリ構造が検査され、アプリの種類が決定されます。azd initコマンドの詳細については、azd init 参照してください。 を使用して選択します。
? How do you want to initialize your app?  [Use arrows to move, type to filter]
> Use code in the current directory
  Select a template
ディレクトリをスキャンした後、
azdが正しい.NET.NET AspireAppHost プロジェクトを見つけたことを確認するよう求められます。 「確認」を選択し、アプリ の初期化を続行します。Detected services: .NET (Aspire) Detected in: D:\source\repos\AspireSample\AspireSample.AppHost\AspireSample.AppHost.csproj azd will generate the files necessary to host your app on Azure using Azure Container Apps. ? Select an option [Use arrows to move, type to filter] > Confirm and continue initializing my app Cancel and exit環境名を入力します。これは、Azure でプロビジョニングされたリソースに名前を付け、
devやprodなどのさまざまな環境を管理するために使用します。Generating files to run your app on Azure: (✓) Done: Generating ./azure.yaml (✓) Done: Generating ./next-steps.md SUCCESS: Your app is ready for the cloud! You can provision and deploy your app to Azure by running the azd up command in this directory. For more information on configuring your app, see ./next-steps.md
azd は、多数のファイルを生成し、作業ディレクトリに配置します。 これらのファイルは次のとおりです。
- azure.yaml: AppHost プロジェクトなどのアプリのサービス .NET Aspire について説明し、それらを Azure リソースにマップします。
-
.azure/config.json: 現在のアクティブな環境が何であるかを
azd通知する構成ファイル。 - .azure/aspireazddev/.env: 環境固有のオーバーライドが含まれています。
テンプレートをデプロイする
テンプレートが初期化されると、azd upを使用して、 AppHost プロジェクト ディレクトリから 1 つのコマンドとしてプロビジョニングとデプロイプロセス実行できます。 azd up使用可能なオプションの一覧から、デプロイするサブスクリプションを選択します。
Select an Azure Subscription to use:  [Use arrows to move, type to filter]
  1. SampleSubscription01 (xxxxxxx-xxxx-xxxx-xxxx-xxxxxxxxxx)
  2. SamepleSubscription02 (xxxxxxx-xxxx-xxxx-xxxx-xxxxxxxxxx)
使用可能なオプションの一覧から、使用する Azure の場所を選択します。
Select an Azure location to use:  [Use arrows to move, type to filter]
  42. (US) Central US (centralus)
  43. (US) East US (eastus)
> 44. (US) East US 2 (eastus2)
  46. (US) North Central US (northcentralus)
  47. (US) South Central US (southcentralus)
選択した後、azd はプロビジョニングとデプロイのプロセスを実行します。
By default, a service can only be reached from inside the Azure Container Apps environment it is running in. Selecting a service here will also allow it to be reached from the Internet.
? Select which services to expose to the Internet webfrontend
? Select an Azure Subscription to use:  1. <YOUR SUBSCRIPTION>
? Select an Azure location to use: 1. <YOUR LOCATION>

Packaging services (azd package)


Provisioning Azure resources (azd provision)
Provisioning Azure resources can take some time.

Subscription: <YOUR SUBSCRIPTION>
Location: <YOUR LOCATION>

  You can view detailed progress in the Azure Portal:
  <LINK TO DEPLOYMENT>

  (✓) Done: Resource group: <YOUR RESOURCE GROUP>
  (✓) Done: Container Registry: <ID>
  (✓) Done: Log Analytics workspace: <ID>
  (✓) Done: Container Apps Environment: <ID>

SUCCESS: Your application was provisioned in Azure in 1 minute 13 seconds.
You can view the resources created under the resource group <YOUR RESOURCE GROUP> in Azure Portal:
<LINK TO RESOURCE GROUP OVERVIEW>

Deploying services (azd deploy)

  (✓) Done: Deploying service apiservice
  - Endpoint: <YOUR UNIQUE apiservice APP>.azurecontainerapps.io/

  (✓) Done: Deploying service webfrontend
  - Endpoint: <YOUR UNIQUE webfrontend APP>.azurecontainerapps.io/

Aspire Dashboard: <LINK TO DEPLOYED .NET ASPIRE DASHBOARD>

SUCCESS: Your up workflow to provision and deploy to Azure completed in 3 minutes 50 seconds.
azd up コマンドは、次の個々の azd コマンドのラッパーとして機能し、1 つの手順でリソースをプロビジョニングおよびデプロイします。
-
azd package: アプリ プロジェクトとその依存関係はコンテナーにパッケージ化されます。 -
azd provision: アプリに必要な Azure リソースがプロビジョニングされます。 -
azd deploy: プロジェクトはコンテナーとして Azure Container Registry インスタンスにプッシュされ、コードがホストされる Azure Container Apps の新しいリビジョンを作成するために使用されます。
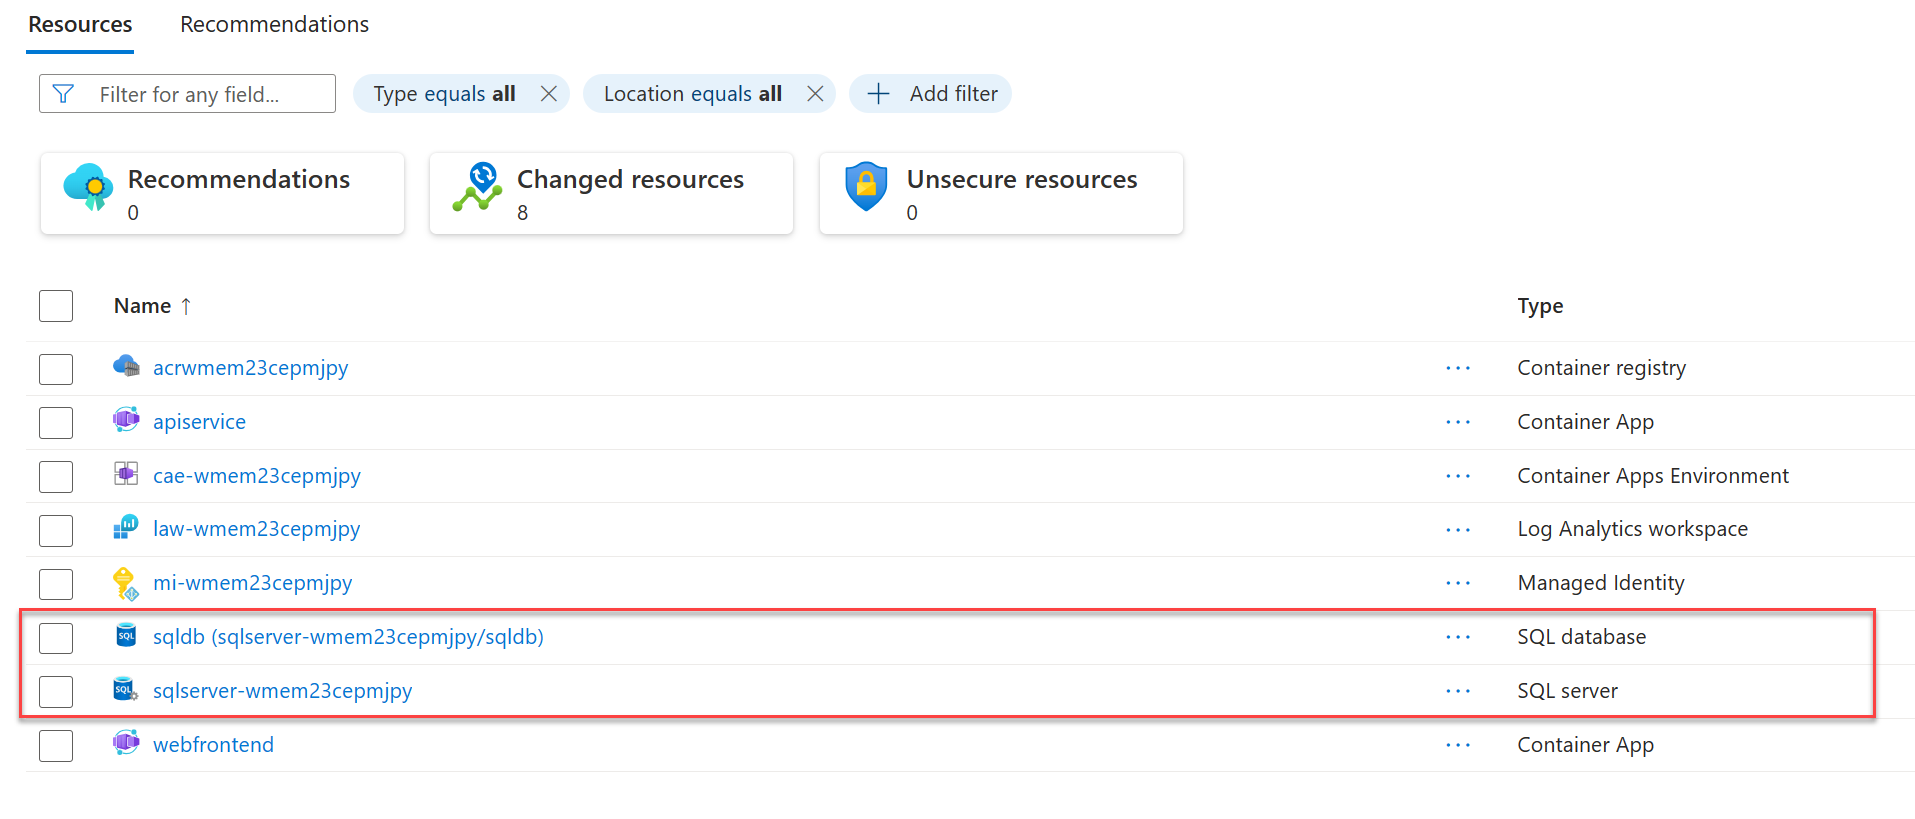
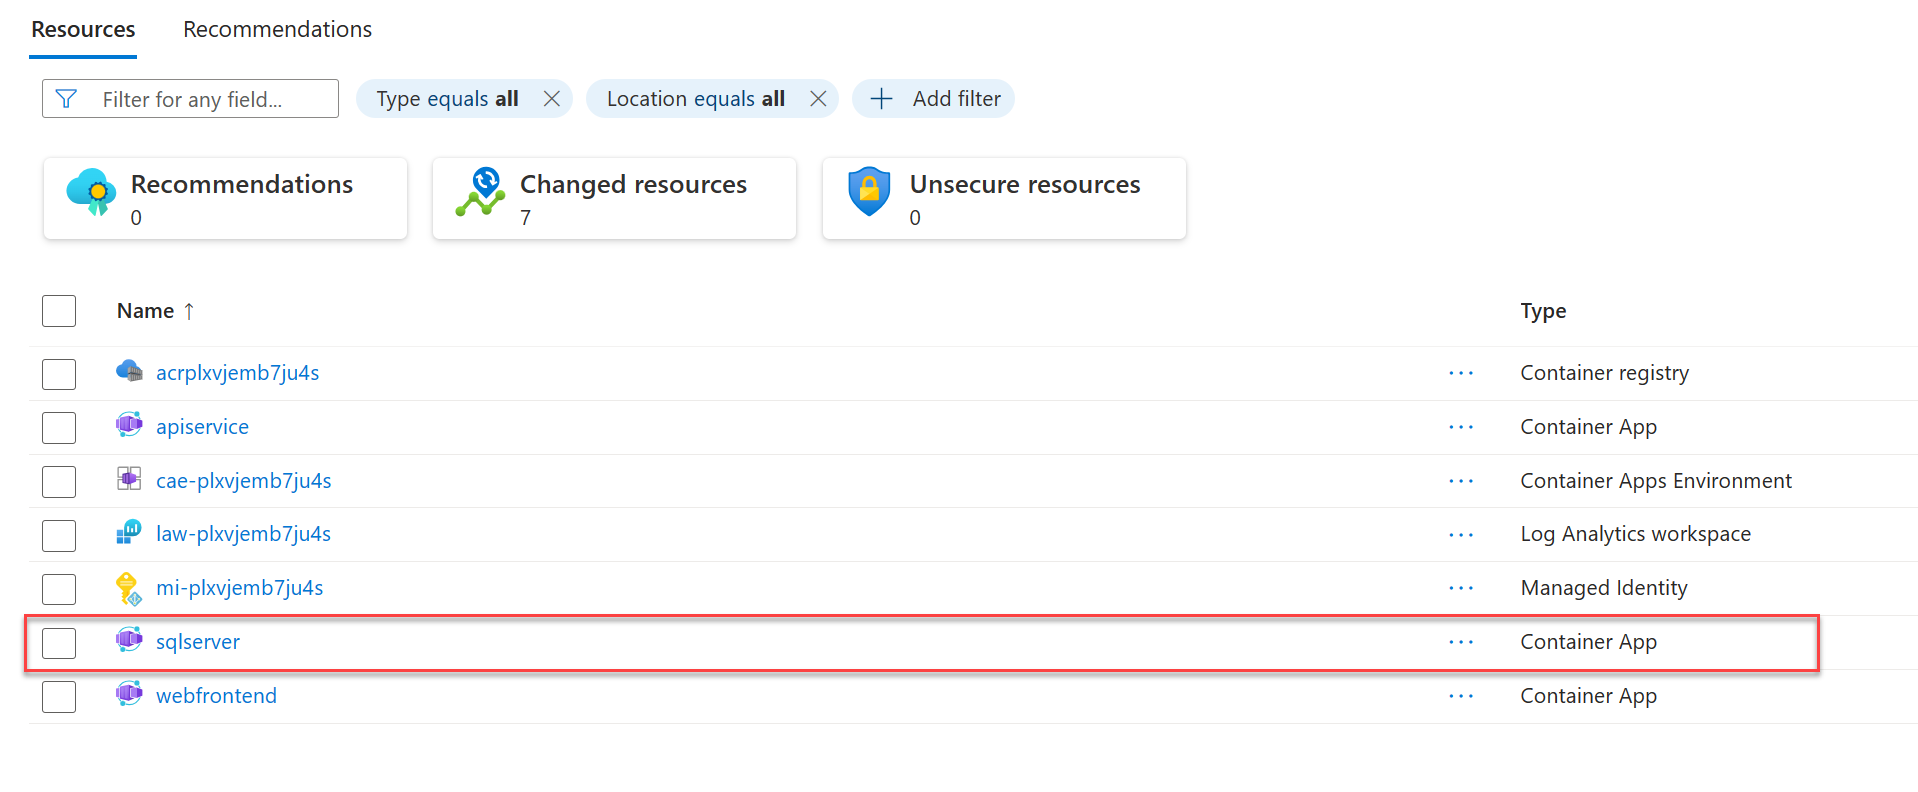
azd up ステージが完了すると、アプリは Azureで使用できるようになり、Azure ポータルを開いてリソースを探索できます。
azd は、デプロイされたアプリに直接アクセスするための URL も出力します。
提供された .AppHost 構成と

リソースのクリーンアップ
作成した Azure リソースが不要になったら、次の Azure CLI コマンドを実行してリソース グループを削除します。 リソース グループを削除すると、その中に含まれるリソースも削除されます。
az group delete --name <your-resource-group-name>
詳細については、リソースのクリーンアップについて Azureを参照してください。
関連項目
- .NET Aspire のデプロイは Azure Container Apps を介して行います
- デプロイメント .NET AspireAzure Container Apps の深掘り
Actions を使用して プロジェクトを配置する
.NET Aspire

