Microsoft Defender for Identity センサーの管理と更新
この記事では、Microsoft Defender XDRでMicrosoft Defender for Identity センサーを構成および管理する方法について説明します。
Defender for Identity センサーの設定と状態を表示する
Microsoft Defender XDRで、[設定]、[ID] の順に移動します。
![[設定]、[ID] の順に移動します。](media/settings-identities.png)
[ センサー ] ページを選択すると、すべての Defender for Identity センサーが表示されます。 センサーごとに、その名前、ドメイン メンバーシップ、バージョン番号、更新が遅れる必要がある場合、サービスの状態、センサーの状態、正常性状態、正常性の問題の数、センサーが作成された日時が表示されます。 各列の詳細については、「 センサーの詳細」を参照してください。
[フィルター] を選択すると、使用可能なフィルターを選択できます。 次に、各フィルターを使用して、表示するセンサーを選択できます。

いずれかのセンサーを選択すると、センサーとその正常性状態に関する情報がウィンドウに表示されます。
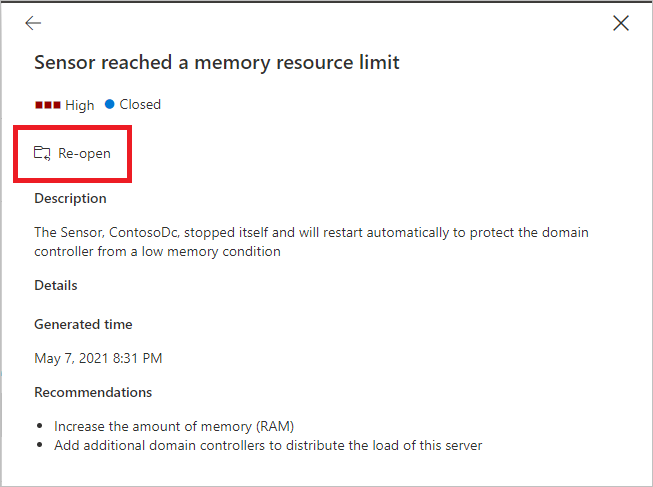
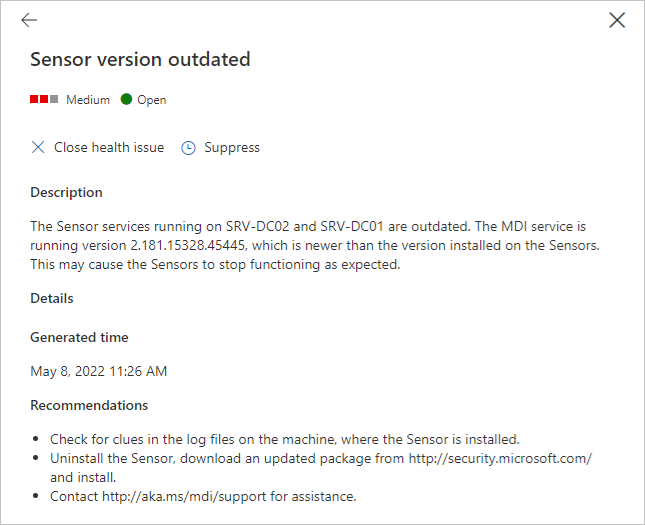
正常性の問題のいずれかを選択すると、その詳細が表示されたウィンドウが表示されます。 終了した問題を選択した場合は、ここから再度開くことができます。

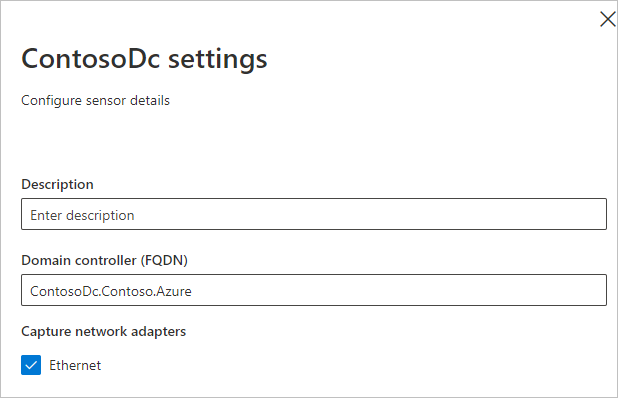
[センサーの 管理] を選択すると、センサーの詳細を構成できるウィンドウが開きます。


[ センサー ] ページで、[エクスポート] を選択して、センサーの一覧を .csv ファイルに エクスポートできます。

センサーの詳細
[センサー] ページには、各センサーに関する次の情報が表示されます。
センサー: センサーの NetBIOS コンピューター名を表示します。
種類: センサーの種類を表示します。 使用可能な値は次のとおりです。
ドメイン コントローラー センサー
AD FS センサー (Active Directory フェデレーション サービス (AD FS))
スタンドアロン センサー
ADCS センサー (Active Directory 証明書サービス)。 テスト環境など、AD CS が構成されたドメイン コントローラー サーバーにセンサーがインストールされている場合、センサーの種類は代わりに ドメイン コントローラー センサー として表示されます。
[ドメイン]: センサーがインストールされている Active Directory ドメインの完全修飾ドメイン名を表示します。
サービスの状態: サーバー上のセンサー サービスの状態を表示します。 使用可能な値は次のとおりです。
実行中: センサー サービスが実行されています
開始中: センサー サービスが開始中
無効: センサー サービスが無効です
停止: センサー サービスが停止しています
不明: センサーが切断されているか、到達できない
センサーの状態: センサーの全体的な状態を表示します。 使用可能な値は次のとおりです。
最新: センサーは現在のバージョンのセンサーを実行しています。
古い: センサーは、現在のバージョンより少なくとも 3 つのバージョンのソフトウェアを実行しています。
更新中: センサー ソフトウェアが更新されています。
更新に失敗しました: センサーが新しいバージョンに更新できませんでした。
未構成: センサーが完全に動作する前に、より多くの構成が必要です。 これは、AD FS/AD CS サーバーまたはスタンドアロン センサーにインストールされているセンサーに適用されます。
開始に失敗しました: センサーが 30 分以上構成をプルしませんでした。
同期: センサーには構成の更新が保留中ですが、新しい構成はまだプルされていませんでした。
切断: Defender for Identity サービスでは、このセンサーからの通信が 10 分間表示されていません。
到達不能: ドメイン コントローラーが Active Directory から削除されました。 ただし、使用を停止する前に、センサーのインストールがアンインストールされ、ドメイン コントローラーから削除されませんでした。 このエントリは安全に削除できます。
バージョン: インストールされているセンサーのバージョンを表示します。
遅延更新: センサーの遅延更新メカニズムの状態を表示します。 使用可能な値は次のとおりです。
有効
無効
正常性状態: センサーの全体的な正常性状態を、重大度が最も高いオープン正常性アラートを表す色付きアイコンで表示されます。 使用可能な値は次のとおりです。
正常 (緑色のアイコン): 開いている正常性の問題なし
正常でない (黄色のアイコン): 開いている最も重大度の高い正常性の問題が低い
正常でない (オレンジ色のアイコン): 開いている最も重大度の高い正常性の問題は中程度です
正常でない (赤いアイコン): 開いている最も重大度の高い正常性の問題が高い
正常性の問題: センサーで開かれた正常性の問題の数を表示します。
作成済み: センサーがインストールされた日付を表示します
センサーの更新
Microsoft Defender for Identityセンサーを最新の状態に保つことで、organizationに最適な保護が提供されます。
Microsoft Defender for Identity サービスは、通常、新しい検出、機能、パフォーマンスの向上により、月に数回更新されます。 通常、これらの更新プログラムには、センサーに対応するマイナー更新プログラムが含まれます。 センサー更新パッケージは、Defender for Identity センサーとセンサー検出機能のみを制御します。
Defender for Identity センサーの更新の種類
Defender for Identity センサーでは、次の 2 種類の更新プログラムがサポートされています。
マイナー バージョンの更新:
- 頻繁
- MSI のインストールとレジストリの変更は必要ありません
- 再起動: Defender for Identity センサー サービス
メジャー バージョンの更新:
- 珍
- 重要な変更が含まれています
- 再起動: Defender for Identity センサー サービス
注:
- Defender for Identity センサーは、常に、インストールされているドメイン コントローラーで使用可能なメモリと CPU の少なくとも 15% を予約します。 Defender for Identity サービスがメモリを消費しすぎると、Defender for Identity センサー アップデーター サービスによってサービスが自動的に停止および再起動されます。
遅延センサーの更新
Defender for Identity の開発とリリースの更新が急速に進むため、センサーのサブセット グループを遅延更新リングとして定義し、センサーの更新プロセスを段階的に行うことができます。 Defender for Identity を使用すると、センサーの更新方法を選択し、各センサーを 遅延更新 候補として設定できます。
遅延更新用に選択されていないセンサーは、Defender for Identity サービスが更新されるたびに自動的に更新されます。 [ 遅延更新] に設定されているセンサーは、各サービス更新プログラムの公式リリースに続いて、72 時間の遅延で更新されます。
[遅延更新] オプションを使用すると、すべての更新プログラムが自動的にロールアウトされる自動更新リングとして特定のセンサーを選択し、残りのセンサーを遅延時に更新するように設定し、自動的に更新されたセンサーが成功したことを確認する時間を与えます。
注:
エラーが発生し、センサーが更新されない場合は、サポート チケットを開きます。 ワークスペースとのみ通信するようにプロキシをさらに強化するには、「 プロキシの構成」を参照してください。
センサーと Azure クラウド サービス間の認証では、強力な証明書ベースの相互認証が使用されます。 クライアント証明書は、センサーのインストール時に自己署名証明書として作成され、2 年間有効です。 Sensor Updater サービスは、既存の証明書の有効期限が切れる前に、新しい自己署名証明書を生成する役割を担います。 証明書は、ローリング証明書が認証を中断する状況を回避するために、バックエンドに対して 2 フェーズの検証プロセスでロールされます。
各更新プログラムは、ネットワークと操作への影響を最小限に抑えるために、サポートされているすべてのオペレーティング システムでテストおよび検証されます。
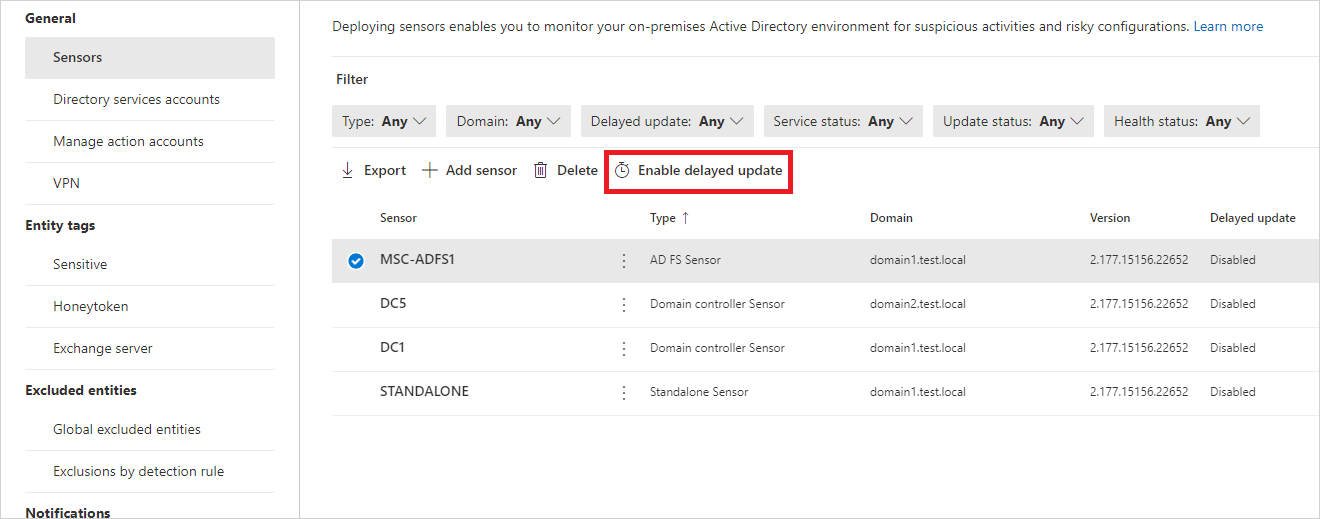
センサーを遅延更新に設定するには:
[ センサー ] ページで、遅延更新プログラムに設定するセンサーを選択します。
[ 有効な遅延更新] ボタンを 選択します。

確認ウィンドウで、[ 有効] を選択します。
遅延更新を無効にするには、センサーを選択し、[無効な 遅延更新 ] ボタンを選択します。
センサーの更新プロセス
数分ごとに、Defender for Identity センサーは最新バージョンがあるかどうかをチェックします。 Defender for Identity クラウド サービスが新しいバージョンに更新されると、Defender for Identity センサー サービスによって更新プロセスが開始されます。
Defender for Identity クラウド サービスが最新バージョンに更新されます。
Defender for Identity センサーアップデーター サービスは、更新されたバージョンがあることを学習します。
[遅延更新] に設定されていないセンサーは、センサーごとに更新プロセスを開始します。
- Defender for Identity センサー アップデーター サービスは、クラウド サービス (cab ファイル形式) から更新されたバージョンをプルします。
- Defender for Identity センサーアップデーターは、ファイル署名を検証します。
- Defender for Identity センサーアップデーター サービスは、cab ファイルをセンサーのインストール フォルダー内の新しいフォルダーに抽出します。 既定では、C:\Program Files\Azure Advanced Threat Protection Sensor<version 番号に抽出されます>
- Defender for Identity センサー サービスは、cab ファイルから抽出された新しいファイルを指します。
- Defender for Identity センサー アップデーター サービスは、Defender for Identity センサー サービスを再起動します。
注:
マイナー センサー更新プログラムは、MSI をインストールせず、レジストリ値もシステム ファイルも変更しません。 保留中の再起動でも、センサーの更新には影響しません。
- センサーは、新しく更新されたバージョンに基づいて実行されます。
- センサーは Azure クラウド サービスからクリアランスを受け取ります。 センサーの状態は、[ センサー ] ページで確認できます。
- 次のセンサーは、更新プロセスを開始します。
[遅延更新] に選択されているセンサーは、Defender for Identity クラウド サービスが更新されてから 72 時間後に更新プロセスを開始します。 これらのセンサーは、自動的に更新されたセンサーと同じ更新プロセスを使用します。
更新プロセスを完了できないセンサーの場合、関連する 正常性アラート がトリガーされ、通知として送信されます。

Defender for Identity センサーをサイレント モードで更新する
Defender for Identity センサーをサイレント 更新するには、次のコマンドを使用します。
構文:
"Azure ATP sensor Setup.exe" [/quiet] [/Help] [NetFrameworkCommandLineArguments="/q"]
インストール オプション:
| 名前 | 構文 | サイレント インストールに必須ですか? | 説明 |
|---|---|---|---|
| 静か | /quiet | はい | UI とプロンプトが表示されないインストーラーを実行します。 |
| ヘルプ | /ヘルプ | いいえ | ヘルプとクイック リファレンスを提供します。 すべてのオプションと動作の一覧を含むセットアップ コマンドの正しい使用方法を表示します。 |
| NetFrameworkCommandLineArguments="/q" | NetFrameworkCommandLineArguments="/q" | はい | .Net Framework インストールのパラメーターを指定します。 .Net Framework のサイレント インストールを適用するように設定する必要があります。 |
例:
Defender for Identity センサーをサイレント モードで更新するには:
"Azure ATP sensor Setup.exe" /quiet NetFrameworkCommandLineArguments="/q"
プロキシ設定を構成する
インストール中に、 コマンド ライン スイッチを使用して初期プロキシ設定を構成することをお勧めします。 後でプロキシ設定を更新する必要がある場合は、 CLI または PowerShell を使用します。
以前に WinINet またはレジストリ キーを使用してプロキシ設定を構成していて、それらを更新する必要がある場合は、最初に使用したのと 同じ方法を使用 する必要があります。
詳細については、「 エンドポイント プロキシとインターネット接続の設定を構成する」を参照してください。
![[センサー] ページ。](media/sensor-page.png)

