Azure IoT Central の UI をカスタマイズする
この記事では、カスタム テーマを適用したり、テキストを変更したり、独自のカスタム ヘルプ リソースを指すようにヘルプのリンクを変更したりして、アプリケーションの UI をカスタマイズする方法について説明します。
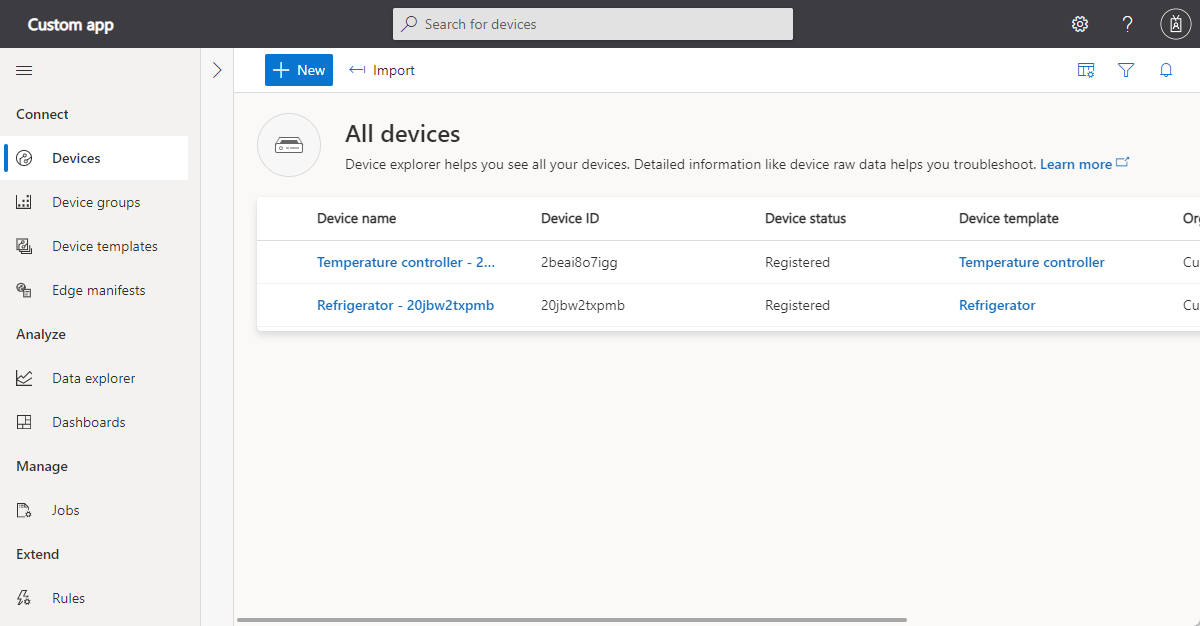
次のスクリーンショットは、標準テーマを使用したページを示しています。
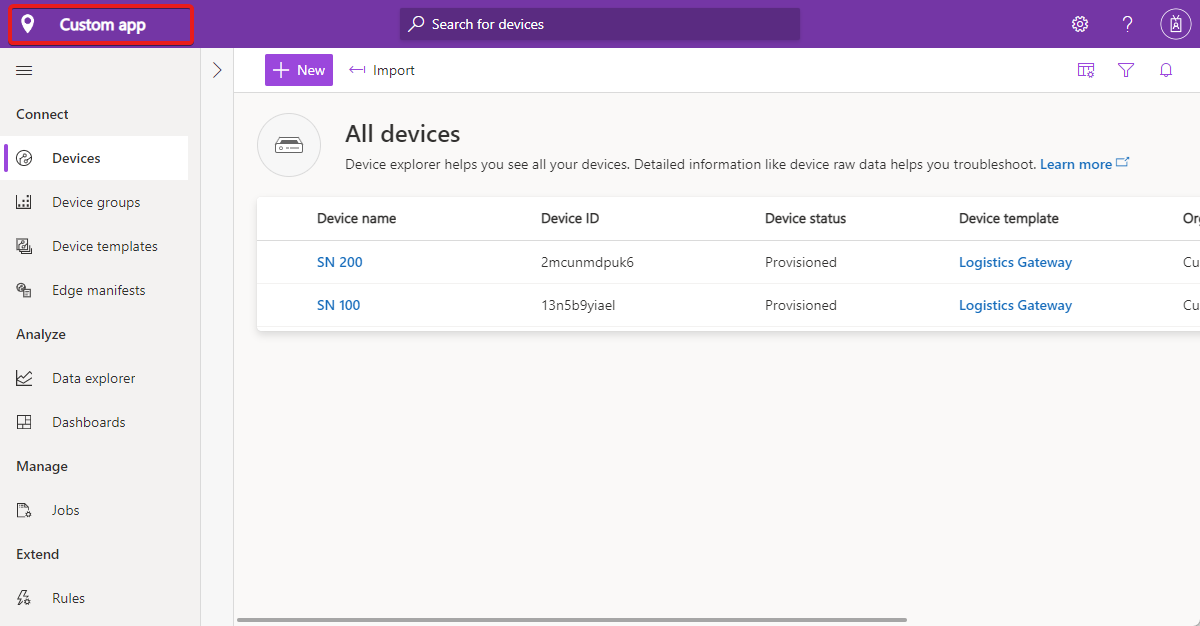
次のスクリーンショットは、カスタマイズされた UI 要素が強調表示されたカスタム テーマを使用したページを示しています。
ヒント
ブラウザーのアドレス バーとお気に入りの一覧に表示される画像をカスタマイズすることもできます。
テーマの作成
カスタム テーマを作成するには、[カスタマイズ] ページの [外観] セクションに移動します。
このページで、アプリケーションの以下の要素をカスタマイズできます。
アプリケーション ロゴ
1 MB 以下で、透明な背景の PNG イメージ。 このロゴは、IoT Central アプリケーションのタイトル バーに表示されます。
ロゴのイメージにアプリケーションの名前が含まれている場合は、アプリケーション名のテキストを非表示にすることができます。 詳細については、「アプリケーションの管理」を参照してください。
ブラウザー アイコン (favicon)
32 x 32 ピクセル以下で、透明な背景の PNG イメージ。 Web ブラウザーでは、このイメージをアドレス バー、履歴、ブックマーク、およびブラウザー タブで使用できます。
ブラウザーの色
ページ ヘッダーの色と、ボタンやその他の強調対象を目立たせるために使用される色を変更できます。 6 文字の 16 進カラー値を ##ff6347 の形式で使用します。 16 進値の色表記の詳細については、「HTML Colors (HTML の色)」を参照してください。
Note
[外観] セクションで、いつでも既定のオプションに戻すことができます。
オペレーターのための変更
管理者がカスタム テーマを作成すると、アプリケーションのオペレーターと他のユーザーは、[外観] でテーマを選択できなくなります。
ヘルプ リンクの置き換え
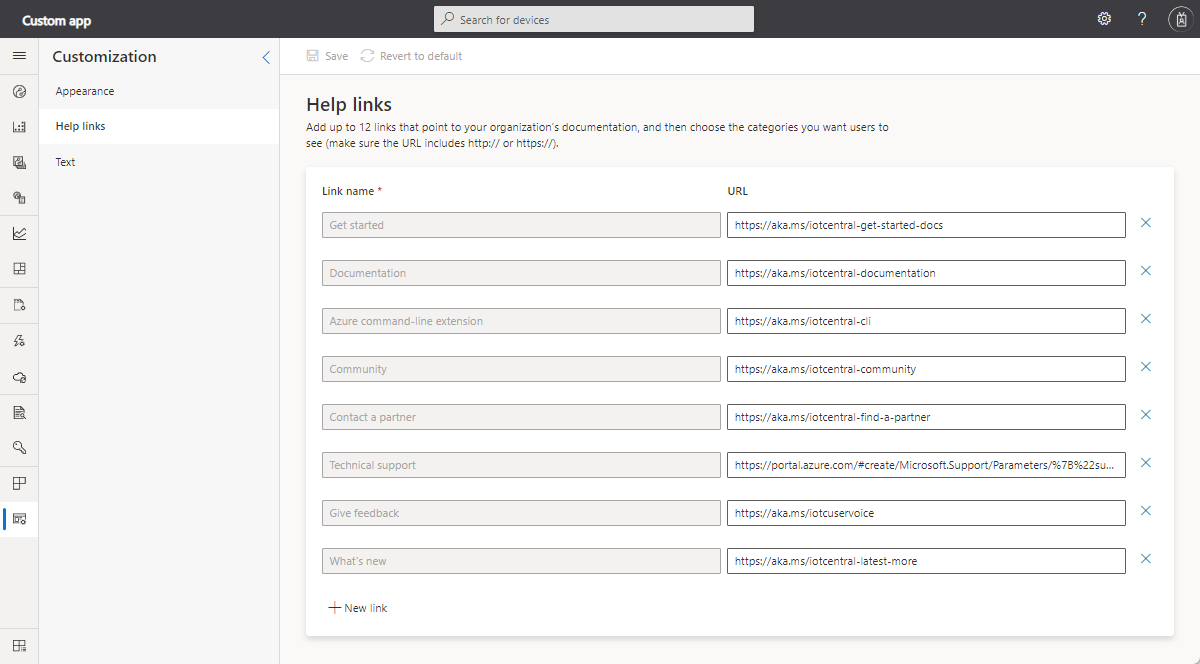
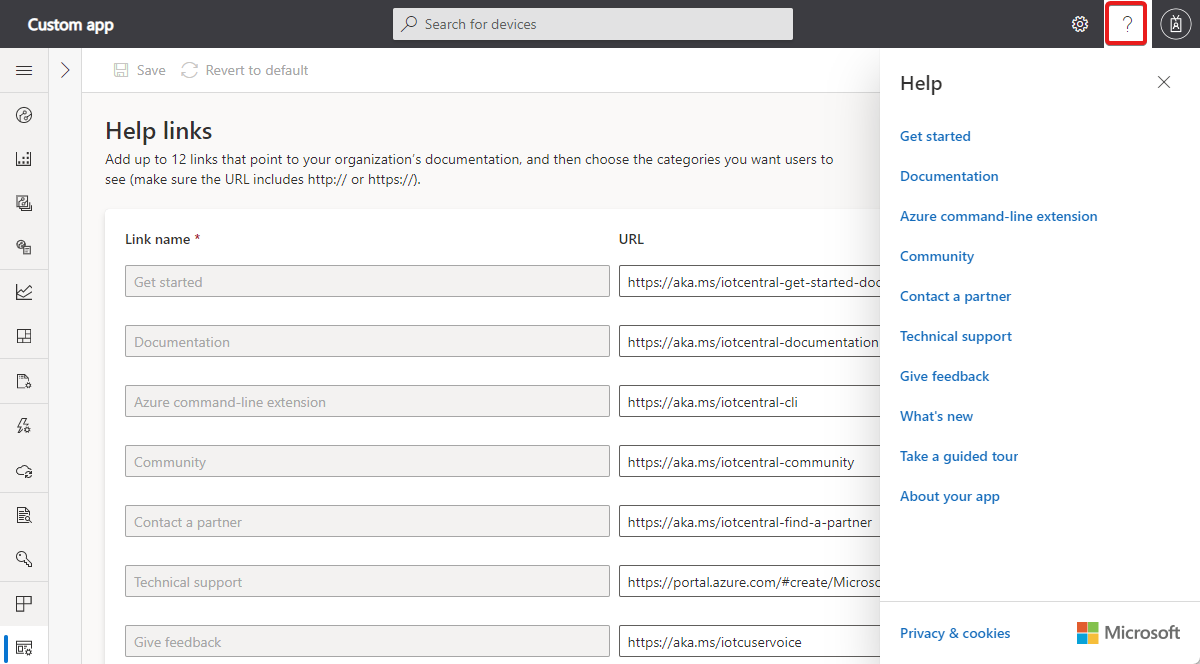
オペレーターや他のユーザーにカスタム ヘルプ情報を提供するには、アプリケーションの [ヘルプ] メニューのリンクを変更します。
ヘルプ リンクを変更するには、[カスタマイズ] ページの [ヘルプ リンク] セクションに移動します。
ヘルプ メニューに新しいエントリを追加したり、既定のエントリを削除したりすることもできます。
Note
[カスタマイズ] ページで、いつでも既定のヘルプのリンクに戻すことができます。
アプリケーションのテキストの変更
アプリケーションのテキスト ラベルを変更するには、[カスタマイズ] ページの [テキスト] セクションに移動します。
このページでは、サポートされているすべての言語のアプリケーションのテキストをカスタマイズできます。 カスタム テキスト ファイルをアップロードすると、アプリケーション テキストが更新されたテキストで自動的に表示されます。 カスタマイズ ファイルを編集して上書きすることにより、さらにカスタマイズを行うことができます。 IoT Central UI でサポートされているすべての言語に対して、このプロセスを繰り返すことができます。
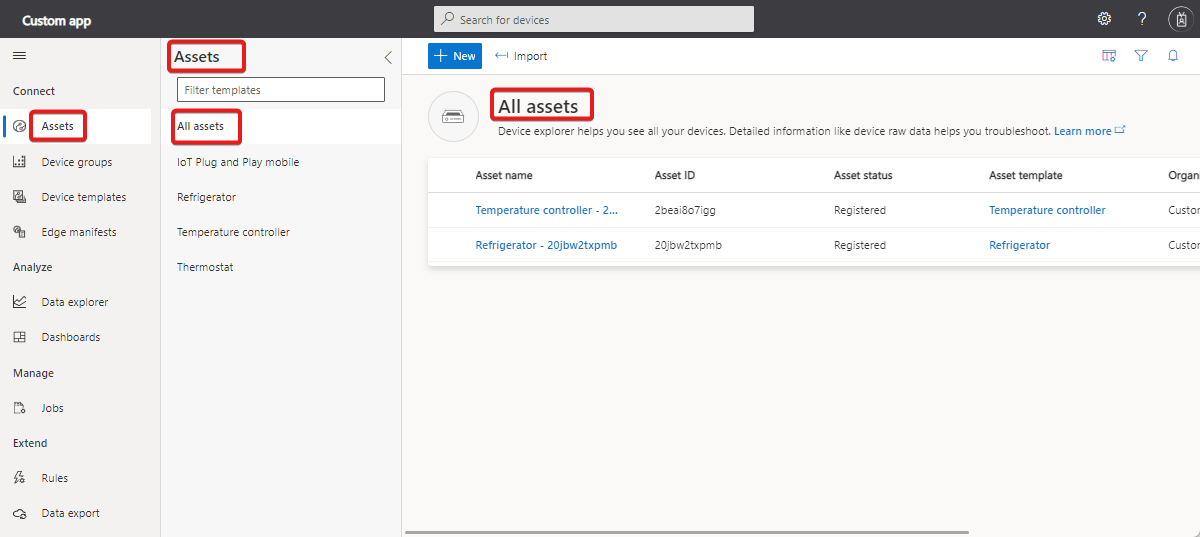
次の例では、英語でアプリケーションを表示するときに、単語 Device を Asset に変更する方法を示します。
[アプリケーション テキストの追加] を選択し、ドロップダウンで英語を選択します。
既定のテキスト ファイルをダウンロードします。 ファイルには、変更できるテキスト文字列の JSON 定義が含まれています。
deviceをassetに置き換えるには、ファイルをテキスト エディターで開き、値の文字列を次の例に示すように編集します。{ "Device": { "AllEntities": "All assets", "Approve": { "Confirmation": "Are you sure you want to approve this asset?", "Confirmation_plural": "Are you sure you want to approve these assets?" }, "Block": { "Confirmation": "Are you sure you want to block this asset?", "Confirmation_plural": "Are you sure you want to block these assets?" }, "ConnectionStatus": { "Connected": "Connected", "ConnectedAt": "Connected {{lastReportedTime}}", "Disconnected": "Disconnected", "DisconnectedAt": "Disconnected {{lastReportedTime}}" }, "Create": { "Description": "Create a new asset with the given settings", "ID_HelpText": "Enter a unique identifier this asset will use to connect.", "Instructions": "To create a new asset, select an asset template, a name, and a unique ID. <1>Learn more <1></1></1>", "Name_HelpText": "Enter a user friendly name for this asset. If not specified, this will be the same as the asset ID.", "Simulated_Label": "Simulate this asset?", "Simulated_HelpText": "A simulated asset generates telemetry that enables you to test the behavior of your application before you connect a real asset.", "Title": "Create a new asset", "Unassigned_HelpText": "Choosing this will not assign the new asset to any asset template.", "HardwareId_Label": "Hardware type", "HardwareId_HelpText": "Optionally specify the manufacturer of the asset", "MiddlewareId_Label": "Connectivity solution", "MiddlewareId_HelpText": "Optionally choose what type of connectivity solution is installed on the asset" }, "Delete": { "Confirmation": "Are you sure you want to delete this asset?", "Confirmation_plural": "Are you sure you want to delete these assets?", "Title": "Delete asset permanently?", "Title_plural": "Delete assets permanently?" }, "Entity": "Asset", "Entity_plural": "Assets", "Import": { "Title": "Import assets from a file", "HelpText": "Choose the organization that can access the assets you’re importing, and then choose the file you’ll use to import. <1>Learn more <1></1></1>", "Action": "Import assets with an org assignment from a chosen file.", "Upload_Action": "Upload a .csv file", "Browse_HelpText": "You’ll use a CSV file to import assets. Click “Learn more” for samples and formatting guidelines." }, "JoinToGateway": "Attach to gateway", "List": { "Description": "Grid displaying list of assets", "Empty": { "Text": "Assets will send data to IoT Central for you to monitor, store, and analyze. <1>Learn more <1></1></1>", "Title": "Create an Asset" } }, "Migrate": { "Confirmation": "Migrating selected asset to another template. Select migration target.", "Confirmation_plural": "Migrating selected assets to another template. Select migration target." }, "Properties": { "Definition": "Asset template", "DefinitionId": "Asset template ID", "Id": "Asset ID", "Name": "Asset name", "Scope": "Organization", "Simulated": "Simulated", "Status": "Asset status" }, "Rename": "Rename asset", "Status": { "Blocked": "Blocked", "Provisioned": "Provisioned", "Registered": "Registered", "Unassociated": "Unassociated", "WaitingForApproval": "Waiting for approval" }, "SystemAreas": { "Downstreamassets": "Downstream assets", "Module_plural": "Modules", "Properties": "Properties", "RawData": "Raw data" }, "TemplateList": { "Empty": "No definitions found.", "FilterInstructions": "Filter templates" }, "Unassigned": "Unassigned", "Unblock": { "Confirmation": "Are you sure you want to unblock this asset?", "Confirmation_plural": "Are you sure you want to unblock these assets?" } } }編集したカスタマイズ ファイルをアップロードし、[保存] を選択して、アプリケーションで新しいテキストを表示します。
UI で新しいテキスト値が使用されるようになりました。
カスタマイズ ファイルは、[カスタマイズ] ページの [テキスト] セクションの一覧から関連する言語を選択することで、さらに変更を加えて再アップロードできます。
次のステップ
ここでは、IoT Central アプリケーションの UI をカスタマイズする方法について説明しました。推奨される次の手順は以下のとおりです。
