ダッシュボード ハブでダッシュボードを作成して管理する (プレビュー)
ダッシュボードは、Azure portal でクラウドリソースを集中的に整理したビューです。 新しいダッシュボード ハブ (プレビュー) エクスペリエンスでは、タブ、さまざまなデータ ソースをサポートする豊富なタイルセット、最新バージョンの Azure mobile app でのダッシュボードへのアクセスなどの機能を編集できます。
現時点では、ダッシュボード ハブは共有ダッシュボードの作成と管理にのみ使用できます。 これらの共有ダッシュボードは、サブスクリプション内の Azure リソースとして実装されます。 これらは、サブスクリプション レベルのアクセス権を持つすべてのユーザーに対して、Azure portal または Azure mobile app に表示されます。
重要
ダッシュボード ハブは現在プレビュー段階です。 ベータ版、プレビュー版、または一般提供としてまだリリースされていない Azure の機能に適用される法律条項については、「Microsoft Azure プレビューの追加使用条件」を参照してください。
現在の制限
新しいダッシュボード ハブ エクスペリエンスを使用する前に、以下に示す現在の制限事項に目を通し、新しいダッシュボードが組織のニーズを満たしていることを確認してください。
プライベート ダッシュボードは、ダッシュボード ハブでは現在サポートされていません。 これらのダッシュボードは、既定でサブスクリプション内のすべてのユーザーと共有されます。 プライベート ダッシュボードを作成したり、限定されたユーザーのセットとのみ共有するには、新しいエクスペリエンスを使用するのではなく、Azure portal で [ダッシュボード] ビューからダッシュボードを作成してください。
一部のタイルは、ダッシュボード ハブ エクスペリエンスではまだ使用できません。 現在使用できるタイルは以下のとおりです。
- Azure Resource Graph クエリ
- メトリック
- リソース
- リソース グループ
- 最近のリソース
- [All Resources](すべてのリソース)
- Markdown
- ポリシー
ダッシュボードがこれらのタイルのいずれかに依存している場合は、現時点でそのダッシュボードの新しいエクスペリエンスを使用しないことをお勧めします。 新しいエクスペリエンスにタイルの種類が追加されると、このページが更新されます。
新しいダッシュボードを作成する
名前が割り当てられた新しい共有ダッシュボードを作成するには、次の手順に従います。
Azure portal にサインインします。
ダッシュボード ハブを検索し、それを選択します。
[ダッシュボード (プレビュー)] で、[共有ダッシュボード] を選択します。 [作成] を選択します。
![ダッシュボード ハブの [作成] オプションのスクリーンショット。](media/dashboard-hub/dashboard-hub-create.png)
タイルを配置できるグリッド付きの空のダッシュボードが表示されます。
テンプレートを使用してダッシュボードを作成する場合は、[テンプレートの選択] を選択し、開始する使用可能なテンプレートを選択します。 名前とその他の該当する情報を入力します。 たとえば、[SQL データベースの正常性] を選択した場合は、SQL データベース リソースを指定する必要があります。 完了したら、[送信] を選択します。
テンプレートを使用していない場合、またはタイルを追加する場合は、[タイルの追加] を選択して [タイル ギャラリー] を開きます。 [タイル ギャラリー] には、さまざまな種類の情報を表示するさまざまなタイルが用意されています。 タイルを選択し、[追加] を選択します。 [タイル ギャラリー] からグリッドにタイルをドラッグすることもできます。 必要に応じてタイルのサイズを変更または再配置します。
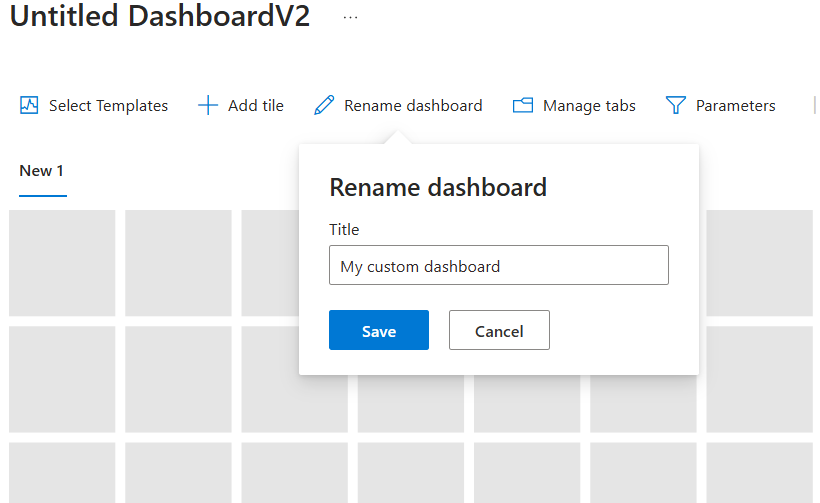
まだ名前を指定していない場合、または入力した名前を変更する場合は、[ダッシュボードの名前を変更] を選択して、ダッシュボードを簡単に識別するのに役立つ名前を入力します。
完了したら、コマンド バーで [ダッシュボード V2 を公開する] を選択します。
ダッシュボードを保存するサブスクリプションとリソース グループを選択します。
ダッシュボードの名前を入力します。 この名前は Azure のダッシュボード リソースに使用され、公開後に変更することはできません。 ただし、ダッシュボードの表示タイトルは後で編集できます。
送信を選択します。
ダッシュボードが公開されたことを確認する通知が表示されます。 必要に応じて、引き続きダッシュボードを編集できます。
重要
新しいエクスペリエンスのすべてのダッシュボードは既定で共有されるため、サブスクリプションにアクセスできるすべてのユーザーがダッシュボード リソースにアクセスできます。 アクセスの制御オプションの詳細については、「アクセスの制御について」を参照してください。
既存のダッシュボードに基づいてダッシュボードを作成する
既存のダッシュボードに基づいて、名前が割り当てられた新しい共有ダッシュボードを作成するには、次の手順に従います。
ヒント
先に進む前に、現在の制限事項を確認してください。 ダッシュボードに、新しいエクスペリエンスで現在サポートされていないタイルが含まれている場合でも、元のダッシュボードに基づいて新しいダッシュボードを作成できます。 ただし、まだ使用できないタイルは含まれません。
開始したいダッシュボードに移動します。 これを行うには、Azure メニューから [ダッシュボード] を選択し、開始するダッシュボードを選択します。 または、新しいダッシュボード ハブで、[ダッシュボード] を展開し、[プライベート ダッシュボード] または [共有ダッシュボード] のいずれかを選択してダッシュボードを見つけます。
[今すぐ試す] を選択します。
![ダッシュボードの [今すぐ試す] リンクを示すスクリーンショット。](media/dashboard-hub/dashboard-try-it-now.png)
ダッシュボードが新しいダッシュボード ハブ編集エクスペリエンスで開きます。 前のセクションで説明したプロセスに従って、ダッシュボードを新しい共有ダッシュボードとして公開するか、公開する前にダッシュボードを編集する方法について確認してください。
ダッシュボードを編集する
ダッシュボードを作成したら、Azure リソースを表示したり、その他の役に立つ情報を表示したりするタイルを追加、サイズ変更、配置できます。
ダッシュボードの編集ページを開くには、コマンド バーから [編集] を選択します。 以下のセクションの説明に従って変更を加え、完了したら [ダッシュボード V2 を公開する] を選択します。
タイル ギャラリーからタイルを追加する
タイル ギャラリーを使用してダッシュボードにタイルを追加するには、次の手順に従います。
[タイルの追加] クリックして、タイル ギャラリーを開きます。
ダッシュボードに追加するタイルを選択し、[追加] を選択します。 または、タイルをグリッド内の目的の場所にドラッグすることもできます。
タイルを構成するには、[編集] を選択してタイル エディターを開きます。
![Azure portal のダッシュボード ハブの [タイルの編集] オプションのスクリーンショット。](media/dashboard-hub/dashboard-hub-edit-tile.png)
タイトルの編集や構成の変更など、タイルに必要な変更を加えます。 終了したら、[変更の適用] を選択します。
タイルのサイズまたは配置を変更する
タイルのサイズを変更するには、タイルの右下隅にある矢印を選択し、ドラッグしてサイズを変更します。 タイルのサイズを変更するのに十分なグリッド領域がない場合は、元のサイズに戻ります。
タイルの配置を変更するには、タイルを選択し、ダッシュボード上の新しい場所にドラッグします。
タイルのレイアウトが希望どおりになるまで、必要に応じてこれらの手順を繰り返します。
タイルを削除する
ダッシュボードからタイルを削除するには、タイルの右上隅にマウス ポインターを合わせ、[削除] を選択します。
管理タブ
新しいダッシュボード エクスペリエンスでは、情報をグループ化できる複数のタブを作成できます。 タブを作成するには:
コマンド バーから [タブの管理] を選択して、[タブの管理] ウィンドウを開きます。
![Azure portal のダッシュボード ハブの [タブの管理] ページのスクリーンショット。](media/dashboard-hub/dashboard-hub-manage-tabs.png)
作成するタブの名前を入力します。
タブ オーダーを変更するには、タブをドラッグ アンド ドロップするか、タブの横にあるチェックボックスをオンにして、[上へ移動] ボタンと [下へ移動] ボタンを使用します。
完了したら、[変更の適用] を選択します。
その後、各タブを選択して、個々の編集を行うことができます。
ダッシュボードのフィルターの適用
ダッシュボードにフィルターを追加するには、コマンド バーから [パラメーター] を選択して、[パラメーターの管理] ウィンドウを開きます。
表示されるオプションは、ダッシュボードで使用されているタイルによって異なります。 たとえば、特定のサブスクリプションまたは場所のデータをフィルター処理するためのオプションが表示される場合があります。
ダッシュボードに [メトリック] タイルが含まれている場合、既定のパラメーターは [時間の範囲] と [時間の細分性] です。
![Azure portal のダッシュボード ハブの [パラメーターの管理] ウィンドウのスクリーンショット。](media/dashboard-hub/dashboard-hub-parameters.png)
パラメーターを編集するには、鉛筆アイコンを選択します。
新しいパラメーターを追加するには、[追加] を選択し、必要に応じてパラメーターを構成します。
パラメーターを削除するには、ごみ箱アイコンを選択します。
リソース ページからのコンテンツをピン留めする
ダッシュボードにタイルを追加するもう 1 つの方法では、リソース ページから直接行います。
多くのリソース ページのコマンド バーにはピン留めアイコンがあります。これは、リソースを表すタイルをピン留めできることを意味します。
![Azure リソースの [ピン留め] オプションを示すスクリーンショット。](media/dashboard-hub/dashboard-hub-pin.png)
場合によっては、ページ内の特定のコンテンツの近くにピン アイコンが表示されることもあります。この場合、ページ全体ではなく、その特定のコンテンツのタイルをピン留めすることができます。 たとえば、コンテキスト ウィンドウから一部のリソースをピン留めできます。
![リソースのコンテキスト ウィンドウの [ピン留め] オプションを示すスクリーンショット。](media/dashboard-hub/dashboard-hub-pin-context-pane.png)
コンテンツをダッシュボードにピン留めするには、[ダッシュボードにピン留めする] オプションまたはピン留めアイコンを選択します。 ダッシュボードの種類は [共有] を選択してください。 [新規作成] を選択して、このピンを含む新しいダッシュボードを作成することもできます。
ダッシュボードをエクスポートする
ダッシュボード ハブからダッシュボードをエクスポートして、その構造をプログラムで表示できます。 これらのエクスポートされたテンプレートは、今後ダッシュボードを作成するための基礎としても使用できます。
ダッシュボードをエクスポートするには、[エクスポート] を選択します。 ダウンロードする形式のオプションを選択します。
- ARM テンプレート: ダッシュボードの ARM テンプレート表現をダウンロードします。
- ダッシュボード: ダッシュボードの JSON 表現をダウンロードします。
- ビュー: ダッシュボードの宣言型ビューをダウンロードします。
選択した後、選択したエディターでダウンロードしたバージョンを表示できます。
アクセスの制御について
公開されたダッシュボードは Azure リソースとして実装されます。各ダッシュボードは、サブスクリプション内のリソース グループに含まれる管理可能な項目として存在します。 ダッシュボード ハブを使用してアクセス制御を管理できます。
Azure ロールベースのアクセス制御 (Azure RBAC) を使用すると、管理グループ、サブスクリプション、リソース グループ、またはリソースの 4 つの異なるスコープ レベルでロールにユーザーを割り当てることができます。 Azure RBAC のアクセス許可は、上位レベルから個々のリソースまで継承されます。 多くの場合、サブスクリプションに対するロールに既にユーザーが割り当てられていることがあり、それによって、公開されたダッシュボードへのアクセス権が付与されます。
たとえば、サブスクリプションに対する所有者または共同作成者のロールを持つユーザーは、サブスクリプション内でダッシュボードを一覧表示、表示、作成、変更、または削除できます。 Microsoft.Portal/Dashboards/Write アクセス許可を含むカスタム ロールを持つユーザーも、これらのタスクを実行できます。
サブスクリプションに対する閲覧者ロール (または Microsoft.Portal/Dashboards/Read permission を持つカスタム ロール) を持つユーザーは、そのサブスクリプション内のダッシュボードの一覧表示と表示はできますが、変更と削除はできません。 これらのユーザーは、自分用にダッシュボードの個人用コピーを作成できます。 また、問題のトラブルシューティング時などに自分で使用するために、公開されたダッシュボードをローカルで編集できますが、それらの変更をサーバーに戻して公開することはできません。 これらのユーザーは、Azure mobile app でこれらのダッシュボードを表示することもできます。
サブスクリプション レベルで付与されたアクセス権を超えてダッシュボードへのアクセス権を拡張するには、個々のダッシュボードに、または複数のダッシュボードを含むリソース グループにアクセス許可を割り当てます。 たとえば、あるユーザーがサブスクリプション全体では制限されたアクセス許可を持っているものの、1 つの特定のダッシュボードでは編集できる必要がある場合、そのダッシュボードに対してのみ、より多くのアクセス許可を持つ別のロール (共同作成者など) を割り当てることができます。