Using WNS Toast localization in a Windows Phone Silverlight 8.1 application
If you are writing a Windows Phone Silverlight 8.1 application and using Windows Notification Service (WNS) you may have come across a little problem when trying to enable localization for your Toast messages: they don't show up with the correct text.
What I found is that an application needs to have resources stored in a “Resources.pri” file within the application package for Toast localization to work correctly.
A Windows Phone Silverlight 8.1 application package does include a Resources.pri but by default this file only contains the tile graphics. In order to get localized strings into this file you need to use the *.resw resource source file format but there are two hurdles you need to work around when your project type is Windows Phone Silverlight 8.1:
- The Visual Studio IDE will not show the “resw” resource file template type.
- If you add an existing file of this type, using “Add Existing Item…” from the Project menu, the Build Action will default to “None” and the Visual Studio IDE will not allow you to change the Build Action for this file type to the appropriate action, which is: PRIResource.
To work around the first problem, creating the resw resource files, I add a Windows Runtime project to my solution in which I can create the resw resource files for each language I want to support.
NOTE: This project only exists to create the resw resource files, it should not be included in the final package, so I remove it from the build options.
In the Windows Runtime project I now create the localized resource files as described in Globalization and accessibility for tile and toast notifications.
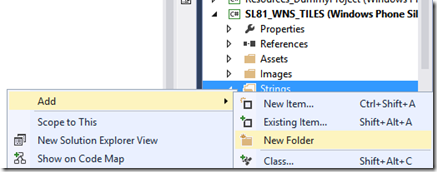
First I create the directory structure: …\Strings\[LCID]\, where [LCID] is the locale identifier, like “en-US”.
Next I right-click on each locale directory and choose “Add” –> “New Item…” and select “Resources File (.resw)” from the General templates, ex:
I then fill in the resource strings required for my toast notifications, ex:
(Repeat the previous two steps for each locale.)
After I’m done creating all the resource files I need, I then copy this entire “Strings” directory structure from the Windows Runtime project:
…and paste it into my Windows Phone Silverlight 8.1 project.
If the copy & paste operation works correctly you should now see the same directory structure and files in your Silverlight 8.1 project and the “Build Action” for the resw resource file should be “PRIResource”, ex:
If something goes wrong with the copy, or if you want to re-use Resources.resw files from a different solution, the following steps can be used manually add individual resw files to your project:
Manually create the appropriate directory structure directly in your Silverlight 8.1 project. (i.e. …\Strings\[LCID]\, where [LCID] is the locale identifier, like “en-US”.)
Use file explorer to copy the Resources.resw files into the appropriate folders you just created.
In the Visual Studio IDE, right-click on each locale folder and choose “Add” –> “Existing Item…”
As I mentioned at the beginning of this blog, after you add these resw files to your project you may notice that the Build Action is set to “None”, ex:
In order to fix this problem you will need to modify the project file directly. To do this:
Right-click on the project in the Solution Explorer window and select “Unload Project”
Then right click again and select “Edit [project file name]”, ex:
In the project file look for any references to “Resource.resw” and modify those entries to start with “PRIResource”.
For example, change:to:
After you have modified these values, save and close the project file then select “Reload Project” from Solution Explorer entry.
You should now be able to build the project and reference the string resources from a WNS Toast.
Don’t forget to follow the Windows Store Developer Solutions team on Twitter @wsdevsol. Comments are welcome, both below and on twitter.


