Configuring ARR for Lync Server
Sometime ago we got into a situation where a customer deployed ARR as a Reverse Proxy for Lync Server. This was new to us. We found some articles on the Internet showing how to configure it, but none of them were clear enough. We wanted to understand this better, so we configured ARR from zero and got successful after sometime. With Forefront TMG discontinued, this will be more and more common in the future. This is how you can configure ARR, simple as it is. Be aware that, using IIS7 and ARR 2.5 on Windows Server 2012, you’ll have to update ARR correctly to have it working fine. We’ll explain better later. First of all, there are two possible ways to configure ARR for Lync Server. We’ll explain the one that worked best for us, but there is a second way to configure it, which you can check on NextHop blog, here: https://blogs.technet.com/b/nexthop/archive/2013/02/19/using-iis-arr-as-a-reverse-proxy-for-lync-server-2013.aspx .
You can download ARR here: https://www.iis.net/downloads/microsoft/application-request-routing . You need at least Windows Server 2008 fully updated.
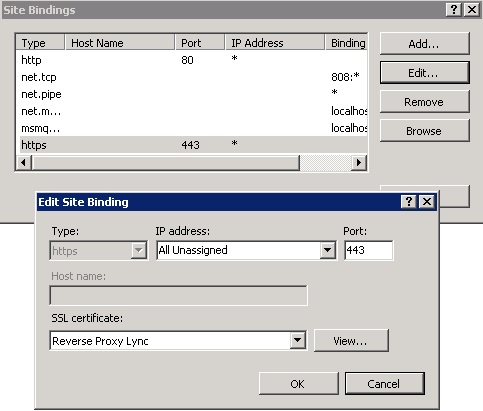
- After installing it, don’t forget to associate your Reverse Proxy certificate, on the “Default Web Site” at IIS ARR, binding it to port 443.
- Also, install your root CA certificate on the server.
- It’s good to remember that, on the certificate, you need the following URLs:
lyncweb.domain.com (this is the External Web Services URL)
lyncdiscover.domain.com
sip.domain.com
meet.domain.com
dialin.domain.com
Remember that these are example URLs, and they’ll be different according to your topology configuration. - Also, if you don’t want to install the root CA certificate on every mobile device, it’s recommended to use a Public CA Certificate.
- In IIS Manager, right-click on Server Farms and choose Create Server Farm.
- Enter a name for it (for example “Lync Reverse Proxy”).
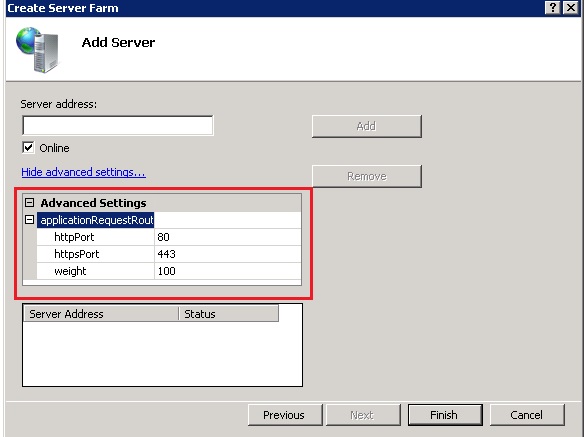
- On the next screen, before anything else, click on Advanced Settings and change the ports on HTTP Port and HTTPS Port to 8080 and 4443, respectively.
- Then, put the FE FQDN address and click on Add and Finish.
- If you’re going to use the load balancing feature, add all of your front-end servers in the pool. If you have a HLB, then this server IP should be going to your HLB.
- In the message that appears after you click on Finish, click on the Yes button.
- Now you can click on your new Server Farm created on the Left Side of the Screen. Clicking on it, you’ll have some properties on the Farm that you can change.
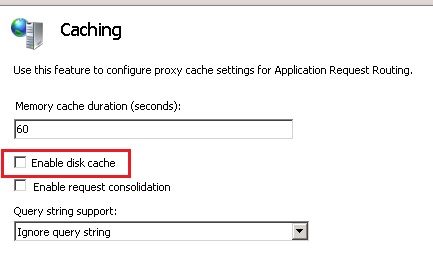
- First, you need to go on Caching and disable Disk Cache.
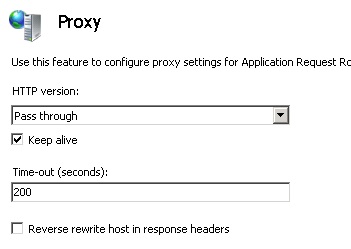
- Now, you can go to Proxy and change the Time-out to 900 seconds. This is because Lync Mobile can get a timeout from Reverse Proxy and disconnect.
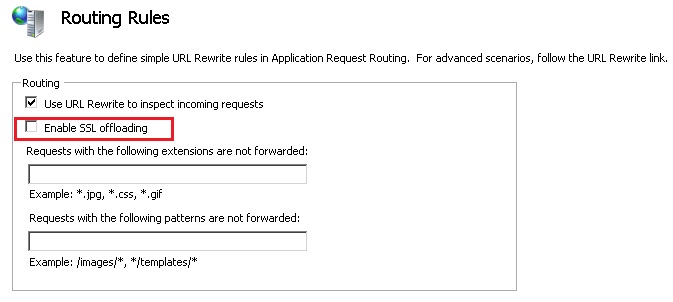
- Lastly, you have to go to Routing Rules and disable the SSL offloading option. Don’t forget, in each step, to Apply the changes.
- Now, we need to edit the URL Rewrite Rules, and to do that you need to go on IIS to the Server – don’t go to the Default Web Site.
- Joining the URL Rewrite option, you’ll find two rules created. One of them is the SSL rule, and the other is the HTTP rule. The HTTP rule can be disabled, as you’ll not be using it.
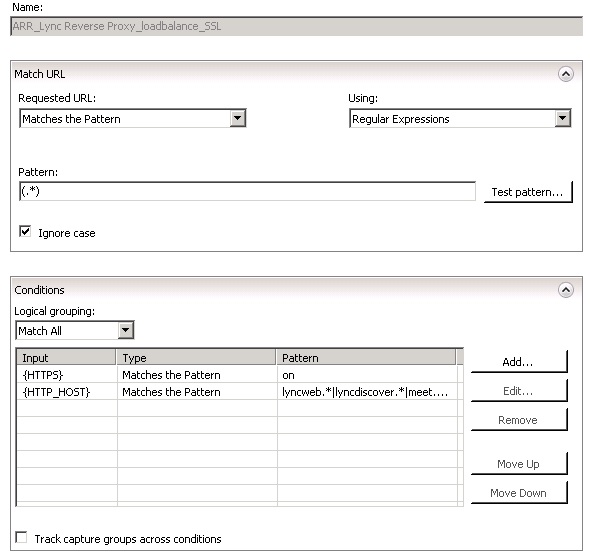
- Open the SSL rule and you’ll find something like this:
- So, first of all, change the Using field to Regular Expressions, and change the Pattern to (.*).
- Then, on Conditions, click Add, and on the screen that appears, on Condition Input type {HTTP_HOST}, and on Pattern type dialin.*|meet.*|lyncdiscover.*|lyncweb.*.
- To be sure that you configured it correctly, click Test Pattern and test one of the Lync URLs (such as lyncdiscover.domain.com) and check if the Test Results is successful. After testing, click OK.
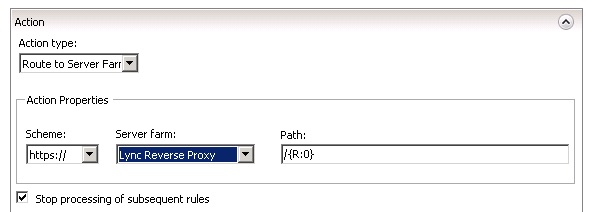
- Also, be assured that on Action the Action Type is routing to the correct Server Farm.
- Don’t forget to Apply the changes.
With this you have ARR correctly configured for Lync Mobility. You can go and test.
Tip
This is not a real tip, but it’s always important to remember that (the easier configuration) at ARR Server you’ll need two NICs – one for External Access and one for the Internal Network. NAT can be used, and DNS and Gateway information must be set only on the External NIC. The Internal NIC can’t be configured with this info. You’ll have to create a static route and add info on the hosts file for the ARR to be able to communicate with internal network.
ARR 2.5 with IIS7 (Windows Server 2012)
ARR with Windows Server 2012 works the same, but there is an important issue that you need to address in this case. For ARR to correctly route the traffic, you have to install an important update before doing the configuration (if you don’t update, your configuration won’t work).
Hotfix for Microsoft Application Request Routing Version 2.5 for IIS7 (KB 2732764) (x64)
Download and install it. After this, ARR will work correctly
Comments
- Anonymous
July 27, 2015
I must say that several issues with IIS ARR can be solved after delete the Server Farm and recreat it again with this post. - Anonymous
March 14, 2016
Wonderful post, very useful !!!
