How to FTP to your Microsoft Azure Websites
There are many ways to deploy your website to Microsoft Azure Websites. You could deploy with Visual Studio, WebMatrix, TFS, Git or Mecurial repositories, heck even from Dropbox! But one of the most common ways people deploy their websites is trusted FTP!
Transferring files to an Azure Website with FTP is pretty straightforward, however, I get asked questions about it regularly.
Step 1: Find the FTP hostname.
You can find your FTP hostname on the Dashboard tab of your Website. In this example my website is ftphowto.azurewebsites.net

Once on the Dashboard page, you will see a quick glance section on the right. Scroll down until you see FTP HOST NAME

For this site, my host name is: ftp://waws-prod-ch1-003.ftp.azurewebsites.windows.net/.
Step 2: Understand your deployment credentials
This is probably the most confusing step of deploying to an Azure Website. To log into the Azure portal you need a Microsoft Account and each Microsoft Account is assigned a global deployment username and password. In the picture above you can see my Deployment / FTP User is ftphowto\tim. My website is ftphowto and my global deployment username is tim. This means that the password associated with my deployment user tim can deploy to any website on any of my Microsoft Account's Azure Subscriptions. For example, let's say I had another website myblog.azurewebsites.net. My deployment / ftp user for that site would be myblog\tim and it would have the same password as ftphowto\tim. The global deployment account is not just for FTP either, if you deploy from a local Git repository you will use this same username / password to authenticate.
This is awesome! I only need to remember one username / password to deploy to any website I host on Azure. However, this is also very dangerous because you would not want to share this username / password, but the portal doesn't highlight the other option of the publishing profile. In addition, many people will mistakenly reset their deployment credentials assuming they are only resetting the credentials for that particular website.
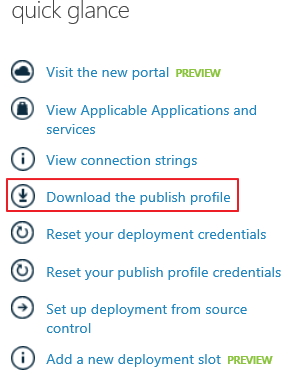
If you want credentials that can ONLY deploy to the website you are administering or you want to share the FTP credentials, then you want to download the Publishing Profile. You can do this from the top of the quick glance section.
The publishing profile may have an extension of .PublishSettings but it is really just an XML document. Open the file in any text editor or your favorite XML editor and you will see a publishing profile node with a publishMethod of FTP. That node will have a dedicated FTP username / password with permission to deploy to only that site.

Step 3: FTP your files
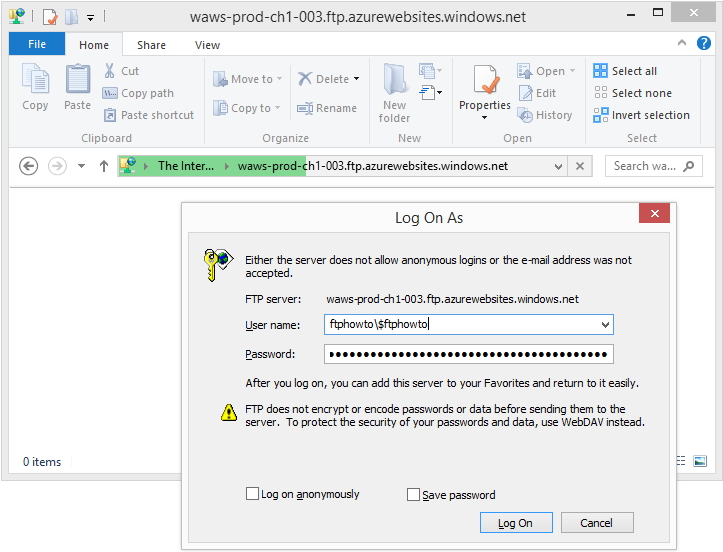
Now that you have the FTP Host Name and FTP username and password you are ready to FTP the files. You can use any FTP program such as FileZilla or WS_FTP, but why complicate things ... just use Windows Explorer!

