Using the OMS Search API with native PowerShell cmdlets
In a hybrid cloud world where manageability of your resources is key, it’s important to have automation support to leverage APIs that can help you in your to day management. One of those APIs is the Operations Management Suite (OMS) Search API. The OMS Search API allows you to execute saved searches and/or dynamic queries that use the powerful Log Analytics feature in OMS.
This blogpost talks about using an Azure Active Directory account. Refer to this blogpost if you want to use a service account - also known as a service principal.
Some examples of where you can use the OMS Search API for are:
• Pulling OMS analytics data in your custom dashboards
• Invoking external automated actions based on search results, although OMS Log Search has this now build in, leveraging Azure Automation
• Acting on search results without having access to the OMS portal
• Only providing access to saved searches with predefined parameters
Note This blog post supersedes two previously written blogposts where I described how to use the ARM client and custom PowerShell modules to leverage the OMS Search API. Those blogposts were written at the time that no native PowerShell cmdlets where available to leverage the OMS Search API.
The AzureRm.OperationalInsights cmdlet only requires you to be authenticated against Azure using a service principal name (SPN) or an Azure Active Directory (AAD) service account.
Installing the AzureRm.OperationalInsights module
I recommend that you test your PowerShell script and/or runbook in PowerShell ISE. If you haven’t imported the module yet, start a PowerShell session and type the following:
Find-Module AzureRM.OperationalInsights | Install-Module
If you are not installing it as an administrator, you can use this command:
Install-Module AzureRM.OperationalInsights -Scope CurrentUser
If you encounter the following warning, consider adding the –Force parameter to the Install-Module command:
Use Get-Module AzureRm.OperationalInsights to validate the installation and the version after you have imported the module.
Testing the cmdlets against the OMS Search API
Now that you have downloaded and installed the module, it is time to set up your connection in PowerShell ISE:
Login-AzureRmAccount
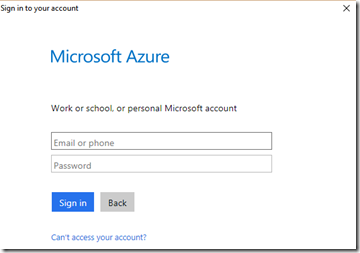
You will be prompted to enter your credentials:
After a successful login you will get the following confirmation:
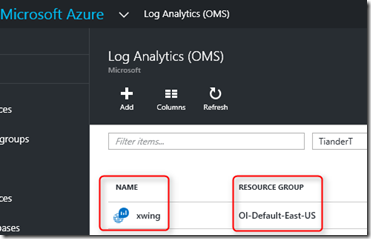
To work with the OMS Search API, we need to provide a workspace name and a resource group name.
You can find this information in the OMS portal:
Let’s put these two values in a variable in our PowerShell ISE session:
 $ResourceGroupName = "OI-Default-East-US"
$WorkSpaceName = "xwing"
With this information we can test the OMS Search API, as described in the following sections – all locally tested with PowerShell ISE:
Get all saved searches
 $query = Get-AzureRmOperationalInsightsSavedSearch `
 -ResourceGroupName $ResourceGroupName `
 -WorkspaceName $WorkSpaceName
$query.value |FL
This returns the following:
Get a specific saved search with the actual query
 $query = Get-AzureRmOperationalInsightsSavedSearch `
 -ResourceGroupName $ResourceGroupName `
 -WorkspaceName $WorkSpaceName `
 -SavedSearchId "tiander|failed logons"
$query.properties | FL
This returns the following:
Execute a specific saved search
 $result = Get-AzureRmOperationalInsightsSavedSearchResults `
-ResourceGroupName $ResourceGroupName `
-WorkspaceName $WorkSpaceName `
-SavedSearchId "tiander|failed logons"
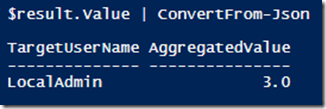
$result.value | ConvertFrom-Json
This returns the following:
Execute an ad-hoc query with a start and end time
 $dynamicQuery = "Type=SecurityEvent EventID=4625 TargetUserName=LocalAdmin | Measure count() by TargetUserName"
$StartDateAndTime = "2016-03-10T18:20:58.8Z"
$EndDateAndTime = "2016-03-10T18:30:58.8Z"
$result = Get-AzureRmOperationalInsightsSearchResults `
-ResourceGroupName $ResourceGroupName `
-WorkspaceName $WorkSpaceName `
-Query $dynamicQuery `
-Start $StartDateAndTime `
-End $EndDateAndTime
$result.Value | ConvertFrom-Json
This returns the following:
Creating an Azure Automation runbook to execute a search leveraging the OMS Search API
Now that we have tested the OMS Search API in PowerShell ISE we can easily leverage this in Azure Automation. Just like we did in our PowerShell ISE testing we need to:
- Import the AzureRm.OperationalInsights PowerShell module
- Create variables which hold our workspace and resource group name
Note This section talks about importing the AzureRm* modules, which might conflict with the versions of your existing modules. It is important to do proper testing to avoid version conflicts. Please refer to this blogpost for more guidance.
Creating the necessary Assets
In this section we will create Azure Automation Assets. This will ensure that we will have all the dependencies in place, like the PowerShell modules and variables for efficient re-use.
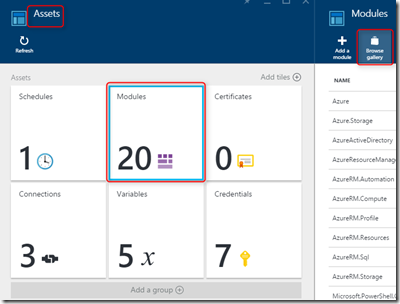
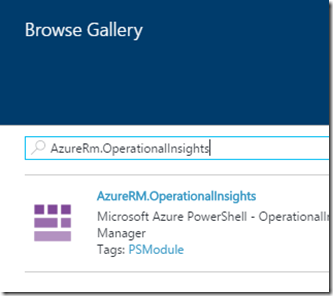
Navigate to Assets, Modules and click on Browse gallery:
Search for the AzureRmOperationalInsights module:
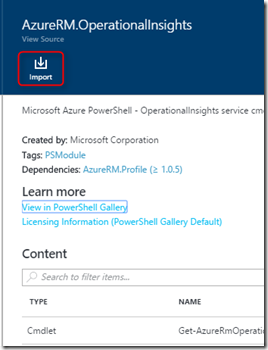
Click on Import:
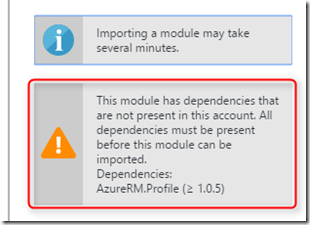
You might see a dependency error:
If you see this error, please make sure to import ALL Azure/AzureRM modules (not just the ones that ship out of the box in Azure Automation) first before importing the AzureRm.OperationalInsights module to avoid versioning conflicts. See https://azure.microsoft.com/en-us/blog/announcing-azure-resource-manager-support-azure-automation-runbooks/ for more details.
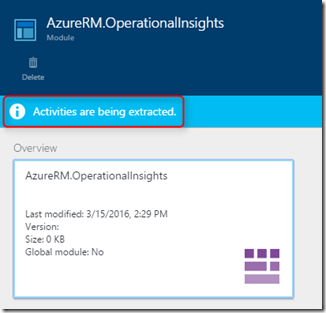
You will see a confirmation that the deployment has started:
Note Wait until the activities extraction has completed successfully before continuing.
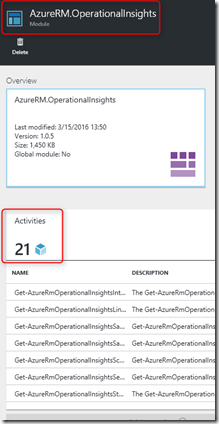
If you navigate to Assets, Modules you should see the module AzureRm.OperationalInsights:
Now that we have the module imported, let’s create the necessary Variables, which stores our workspace and resource group name.
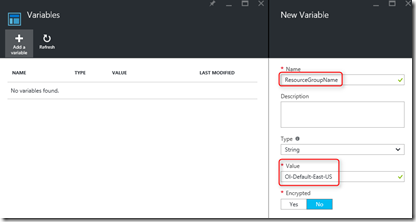
Go to Assets, Variables and click on Add a Variable called ResourceGroupName:
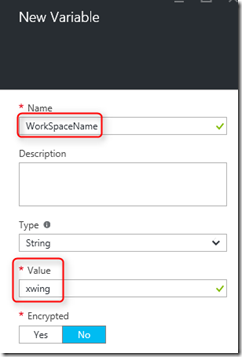
Do the same thing for the second variable WorkSpaceName:
Azure Active Directory account
The last missing piece is an Azure Active Directory (AAD) account with access to your Azure subscription
Refer to this blogpost how to create an AAD account and assign the appropriate permissions.
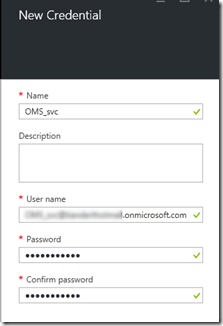
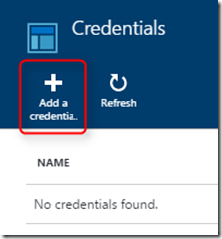
After you have created your AAD account, add it to Azure Automation by navigating to Assets and Credentials and add a Credential:
Azure Automation Runbook
Now that we have done local testing in PowerShell ISE, imported the AzureRm.OperationalInsights module in Azure Automation and created the necessary assets, it’s time to create our Azure Automation runbook.
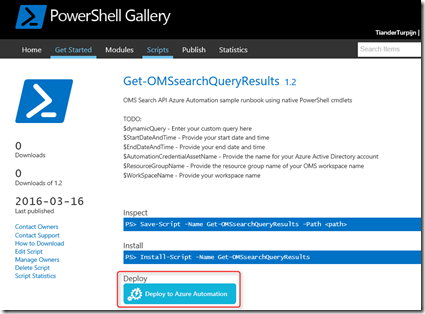
Navigate to PowerShellGallery.com to easily import the Azure Automation runbook in your environment by clicking on Deploy to Azure Automation:
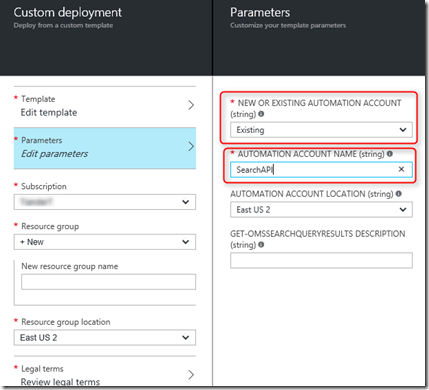
This will guide you through the deployment dialog:
Note If you select Existing Automation Account that you have to manually type in the Automation Account Name.
As an alternative you can also copy and paste the runbook as a native PowerShell script runbook:
 #TODO:
#$dynamicQuery - Enter your custom query here
#StartDateAndTime - Provide your start date and time
#EndDateAndTime - Provide your end date and time
#AutomationCredentialAssetName - Provide the name for your Azure Active Directory account
#ResourceGroupName - Provide the resource group name of your OMS workspace name
#WorkSpaceName - Provide your workspace name

param (
    [Parameter(Mandatory=$false)]
    [string]$dynamicQuery = "Type=SecurityEvent EventID=4625 | Measure count() by Computer",
    [ValidateNotNullOrEmpty()]
    [string]$StartDateAndTime = "2016-03-10T18:20:58.8Z",
    [ValidateNotNullOrEmpty()]
    [string]$EndDateAndTime = "2016-03-10T18:30:58.8Z"
    )
#Get Azure Active Directory account with access to my Azure subscription
$AutomationCredentialAssetName = "YOUR_CREDENTIAL_HERE"
$Cred = Get-AutomationPSCredential -Name $AutomationCredentialAssetName

#Get Workspacename and resource group name
$WorkSpaceName =Get-AutomationVariable -Name 'WorkSpaceName'
$ResourceGroupName = Get-AutomationVariable -Name 'ResourceGroupName'

# Authenticate to Azure Resource Manager
"Authenticating...."
Add-AzureRmAccount -Credential $Cred | out-null

#Execute a dynamic query and output the results
Write-Output ("Executing the following query:  $dynamicQuery")

$result = Get-AzureRmOperationalInsightsSearchResults -ResourceGroupName $ResourceGroupName -WorkspaceName $WorkSpaceName `
 -Query $dynamicQuery -Start $StartDateAndTime -End $EndDateAndTime
"`n"
Write-Output "Query results:"
$result.Value | ConvertFrom-Json
Make sure that you update the TODO section.
Testing the Azure Automation Runbook
We are finally ready to test the runbook!
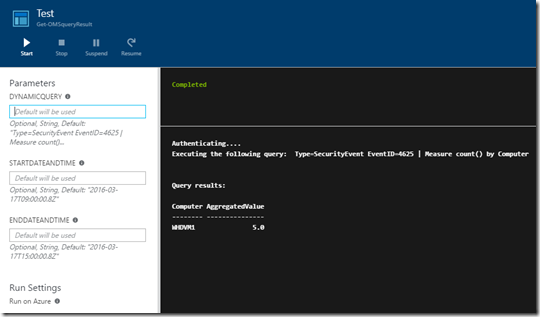
This is the output when we test the runbook:
With this blogpost I’ve provided an example of a simplified way of leveraging the OMS Search API through the native PowerShell cmdlets.
Until next time, happy automating!


