SCOM Environment Classification
I often hear from customers that they are connecting all there Environments (Test, Acceptance, Production) to one SCOM environment.
As expected, SCOM will generate alerts for all environments without making a difference between the environment.
Customers are asking if we can split up the Environment monitoring in the SCOM console.
A sollution could be making manual groups for each of the class types or Windows Computer objects.
I try to avoid manual work and maintenance, therefore I developed the following Management Pack in order to classify:
- Windows Computer Objects
- Other Objects from other classes
Here's a high level overview of what the Management Pack does:
- Create new Class "Windows Computer Environment Class" with "Windows Computer" as the base class and polulate Class with all "Windows Computer" objects and add a discoverd registry property "Environment" based on a Registry Key.
- Create Groups for each environment (Test, Acceptance, Production) and populate them with "Windows Computer" Objects.
- Create Groups for each environment (Test, Acceptance, Production) and Class and populate the with the instances of the class selected.
I will use Visual Studio 2015 with Authoring Extensions (VSAE) to develop the Management Pack. (available here: https://www.microsoft.com/en-us/download/details.aspx?id=30169)
VSAE has the advantage to work with "Snippets". I will be using them in order to simplify the development and to reproduce XML data.
Don't be afraid of using Visual Studio, it's a great tool to develop Management Packs.
Let's go :
Create new Class "Windows Computer Environment Class" with "Windows Computer" as the base class and polulate Class with all "Windows Computer" objects and add a discoverd registry property "Environment" based on a Registry Key.
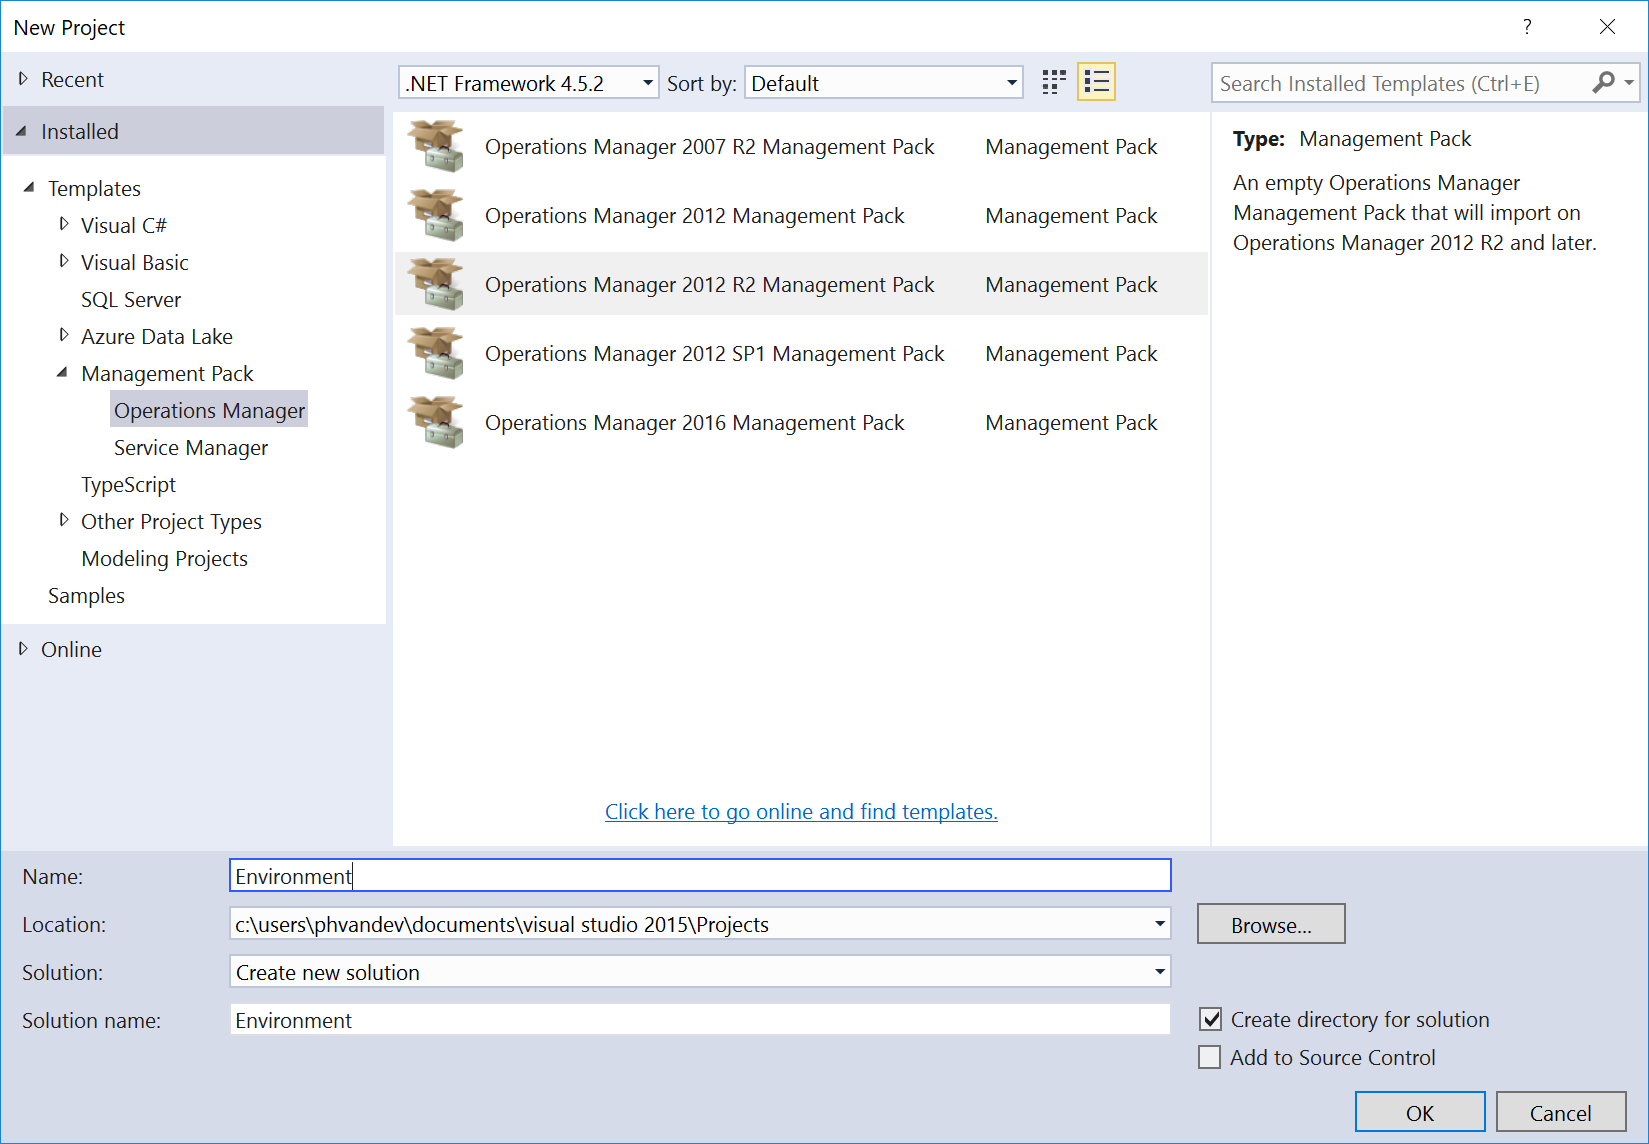
Let's start by creating a new Visual Studio Project:
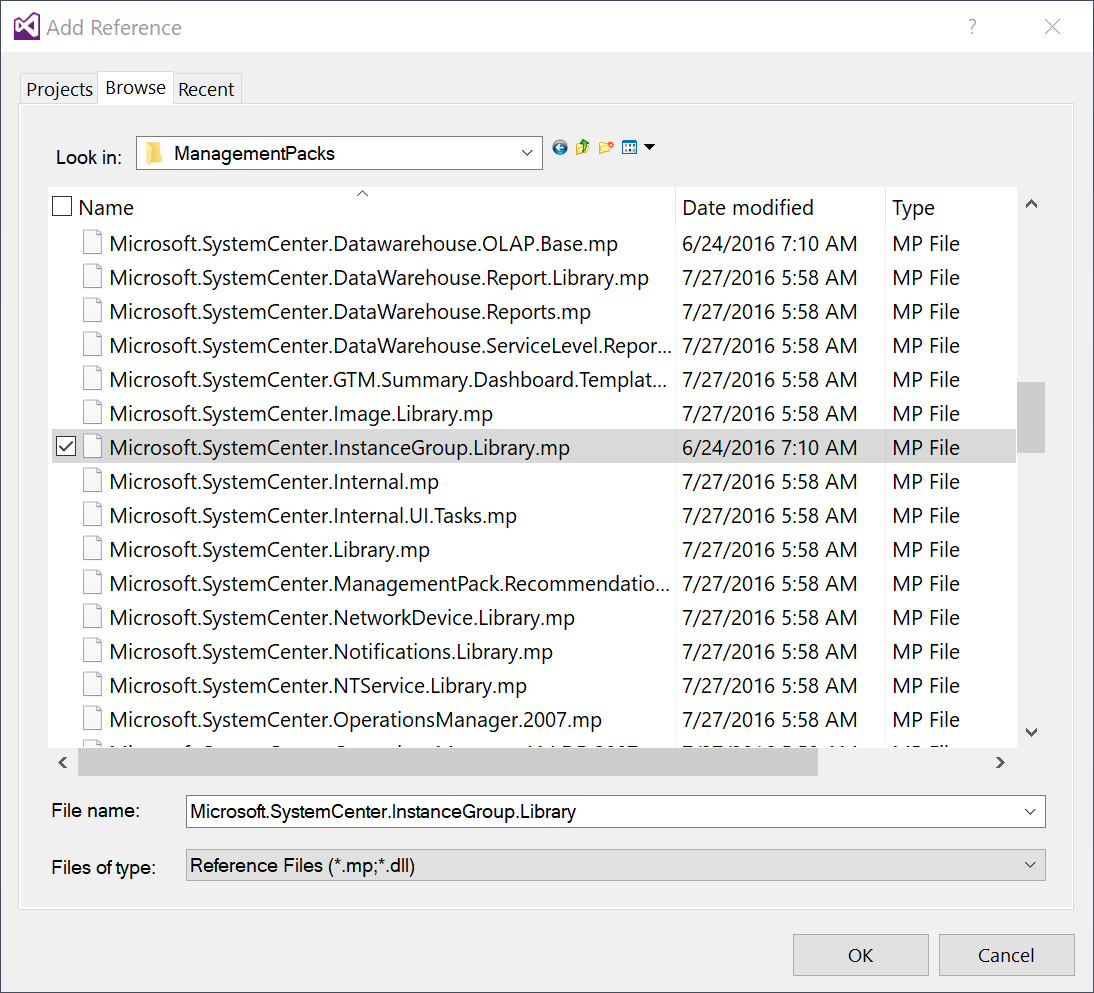
Add a new reference (Microsoft.SystemCenter.InstanceGroup.library.mp) can be found on the SCOM install media "ManagementPacks" folder:
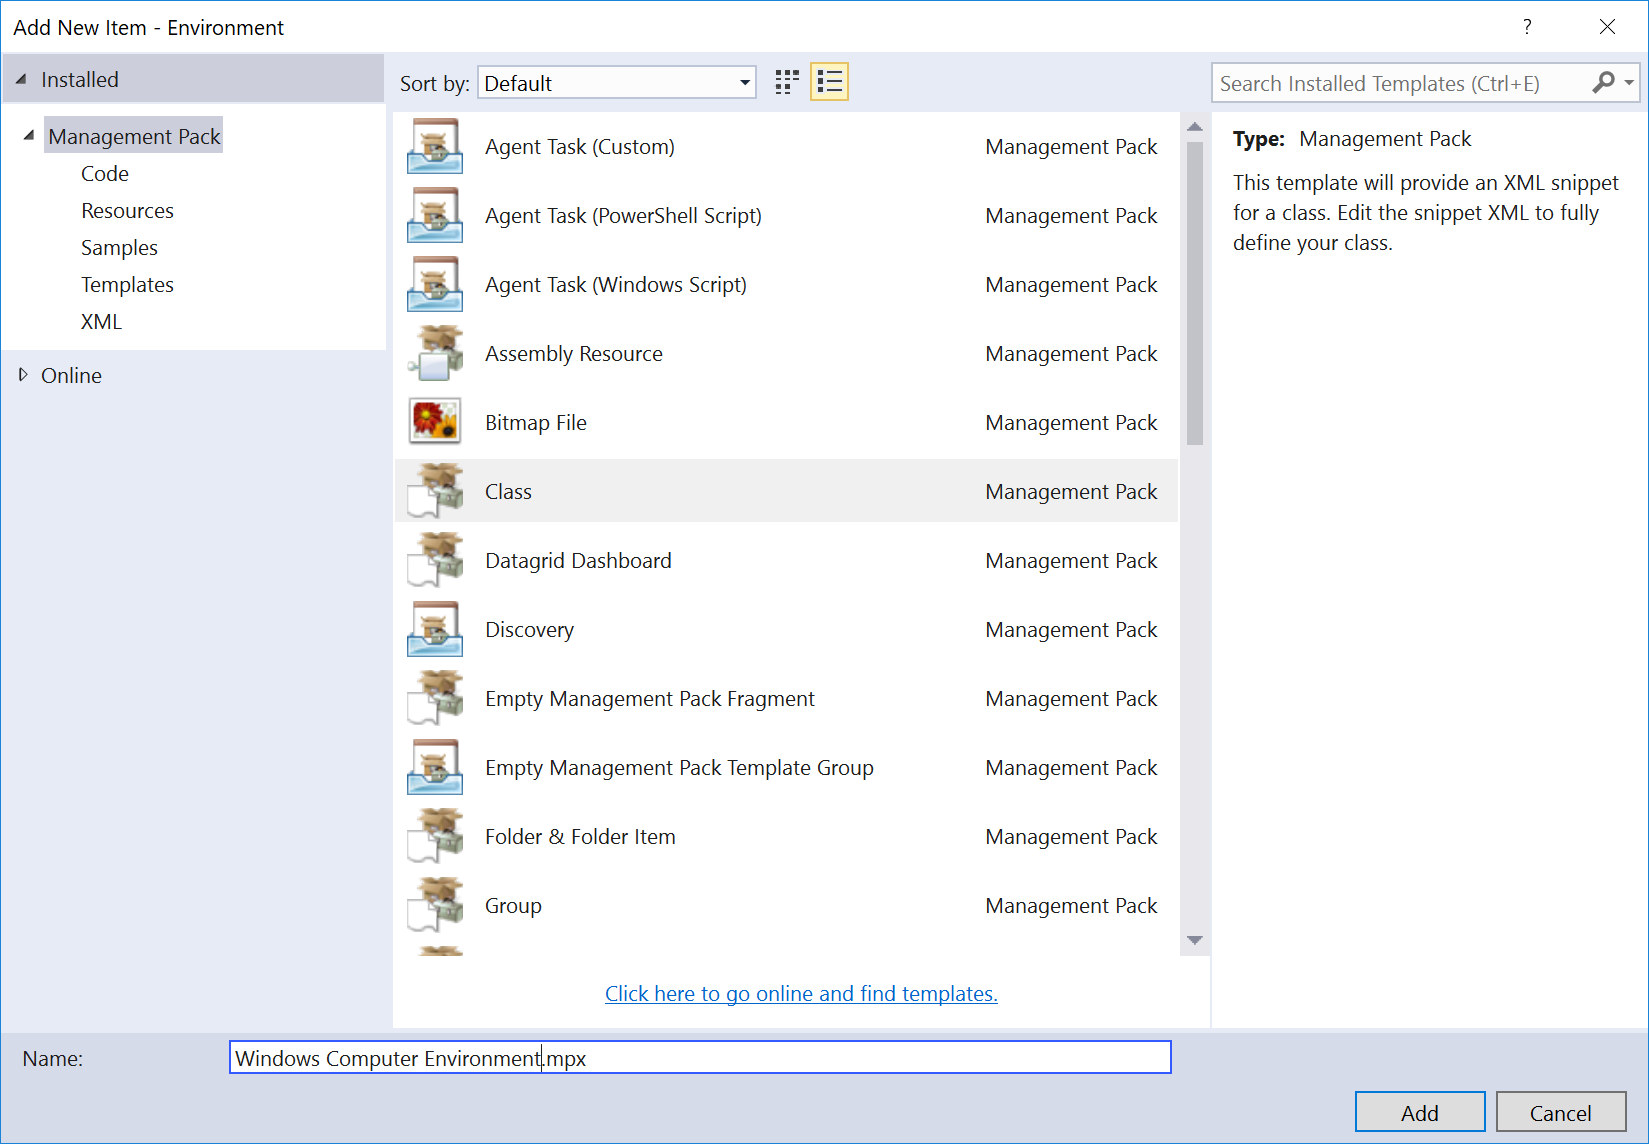
Create a new Class Windows Computer Environment:
Here's the XML of the Class, creating the Class "Environment.Windows_Computer_Environment" with "Microsoft.Windows.Computer" as a base class and with a property "Environment.Windows_Computer_EnvironmentProperty".
<ManagementPackFragment SchemaVersion="2.0" xmlns:xsd="https://www.w3.org/2001/XMLSchema"> <TypeDefinitions> <EntityTypes> <ClassTypes> <ClassType ID="Environment.Windows_Computer_Environment" Accessibility="Public" Abstract="false" Base="Windows!Microsoft.Windows.Computer" Hosted="false" Singleton="false" Extension="false"> <Property ID="Environment.Windows_Computer_Environment.EnvironmentProperty" Type="string" AutoIncrement="false" Key="false" CaseSensitive="false" MaxLength="256" MinLength="0" Required="false" Scale="0" /> </ClassType> </ClassTypes> </EntityTypes> </TypeDefinitions> <LanguagePacks> <LanguagePack ID="ENU" IsDefault="true"> <DisplayStrings> <DisplayString ElementID="Environment.Windows_Computer_Environment"> <Name>Windows Computer Environment Class</Name> <Description></Description> </DisplayString> <DisplayString ElementID="Environment.Windows_Computer_Environment" SubElementID="Environment.Windows_Computer_Environment.EnvironmentProperty"> <Name>Environment</Name> <Description /> </DisplayString> </DisplayStrings> </LanguagePack> </LanguagePacks></ManagementPackFragment>
Add new Discovery "Windows Computer Environment Discovery" :
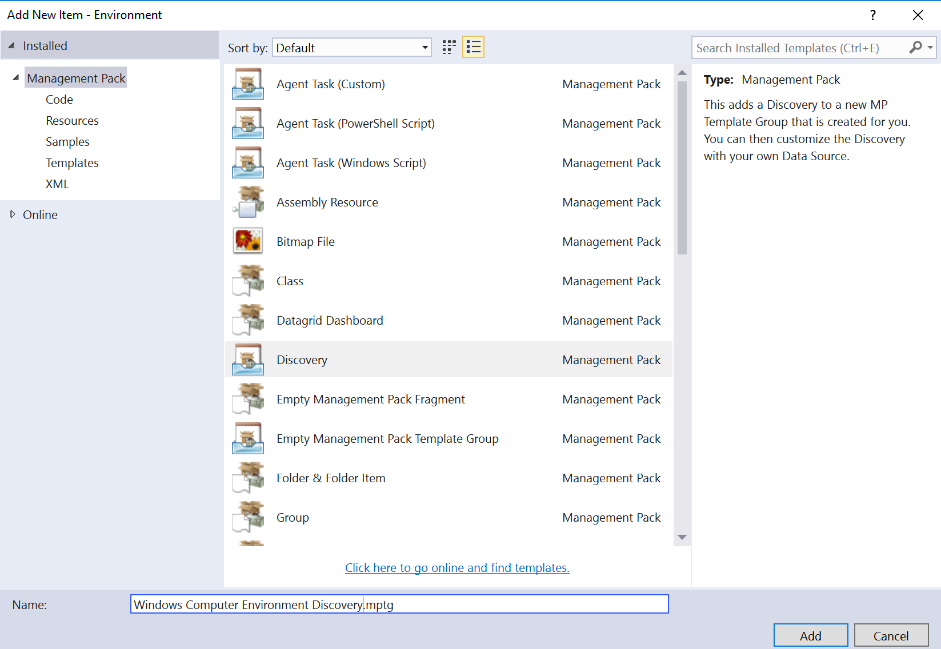
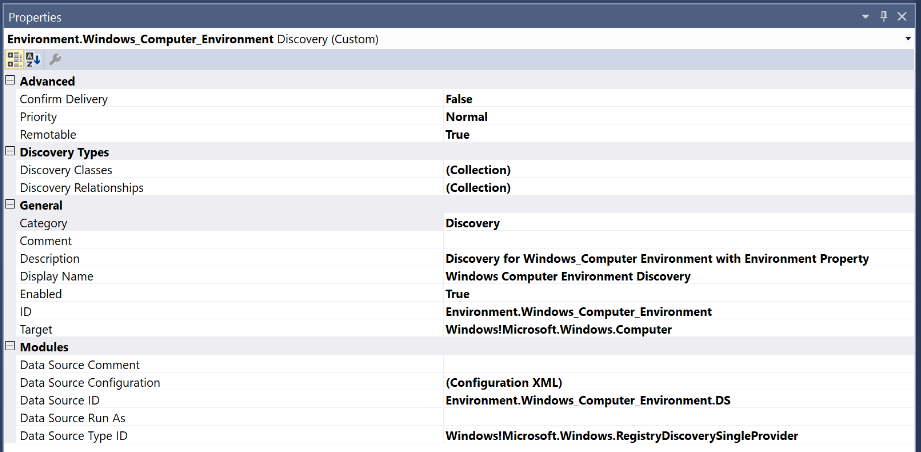
Change the Discovery with following Properties:
Here's the XML from the "Configuration XML" Property.
The discovery will look for a registry key "SYSTEM\Configuration\Environment" and will populate the value in the "Environment" Property of the "Windows Computer Environment" Class:
<?xml version="1.0" encoding="utf-8"?><Configuration xmlns:xsi="https://www.w3.org/2001/XMLSchema-instance" xmlns:xsd="https://www.w3.org/2001/XMLSchema" xsi:noNamespaceSchemaLocation="C:\Users\phvandev\AppData\Local\Temp\tmp4E2C.tmp"> <ComputerName>$Target/Property[Type="Windows!Microsoft.Windows.Computer"]/NetworkName$</ComputerName> <AttributeName>Environment.Windows_Computer_Environment.EnvironmentPropertyRule</AttributeName> <Path>SYSTEM\Configuration\Environment</Path> <PathType>1</PathType> <AttributeType>1</AttributeType> <Frequency>86000</Frequency> <ClassId>$MPElement[Name="Environment.Windows_Computer_Environment"]$</ClassId> <InstanceSettings> <Settings> <Setting> <Name>$MPElement[Name="Environment.Windows_Computer_Environment"]/Environment.Windows_Computer_Environment.EnvironmentProperty$</Name> <Value>$Data/Values/Environment.Windows_Computer_Environment.EnvironmentPropertyRule$</Value> </Setting> <Setting> <Name>$MPElement[Name="Windows!Microsoft.Windows.Computer"]/PrincipalName$</Name> <Value>$Target/Property[Type="Windows!Microsoft.Windows.Computer"]/PrincipalName$</Value> </Setting> </Settings> </InstanceSettings></Configuration>
This is the will finilize of the configuration of the "Windows Computer Environment" Class with the Property "Environment".
The overall configuration of you Visual Studio Solution should more or less looking as follow:
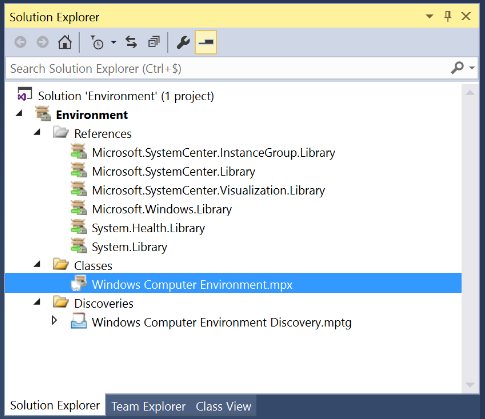
After you import the Management Pack, you can see the property "Environment" when you use the "Discovered Inventory" view Targetted to "Windows Computer Environment"

Create Groups for each environment (Test, Acceptance, Production) and populate them with "Windows Computer" Objects.
For this part I will use Visual Studio Snippets to reproduce XML data for each environment.
Create a new Snippet Template called "Environment Group.templatesnippet":
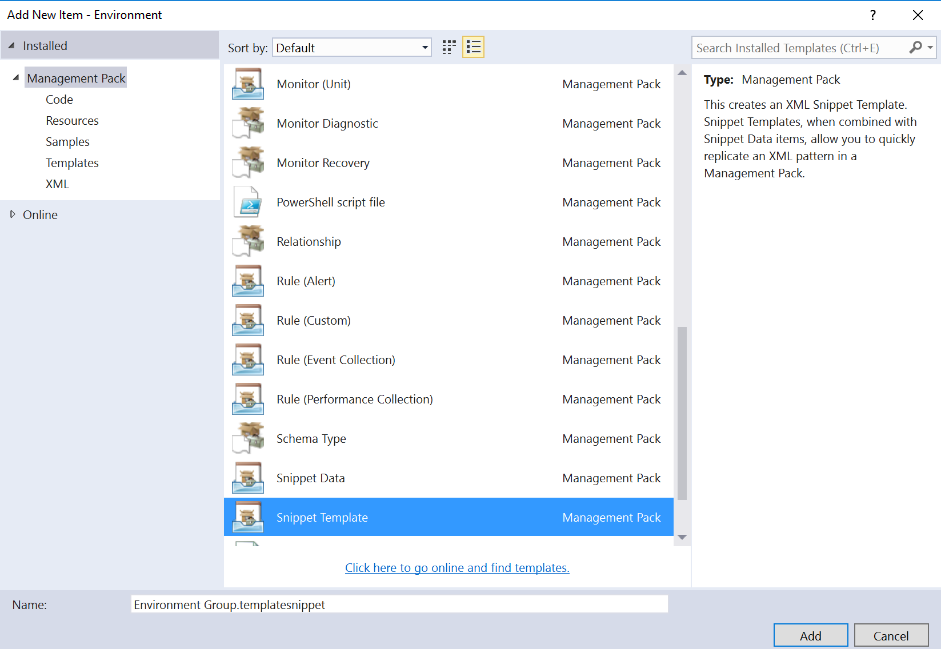
Here's the XML from the Snippet Template
The XML will:
- Create a class for the Environment Group
- Populate the class with members that have a specific Environment Property.
Note that I use the following variables:
- #text('EnvironmentName')# (Used as variable for the environment)
- #alias('managementpackname')# (Used to get the alias of the referenced Management Pack)
<ManagementPackFragment SchemaVersion="2.0"> <TypeDefinitions> <EntityTypes> <ClassTypes> <ClassType ID="Environment.#text('EnvironmentName')#.Group" Accessibility="Public" Abstract="false" Base="#alias('Microsoft.SystemCenter.InstanceGroup.Library')#!Microsoft.SystemCenter.InstanceGroup" Hosted="false" Singleton="true" Extension="false" /> </ClassTypes> </EntityTypes> </TypeDefinitions> <Monitoring> <Discoveries> <Discovery ID="Environment.#text('EnvironmentName')#.Group.DiscoveryRule" Enabled="true" Target="Environment.#text('EnvironmentName')#.Group" ConfirmDelivery="false" Remotable="true" Priority="Normal"> <Category>Discovery</Category> <DiscoveryTypes> <DiscoveryRelationship TypeID="#alias('Microsoft.SystemCenter.InstanceGroup.Library')#!Microsoft.SystemCenter.InstanceGroupContainsEntities" /> </DiscoveryTypes> <DataSource ID="GroupPopulationDataSource" TypeID="#alias('Microsoft.SystemCenter.Library')#!Microsoft.SystemCenter.GroupPopulator"> <RuleId>$MPElement$</RuleId> <GroupInstanceId>$MPElement[Name="Environment.#text('EnvironmentName')#.Group"]$</GroupInstanceId> <MembershipRules> <MembershipRule> <MonitoringClass>$MPElement[Name="Environment.Windows_Computer_Environment"]$</MonitoringClass> <RelationshipClass>$MPElement[Name="#alias('Microsoft.SystemCenter.InstanceGroup.Library')#!Microsoft.SystemCenter.InstanceGroupContainsEntities"]$</RelationshipClass> <Expression> <SimpleExpression> <ValueExpression> <Property>$MPElement[Name="Environment.Windows_Computer_Environment"]/Environment.Windows_Computer_Environment.EnvironmentProperty$</Property> </ValueExpression> <Operator>Equal</Operator> <ValueExpression> <Value>#text('EnvironmentName')#</Value> </ValueExpression> </SimpleExpression> </Expression> </MembershipRule> </MembershipRules> </DataSource> </Discovery> </Discoveries> </Monitoring> <LanguagePacks> <LanguagePack ID="ENU" IsDefault="true"> <DisplayStrings> <DisplayString ElementID="Environment.#text('EnvironmentName')#.Group"> <Name>Environment - #text('EnvironmentName')#</Name> </DisplayString>
<DisplayString ElementID="Environment.#text('EnvironmentName')#.Group.DiscoveryRule"> <Name>Populate Environment - #text('EnvironmentName')#</Name> <Description>This discovery rule populates the group 'Environment - #text('EnvironmentName')# '</Description> </DisplayString> </DisplayStrings> </LanguagePack> </LanguagePacks>
</ManagementPackFragment>
Next would be creating the Snippet Data where we reference the created Snippet Template ("Environment Group"):
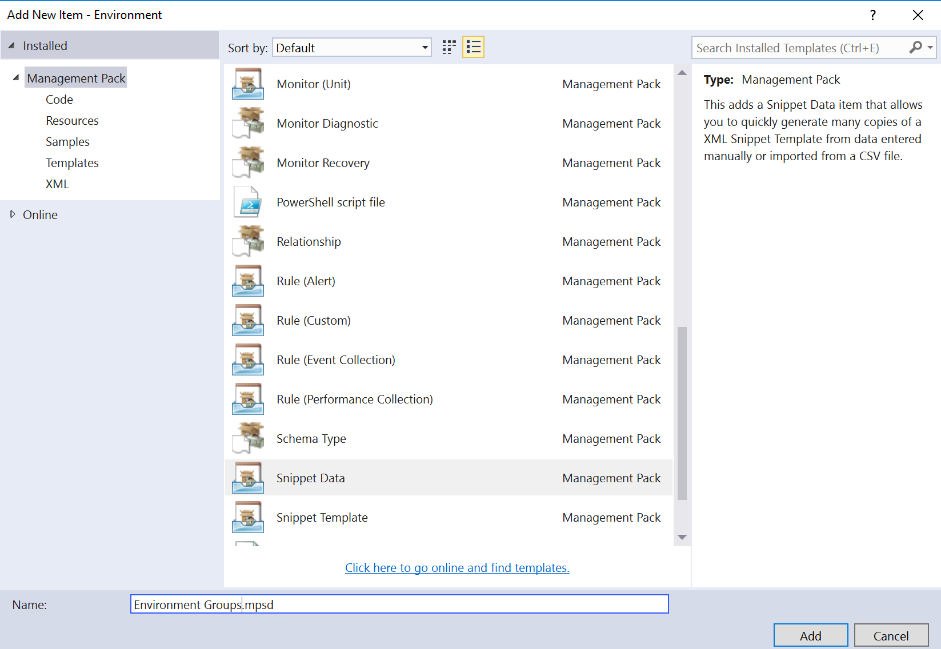
You now can define the variables used for the Snippet Template (in this case only EnvironmentName is used).
Simply enter the Environment names for all environments. By doing this you will reproduce the XML for each defined Environment variable.
This is showing how easy and fast you can develop parts of a Management Pack.

The overall configuration of you Visual Studio Solution should more or less looking as follow:
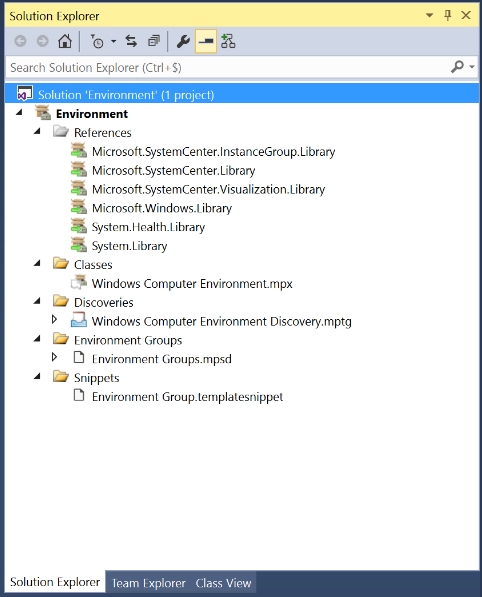
When you import the Management Pack you should see 3 groups created, one for each created environment (TST, ACC, PROD):
- Environment - TST
- Environment - ACC
- Environment - PROD
Create Groups for each environment (Test, Acceptance, Production) and Class and populate the with the instances of the class selected.
Also for this part I will use Visual Studio Snippets to reproduce XML data for each environment.
Create a new Snippet Template called "Environment Instance Group.templatesnippet" as shown earlier.
Here's the XML of the Snippet Template.
Note that I use the following variables:
- #text('EnvironmentName')# (Used as variable for the environment)
- #text('InstanceClass')# (Used as variable for the Instance Class we are selecting)
- #text('InstanceClassMPAlias')# (Used as variable for the Alias of the Management Pack that holds Instance Class that we are selecting)
- #alias('managementpackname')# (Used to get the alias of the referenced Management Pack)
<ManagementPackFragment SchemaVersion="2.0"> <TypeDefinitions> <EntityTypes> <ClassTypes> <ClassType ID="Environment.#text('EnvironmentName')#.#text('InstanceClass')#.Group" Accessibility="Public" Abstract="false" Base="#alias('Microsoft.SystemCenter.InstanceGroup.Library')#!Microsoft.SystemCenter.InstanceGroup" Hosted="false" Singleton="true" Extension="false"></ClassType> </ClassTypes> </EntityTypes> </TypeDefinitions> <Monitoring> <Discoveries> <Discovery ID="Environment.#text('EnvironmentName')#.#text('InstanceClass')#.Group.DiscoveryRule" Enabled="true" Target="Environment.#text('EnvironmentName')#.#text('InstanceClass')#.Group" ConfirmDelivery="false" Remotable="true" Priority="Normal"> <Category>Discovery</Category> <DiscoveryTypes> <DiscoveryRelationship TypeID="#alias('Microsoft.SystemCenter.InstanceGroup.Library')#!Microsoft.SystemCenter.InstanceGroupContainsEntities" /> </DiscoveryTypes> <DataSource ID="GroupPopulationDataSource" TypeID="#alias('Microsoft.SystemCenter.Library')#!Microsoft.SystemCenter.GroupPopulator"> <RuleId>$MPElement$</RuleId> <GroupInstanceId>$MPElement[Name="Environment.#text('EnvironmentName')#.#text('InstanceClass')#.Group"]$</GroupInstanceId> <MembershipRules> <MembershipRule> <MonitoringClass>$MPElement[Name="#text('InstanceClassMPAlias')#!#text('InstanceClass')#"]$</MonitoringClass> <RelationshipClass>$MPElement[Name="#alias('Microsoft.SystemCenter.InstanceGroup.Library')#!Microsoft.SystemCenter.InstanceGroupContainsEntities"]$</RelationshipClass> <Expression> <Contained maxDepth="2"> <MonitoringClass>$MPElement[Name="Environment.#text('EnvironmentName')#.Group"]$</MonitoringClass> </Contained> </Expression> </MembershipRule> </MembershipRules> </DataSource> </Discovery> </Discoveries> </Monitoring> <LanguagePacks> <LanguagePack ID="ENU" IsDefault="true"> <DisplayStrings> <DisplayString ElementID="Environment.#text('EnvironmentName')#.#text('InstanceClass')#.Group.DiscoveryRule"> <Name>Environment - #text('EnvironmentName')# - #text('InstanceClass')# Group Populator</Name> <Description>This discovery rule populates the group 'Environment - #text('EnvironmentName')# - #text('InstanceClass')#'</Description> </DisplayString> <DisplayString ElementID="Environment.#text('EnvironmentName')#.#text('InstanceClass')#.Group"> <Name>Environment - #text('EnvironmentName')# - #text('InstanceClass')#</Name> </DisplayString> </DisplayStrings> </LanguagePack> </LanguagePacks> </ManagementPackFragment>
Create new Snippet Data called "Environment Instance Groups.mpsd" and reference the Snippet Template "Environment Instance Group" created in previous step.
For this example I'll use the "Microsoft.Windows.Server.10.0.OperatingSystem" Class from the "Microsoft.Windows.Server.2016.Discovery" Management Pack (Windows Server 2016 Operating System) and populate all instance from a particular Environment to a Group.
Therefore, we need to create a new reference to the "Microsoft.Windows.Server.2016.Discovery" Management Pack:
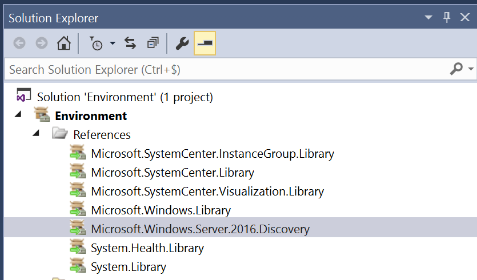
Note the Alias for the Management Pack in the Properties of the Management Pack:
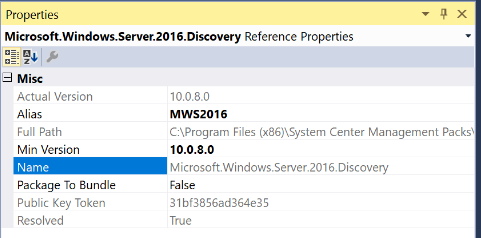
Next would be creating the Snippet Data where we reference the created Snippet Template ("Environment Instance Group") as shown earlier.
You now can use the variables used for the Snippet Template (EnvironmentName, InstanceClass, InstanceClassMPAlias)
- EnvironmentName (The Environment Variable we defined earlier (TST, ACC, PROD)
- InstanceClass (The Class that we select to populate the group with, for this example we'll use "Microsoft.Windows.Server.10.0.OperatingSystem")
- InstanceClassMPAlias (The Management Pack Alias for the Management Pack that holds the class, for this example we'll use "MWS2016")
By doing this you will reproduce the XML for each defined variable set.

This will end the configuration of the Management Pack.
When you import the Management Pack, you'll see the following Groups created:

The "Environment - PROD - Microsoft Windows Server 10.0.OperatingSystem" will show all production Windows Server 2016 Operating System Objects:

You can now use these groups to build dashboards or other purposes.
Here's the Visual Studio Project:
https://msdnshared.blob.core.windows.net/projects/Environment.zip
Here's the Management Pack XML:
https://msdnshared.blob.core.windows.net/projects/Environment.xml

