How to publish an internal web application using Microsoft Azure
How to publish an internal web application using Microsoft Azure
In this blog post, I will detailed the steps on how to publish an internal web application using Microsoft Azure. I will publish an internal Self Service Portal for MBAM (Microsoft BitLocker Administration and Management). This Portal is used to generate BitLocker Recovery Key if you are locked out of Windows by BitLocker.
Step 1: Enable Application Proxy on your directory
Select your Directory, then select Configure. Scroll down and click on Enabled
Step 2: Establish connectivity with the network
From your internal server, select Download and install the Application Proxy Connector on your network. Select Download now.
Run the install and follow the wizard. I installed Application Proxy Connector on my MBAM Web Server, but it is not required to be installed on the same server. Once the install completes successfully, you are ready to Add an Application.
Step 3: Add an Application
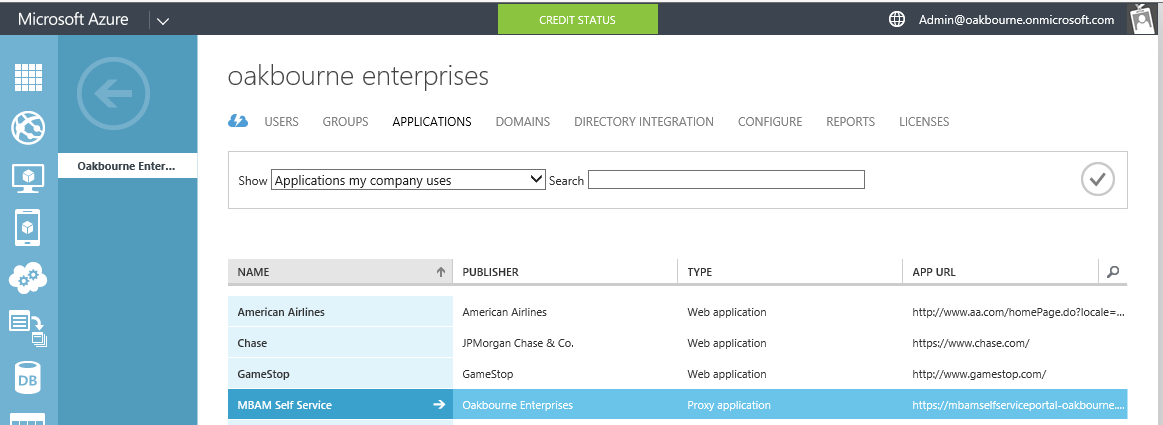
Login to Microsoft Azure - https://manage.windowsazure.com. Select your Directory (mine is called Oakbourne Enterprises), then click on Applications button at the top of the page.
Select Add at the bottom of the Application page. Select Publish an application that will be accessible from outside your network.
Name: MBAM Self Service Portal
Internal URL: https://mbam.contoso.org/selfservice
Preauthentication Method: Azure Active Directory
Step 5: Assign Users
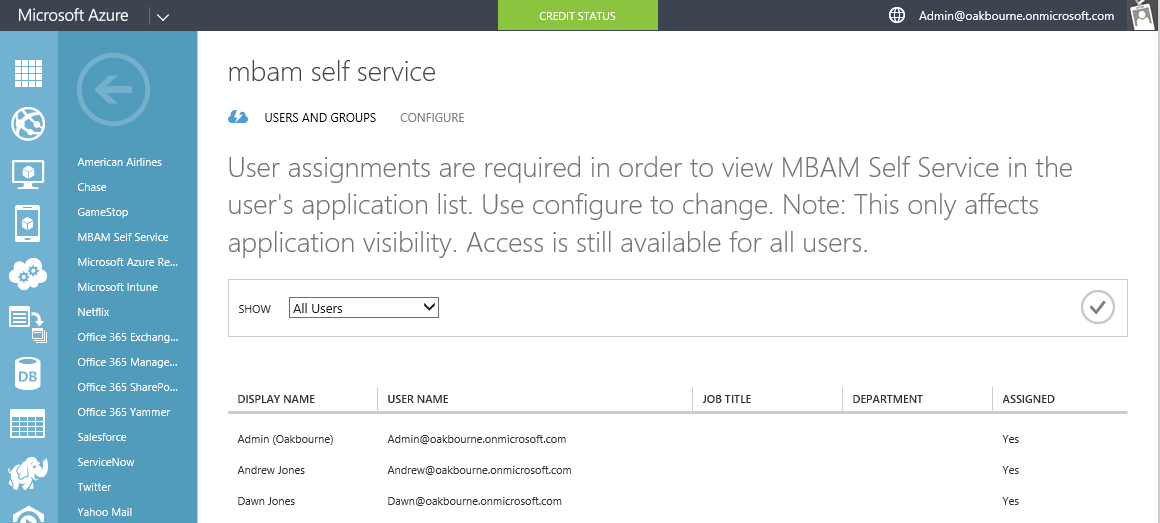
From your list of Applications, select your application, then click on Users and Groups. Select appropriate Users and/or Groups for the application to show up in the user's application list.
Note: This only affects application visibility.
Step 6: Configure Application SPN
Note: The Application Proxy and Web Site are on the same server - MBAM.contoso.org
Select Configure at the top of the page, scroll down near the bottom of the page and enter Internal Application SPN: http/mbam.contoso.org (it is not a typo that I used http/servername).
If a HTTP SPN is not already configured for server, it will have to be set using SETSPN command. To check and set if necessary, follow these commands from your webserver:
This will list all registered SPN for this server. SETSPN -L (enter server name) - example: setspn -l mbam
You should see a line containing HOST/MBAM.contoso.org - If not, proceed to Add a SPN.
If a HTTP SPN is not set, follow this command to create one:
SETSPN -S HTTP/ServerName Servername - example: setspn -s http/mbam mbam
Step 7: Configure Server Delegation
Launch Active Directory Users and Computers - find your Server, open Properties and select Delegation tab. Select Trust this computer for delegation to specified services only. Then select Use any authentication protocol, finally click Add button. Select your server, choose http mbam.contoso.org.
Finally, logon to Azure AD Portal to launch your Application - https://myapps.microsoft.com. Click on MBAM Self Service icon to launch.
Note the differences between the URLs
External Azure: https://mbamselfserviceportal-oakbourne.msappproxy.net/selfservice
Internal Network: https://mbam.contoso.org/selfservice


