Combining IaaS and PaaS – PHP and MySQL
The new Virtual Machines & Virtual Networks features are absolutely awesome and open up a whole new world of possibilities, especially when there are very specific infrastructure requirements that need to be included. But first things first…
Why Include IaaS components?
When you start a project from scratch, then in the most cases it would be perfectly reasonable to stick to the tools that the Windows Azure Platform has in its belt – use Windows Azure SQL Databases for structured data storage, Blob Storage for unstructured, Table Storage for NoSQL Name/Value pairs, Queues, Service Bus, etc.
But the world isn’t always that easy. Sometimes there are existing code components that definitely need to be part of your solution – whether this is a specific CMS system requiring a specific database, external systems that need to be connected in a particular way, there are multiple reasons why you may need to include infrastructural components to your solution
So Why use PaaS after all?
In my eyes, for a developer, PaaS is and remains THE optimal way of deploying and maintaining software. The sheer beauty of separating application maintenance and management from that of the OS and the simplicity of packaging and deployment, of scaling and testing is a developer’s dream.
What are the prerequisites?
You need a Windows Azure subscription that has the preview features “Virtual Machines & Virtual Networks” enabled – you can get there you can do this from https://account.windowsazure.com/PreviewFeatures once you’ve created your subscription:
After you’ve done that, ensure that you head to the Preview Portal <manage.windowsazure.com> to access and manage those new features.
Step-by-step Process
I am roughly following the steps described in the Windows Azure Training Kit chapter called “Connecting a PaaS application to an IaaS Application”, with the exception that I will be using MySQL instead of SQL Server. The Training Kit can be downloaded from https://www.windowsazure.com/en-us/develop/net/other-resources/training-kit/
Step 1 – Create the Network
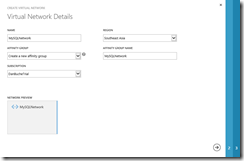
As one would do in the physical world, it all starts with the network. Select “New”, “Network”, “Custom Create”. Give the new network a name and create a new affinity group for it:
Then, give it an address space (I have a personal preference for 192.168.x.x) and a subnet that you want all the fun to be happening in (I called mine “Dot1” and used 192.168.1.x for it).
In the last configuration step, we won’t be needing a DNS server, nor does this example require a VPN connection into an on-premises network, so you can just hit the OK button.
Step 2 – Create the MySQL Server and put it into the right Virtual Network
Now create a Virtual Machine by selecting “New”, “Virtual Machine”, “From Gallery”.
- Choose an appropriate OS (I used the June release of the Windows Server 2008 R2 SP1 OS)
- On the next page, choose any VM Name and Password and leave the VM size at “Small” for now.
- Now, select a DNS name for the VM (try any name of your choosing that is still free). In “Region/Affinity Group/Virtual Network”, select the network we just created in Step 1.
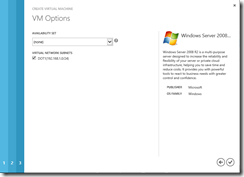
- Then, choose the subnet that this VM should be placed into and hit “OK”
As soon as the creation of the VM is finished (give it a few minutes), you can then hit “Connect” in the portal to launch a remote desktop connection into the VM. Use the password you chose in point 2 above.
For the next steps, I would assume that you are comfortable with administering Windows Server and especially with installing MySQL. The steps look like this:
- Open Server Manager, configure “IE ESC” (Internet Explorer Enhanced Security Configuration) and disable it for now (that will enable you to download and install software from the Internet a lot easier
 )
) - Open IE and navigate to www.mysql.com/downloads/, download the latest MySQL Server installer and install
- The version I used (5.5.25GA) asked me during the installation process whether I wanted to allow root access from remote machines. For simplicity, I enabled this option so that I could later simply use the root user for application access. Certainly not a very secure setup, but since we’re only using this for demo and in an isolated network for now, this will do. Also, in my version, the installer had the option to create the firewall exception for MySQL automatically. This is needed, otherwise the roles we create later won’t be able to connect.
- Then, use whatever method available to you to create a new database called “tasklist” in MySQL. We will need that for the sample application later.
- As a last step, open a command prompt on the server and use the “ipconfig” command to figure out the IP address of your server. We will need that later.
Note that the VM will not allow any traffic into MySQL from outside our virtual network by default. For our example, we will not need it to either.
Step 3 – Create a PHP PaaS application to consume the MySQL database
Using PHP with Windows Azure is pretty straight forward. All the required steps are outlined here: https://www.windowsazure.com/en-us/develop/php/how-to-guides/powershell-cmdlets/
In the beginning, you’ll need to download and install the Azure powershell cmdlets and import your configuration into the system
- Get-AzurePublishSettingsFile
- Import-AzurePublishSettingsFile
Then, you create the skeleton Azure PHP service
- New-AzureServiceProject -ServiceName MyService
- Add-AzurePHPWebRole
now, in the subdirectory “MyService\WebRole1”, you will find the root directory of your PHP solution. Replace the PHP files there with the content of this sample PHP application:
https://github.com/WindowsAzure/azure-sdk-for-php-samples/tree/master/tasklist-mysql
In this application, open up the “taskmodel.php” file and modify the database connection parameters. You will need the IP address of the MySQL server (see Step 2.5) and the password you created for the MySQL root user account. In my case, it was “192.168.1.5” and “password”
1: function connect()
2: {
3: // DB connection info
4: $host = "192.168.1.5";
5: $user = "root";
6: $pwd = "password";
7: $db = "tasklist";
8: try{
9: $conn = new PDO( "mysql:host=$host;dbname=$db", $user, $pwd);
10: $conn->setAttribute( PDO::ATTR_ERRMODE, PDO::ERRMODE_EXCEPTION );
11: }
12: catch(Exception $e){
13: die(print_r($e));
14: }
15: return $conn;
16: }
Now use the the Azure cmdlet to deploy the service into an Azure Cloud Service:
- Publish-AzureServiceProject
Note that this will not be able to connect to the database yet since we haven’t joined the PaaS service to the Virtual Network. After you’ve seen the deployment up and running, delete it again through the Windows Azure portal.
Step 4 – Deploy the PHP application into the correct virtual network
Unfortunately, this is currently a separate step, as the “Publish-AzureServiceProject” as of today removes the settings I am about to introduce into the cloud settings file. Hopefully, there will be an easier way to do this later.
In the “MyService” directory, you should now see
- A cloud_package.cspkg file containing the PHP application itself
- A ServiceConfiguration.Cloud.cscfg file containing the Azure application settings
- and a few extra files
Open up the ServiceConfiguration.Cloud.cscfg file and add the following lines of XML just above the final line </ServiceConfiguration>:
1: <NetworkConfiguration>
2: <VirtualNetworkSite name="MySQLNetwork" />
3: <AddressAssignments>
4: <InstanceAddress roleName="WebRole1">
5: <Subnets>
6: <Subnet name="Dot1" />
7: </Subnets>
8: </InstanceAddress>
9: </AddressAssignments>
10: </NetworkConfiguration>
Now, go to the portal and upload the package file and the modified configuration file into your Azure cloud service. This will deploy your service right into the Virtual Network we created earlier.
Important: Do NOT use the Publish-AzureServiceProject cmdlet for this as this will remove the above settings from the .cscfg file again!
Now, when you navigate to “<yourservice>.cloudapp.net/createtable.php”, the system will connect to MySQL and create the table structure for the application. Navigating to “<yourservice>.cloudapp.net” will now give you this screen:
Welcome to your Windows Azure PHP service running in PaaS and connecting to an IaaS-hosted MySQL Server!


