Deploying Windows Server 2008 with "slipstreamed" Hyper-V RTM. Part 1.
This article walks through updating an WDS infrastructure such that Hyper-V RTM bits are “slipstreamed” into the operating system installation. Given that Hyper-V has reached RTM (release to manufacturing), it was time to refresh my test deployment environment in my office anyway. I have an entirely private network segment here with its own domain controller and WDS server. I use this environment extensively for quickly deploying test operating system installations to both physical and virtual machines. (It’s also helpful as I can get full dedicated gigabit networking – something which I can’t get from corporate services here at Microsoft – this alone almost halves the overall installation time :) )
There are a few resources you need to refer to start with:
1. Mikes posts on servicing from which I’m borrowing many of these instructions
2. The download for KB950049 x64 – This is the Hyper-V RTM bits for Windows Server 2008
3. The install.wim from Windows Server 2008 x64 RTM media. The WIM is present in the sources directory of the media.
4. The boot.wim from Windows Server 2008 x64 RTM media (for preparing the WDS server – outside the scope of this post)
5. The Automated Installation Toolkit (AIK) for Windows Vista SP1 and Windows Server 2008
6. KB928636 to provide more information on extracting an MSU
The first step is to expand the MSU into a directory by entering the following command “expand –F:* <pathtomsu> <folder>”
There are four files created. Windows6.0-KB950050-x64.cab is the file we are going to add to our master image. We need to now see what the list of images is in the WIM file. For the purposes of this walkthrough, I’m using Windows Server 2008 en-us x64 Volume License media which has six images in it.
From an elevated AIK Tools command prompt: enter imagex /info <pathtoWIM>

In order, the images are: Standard Full, Enterprise Full, Datacentre full, Standard core, Enterprise Core, Datacentre Core. To perform the update, you need a directory for a mount point. In my case, e:\mount.
For each of the images which are relevant to you, execute the following commands from an elevated AIK Tools Prompt:
- imagex /mountrw <WIM> <WIM Image Index> e:\mount
- start /w pkgmgr /ip /m:e:\950050\Windows6.0-KB950050-x64.cab /o:e:\mount;e:\mount\windows /s:%temp% (see note below)
- imagex /unmount /commit e:\mount
CAUTION: This procedure appears to hit a bug in the servicing engine and may not work correctly if you have previously run pkgmgr and have some stale files left over in the directory specified by the /s: parameter. It would be safer to either create a new blank directory and use that as the parameter value for /s:, or ensure that you completely remove the contents of %temp% before running the command. You may wish to add /l:<kbnumber>.txt as another parameter to the pkgmgr command, and look at the output log file <kbnumber>.txt.txt generated. It should be obvious if you are seeing servicing trying to match to an incorrect KB number.
Note that the second and third steps can take a little while to complete.
Now we need to add those images to the WDS server. For this walkthrough, I’m going to add an image group called “Hyper-V RTM Windows Server 2008 Images”. From administrative tools, start Windows Deployment Services, navigate down to Install Images, right click and add an image group entering the appropriate name.
Once the image group is created, right-click on it and select Add Install Image. Use the wizard to walk through adding all the available images. I’m just using the default names for this walkthrough, but rename them as appropriate.
At this point, you’re pretty much set.
Before we can use WDS, you also need to have prepared the boot images on the WDS server if you haven’t already. I’d already previously added both x86 and x64 architectures. (Lots of information on this can be found in WDS documentation).
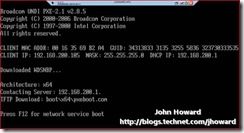
So let’s PXE boot a physical server and install Windows Server 2008 Enterprise edition with Hyper-V RTM installed in the image. (I’m using an HP iLO on a Proliant DL380 G5 if you're wondering).
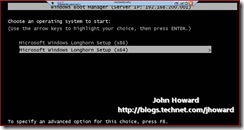
As I have both x86 and x64 boot images installed on the WDS server, I select my architecture. In this case, x64 is what I want as Hyper-V is not present as a role in Windows Server 2008 x86 SKUs.
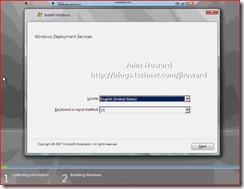
Run through Windows setup as normal.
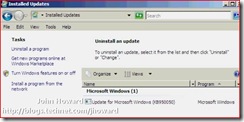
Once installation has completed and you log on, you will notice that KB950050 now appears out of the box as installed under Control Panel, Programs and Features, Installed Updates.
We still need to enable the Hyper-V role. Just use Server Manager on the Add roles button in Initial Configuration Tasks, walk through the wizard and reboot. Hyper-V Manager will then be present under administrative tools.
And, of course, you can use exactly the same mechanism to install Virtual Machines, the Windows Server 2008 x86 or Windows Vista SP1 x64 or x86 management tools (KB952627). Just add the right package to the right WIM. It’s really that simple. There is a gotcha here for Vista SP1 virtual machines which I’ll cover in a separate post soon. Also, there’s one follow up post I’ll do which shows you how to deploy Windows Server 2008 with Hyper-V RTM from WDS and get the Hyper-V role enabled at the same time, saving even more time on the overall installation.
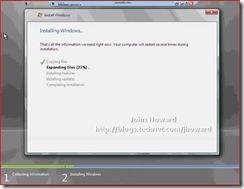
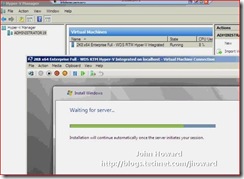
Here’s a Virtual Machine being installed from the WDS server. And the real beauty of this – I will have all the right components already installed in the virtual machine once installation completes. No need to use the Actions/Insert Integration Services Setup Disk and run setup in the virtual machine.
Cheers,
John.
Comments
Anonymous
January 01, 2003
Hyper-V HW & SW requirement: http://technet.microsoft.com/en-us/library/cc816844.aspx Hyper-V RTMAnonymous
January 01, 2003
Setting the Record Straight One Post at a Time ... That's the tagline of the Virtual Reality VMWare blog,Anonymous
January 01, 2003
crosspost from http://blogs.msdn.com/rextang Just finished slipstream / servicing the windows 2008 serverAnonymous
January 01, 2003
Performance Tuning Guidelines for Windows Server 2008 Hyper-V Release Notes Planning for Hyper-V SecurityAnonymous
January 01, 2003
In this security conscious age, it makes sense to build your hypervisor (the layer that has access to...Anonymous
January 01, 2003
This article walks through updating an WDS infrastructure such that Hyper-V RTM bits are “slipstreamed”Anonymous
January 01, 2003
I've written a lot about Hyper-V on this blog (some would say too much) but I'm going to carryAnonymous
January 01, 2003
This continues on from last week's post to show the changes needed to enable the "slipstreamed"Anonymous
January 01, 2003
The first two parts of this mini-series dealt with deploying Windows Server 2008 – either as the rootAnonymous
January 01, 2003
Unless you've been hiding under a rock, you probably noticed that the final RTM release of Hyper-V wasAnonymous
January 01, 2003
Performance Tuning Guidelines for Windows Server 2008 Hyper-V Release Notes Planning for Hyper-V SecurityAnonymous
January 01, 2003
Mark Wilson IT: I’ve spent a fair amount of time recently clearing up confusion about the various


