Creating and Editing Gradients in Expression Blend 3 Preview
One of our goals for Expression Blend 3 is to provide better tools and user experience for visual designers. At a high level, we prioritized features that allow the designer to keep their focus on the artboard more often. This translated into an improved selection model, predictable layout, familiar and efficient keyboard shortcuts and a flexible and powerful gradient editing experience. This blog post is the first in a series that will highlight features and improvements targeted to the visual designer. Let’s start with the new gradient editing tools. The UI is subject to change for the final release but this overview should give you an idea of the features available in the Preview.
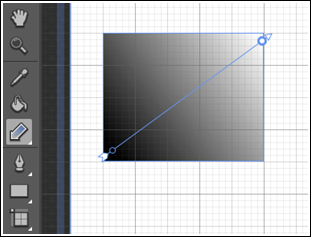
For Blend 3 we have separated out the Brush Transform tool into two different tools, Gradient and Brush Transform. The Gradient tool allows you to create and edit the properties of linear (LinearGradientBrush) and radial (RadialGradientBrush) gradients on the artboard. The Brush Transform tool allows you to transform any brush type by modifying the translation, rotation, scale and skew. These values are stored as a part of the RelativeTransform property on the brush. Separating out these tools gives you greater control and predictability of which properties are edited, creates cleaner XAML, and makes it easier to animate and bind gradient properties.
All you have to do to create a gradient is select the Gradient tool in the Toolbar or press the ‘G’ keyboard shortcut and click and drag to define the start and end points. This creates a gradient for the selected object and sets start and end point to the same positions that you clicked and released the mouse.
The Gradient tool adorner shows the start point, end point, individual stops and the selected stop. Now you can use the adorners to edit the start (StartPoint) and end (EndPoint) of the gradient by rotating and dragging the adorner. To add a new stop press Alt and click anywhere on the line (Note: In the final release you will not have to press Alt, just click and release). To change the position of a gradient stop (Offset) just click and drag it along the line. To remove a gradient stop click and drag it off the line. To edit the color just double click on the stop and a color picker is displayed where you can select a color for the stop.

Another really useful feature for editing gradients is the Gradient eyedropper. This is located in the color editor in the Brushes panel when you have an object with a gradient selected.
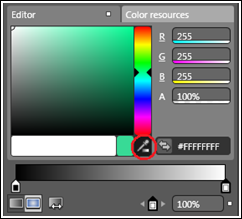
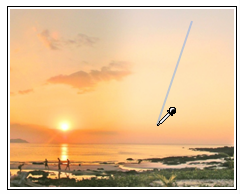
Just select the Gradient eyedropper and click and drag anywhere inside or outside of Blend to grab a gradient. For example, if I have a picture displayed in my browser with a nice gradient I can easily apply this gradient to my shape using the Gradient eyedropper by clicking and dragging:
Once the gradient has been selected, you will notice that your selected element in Blend now features the range of colors you selected earlier:
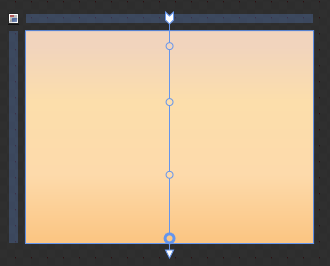
The range of colors I picked in the above example was pretty simple, so you are able to see the four gradient stops and the colors they represent. For more complicated source images, you may have stops that are located close to each other. To adjust these stops, just zoom in to create more visual space between the stops on the artboard so that it is easier to select and edit them.
Closing Tips
By using the Gradient eyedropper, it can be easy to get some pretty complex gradients. Have you ever wondered how to reset the gradient back to the black to white default? Blend uses the gradient from the object that was last selected.
- Set your object to No brush in the Brushes panel.
- Select none by clicking on an empty area of the artboard or pressing Ctrl + Shift + A.
- Select your object and then select the Gradient brush tab.
There are also a few additions in the Brushes panel that will help you create and edit gradients.
- Use the Offset editor to specify a value numerically.
- Reverse the order of your gradient stops with the Reverse gradient stops button.
- Select the previous or next gradient stop using the gradient stop iterator. This is useful for selecting stops when you have two stops with the same or very similar values.
- Hover over a stop to get a tooltip of its offset and color value.
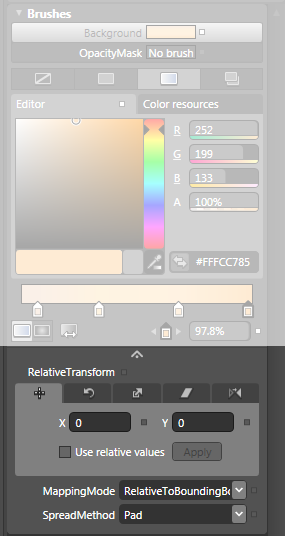
Finally, there is also an Advanced properties section for the Brushes panel that includes other brush properties like MappingMode, SpreadMethod and RelativeTransform:
Well, that’s the overview of the new gradient editing features in Expression Blend 3 Preview! I hope you find it easier to work with gradients.
Joanna
Comments
Anonymous
April 08, 2009
PingBack from http://microsoft-sharepoint.simplynetdev.com/creating-and-editing-gradients-in-expression-blend-3-preview/Anonymous
April 09, 2009
The comment has been removedAnonymous
April 13, 2009
We really wanted to get exactly that functionality in for Blend 3 but since animation was not a big focus area for us we didn't get a chance to add this unfortunatly. I am curious how you would expect this to work, for the selected keyframe within the same property or across all keyframes in the Storyboard?Anonymous
April 14, 2009
Queria partilhar convosco algumas leituras que ando a fazer esta semana, dedicadas ao silverlight ouAnonymous
April 25, 2009
The comment has been removedAnonymous
May 06, 2011
This is really nice, but gradients arent an end unto themselve and as such this leaves one hanging. Sure would like to see a tutorial on implementing gradients on web pages, what to look out for in doing so, best practices, etc.