Using Amazon RedShift with Power BI
Over this blog, I would like to address on how to install the Amazon Redshift Driver on Windows Operating System and how to configure the Data Source Name(DSN) to be used with Power BI.
Creating a System DSN Entry for an ODBC Connection on Microsoft Windows.
After you download and install the ODBC driver, you need to add a data source name (DSN) entry to the client machine. SQL client tools use this data source to connect to the Amazon Redshift database.
Note: If you have installed Power BI(64-bit) make sure to install the Amazon Redshift ODBC Driver (64-bit) and for Power BI (32-bit) install Amazon Redshift ODBC Driver (64-bit).
- To create a system DSN entry
1. In the Start menu, in your list of programs, locate the driver folder or folders.
Note: If you installed the 32-bit driver, the folder is named Amazon Redshift ODBC Driver (64-bit). If you installed the 64-bit driver, the folder is named Amazon Redshift ODBC Driver (64-bit). If you installed both drivers, you'll have a folder for each driver.
2. Click ODBC Administrator, and then type your administrator credentials if you are prompted to do so.
3. Select the System DSN tab if you want to configure the driver for all users on the computer, or the User DSN tab if you want to configure the driver for your user account only.
4. Click Add. The Create New Data Source window opens.
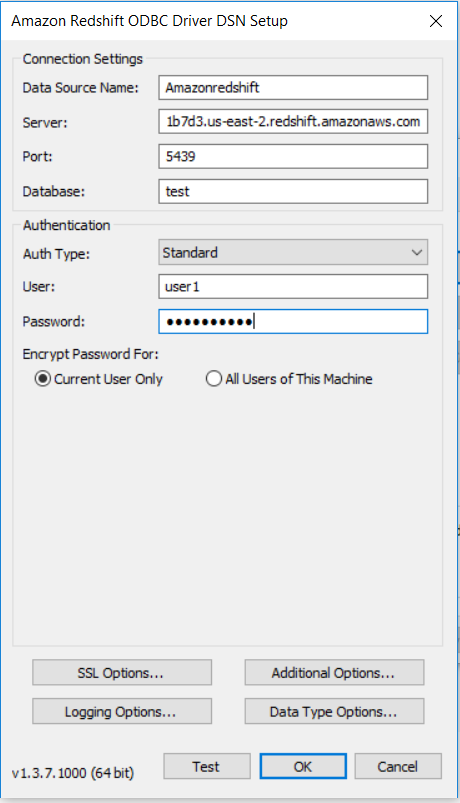
5. Select the Amazon Redshift ODBC driver, and then click Finish. The Amazon Redshift ODBC Driver DSN Setup window opens.
6. Under Connection Settings, enter the following information:
Data Source Name: Type a name for the data source. You can use any name that you want to identify the data source later when you create the connection to the cluster.
Server: Specify the endpoint for your Amazon Redshift cluster. You can find this information in the Amazon Redshift console on the cluster’s details page.
Port: Type the port number that the database uses. By default, Amazon Redshift uses 5439, but you should use the port that the cluster was configured to use when it was launched.
Database: Type the name of the Amazon Redshift database.
Under Credentials, enter the following information:
User: Type the user name for the database user account that you want to use to access the database.
Password: Type the password that corresponds to the database user account.
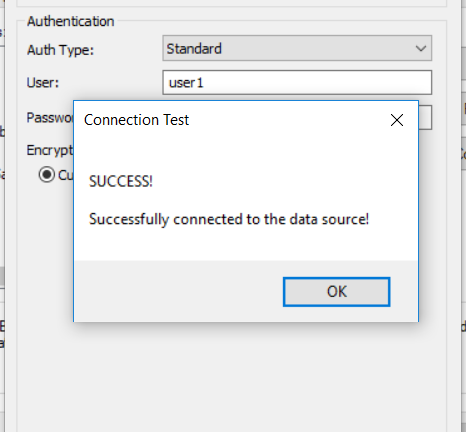
Click Test. If the client computer can connect to the Amazon Redshift database, you will see the following message: Connection successful.
Extracting the data from the Amazon Redshift Database for Power BI Desktop.
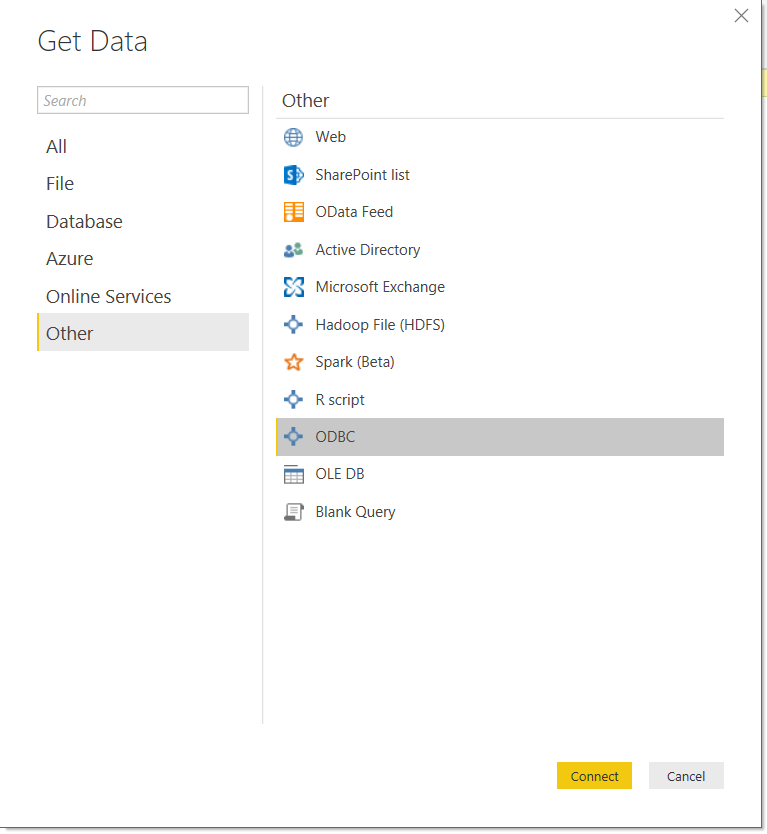
- Click on Get Data from the Power BI Desktop console. Then click on Other and further click on ODBC.
Click on connect.
Click on the drop down under From ODBC.
Select the DSN name which you have created and click on OK.
A prompt asking for credentials will pop-up. Pass on the database credentials. And click on Connect.
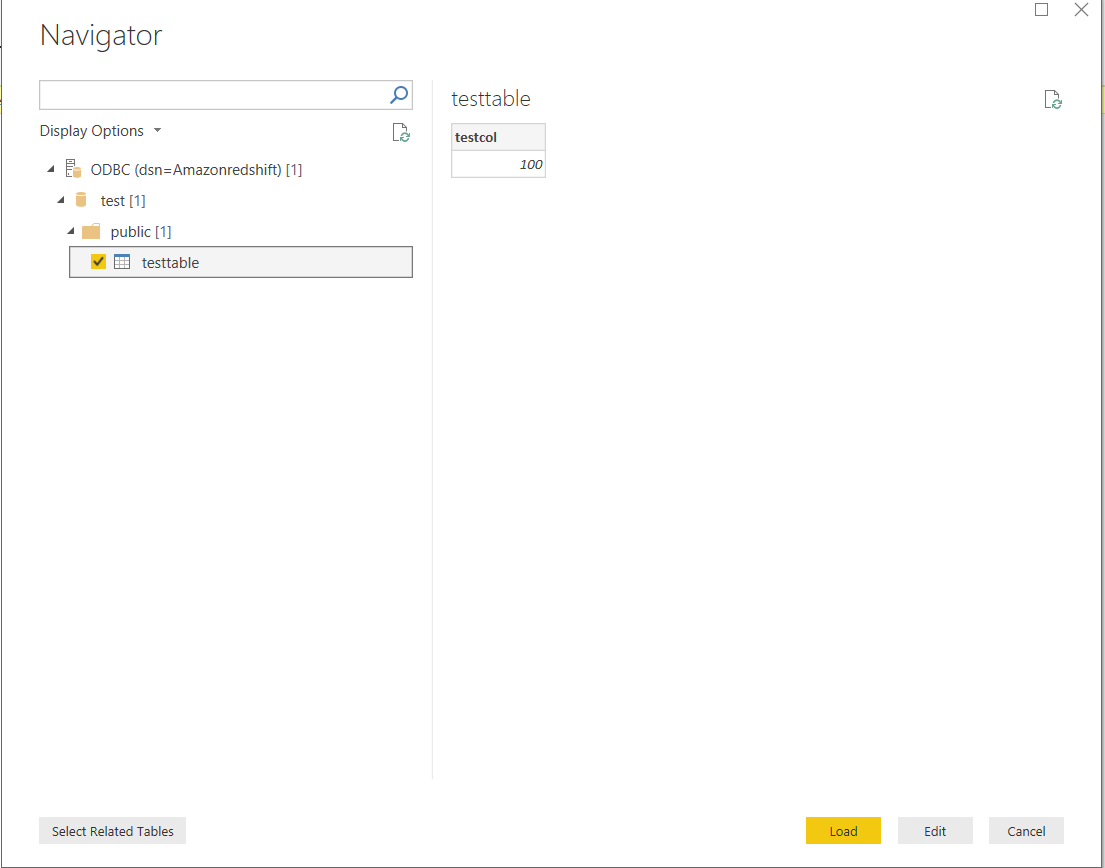
After connecting Load your data and Publish it in the Power BI Desktop.
Configuring the data source for the Power BI Service for scheduling a refresh.
- Click on Settings icon and choose the Manage gateways
Click on ADD DATA SOURCE for configuring a data source for your dataset.
Fill in the required information and click on Add.
Note: The data source name should be the same as passed on to the dsn. And the connection string should be in the format: dsn=<dsnname> 
- Once you have configured the data source add the gateway to your dataset and you are ready to go.
Author: Aishwarya Jaiswal – Support Engineer, SQL Server BI Developer team, Microsoft
Reviewer: Kane Conway – Support Escalation Engineer, SQL Server BI Developer team, Microsoft


