Importing a subset of data using partitions, step by step
This is a follow up to part 1 – dealing with large row sets in the tabular designer. In this post I will show how to import just a subset of your table data to get started, add partitions while you go, and then process the whole model at deployment time. I will demonstrate the technique importing via preview and filter, though obviously you can achieve the same effect using SQL queries for import.
Imagine for one moment that AdventureWorks has turned into a mega-conglomerate. Pretend FactInternetSales has bloated to the point where it is now painful to import and process the whole table in one shot. To solve this problem, we will chunk up FactInternetSales into partitions, using a date-based partitioning scheme.
Let’s get started. Create a new tabular project, start the import wizard, connect to the Denali CTP3 AdventureWorks database, and get to the table selection page. Select the FactInternetSales table, then click Preview and Filter, as shown below:
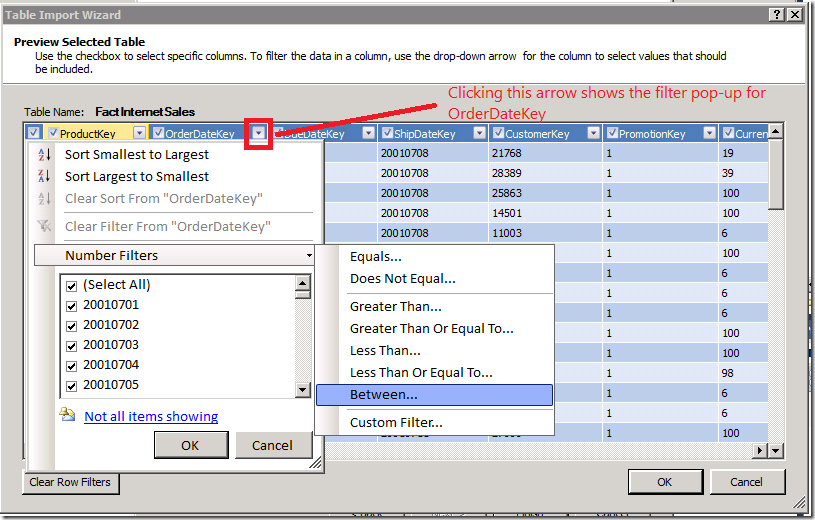
The Preview and Filter dialog appears, as shown below. Here, I am going to restrict the rows in the FactInternetSales table to orders placed in 2001. To do that, I will filter the OrderDateKey to values between 20010000 and 20020000. I get started by opening up the Filter drop-down and selecting the “Between” filter:
The Custom Filter dialog appears, as shown below. I type in my filter values:
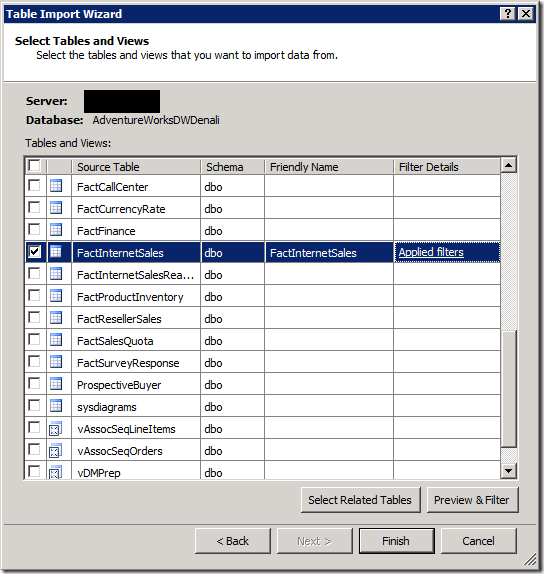
I click OK to close these dialogs, now I see that my filter has been applied in the import wizard, as shown below. Click Finish to complete the import.
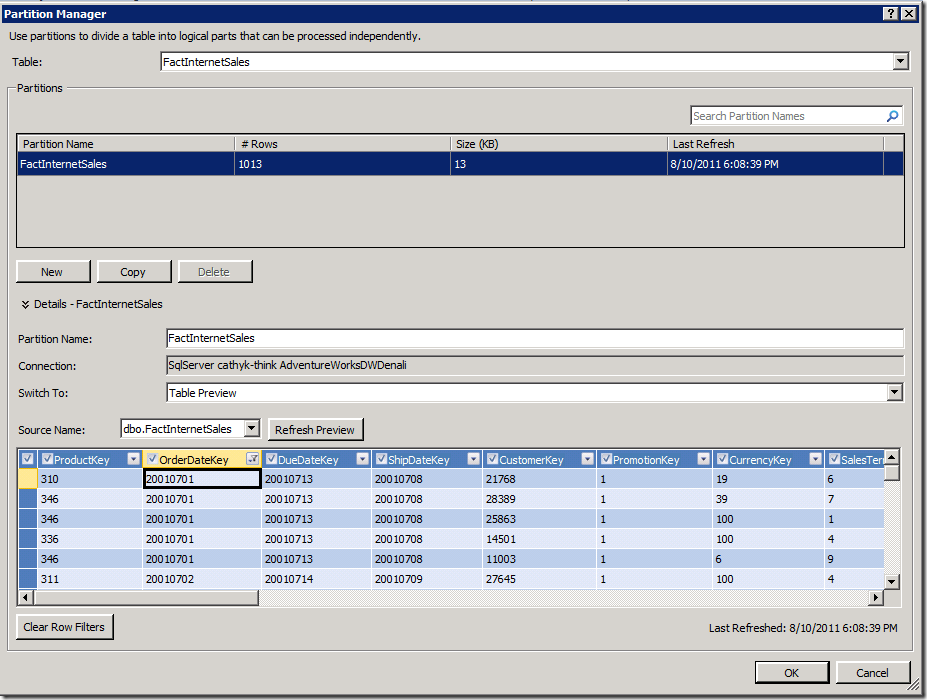
If I was to take a look at my model at this point, I would see that 1,013 rows are in the FactInternetSales table, and all of them are sales for 2001. Great. Now it’s time to set up my partitions, so I start the Partition Manager:
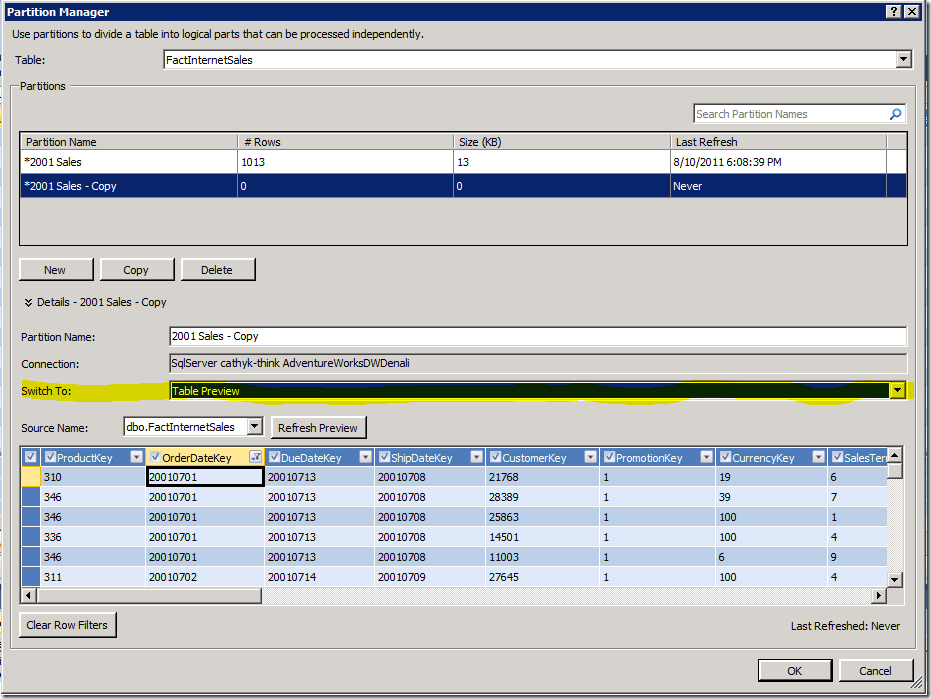
Looking at the Partition Manager, I can see that importing created one partition for me, called FactInternetSales. The partition has the filter I applied at import time. First thing I will do is rename this partition, call it 2001 Sales so I don’t get confused. Then I will make a copy of it to work from for my 2002 Sales. The picture below shows the state of the Partition Manager immediately after doing the copy:
Now I want to edit my copied partition so its filter restricts rows to the 2002 year, not the 2001 year. It’s too much clicking to go back into that filter dialog to update my filter for the 2002 year, so I will use the highlighted combo box to switch to SQL view to edit my partition query. (We are replacing this with a button for RTM, but for now use the combo). That takes me here:
I see the SQL statement was pre-populated with the values for the 2001 year. All I have to do is change the highlighted parameters to 20020000 and 20030000, rename the partition 2002 Sales, then OK to save my changes.
When the partition manager closes, I see that there are still 1,013 rows for FactInternetSales. Nothing has changed! Making a new partition is a metadata operation, not a data operation. I can continue to model, adding measures, relationships, hierarchies, roles, etc without ever adding a new row. Unless of course you click this tempting red button:
Refreshing (or processing) your data in the designer will fetch all the data for all partitions, so don’t process any more if you want to work with a subset of the data. If you want a subset, don’t push the red button!
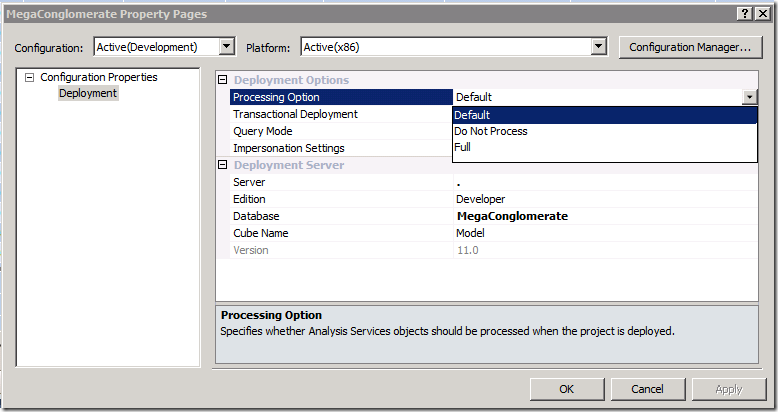
Now it is time to deploy and optionally process. Right click your .smproj, select properties. Check out the deployment processing options, we have three:
Process Default loads all the data for unprocessed partitions and recalculates relationships, hierarchies, calculated columns, and other internal engine structures. Process Full drops all your data and starts from scratch. Do Not Process works as advertised. Pick one of these options and deploy.
Now you can have all your data in your deployment environment while having spared yourself the pain of having to wait for it to import into the development environment. Enjoy.
Comments
- Anonymous
May 21, 2013
Which partition manager are you talking of?

