Step-By-Step: Completing Storage Live Migration in Hyper-V 2012 R2
With both Managing the Datacenter and Virtualizing the Datacenter #CANITPRO Camps coming to a close. Further details regarding the next upcoming will be made available soon. As you may be aware, Microsoft provides evaluation copies of Windows Server 2012R2 and Hyper-v Server 2012R2 to allow for testing from within your own private lab environments. Coupled with these Step-By-Step blog posts, we hope that you are empowered to further your endeavors as well as provide a reference for future activities asked of you within you production environment.
Storage Live Migration in Hyper-V
Storage Live Migration provides the ability to move your virtual machine storage while your VM is running. In comparison, Storage Live Migration is similar in offering to the VMware storage offering called vMotion. The virtual hard disks used by a virtual machine can be moved to different physical storage while the virtual machine remains running making it unnecessary to take a virtual machine offline to move the VMs files to different physical storage. Storage Live Migration supports both VHD and VHDX file types. VHDX file types are the new virtual hard drive format utilizing a 64k block size supporting virtual disks up to 64 TB in size and subsequently provide improved disk access speed in comparison to the old VHD file format. Older VHD disks utilize a 512 byte block size and have a maximum size of 2 TB.
During the Storage Live Migration process, the Virtual Machine disk is mirrored to either a local disk or shared storage allowing the server to continue to run the VM. Upon completion, Hyper-V switches the VM to run from destination virtual hard disk. Hyper-v can revert back to running the original source files should an error occur within the Storage Live Migration process and/or Hyper-V is unable to utilize the new destination virtual disk. An additional benefit of Storage Live Migration is that when deleting snapshots from a running VM, the snapshot / differencing disk will be merged in while the VM is running. Previously these changes were merged when the VM was restarted causing longer than expected reboot times as the VM had to wait to restart until changes were merged.
To add, the Shared Nothing Live Migration process provides storage migration mirroring the virtual hard disk to another server before completing the live migration. This process mirrors the memory to the new server then switches the running server to run on the new server and removes it from the original server thus moving a running VM from one Hyper-v host server without utilizing shared storage.
Fellow Microsoft Technical Evangelist, Brian Lewis, has created a detailed Storage Live Migration lab process which we at CANITPRO are happy to share.
Live Storage Migration via Hyper-v Manager
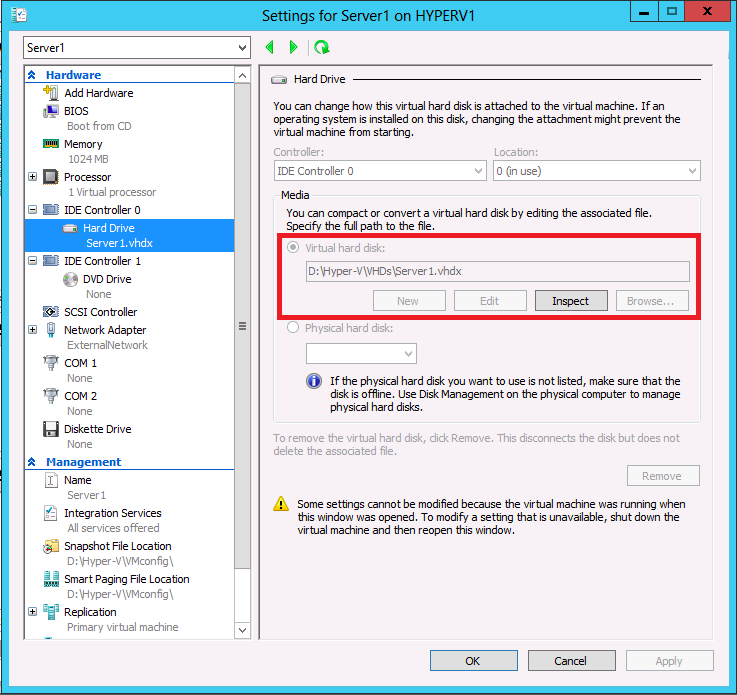
Within the Hyper-v MMC – you can see the settings of VM Server1 that the virtual hard disk is currently located under d:\Hyper-v\VHDs\Server1.vhdx
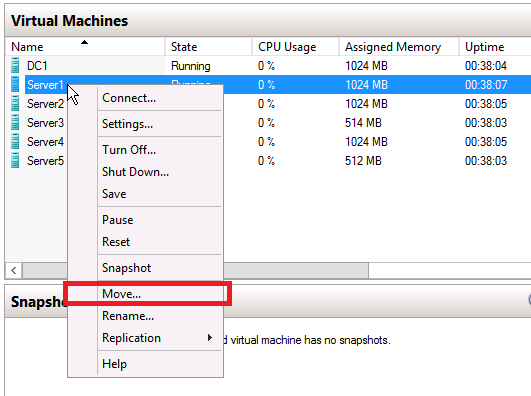
To initiate a Live Storage Migration – right click on the server then select Move
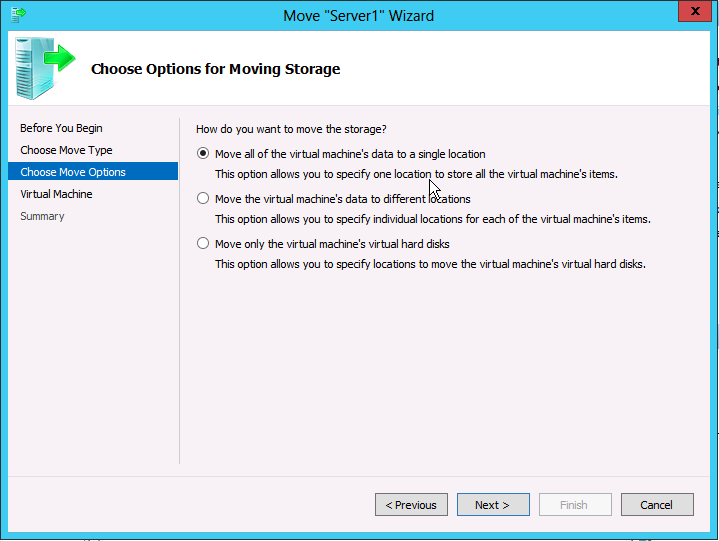
In the Wizard select if you want to move the Virtual Machine or the Storage of the Virtual Machine. In this example moving the storage to the VM is chosen
Choice is provided to move just the virtual disks or to also include the configuration files. In this example, the disks, snapshots, and configuration file are selected to be moved
Choose the folder of where you wish to place the files
In this example the files are being moved from the local hard drive (d:\Hyper-v\VHDs\Server1.vhdx) to a file share (\\hyperv1\VHDS\VirtualMachines\)
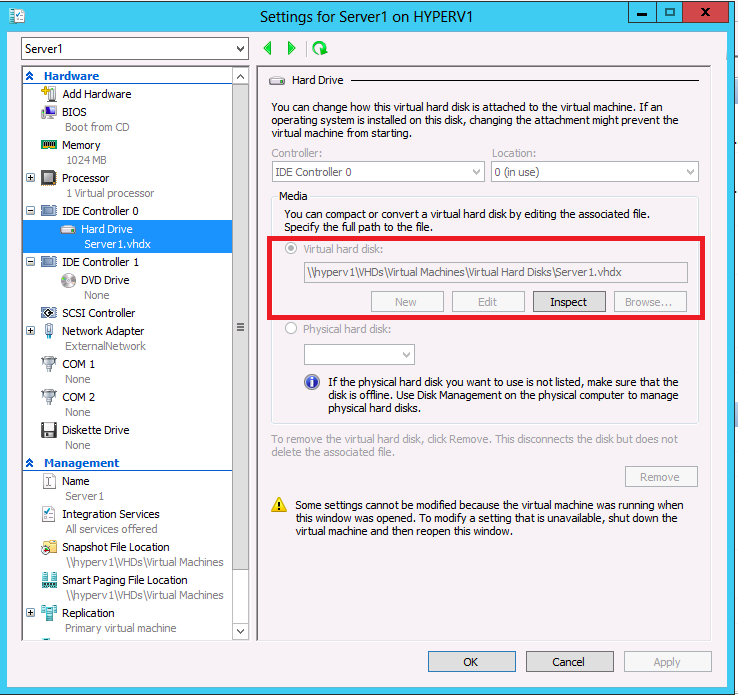
The process is now completed. The location of the virtual hard disk has now been moved to the file share which occurred without shutting down any VMs
Live Storage Migration via PowerShell
To learn about additional functionality in regards to Hyper-V 2012 R2, visit Microsoft Virtual Academy and checkout the Windows Server 2012 R2 Virtualization course.
