DevOps Basics: Infrastructure as Code – The Visual Studio Method
Hello folks,
Last week and the week before we talked about Infrastructure as Code (IaC) and the benefits that you can gain from using a template to deploy your solutions in a orderly fashion.
This week we’ll look at the same template but through Visual Studio. Why visual Studio you may ask? Well there are many reasons…. But in my own opinion the ones that matter to IT pros are:
- It’s a great editor for the JSON files
- It allows you to check your templates in your code repository and treat it as any other code in your organization.
- Great integration with GitHub where the Azure QuickStart Templates are located
In order to use the template today. we will have to connect GitHub and Visual Studio. For those who don’t know, Git is a free and open source distributed version control system designed to handle everything from small to very large projects with speed and efficiency. And a lot of Azure Resource Manager Templates are stored there.
To Connect to GitHub.
Browse to https://www.github.com . If you don’t have an account, click the Sign up for GitHub button to create one
Once you have created your account, sign in and access the main page.
Browse to https://github.com/Azure/azure-quickstart-templatesand copy the clone URL from that page.
Note: You need the Azure SDK for .NET 2.6 installed to perform the following steps in Visual Studio.
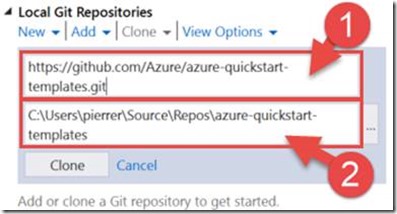
Start Visual Studio 2015 RC and notice3 on the right side in the Team Explorer there is a spot for Local Git Repository. In that section click on Clone.
In the form, you’ll paste the URL we copied from the GitHub portal (1) and it will automatically fill in the path where the local repository will be stored (2). Click Cloneto start the process.
The process will clone the Git repository locally
Now that we have a cloned copy of the repository, we can create a project in VS in which we will add our template and deploy our environment using the template.
In Visual Studio 2015 RC, click File, New, and Project
In the new project dialogue box, Select Azure Resource Group (1) , provide a project Name and path to save the project files (2) and click OK (3)
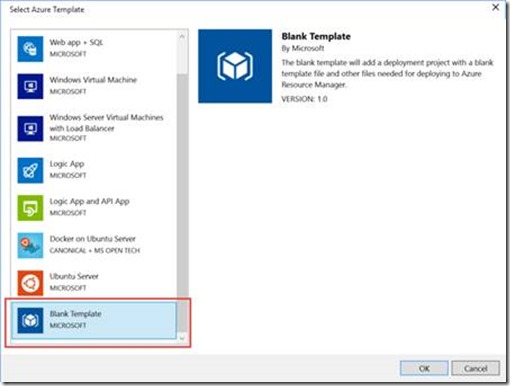
In the Select Azure Template, we’ll select a Blank template since we will include the template we already have in the GitHub repository clone.
Once the Project is created it will show up in the Solution explorer in Visual Studio
At this point we’ll expand the Script section and click on the DeploymentTemplate.json (1) item to show that it is a blank template (2).
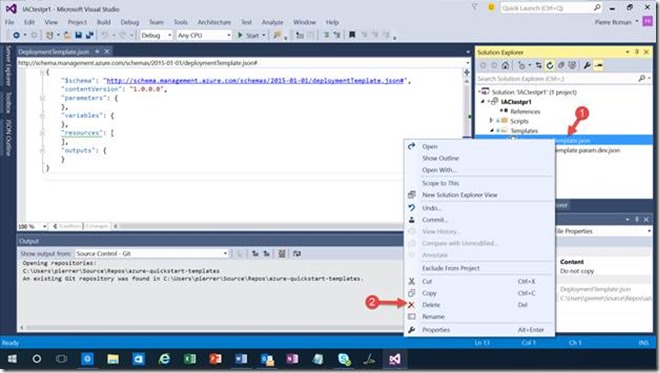
Since we want to use the same template as we used in the last 2 posts. We will delete the blank templates by right-clicking the .json (1) files and selecting Delete (2)
Now that we have a blank slate. We’ll add the template from the GitHub repository we cloned earlier in this article.
We do that by right-clicking the templates section (1) , selecting Add (2) and selecting Existing Item (3)
In the « Add Existing Item” dialogue box, browse to the github repository where our template is located “C:\Users\pierrer\Source\Repos\azure-quickstart-templates\101-simple-windows-vm” (1), select the deployment template and the parameter file (2) and click Add (3)
Once the files are added to our project we can easily deploy the solution and create our environment.
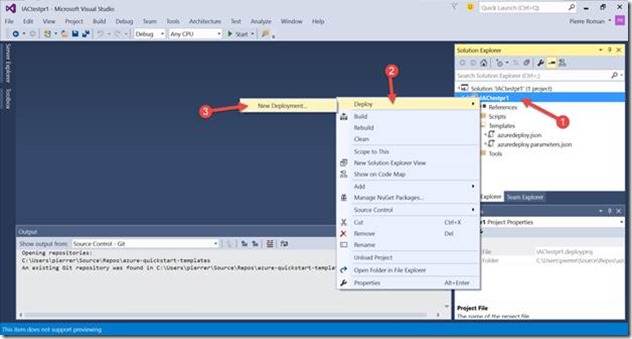
To deploy the template from Visual Studio, right-click the Solution (1), select Deploy (2) and new Deployment (3)
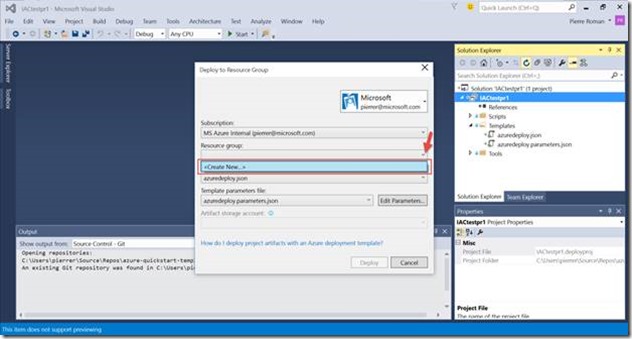
Ensure that your Account and subscription are selected.
Click the drop down arrow in the resource group field and select <create new>
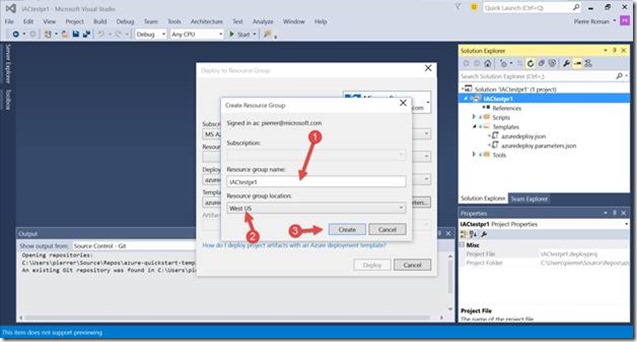
To create the new resource group, give the new group a unique name (1) , select a location for the new group (2) and click create (3).
Click deploy to start the process.
Fill in the parameters and click save.
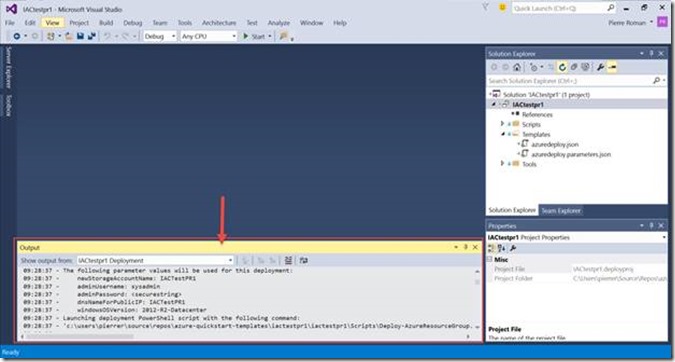
You can monitor the progress in the Outputwindows.
Once complete, you’ll get a message that the template was successfully deployed.
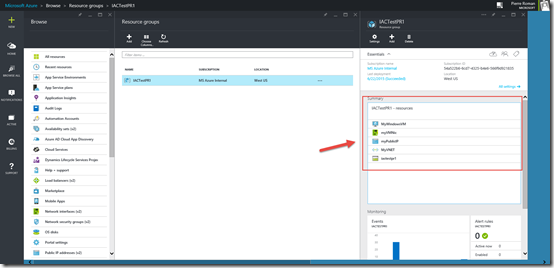
Now let’s confirm by browsing the Resource Groups in the Azure portal (1) and select the resource group we just created (2) .
And as you can see, our resources have been provisioned.
So, we’ve deployed a template using the portal, using PowerShell and today using Visual studio. In all three cases the identical template giving us the identical results. Once again demonstrating the value of using Infrastructure as Code (IaC). Next week we’ll look at the template themselves, how are they composed and how can we edit them, or create our own.
Cheers!
Pierre Roman
@pierreroman


