Step 4: Add Source Document Framework forms to your document UI
This initial wiring will just display empty windows as you didn’t create code which would calculate distributions. But it is good to do it now to be able to have a quick visual test when you later add code related to distributions.
a) Make sure you supplied both Label and SingularLabel for your document header and line tables (see table properties) as those are used by the distributions form.
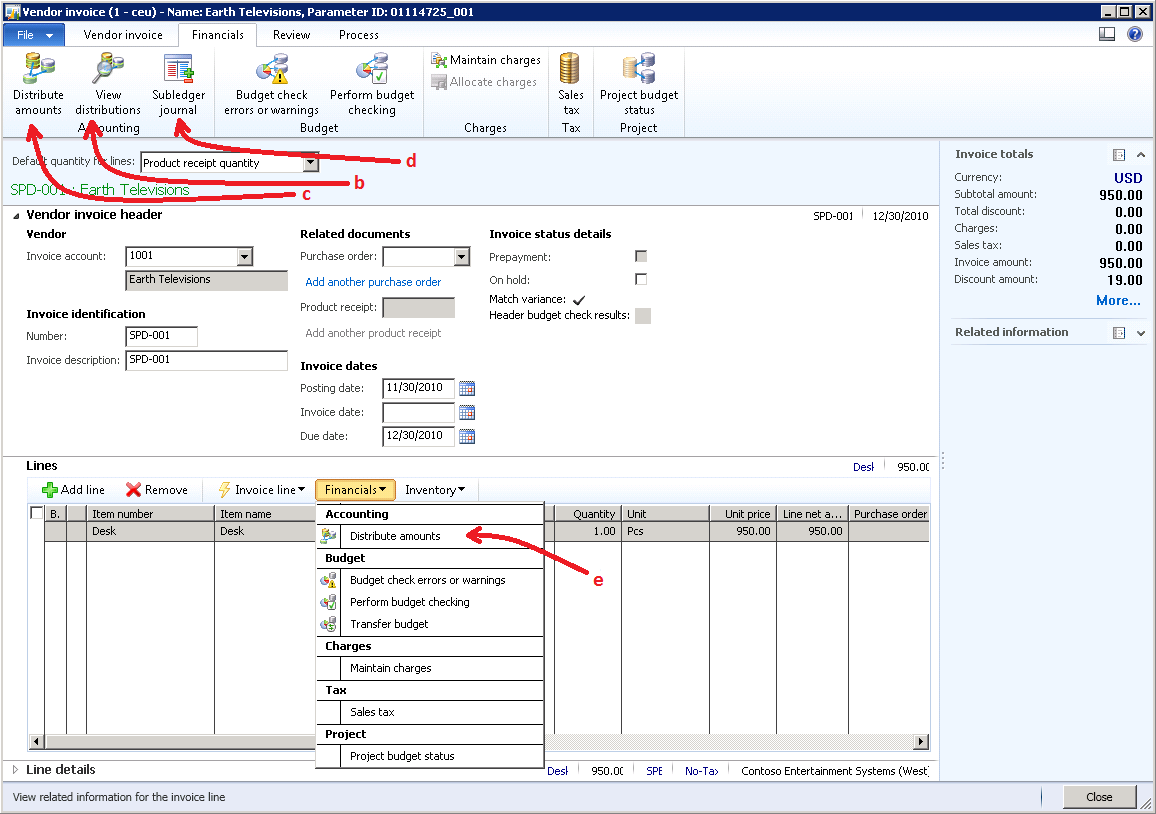
b) On your document form action pane add a button to view distributions for your document. The display menu item which opens the AccountingDistributions form for this purpose is AccountingDistributionsDocumentView.
c) On your document form action pane add a button to edit distributions for your document. The display menu item which opens the AccountingDistributions form for this purpose is AccountingDistributions.
d) On your document form action pane add a button to view subledger journal entries for your document. The display menu item for that purpose is SubledgerJournalAccountEntries.
e) On your document form line action pane add a button to edit distributions for your source document line. The display menu item which opens the AccountingDistributions form for this purpose is AccountingDistributions.
f) For all menu items you need to setup security properly for roles that need access to your document. Along with that you may decide to create your own menu items instead of reusing existing menu items, pointing the new menu items to the same forms as mentioned above and customizing both menu items and security based on those menu items to your needs.
Below is an example of UI wiring to Source Document Framework taken from Vendor Invoice entry form (VendEditInvoice):
Next - Step 5: Add code to distribute and journalize source document amounts
