How to deploy ClickOnce Application using Windows Azure Storage in very simple steps?
In this blog I will show you step by step how you can deploy a ClickOnce application designed using Microsoft Visual Studio 2010 using Windows Azure Storage.
In this case, I have a Windows Form Application name VHDMountAzureVM (https://mountvhdazurevm.codeplex.com/) which I will deploy to my Windows Azure Storage account name HappyBuddha (https://happybuddha.blob.core.windows.net/).
Step 1: Creating a public container in the Windows Azure Storage:
I have created a public container name "clickonceinstall" in the root location of my Windows Azure Storage account name "happybuddha" as below:
Based on above, my Clickonce install location will be described as below:
Step 2: Publishing Windows form Application:
In the VS2010 solution, launch "Publish" option as below:
In the Publish URL enter the Windows Azure Storage container URL (https://happybuddha.blob.core.windows.net/clickonceinstall) as below:
After you start the "Publish" option the follow files will be created as clickonce install package files:
Step 3: Copy all ClickOnce files to Windows Azure Storage Container:
In this step please copy 3 main files (setup.exe, publish.htm and <Application_Name>.application) along with the Application Files Folder directly to Windows Azure Storage container as below:
(If you are using CloudBerry Azure Storage Explorer, you can just drag and drop all the files at once from Windows Explorer to Azure Storage)
Step 4: Launching the installer URL:
Now we can launch the application installer URL as below:
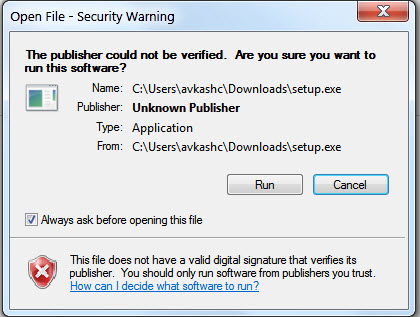
Above when you will click on "Install" button Setup.exe application will be downloaded to your local machine which you can launch to start the installer which you can see in following screen shots:
After the application installation is completed the application will be launched as below:
Step 5: Launching application any time in the machine where the application is installed:
Once application is installed in the machine it will be available in the startup menu as below:
You can just launch the application by clicking the application name.
Step 6: Removing/Uninstalling the application
ClickOnce application does leave the application installation signature in the Control Panel > Programs and Feature > list as below:
You can uninstall the application just by double clicking the application above.
Comments
Anonymous
March 10, 2013
The comment has been removedAnonymous
November 25, 2013
If I deploy from a Cloud do I need en open port for application service oder is port 443 enough?Anonymous
April 09, 2015
This is fantastic -- thank you so, so much!Anonymous
July 30, 2015
VS 2013 removed this ability. It's also gone in 2015.Anonymous
August 07, 2015
I'm using VS2012 and the example worked great (however, the app does not seem to be installed on the local machine using the "No, this application is only available online" option). I would also be interested in how to get a valid digital signature. - Thanks!


