SCSM (System Center Service Manager) Custom Reports 101 with SQL Report Builder
Contrary to popular belief, you do not need to be a SQL DBA / developer / SSRS expert to produce some basic custom Service Manager Reports that may meet your needs better than those which are provided out of the box. I want to give a big HUGE shout out to my esteemed Microsoft PFE colleague Chris Howie who contributed heavily to this. Shout-outs also to the other System Center PFEs who I have included references from – Kevin Holman, Brian Barrington and Rob Davies.
Note, although we focus on Service Manager here, you can use this same approach for the other System Center products and there is a SCOM example further down in this blogpost.
If you find this helpful, any feedback in the comments would be greatly appreciated.
This blog is split into the following areas
1) Introduction to SCSM Reports – what your options are etc.
2) Terminology
3) Getting started with Report Builder
4) Scenario 1 – Use Report Builder to create a Basic Report with a Simple Incident Query
5) Scenario 2 – Add a Selectable parameter to Scenario 1
6) Scenario 3 – Use Report Builder to create an Advanced Report with many selectable parameters
7) General Query Guidance
8) More Examples
1) Introduction to SCSM Reports – what your options are etc
SCSM has 2 broad options out of the box:
a) SQL reporting Services (SSRS) Reports – These reports can either be executed via the SCSM console from the reporting pane, ran directly from the SSRS front-end web page (https://SSRSserver/reports) or scheduled to be emailed out / copied to a file share on a schedule via regular SSRS schedules / subscriptions that are configured on the SSRS web page. These reports query a data source that points to the DWDataMart which is the final destination where reporting historical data resides. SCSM provides some canned reports out of the box (as do some of our partners that have add-ins etc.) or custom reports can be created and made available here which is the focus of this blog post.
NOTE, Reports may look different when executing / ran from the SCSM Console / Report Builder and SSRS front-page, so be sure to test your report using the front-ends you intend to run it from.
b) SQL Analysis Services – SCSM provides cubes out of the box which are formed from the reporting warehouse. The easiest way to get at these is from the SCSM console in the Data Warehouse pane and then the cubes node. From there is an option to ‘Analyze cube in Excel’. I created a blogpost a long time ago that expands on that which is available here - https://blogs.technet.microsoft.com/antoni/2013/05/17/how-to-create-an-incident-dashboard-using-excel-in-system-center-2012-sp1-service-manager-scsm-2012/. There are other options for consuming these cubes such as Power BI and Power View.
2) Terminology
Here is an explanation of the terminology and acronyms we will use in this post
Dataset – The Query you use to retrieve a set of data. Each dataset specifies the fields from the data source that you plan to use in the report, and calculated fields that you can create. In addition to the query and field definitions, a dataset contains a pointer to the data source, query parameters, and data options that include character sensitivities including case, kana type, width, accent, and collation information. (from here)
RDL – Report Definition Language. This is the file format for a report
RPDL – Report Parameter Definition Language – This is the file format for the smart parameter header that may be used in the report
Smart Parameter Header – The header seen when you run a canned report, displaying the selectable parameters such as status, start date, end date etc.
SSRS – SQL Server Reporting Services
SSAS – SQL Server Analysis Services
Data Source – The Repository (database) from which report data is being queried and returned from. In the case of Service Manager, this is typically DWDataMart.
DWDataMart – The Data Warehouse Database where the data finally resides following completion of the ‘Load’ job (part of the ETL process)
ETL – Extract, Transform, Load – The jobs which synchronize data from the source CMDB. Brief descriptions of each below and more details here
EXTRACT - Grabs data from the ServiceManager CMDB and writes it into the DWStagingandConfig database in the same basic form as it is in the cmdb.
TRANSFORM - takes the raw data from the staging area and does any cleansing, reformatting, aggregation, etc. that is required to get it into the final format for reporting, and writes the transformed data into the DWRepository database.
LOAD - queries the transformed data from the DWRepository database and inserts into the DWDatamart database. The DWDatamart is the database used for all end-user reporting needs.
Dimension, Fact, Outrigger – The 3 main types of Table / View in the DWDataMart database
Outrigger – List values, for example - select * from IncidentClassificationvw
Dimension – Instances of a given Class, for example - select * from IncidentDimvw
Fact - Duration and relationships between dimensions and or outriggers, for example - Select * from WorkItemAffectedUserFactvw
3) Getting started with Report Builder
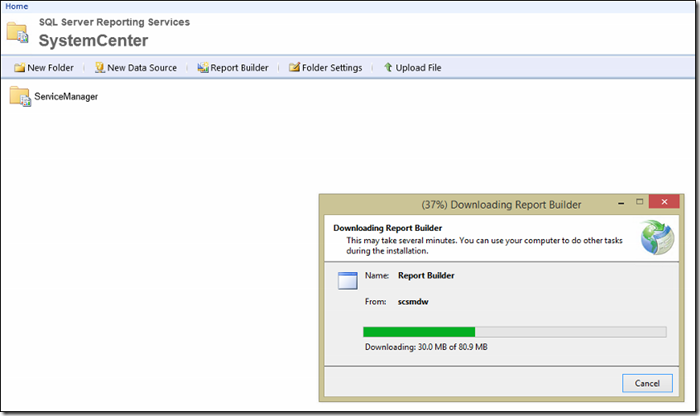
First off you need to get Report Builder. You can either grab it from this handy / dandy Microsoft download link - https://aka.ms/getreportbuilder3
Alternatively you can grab it from the SSRS reporting front page using the report builder button:
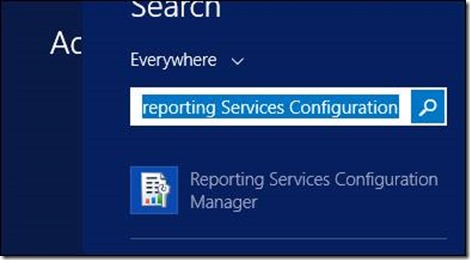
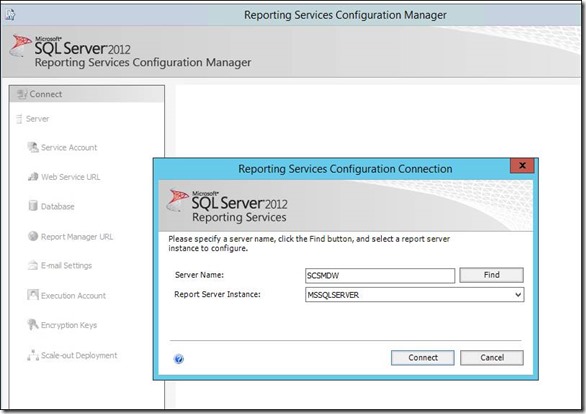
When you install or first launch report builder, you will be asked for the target report server which is the front-end SQL Reporting Server. If necessary, you can verify this by launching Reporting Services Configuration Manager on the SSRS Server:
Connect:
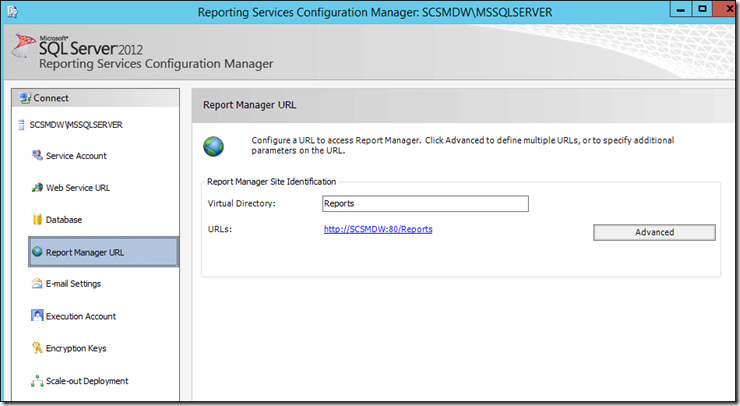
The front-end webpage to be configured will be displayed here in Report manager URL page of the Configuration manager:
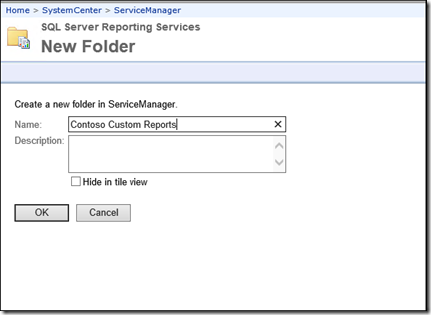
Next Off, you will likely want to create a folder to store your custom reports which you can also do from the SSRS front page using the New Folder button on the left hand side:
IMPORTANT NOTE: It is highly recommended to create a custom folder and store reports there rather than in one of the built-in folders like Incident Management, because if you ever unregister your service manager Data Warehouse from Service Manager, these folders will be deleted as part of that disconnection process and the resultant synchronization.
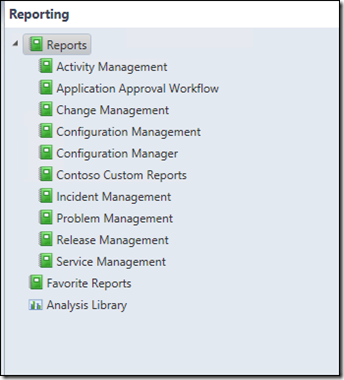
Shortly after the folder has been created, you should see the folder show up here in the SCSM console (you may need to right-click reports in the top left and / or refresh, and / or close re-open console)
OK, Now we’re all set to build some reports ![]()
4) Scenario 1 – Use Report Builder to create a Basic Report with a Simple Incident Query
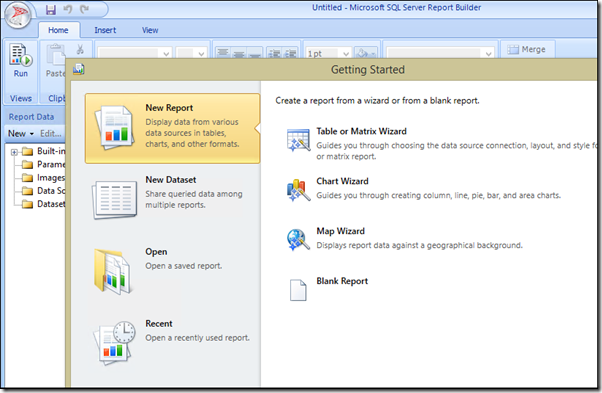
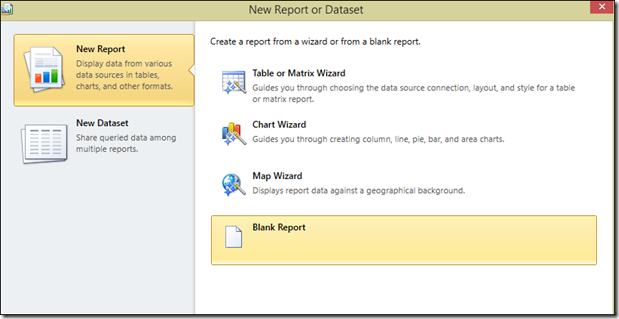
Open Report Builder and create a New Report using the Table or Matrix Wizard (or you can start with a blank report, which we will do in Scenario 3):
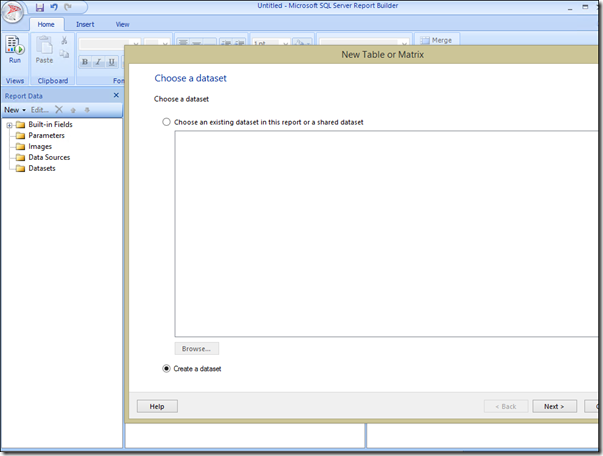
In the New Table or Matrix page, click ‘Create a dataset’ and click Next:
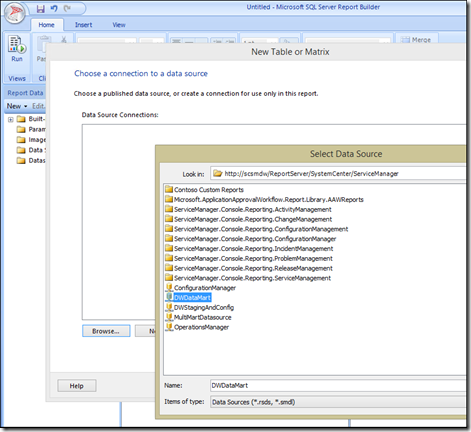
In choose a data source, Click Browse, and select your DWDataMart data source
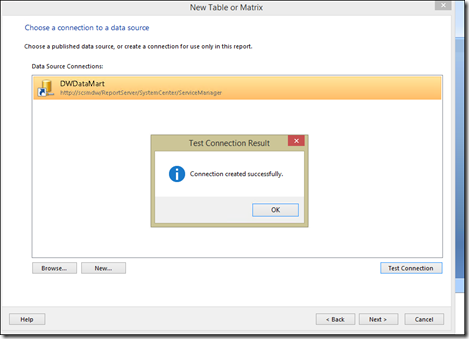
Test the Datasource:
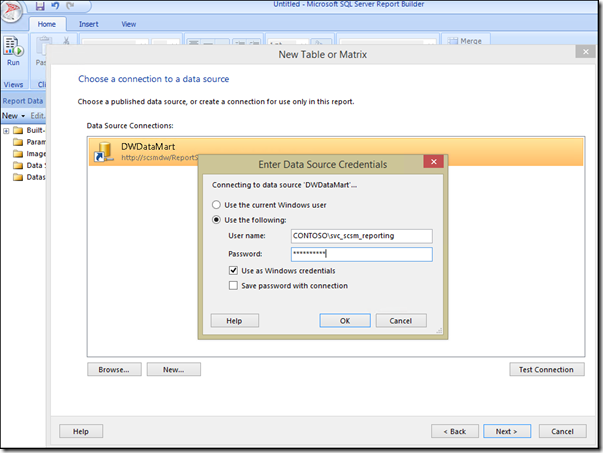
Hit next and enter credentials (these will just be used to validate your query etc – it is not the credentials the report will be ran against, as that is set in the datasource
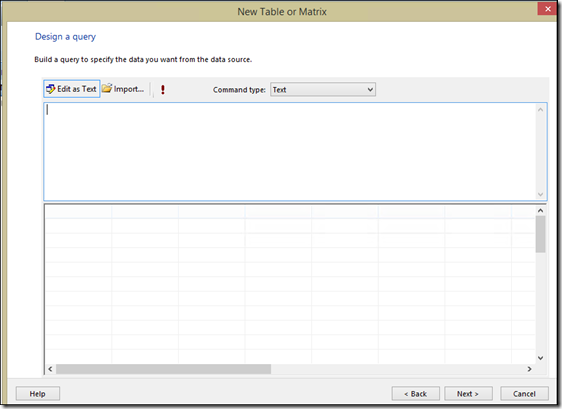
Click the ‘Edit as Text’ button, and paste in your query (See Queries and Examples section for more on that)
In this example, we will use this query:
Select INC.Id AS [Incident ID], INC.Title AS [IR Title], UserInfo.UserName AS [Assigned To User], INC.Classification, UserInfo2.UserName AS [Affected User], inc.Status, DATEADD(hh, DATEDIFF(hh, getutcdate(), getdate()), INC.CreatedDate) AS [Created Date] from IncidentDimvw INC
Left Outer Join WorkItemDim WI ON WI.EntityDimKey = INC.EntityDimKey
Left Outer Join WorkItemAssignedToUserFactvw AssignedToUser ON WI.WorkItemDimKey = AssignedToUser.WorkItemDimKey
Left Outer Join WorkItemAffectedUserFactvw AffectedUser ON WI.WorkItemDimKey = AffectedUser.WorkItemDimKey
Left Outer Join UserDim UserInfo ON UserInfo.UserDimKey = AssignedToUser.WorkItemAssignedToUser_UserDimKey
left outer join UserDim UserInfo2 ON UserInfo2.UserDimKey = AffectedUser.WorkItemAffectedUser_UserDimKey
where AssignedToUser.DeletedDate IS NULL and AffectedUser.DeletedDate IS NULL
and INC.CreatedDate < GetDate() and INC.CreatedDate > DateAdd(dd,-300,Getdate())
Below you see this pasted into the ‘Edit as Text’ section of the Query Designer:
Click the exclamation mark ‘execute’ button to test the query
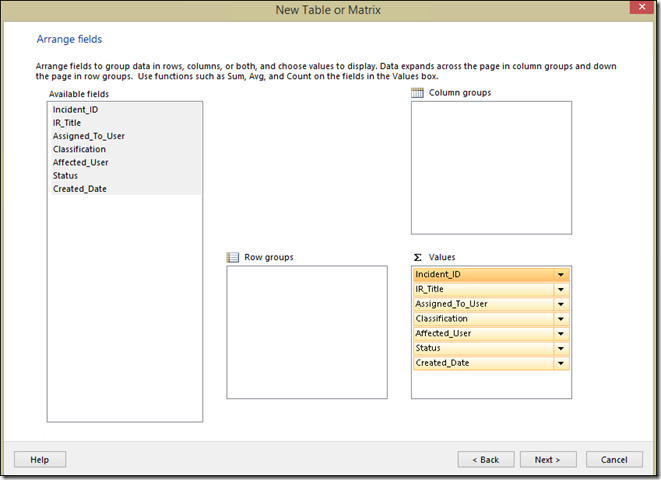
Then drag the Available fields (you can multi-select and drag) over to the Values box:
I just put all mine as values, but notice how you could group by row or columns:
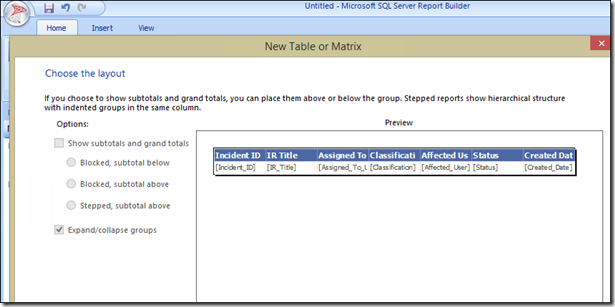
Configure layout as desired and click next:
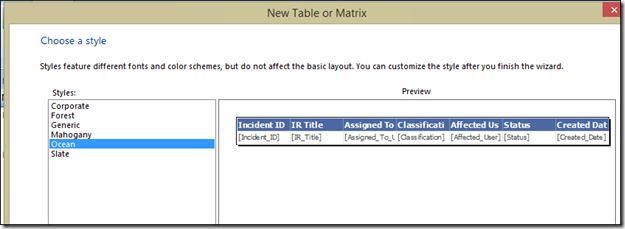
Choose a style and click Finish:
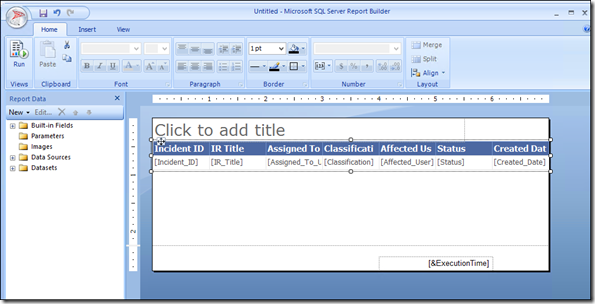
Should look like this:
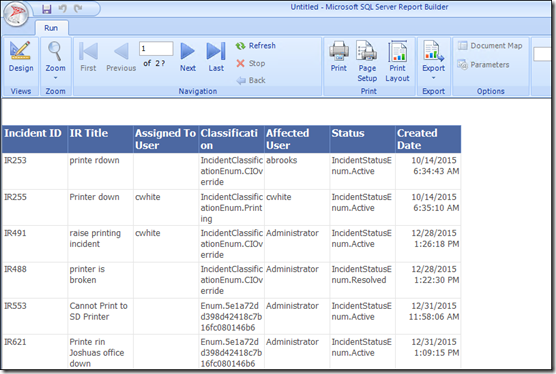
Click the ‘Run’ button in the top left to test
The output should look similar to this:
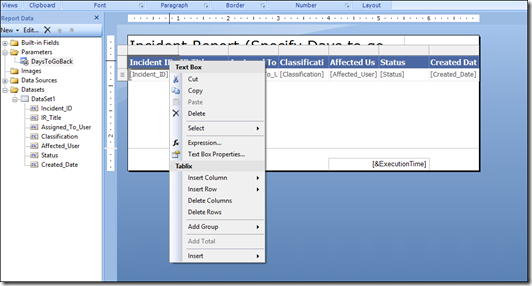
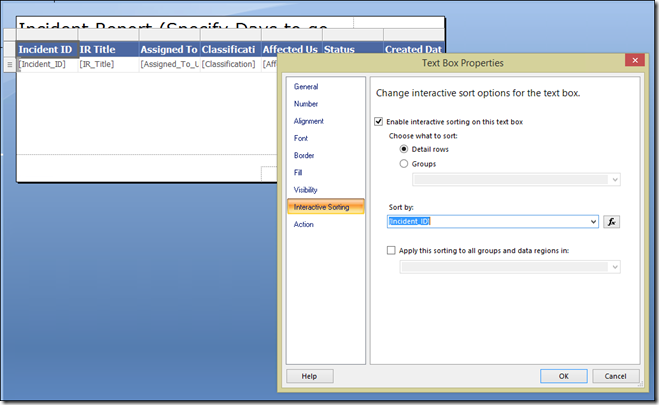
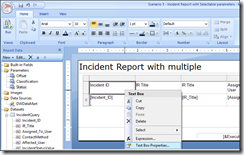
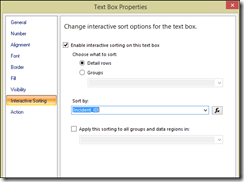
At this point you can add a title and make any other cosmetic changes to the report. One example might be to enable interactive sorting by right-clicking each column header, selecting text box properties, checking the box to enable interactive sorting and then choose the column you right-clicked in the ‘Sort by’ dropdown as shown below:
Repeat this for the other columns in your table you wish to enable sorting for.
From here, you can click the ‘orb’ in the top left and save directly to the SSRS web location, or you can save it locally and use the upload File button in the SSRS web page, to publish the report into the desired folder:
Once saved here, you should be able to view and run the respective report from the Service Manager console.
5) Scenario 2 – Add a Selectable parameter to Scenario 1
Next we will take the previous report created in Scenario 1 and add a parameter so that the offset (how many days the report goes back) can be specified at execution time, and is not hard coded to go back 300 days:
Open up Report builder and the RDL file that you saved in Scenario 1
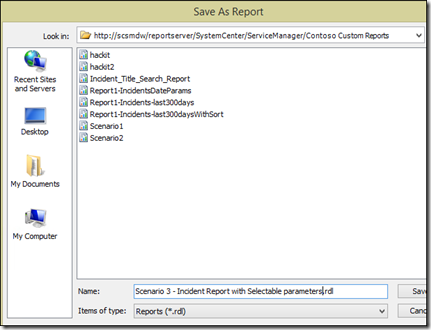
I like to immediately ‘Save As’ before I start modification, so I’m working on a new version rather than changing my previous one.
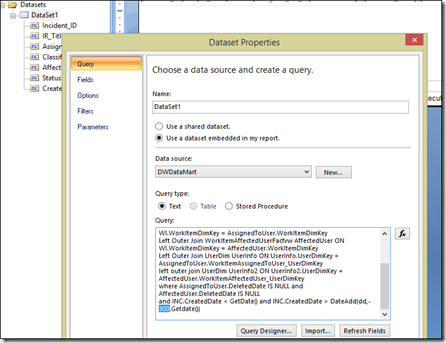
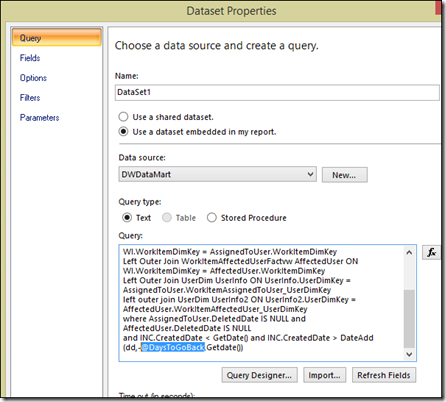
Go into the dataset Properties and the ‘Query’ page:
Change the value you wish to make selectable to a parameter using the @Parameter notation.
For example in this scenario, we change ‘300’ to <‘@DaysToGoBack’>
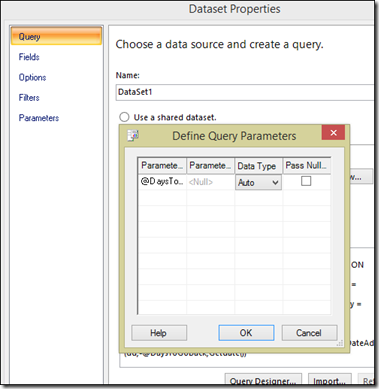
Click the ‘Refresh Fields’ button
Where it says <null> insert an example value such as 300 and click OK in the Dataset Query Properties dialog
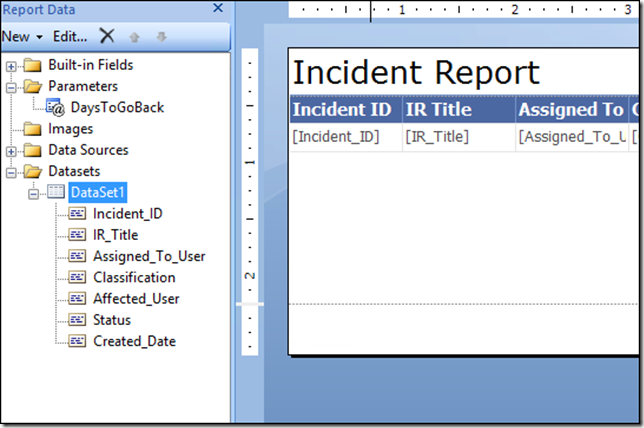
Then click OK in the dataset Properties.The parameter will appear in the navigation tree on the left hand side:
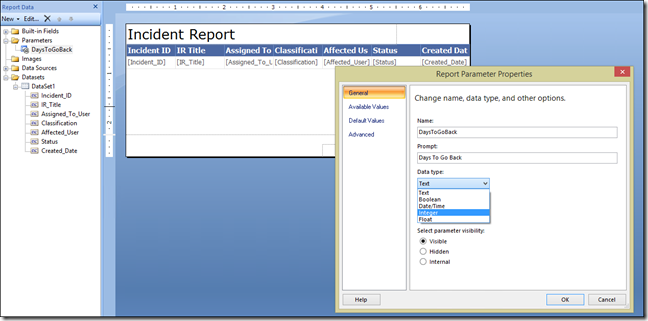
NOTE: Report builder will automatically set parameters to be ‘Text’ so in this case we need to change it to an integer, which is done by right-clicking the parameter name, and clicking Properties:
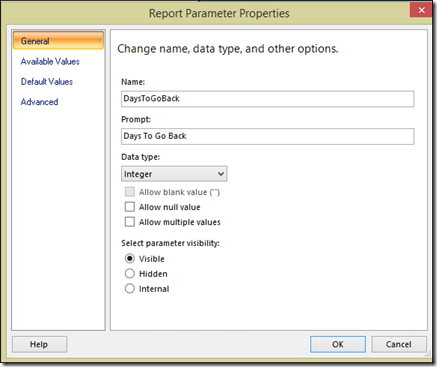
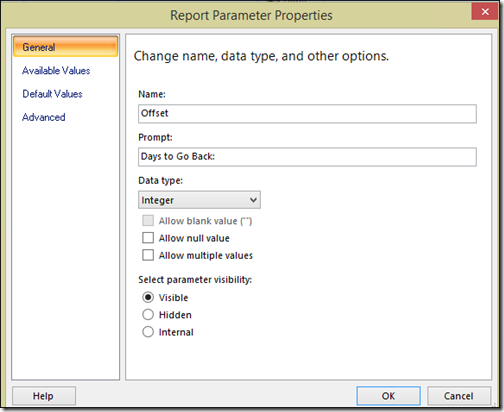
In the Report parameter properties we will change this one to integer. The prompt has also been modified (spaces added) to make the display label more friendly:
Save the report.
Click OK and then ‘Run’.
Now you will see a parameter to enter
Enter a value and click the ‘View Report’ button on the right hand side:
6) Scenario 3 – Use Report Builder to create an Advanced Report (using the blank report option) with many selectable parameters
In this scenario, we will start with a query, and then create the report from the blank report wizard.
We will ultimately use these 3 queries for the report datasets, which have some explanation on how they are formed in the next section:
QUERY / DATASET 1 (Incident)
Select INC.Id AS [Incident ID], INC.Title AS [IR Title], AssignedUserInfo.DisplayName AS [Assigned To User], INC.ContactMethod, AffectedUserInfo.DisplayName AS [Affected User], incstatus.IncidentStatusValue, incclass.IncidentClassificationValue, DATEADD(hh, DATEDIFF(hh, getutcdate(), getdate()), INC.CreatedDate) AS [Created Date]
from IncidentDimvw INC
Left Outer Join WorkItemDim WI ON WI.EntityDimKey = INC.EntityDimKey
Left Outer Join WorkItemAssignedToUserFactvw AssignedToUser ON WI.WorkItemDimKey = AssignedToUser.WorkItemDimKey
Left Outer Join WorkItemAffectedUserFactvw AffectedUser ON WI.WorkItemDimKey = AffectedUser.WorkItemDimKey
Left Outer Join UserDim AssignedUserInfo ON AssignedUserInfo.UserDimKey = AssignedToUser.WorkItemAssignedToUser_UserDimKey
left outer join UserDim AffectedUserInfo ON AffectedUserInfo.UserDimKey = AffectedUser.WorkItemAffectedUser_UserDimKey
Join IncidentStatusvw INCSTATUS ON Inc.Status = INCSTATUS.ID
Join IncidentClassificationvw INCCLASS ON Inc.Classification = INCCLASS.ID
where AssignedToUser.DeletedDate IS NULL and AffectedUser.DeletedDate IS NULL
--and INC.CreatedDate < @EndDate and INC.CreatedDate > @BeginDate
and INC.CreatedDate < GetDate() and INC.CreatedDate > DateAdd(dd,-@Offset,Getdate())
and incclass.IncidentClassificationValue IN (@Classification)
and INCStatus.IncidentStatusValue IN (@Status)
QUERY / DATASET 2 (Incident Classification)
select ID, IncidentClassificationValue from IncidentClassificationvw
QUERY / DATASET 3 (incident Status)
select ID, IncidentStatusValue from IncidentStatusvw
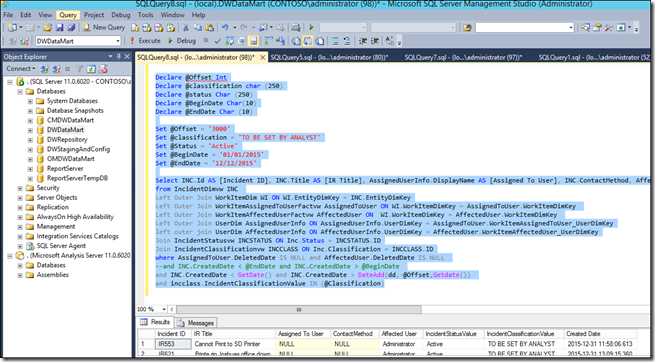
To test queries in SQL Management Studio where parameters are used, declare and set the variables in order to successfully test the query in SQL Management Studio. Note the added “Declare’ and ‘Set’ statements below for testing (these are variables we will ultimately prompt for when the report is ran):
This is the complete query text highlighted above which can be tested in SQL Management Studio:
NOTE: You may need to change the SET statements below to reflect valid values in your environment.
Declare @Offset Int
Declare @classification char (250)
Declare @status Char (250)
Declare @BeginDate Char(10)
Declare @EndDate Char (10)
Set @Offset = '3000'
Set @classification = 'TO BE SET BY ANALYST'
Set @Status = 'Active'
Set @BeginDate = '01/01/2015'
Set @EndDate = '12/12/2015'
Select INC.Id AS [Incident ID], INC.Title AS [IR Title], AssignedUserInfo.DisplayName AS [Assigned To User], INC.ContactMethod, AffectedUserInfo.DisplayName AS [Affected User], incstatus.IncidentStatusValue, incclass.IncidentClassificationValue, DATEADD(hh, DATEDIFF(hh, getutcdate(), getdate()), INC.CreatedDate) AS [Created Date]
from IncidentDimvw INC
Left Outer Join WorkItemDim WI ON WI.EntityDimKey = INC.EntityDimKey
Left Outer Join WorkItemAssignedToUserFactvw AssignedToUser ON WI.WorkItemDimKey = AssignedToUser.WorkItemDimKey
Left Outer Join WorkItemAffectedUserFactvw AffectedUser ON WI.WorkItemDimKey = AffectedUser.WorkItemDimKey
Left Outer Join UserDim AssignedUserInfo ON AssignedUserInfo.UserDimKey = AssignedToUser.WorkItemAssignedToUser_UserDimKey
left outer join UserDim AffectedUserInfo ON AffectedUserInfo.UserDimKey = AffectedUser.WorkItemAffectedUser_UserDimKey
Join IncidentStatusvw INCSTATUS ON Inc.Status = INCSTATUS.ID
Join IncidentClassificationvw INCCLASS ON Inc.Classification = INCCLASS.ID
where AssignedToUser.DeletedDate IS NULL and AffectedUser.DeletedDate IS NULL
--and INC.CreatedDate < @EndDate and INC.CreatedDate > @BeginDate
and INC.CreatedDate < GetDate() and INC.CreatedDate > DateAdd(dd,-@Offset,Getdate())
and incclass.IncidentClassificationValue IN (@Classification)
and INCStatus.IncidentStatusValue IN (@Status)
NOTE: Choose to query on date either using begindate and endate OR @offset (go back 30 days etc) by commenting out the unwanted criteria line with a double hyphen as shown here:
--and INC.CreatedDate < @EndDate and INC.CreatedDate > @BeginDate
and INC.CreatedDate < GetDate() and INC.CreatedDate > DateAdd(dd,-@Offset,Getdate())
6.1) Create the new report
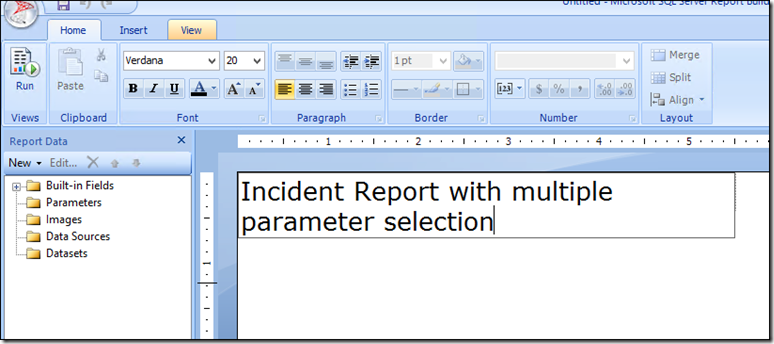
Open Report Builder and create a new report using the blank report option:
6.2) Give the report a title:
6.3) Add Data Source
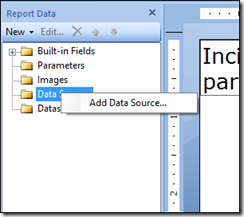
In the navigation tree on the left, Right-click ‘Data Sources’ and Click to Add Data Source:
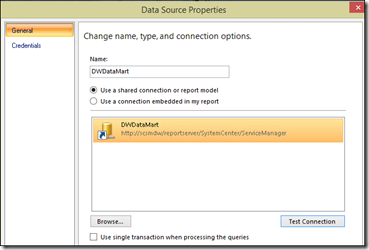
Rename to DWDataMart, and select and Test the DWDataMart connection:
NOTE, if it does not show below, use the Browse button to connect to the DWDataMart Source that will be available in the ServiceManager folder on your SSRS server as shown in the URL in the screenshot below:
6.4) Add Datasets
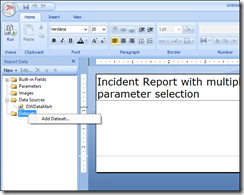
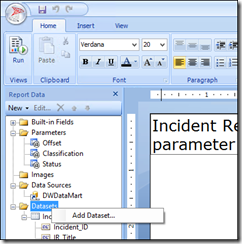
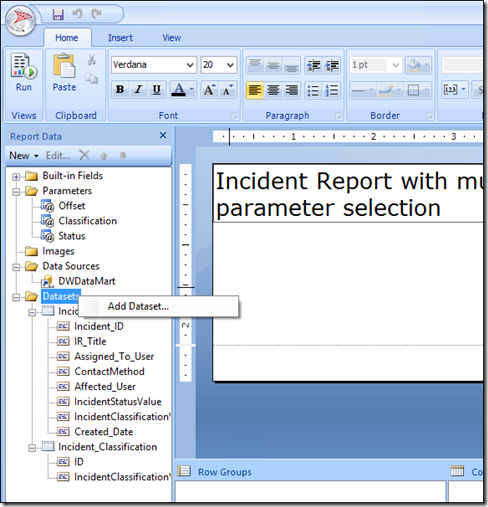
In the navigation tree on the left, Right-click ‘Datasets’ and Click to Add Dataset:
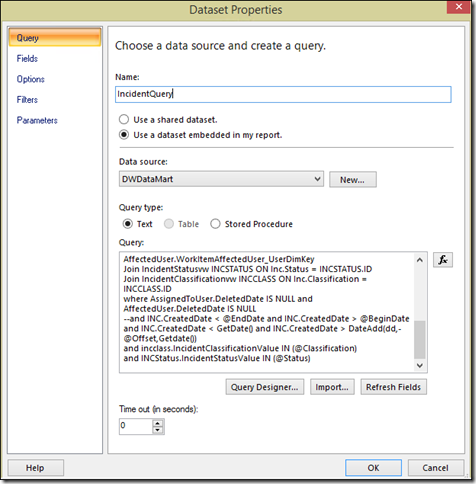
In the Dataset Properties, Change Dataset 1 to a name such as IncidentQuery (no spaces or special characters here) Select the ‘Use a dataset embedded option’, select your DWDataMart Data Source, Choose query type ‘Text’, paste in the main report query, and then click the refresh fields button.
This is the pasted text shown above:
Select INC.Id AS [Incident ID], INC.Title AS [IR Title], AssignedUserInfo.DisplayName AS [Assigned To User], INC.ContactMethod, AffectedUserInfo.DisplayName AS [Affected User], incstatus.IncidentStatusValue, incclass.IncidentClassificationValue, DATEADD(hh, DATEDIFF(hh, getutcdate(), getdate()), Inc.CreatedDate) AS [Created Date]
from IncidentDimvw INC
Left Outer Join WorkItemDim WI ON WI.EntityDimKey = INC.EntityDimKey
Left Outer Join WorkItemAssignedToUserFactvw AssignedToUser ON WI.WorkItemDimKey = AssignedToUser.WorkItemDimKey
Left Outer Join WorkItemAffectedUserFactvw AffectedUser ON WI.WorkItemDimKey = AffectedUser.WorkItemDimKey
Left Outer Join UserDim AssignedUserInfo ON AssignedUserInfo.UserDimKey = AssignedToUser.WorkItemAssignedToUser_UserDimKey
left outer join UserDim AffectedUserInfo ON AffectedUserInfo.UserDimKey = AffectedUser.WorkItemAffectedUser_UserDimKey
Join IncidentStatusvw INCSTATUS ON Inc.Status = INCSTATUS.ID
Join IncidentClassificationvw INCCLASS ON Inc.Classification = INCCLASS.ID
where AssignedToUser.DeletedDate IS NULL and AffectedUser.DeletedDate IS NULL
--and INC.CreatedDate < @EndDate and INC.CreatedDate > @BeginDate
and INC.CreatedDate < GetDate() and INC.CreatedDate > DateAdd(dd,-@Offset,Getdate())
and incclass.IncidentClassificationValue IN (@Classification)
and INCStatus.IncidentStatusValue IN (@Status)
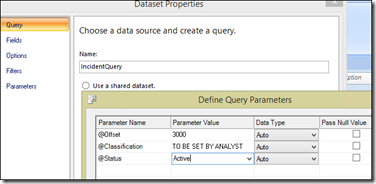
Click the Refresh Fields button, and type a sample value in each of the parameter field values, and click ok
NOTE: Running the 2 queries below in SQL Management Studio (ran against DWDataMart) will show available values for incident classification and status
select ID, IncidentClassificationValue from IncidentClassificationvw
select ID, IncidentStatusValue from IncidentStatusvw
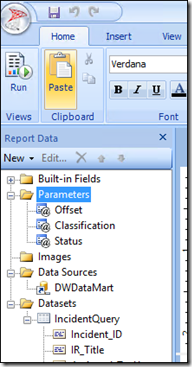
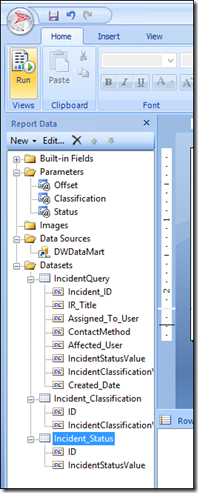
Click OK in the dataset properties and you will notice the 3 parameters appear on the left in the navigation tree:
In the navigation tree on the left, Right-click ‘Datasets’, and Click to Add Dataset:
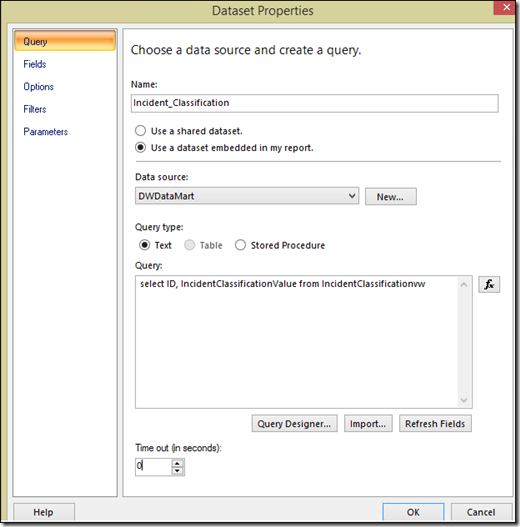
Configure the Dataset properties as shown below and click OK
NOTE query used is as follows
select ID, IncidentClassificationValue from IncidentClassificationvw
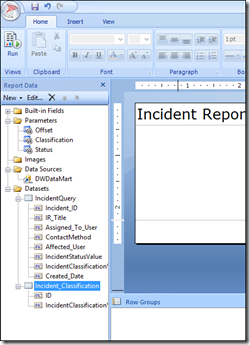
Your new dataset should appear in the navigation tree on the left:
In the navigation tree on the left, Right-click ‘Datasets’ and Click to Add Dataset:
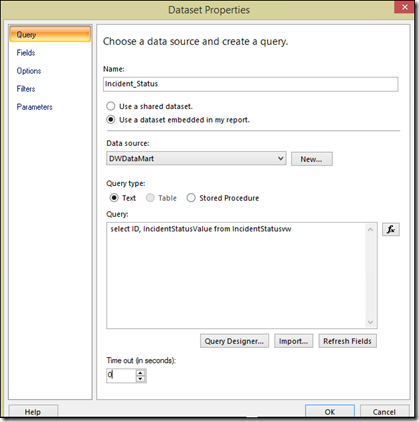
Configure the Incident Status Dataset properties as shown below and click OK
NOTE query used is as follows
select ID, IncidentStatusValue from IncidentStatusvw
Your new dataset should appear in the navigation tree on the left:
6.5) Configure Parameters:
In Parameters (Navigation tree on the left), Right click offset and change Data type from text to integer. You may also wish to change Prompt to something more self-explanatory for the user running the report:
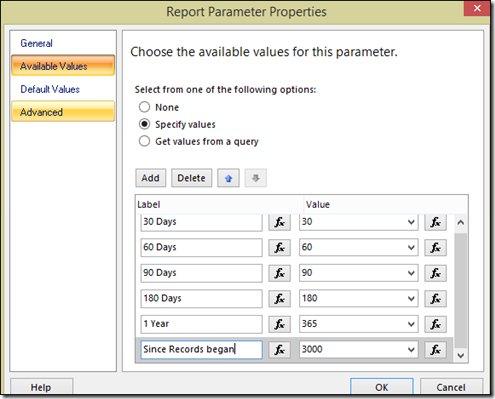
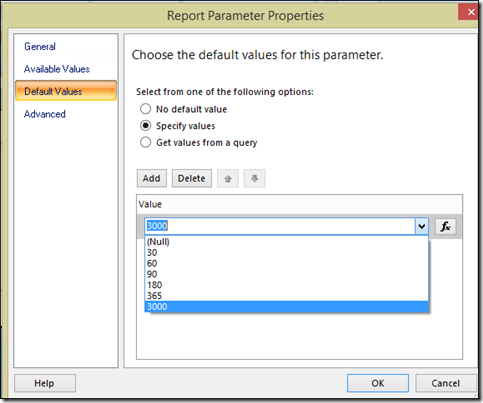
You may also wish to enter Available Values and / or Default Values in the appropriate pages:
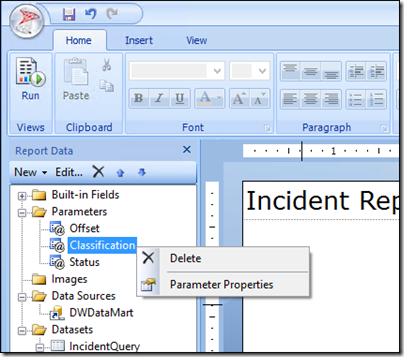
Right-Click on the Classification Parameter and open the Parameter properties:
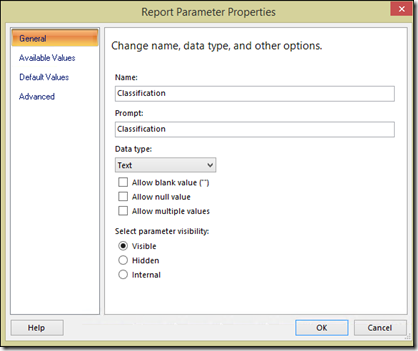
Leave the defaults in the General page, and click on the Available values page:
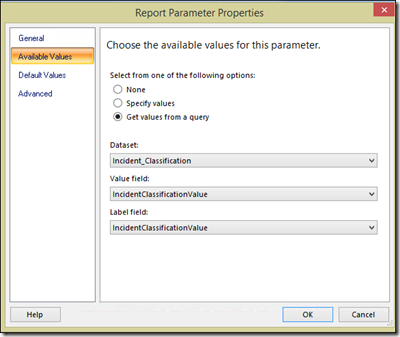
Configure the ‘Get Values from a query’ option and choose the dataset that returns the values you want to be available for this parameter:
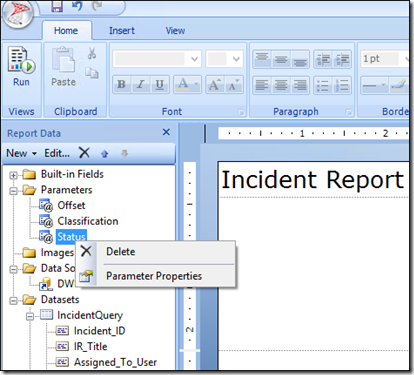
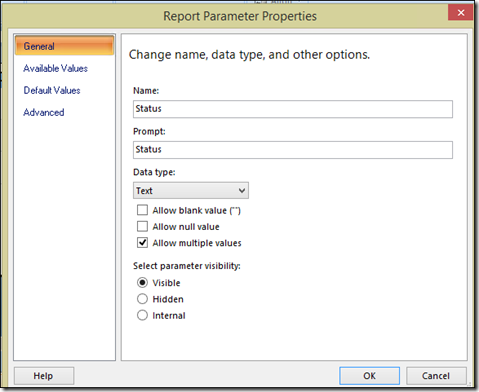
Right-Click on the Status Parameter and open the Parameter properties:
In the General page, we will allow multiple values to be selected by checking the appropriate checkbox:
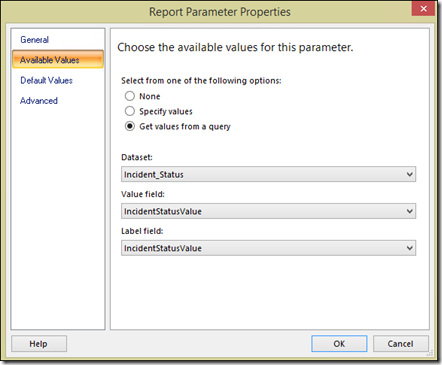
On the Available values page, Configure the ‘Get Values from a query’ option and choose the dataset that returns the values you want to be available for this parameter:
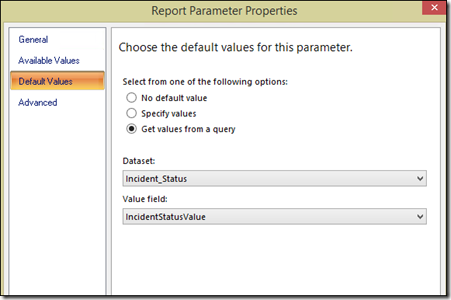
NOTE, if you wanted all values to be selected by default, you can set up the default values as follows:
Click OK in the Report Parameters.
6.6) Save your report
6.7) Configure your report Layout
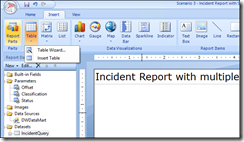
1) Click Insert Table
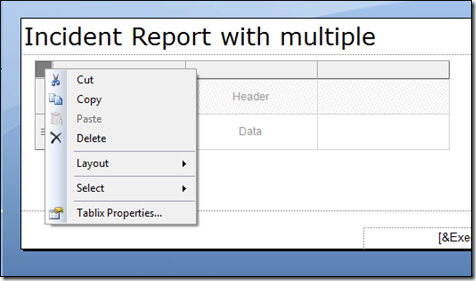
2) Right-click the top left corner of the table and choose tablix properties:
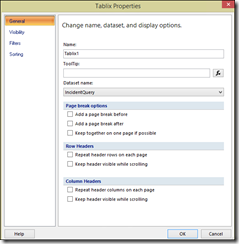
3) Choose your main dataset and click ok:
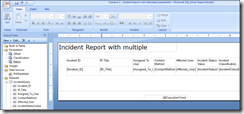
4) Back in the layout view, drag the desired fields into columns:
NOTE: if you drag to the far right, it will create a new column for additional fields.
5) Enable sorting for the columns you wish interactive sorting to be available by clicking text box properties and then configuring the interactive sorting page as shown below.
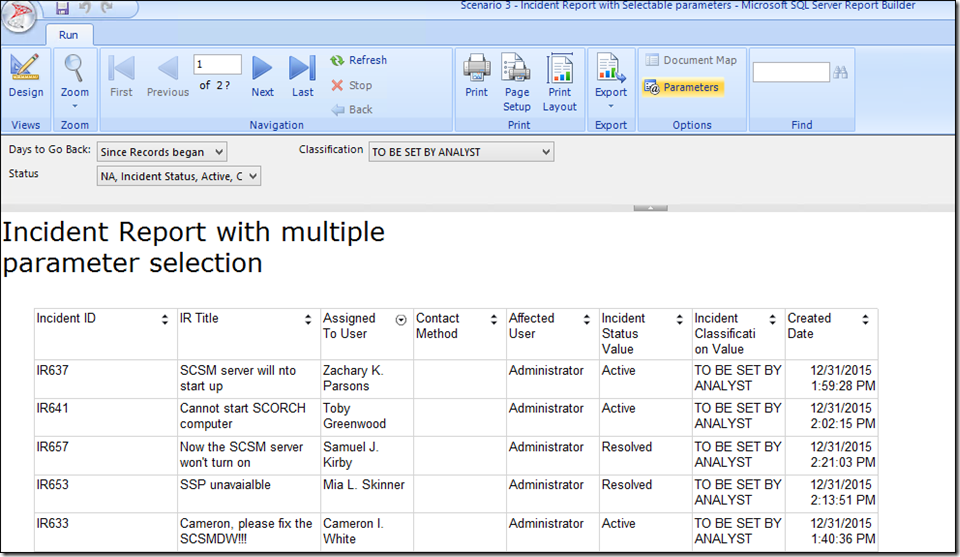
6) Click the Run button to test your report:
Select values in the parameters and then click the View Report Button on the right:
7) General Query Guidance
Use Views where possible as unlike tables, these are less likely to change between product versions
Use Outriggers to get the display names rather than the displaystringdimvw where possible (where outriggers exist) as querying the displaystringdimvw makes the query much (around 14 times in general) more expensive than if we’d used an outrigger.
INC is an alias that we declare for IncidentDimvw when we first reference that view - from IncidentDimvw INC (end of first line in example query below)
The values in [square brackets] become the column headers, so instead of just ‘Id’ for example, you will see ‘Incident ID’
We use Left Outer Joins which includes all the Work Items in the dimension, even ones that do not have an associated record in the table we are joining to. So for example by left outer joining incidentdimvw to the WorkItemAssignedToUserFactvw (the table that associated incidents with Assigned users) we will still retain incidents in the results that do not have an assigned to user. Conversely, if this was a right outer join, you would see all assigned to users including ones that do not have a related incident.
The DateAdd is to convert the createdDate from UTC (how it is stored in the DB) to the local timezone (We can also minus 8 hours off the UTC value to convert to Pacific Time.
Most tables / views are connected via a fact table / view which uses a key from each table to connect two other tables together.For example the WorkItemAffectedUserFactvw connects WorkItem to UserDim
Note for the Assigned and Affected User, two joins are required. The first one gets the assigned / affected user related to the incident (from WorkItemAssignedToUSerFactvw or WorkItemAffectedUserFactvw) and then the second join is required to the userdim table (alias is userinfo) from which we get the user’s display name:
where AssignedToUser.DeletedDate IS NULL and AffectedUser.DeletedDate IS NULL
Example Query 1 - Query Used in Scenario 1
Select INC.Id AS [Incident ID] , INC.Title AS [IR Title], UserInfo.UserName AS [Assigned To User] , INC.Classification, UserInfo2.UserName AS [Affected User], inc.Status, DATEADD(hh, DATEDIFF(hh, getutcdate(), getdate()), DateTime) AS [Created Date] from IncidentDimvw
INC Left Outer Join WorkItemDim WI ON WI.EntityDimKey = INC.EntityDimKey
Left Outer Join WorkItemAssignedToUserFactvw AssignedToUser ON WI.WorkItemDimKey = AssignedToUser.WorkItemDimKey
Left Outer Join WorkItemAffectedUserFactvw AffectedUser ON WI.WorkItemDimKey = AffectedUser.WorkItemDimKey
Left Outer Join UserDim UserInfo ON UserInfo.UserDimKey = AssignedToUser.WorkItemAssignedToUser_UserDimKey
left outer join UserDim UserInfo2 ON UserInfo2.UserDimKey = AffectedUser.WorkItemAffectedUser_UserDimKey
INC is an alias that we declare for IncidentDimvw when we first reference that view - from IncidentDimvw INC
Another way of converting UTC to local time (assuming 8 hours ahead of UTC) is as follows:
DateAdd(hh,-8,INC.CreatedDate)
Info on Joins:
--Joins
DATA USED FOR EXPLAINING JOINS:
select * from incidentdim inc
--returns 103
select * from IncidentClassification class
--returns 30
select * from incidentdim inc where Classification_IncidentClassificationId is null
--returns 4
select * from incidentdim inc where Classification_IncidentClassificationId is NOT null
--returns 99
LEFT JOIN / LEFT OUTER JOIN (same in SQL) – Keep everything to the left (Incidents)
select * from incidentdim inc
left join IncidentClassification class on inc.Classification = class.ID
--returns 103 - KEEPS ALL INCIDENTS (LEFT JOIN) INCLUDING THOSER WITH NO CLASSIFICATION CATEGORY SET
RIGHT JOIN – Keep everything to the right (incident classification)
select * from incidentdim inc
right join IncidentClassification class on inc.Classification = class.ID
--returns 115 - KEEPS ALL CLASSIFICATION CATEGORIES (RIGHT JOIN) INCLUDING THOSE THAT HAVE NO INCIDENTS
INNER JOIN – Keep only matches (gets rid of any nulls)
select * from incidentdim inc
inner join IncidentClassification class on inc.Classification = class.ID
--returns 99 - DROPS INCIDENTS THAT DO NOT HAVE A CLASSIFICATION CATEGORY SET
FULL OUTER JOIN (keeps everything)
select * from incidentdim inc
full outer join IncidentClassification class on inc.Classification = class.ID
--returns 119 INCLUDES INCIDENTS THAT HAVE NO CLASSIFIFCATION CATEGORY AND CLASSIFICATION CATEGORIES THAT HAVE NO INCIDENTS
ADDITIONAL FUNCTIONS AND JOINS (big thanks to Chris Howie for this)
-- Some OOB Functions
Max()
Count()
DateAdd()
DateDiff()
Coalesce()
Replace()
GROUP BY
ORDER BY
BETWEEN @Val and @Val2
IN(@vals)
--Max()
select Max(INC.ID) AS [Max ID], AffectedInfo.DisplayName from IncidentDimvw INC
INNER JOIN WorkItemDimvw WI on INC.EntityDimKey = WI.EntityDimKey
LEFT JOIN WorkItemAffectedUserFactvw AffectedFact ON WI.WorkItemDimKey = AffectedFact.WorkItemDimKey
LEFT JOIN UserDimvw AffectedInfo ON AffectedFact.WorkItemAffectedUser_UserDimKey = AffectedInfo.UserDimKey
GROUP BY AffectedInfo.DisplayName
ORDER BY AffectedInfo.DisplayName DESC
--Count()
select Count(INC.ID) AS [ID Count], AffectedInfo.DisplayName from IncidentDimvw INC
INNER JOIN WorkItemDimvw WI on INC.EntityDimKey = WI.EntityDimKey
LEFT JOIN WorkItemAffectedUserFactvw AffectedFact ON WI.WorkItemDimKey = AffectedFact.WorkItemDimKey
LEFT JOIN UserDimvw AffectedInfo ON AffectedFact.WorkItemAffectedUser_UserDimKey = AffectedInfo.UserDimKey
GROUP BY AffectedInfo.DisplayName
ORDER BY AffectedInfo.DisplayName DESC
--Count() + BETWEEEN
select Count(INC.ID) AS [Count ID], AffectedInfo.DisplayName from IncidentDimvw INC
INNER JOIN WorkItemDimvw WI on INC.EntityDimKey = WI.EntityDimKey
LEFT JOIN WorkItemAffectedUserFactvw AffectedFact ON WI.WorkItemDimKey = AffectedFact.WorkItemDimKey
LEFT JOIN UserDimvw AffectedInfo ON AffectedFact.WorkItemAffectedUser_UserDimKey = AffectedInfo.UserDimKey
Where INC.CreatedDate BETWEEN '01/01/2015' and '12/01/2016'
GROUP BY AffectedInfo.DisplayName
ORDER BY AffectedInfo.DisplayName DESC
--Count() + BETWEEN + Coalesce
select Count(INC.ID) AS [Count ID], Coalesce(AffectedInfo.DisplayName,'Undefined') AS [Affected User] from IncidentDimvw INC
INNER JOIN WorkItemDimvw WI on INC.EntityDimKey = WI.EntityDimKey
LEFT JOIN WorkItemAffectedUserFactvw AffectedFact ON WI.WorkItemDimKey = AffectedFact.WorkItemDimKey
LEFT JOIN UserDimvw AffectedInfo ON AffectedFact.WorkItemAffectedUser_UserDimKey = AffectedInfo.UserDimKey
Where INC.CreatedDate BETWEEN '01/01/2001' and '12/01/2016'
GROUP BY AffectedInfo.DisplayName
ORDER BY AffectedInfo.DisplayName DESC
--Count() + BETWEEN + Coalesce + Replace
select Count(INC.ID) AS [Count ID], Coalesce(Replace(AffectedInfo.DisplayName,'Test', 'Replaced'),'Undefined') AS [Affected User] from IncidentDimvw INC
INNER JOIN WorkItemDimvw WI on INC.EntityDimKey = WI.EntityDimKey
LEFT JOIN WorkItemAffectedUserFactvw AffectedFact ON WI.WorkItemDimKey = AffectedFact.WorkItemDimKey
LEFT JOIN UserDimvw AffectedInfo ON AffectedFact.WorkItemAffectedUser_UserDimKey = AffectedInfo.UserDimKey
Where INC.CreatedDate BETWEEN '01/01/2001' and '12/01/2016'
GROUP BY AffectedInfo.DisplayName
ORDER BY AffectedInfo.DisplayName DESC
--BETWEEN + Coalesce + Replace + DateDiff
select INC.ID, DateDiff(hh,INC.CreatedDate,INC.ResolvedDate) AS [Time to Resolution in Hours], Coalesce(Replace(AffectedInfo.DisplayName,'Test', 'Replaced'),'Undefined') AS [Affected User] from IncidentDimvw INC
INNER JOIN WorkItemDimvw WI on INC.EntityDimKey = WI.EntityDimKey
LEFT JOIN WorkItemAffectedUserFactvw AffectedFact ON WI.WorkItemDimKey = AffectedFact.WorkItemDimKey
LEFT JOIN UserDimvw AffectedInfo ON AffectedFact.WorkItemAffectedUser_UserDimKey = AffectedInfo.UserDimKey
Where INC.CreatedDate BETWEEN '01/01/2001' and '12/01/2016'
ORDER BY AffectedInfo.DisplayName DESC
8) More Example Queries
Scenario 3 queries from this blog post
Select INC.Id AS [Incident ID], INC.Title AS [IR Title], AssignedUserInfo.DisplayName AS [Assigned To User], INC.ContactMethod, AffectedUserInfo.DisplayName AS [Affected User], incstatus.IncidentStatusValue, incclass.IncidentClassificationValue, DATEADD(hh, DATEDIFF(hh, getutcdate(), getdate()), INC.CreatedDate) AS [Created Date]
from IncidentDimvw INC
Left Outer Join WorkItemDim WI ON WI.EntityDimKey = INC.EntityDimKey
Left Outer Join WorkItemAssignedToUserFactvw AssignedToUser ON WI.WorkItemDimKey = AssignedToUser.WorkItemDimKey
Left Outer Join WorkItemAffectedUserFactvw AffectedUser ON WI.WorkItemDimKey = AffectedUser.WorkItemDimKey
Left Outer Join UserDim AssignedUserInfo ON AssignedUserInfo.UserDimKey = AssignedToUser.WorkItemAssignedToUser_UserDimKey
left outer join UserDim AffectedUserInfo ON AffectedUserInfo.UserDimKey = AffectedUser.WorkItemAffectedUser_UserDimKey
Join IncidentStatusvw INCSTATUS ON Inc.Status = INCSTATUS.ID
Join IncidentClassificationvw INCCLASS ON Inc.Classification = INCCLASS.ID
where AssignedToUser.DeletedDate IS NULL and AffectedUser.DeletedDate IS NULL
--and INC.CreatedDate < @EndDate and INC.CreatedDate > @BeginDate
and INC.CreatedDate < GetDate() and INC.CreatedDate > DateAdd(dd,-@Offset,Getdate())
and incclass.IncidentClassificationValue IN (@Classification)
and INCStatus.IncidentStatusValue IN (@Status)
select ID, IncidentClassificationValue from IncidentClassificationvw
select ID, IncidentStatusValue from IncidentStatusvw
INCIDENT TITLE SEARCH
INCIDENT TITLE SEARCH – INCIDENT DATASET:
select Incident.ID, INCStatus.IncidentStatusValue AS [Status], dateadd(hour,-8,Incident.ResolvedDate) AS [Resolved Date], DATEADD(hh, DATEDIFF(hh, getutcdate(), getdate()), incident.CreatedDate) as [Created Date],AffectedUserInfo.DisplayName AS [Affected User],Coalesce(AssignedToInfo.DisplayName, 'Unassigned') AS [Assigned To User],Incident.Title, IncidentQueue.IncidentTierQueuesValue AS [Support Group]
from IncidentDimvw Incident
left outer join IncidentTierQueuesvw IncidentQueue ON IncidentQueue.IncidentTierQueuesId = Incident.TierQueue_IncidentTierQueuesId
left outer join IncidentStatusvw INCStatus ON INCStatus.IncidentStatusId = Incident.Status_IncidentStatusId
inner join WorkItemDimvw WI ON WI.EntityDimKey = Incident.EntityDimKey
left outer join WorkItemAffectedUserFactvw AffectedUserFact ON AffectedUserFact.WorkItemDimKey = WI.WorkItemDimKey
left outer join UserDimvw AffectedUserInfo ON AffectedUserInfo.UserDimKey = AffectedUserFact.WorkItemAffectedUser_UserDimKey
left outer join WorkItemAssignedToUserFactvw AssignedUserFact ON AssignedUserFact.WorkItemDimKey = WI.WorkItemDimKey
left outer join UserDimvw AssignedToInfo ON AssignedToInfo.UserDimKey = AssignedUSerFact.WorkItemAssignedToUser_UserDimKey
Where
Incident.CreatedDate > @BeginDate and
Incident.CreatedDate < @EndDate and
INCStatus.IncidentStatusValue IN (@Status) and
AssignedToInfo.UserDimKey IN (@AssignedToUser) and
IncidentQueue.IncidentTierQueuesValue IN (@SupportGroup) and
incident.Title like '%' + @Title + '%'
order by ID DESC
INCIDENT TITLE SEARCH – SUPPORT GROUP DATASET:
select IncidentTierQueuesValue AS [Support Group] from IncidentTierQueuesvw
where IncidentTierQueuesValue NOT IN ('NA', 'Incident Tier Queue')
order by IncidentTierQueuesValue asc
INCIDENT TITLE SEARCH – STATUS DATASET:
select ID, IncidentStatusValue from IncidentStatusvw
INCIDENT TITLE SEARCH – ASSIGNED TO USER DATASET:
select DISTINCT affected.WorkItemAssignedToUser_UserDimKey, info.DisplayName from WorkItemAssignedToUserFactvw affected
left outer join userdimvw info ON info.UserDimKey = affected.WorkItemAssignedToUser_UserDimKey
inner join WorkItemDimvw WI ON affected.WorkItemDimKey = WI.WorkItemDimKey
where WI.id like '%IR%'
order by DisplayName asc
INICIDENTS BY ANALYST
select Incident.ID, INCStatus.IncidentStatusValue AS [Status], dateadd(hour,-8,Incident.ResolvedDate) AS [ResolvedDate], DATEADD(hh, DATEDIFF(hh, getutcdate(), getdate()), incident.CreatedDate) as [CreatedDate],AffectedUserInfo.DisplayName AS [Affected User],Coalesce(AssignedToInfo.DisplayName, 'Unassigned') AS [Assigned To User],Incident.Title, IncidentQueue.IncidentTierQueuesValue AS [Support Group],DateDiff(hour, Incident.CreatedDate, Incident.ResolvedDate) AS [Time to Resolution] from IncidentDimvw Incident
left outer join IncidentTierQueuesvw IncidentQueue ON IncidentQueue.IncidentTierQueuesId = Incident.TierQueue_IncidentTierQueuesId
left outer join IncidentStatusvw INCStatus ON INCStatus.IncidentStatusId = Incident.Status_IncidentStatusId
inner join WorkItemDimvw WI ON WI.EntityDimKey = Incident.EntityDimKey
left outer join WorkItemAffectedUserFactvw AffectedUserFact ON AffectedUserFact.WorkItemDimKey = WI.WorkItemDimKey
left outer join UserDimvw AffectedUserInfo ON AffectedUserInfo.UserDimKey = AffectedUserFact.WorkItemAffectedUser_UserDimKey
left outer join (select max(InsertedBatchId) as [batch], WorkItemAssignedToUser_UserDimKey,WorkItemDimKey from WorkItemAssignedToUserFactvw
where DeletedDate IS NULL
group by WorkItemDimKey, WorkItemAssignedToUser_UserDimKey)
AssignedUserFact ON AssignedUserFact.WorkItemDimKey = WI.WorkItemDimKey
left outer join UserDimvw AssignedToInfo ON AssignedToInfo.UserDimKey = AssignedUSerFact.WorkItemAssignedToUser_UserDimKey
Where
Incident.CreatedDate > @BeginDate and
Incident.CreatedDate < @EndDate
order by Assignedtoinfo.DisplayName asc
INCIDENTS BY SUPPORT GROUP
select Incident.ID, DateAdd(hour,-8,Incident.ResolvedDate) as ResolvedDate,DATEADD(hh, DATEDIFF(hh, getutcdate(), getdate()), incident.CreatedDate) as CreatedDate,AffectedUserInfo.DisplayName AS [Affected User],Incident.Title, Coalesce(IncidentQueue.IncidentTierQueuesValue,'Unassigned') as [Support Group] from IncidentDimvw Incident
left outer join IncidentTierQueuesvw IncidentQueue ON IncidentQueue.IncidentTierQueuesId = Incident.TierQueue_IncidentTierQueuesId
inner join WorkItemDimvw WI ON WI.EntityDimKey = Incident.EntityDimKey
left outer join WorkItemAffectedUserFactvw AffectedUserFact ON AffectedUserFact.WorkItemDimKey = WI.WorkItemDimKey
left outer join UserDimvw AffectedUserInfo ON AffectedUserInfo.UserDimKey = AffectedUserFact.WorkItemAffectedUser_UserDimKey
Where
Incident.CreatedDate > @BeginDate and
Incident.CreatedDate < @EndDate
order by ID DESC
ASSIGNED TO TOP 5
select TOP 5 Count(AssignedUserdim.DisplayName) AS [Ticket Count],AssignedUserdim.DisplayName AS [Assigned To User] from IncidentDimvw INC
Left outer join WorkItemDimvw WI on WI.EntityDimKey = INC.EntityDimKey
INNER join WorkItemAssignedToUserFactvw AssignedTofact on AssignedTofact.WorkItemDimKey = WI.WorkItemDimKey
left outer join UserDimvw AssignedUserdim on AssignedUserDim.UserDimKey = AssignedTofact.WorkItemAssignedToUser_UserDimKey
where INC.CreatedDate < @EndDate and INC.CreatedDate > @BeginDate
group by AssignedUserdim.DisplayName order by [Ticket Count] desc
SUPPORT GROUP TOP 5
select TOP 5 Count(TierQueue.IncidentTierQueuesValue) AS [Ticket Count],TierQueue.IncidentTierQueuesValue AS [Support Group] from IncidentDimvw INC
left outer join IncidentTierQueuesvw TierQueue on TierQueue.IncidentTierQueuesId = INC.TierQueue_IncidentTierQueuesId
where INC.CreatedDate < @EndDate and INC.CreatedDate > @BeginDate
group by TierQueue.IncidentTierQueuesValue order by [Ticket Count] desc
Classification Top 5
select TOP 5 Count(Classification.IncidentClassificationValue) AS [Ticket Count],Classification.IncidentClassificationValue AS [Classification] from IncidentDimvw INC
left outer join IncidentClassificationvw Classification on Classification.IncidentClassificationId = INC.Classification_IncidentClassificationId
where INC.CreatedDate < @EndDate and INC.CreatedDate > @BeginDate
group by Classification.IncidentClassificationValue order by [Ticket Count] desc
AFFECTED USER TOP 5
select TOP 5 Count(AffectedUserdim.DisplayName) AS [Ticket Count],AffectedUserdim.DisplayName AS [Affected User] from IncidentDimvw INC
Left outer join WorkItemDimvw WI on WI.EntityDimKey = INC.EntityDimKey
left outer join WorkItemAffectedUserFactvw AffectedFact on AffectedFact.WorkItemDimKey = WI.WorkItemDimKey
left outer join UserDimvw AffectedUserdim on AffectedUserdim.UserDimKey = AffectedFact.WorkItemAffectedUser_UserDimKey
where INC.CreatedDate < @EndDate and INC.CreatedDate > @BeginDate
group by AffectedUserdim.DisplayName order by [Ticket Count] desc
BRIAN BARRINGTON QUERIES
See Brian’s blog here for some additional examples
https://blogs.technet.microsoft.com/brianbarrington/2014/10/08/useful-sql-report-queries-for-scsm/
SYSTEM CENTER OPERATIONS MANAGER (SCOM) example
Many customers create an event collection rule in SCOM that collects 6005 events, denoting a system restart (this is logged in the system event log during start up)
Therefore creating this and then combining into a report, allows you to report on last restart times.
Below is a dataset query that could be used for getting 6005 events (in the same way as above, 6005 could be a parameter so you could create a self-service report for any event):
select computername, DATEADD(hh, DATEDIFF(hh, getutcdate(), getdate()), DateTime) AS localtime from Event.vEvent ev
inner join Event.vEventDetail evd on ev.eventoriginid = evd.eventoriginid
inner join Event.vEventParameter evp on ev.eventoriginid = evp.eventoriginid
left outer join eventloggingcomputer elc on ev.loggingcomputerrowid = elc.eventloggingcomputerrowid
where eventdisplaynumber = '6005'
See Kevin Holman’s awesome blog post here for more SCOM Query examples:
https://blogs.technet.microsoft.com/kevinholman/2007/10/18/useful-operations-manager-2007-sql-queries/ (although written for 2007, many of the queries work in 2012 R2 or can be tweaked / modified for use in 2012 R2).
Note with the SCOM reports, if you get connection issues, use a connection embedded in the report, and then later point it to the shared data source, after you upload the RPL.
Check out Chris’s post here as well for addressing another common scenario that comes up when trying to run reports:
