Exercise - Send a Teams message when an item is added to SharePoint

To highlight the time-saving and collaborative possibilities of using the SharePoint Connector in Power Automate, you can create a flow that triggers when someone adds an item to a SharePoint list and then sends information about that item to your coworkers through Microsoft Teams.
Your first step is to create a SharePoint list. It doesn't matter what list you use; you need to make sure that you have read and write permissions to access it. You can use an existing list in your SharePoint site or use the following instructions to create the list for this exercise.
Create a list in SharePoint
To create a list in SharePoint, follow these steps:
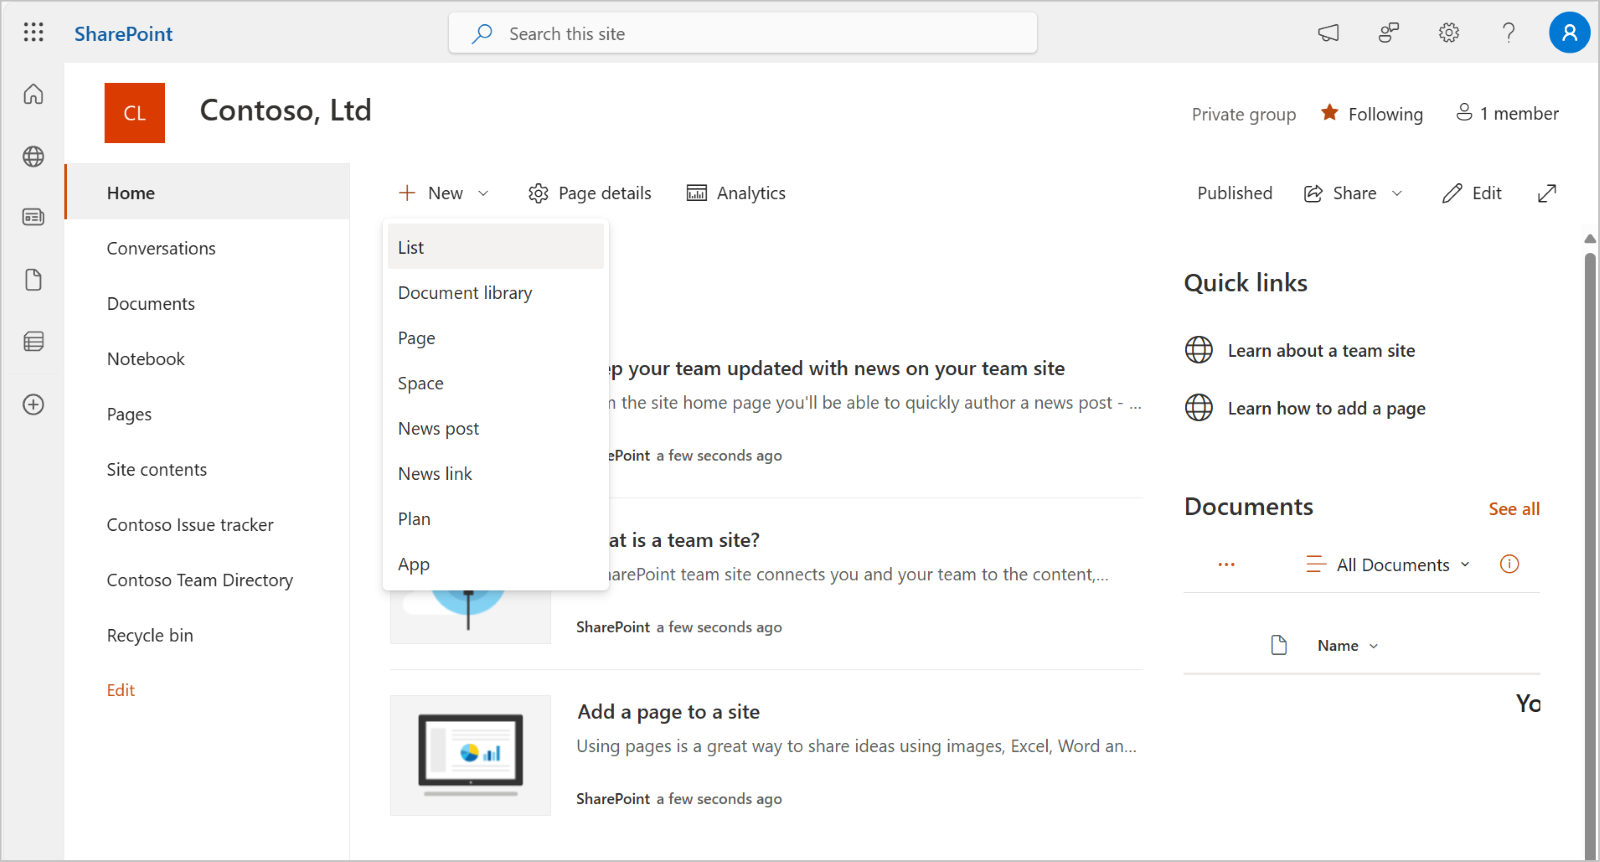
Go to your SharePoint site's home page and then select New > List.
On the next screen, select Issue Tracker from the Templates section to use one of the helpful SharePoint templates for this exercise.
Select Use Template, keep the default name as Issue Tracker, and then select Create.

After you create a new SharePoint list, or after you identify one that you want to use for the exercise, it's time to create your flow.
Create a flow
To create a flow, follow these steps:
- From the Power Automate home page (https://make.powerautomate.com), select Create from the left sidebar.
- Select Automated cloud flow. In the pop-up window that opens, enter a meaningful name, such as Send Teams Message on New SharePoint Item.
- In the search box, search for and select the When an item is created trigger with the SharePoint subtext. Many triggers and actions share similar names, so it's beneficial to familiarize yourself with those logos and technology names as you grow in your Microsoft Power Platform journey.
- Select Create.
Now, you have a flow. Keep in mind that you can't save the flow until you have at least one trigger and one action. Therefore, you should move to the next steps in the exercise so that you can save your work.

Configure the trigger
To configure the trigger, follow these steps:
Select the When an item is created card to bring up the Parameters on the left side of the screen.
The first time that you use the SharePoint Connector, you need to create a connection. The connection allows the connector to more securely interact with your SharePoint data, and it's this connection that also determines the permissions with which you interact with that data. To create a connection, follow these steps:
Select the Change connection link in the lower part of the parameters blade.

Select the connection if the one that you want to use already exists. Alternatively, if you want/need to create a new connection, select Add new.
Select Sign in and, if prompted, pick the account that you want to use for this connection.
Examine the parameters for your trigger. If the "Connected to youremail@yourdomain.com" message appears in the lower left of the screen, the system has set up an active connection. Now, the connector can interact with your SharePoint data by using your sign-in credentials.
With your connection created, you need to fill out the two required parameters for your trigger:
- Site Address - From this dropdown menu, select the SharePoint site that hosts the list that you want to monitor.
- List Name - From this dropdown menu, select the list that you want to monitor.

Add a Compose action
Now, you can do something in response to the item that you created in your SharePoint list. Your next task is to use Power Automate to send your coworkers a notification in Teams. However, before you do so, you should take a moment to explore the data that's available from the trigger that you created.
Select the plus (+) icon under the trigger and then select Add an action. In the search box, search for and select the Compose action in the Data Operation connector. Selecting the Compose action adds it to the flow.
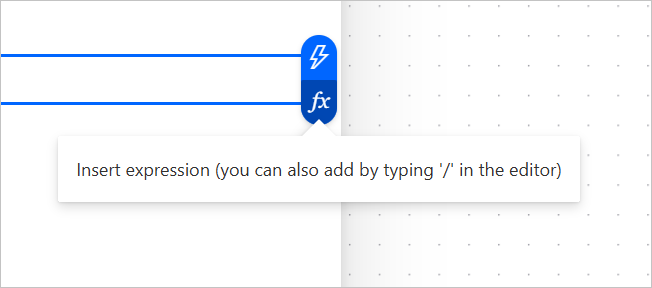
Select the Inputs box. To the right of the box, a lightning bolt icon and an fx icon appear. These icons are important because they provide virtually endless opportunities to customize your flows and create truly dynamic content.
- With the lightning bolt icon, you can expose data that's available from earlier steps, such as data that the When an item is created action captured.
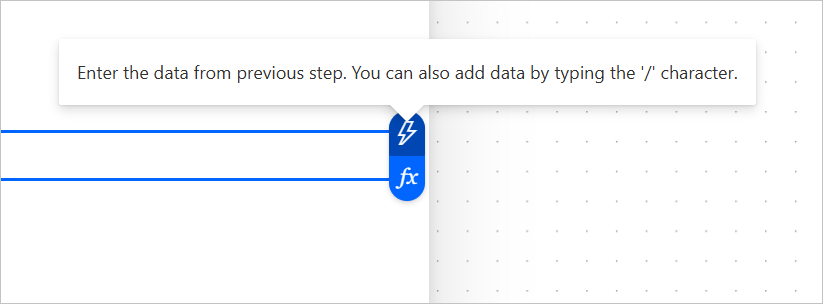
With the fx icon, you can use Microsoft Excel-like expressions to further interact with your data.
Note
You won't use expressions in this introductory module; however, select the links at the end of the module to explore excellent resources on how to use expressions to level up your Power Automate skills.
For the purposes of this exercise, select the lightning bolt icon. The only data that's available so far is the trigger data. Beneath the When an item is created heading is a list of options that closely mirrors the column headings of your SharePoint list. Selecting any option that matches a column in your list causes the Compose action to display the value of that column for the item that you recently created.
To try this functionality, select the Title option in the list. (Select See more to expand the list if it doesn't appear immediately.) Then, save and test your flow to observe how quickly you can go from concept to implementation.
Test the flow
To test the flow, follow these steps:
In the upper part of the screen, select Test > Manually > Save & Test (or Test, if you already saved it).
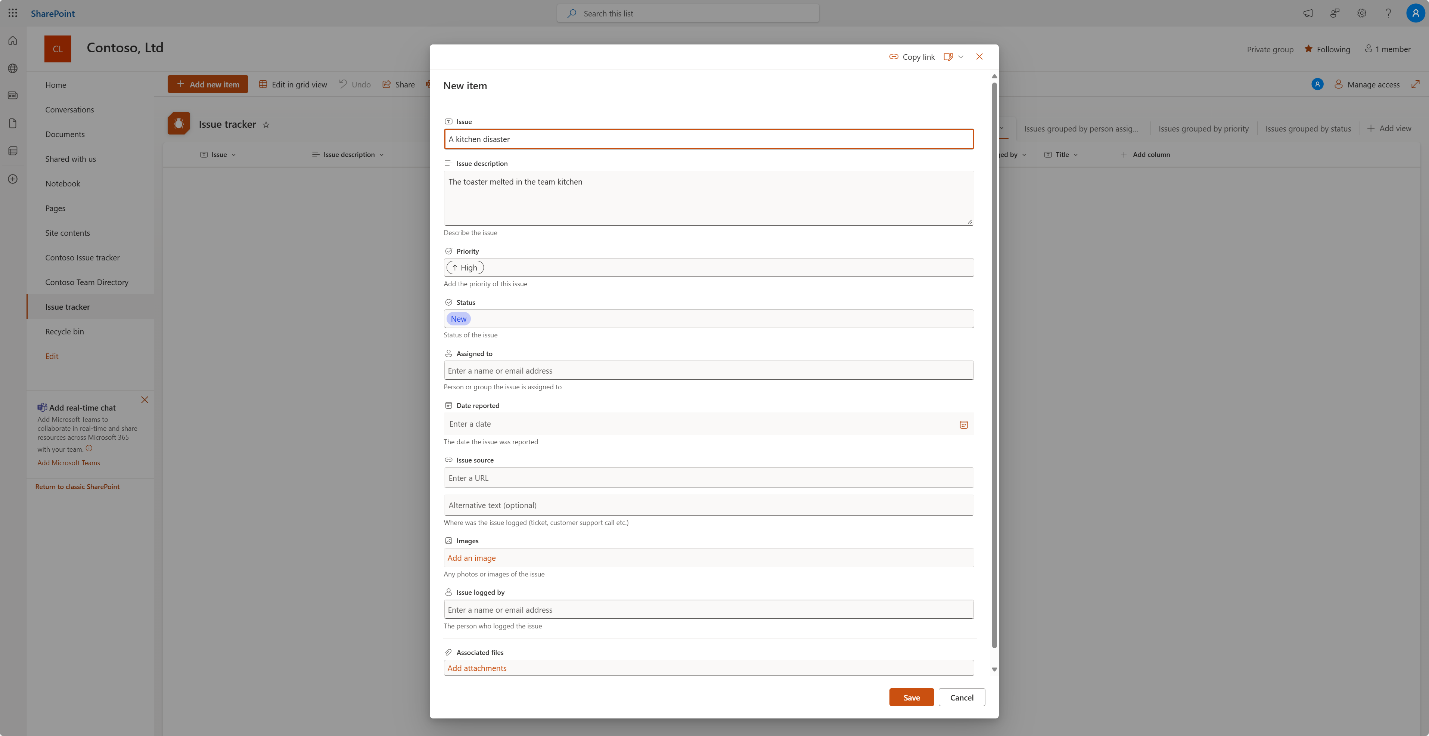
The flow waits for a triggering action to take place. In this case, it's waiting for someone to add an item to your Issue Tracker list. Switch to that SharePoint list, and then add a row of data. Make sure that you at least fill out the Issue column (or whatever the Title column is for your list, if you're using a different list).
After you save that row of data, return to Power Automate.
Note
It might take a moment for this action to initiate the flow. Be patient and allow a minute or so. After the action runs, a green banner should appear across the upper part of the screen indicating that your flow ran successfully.

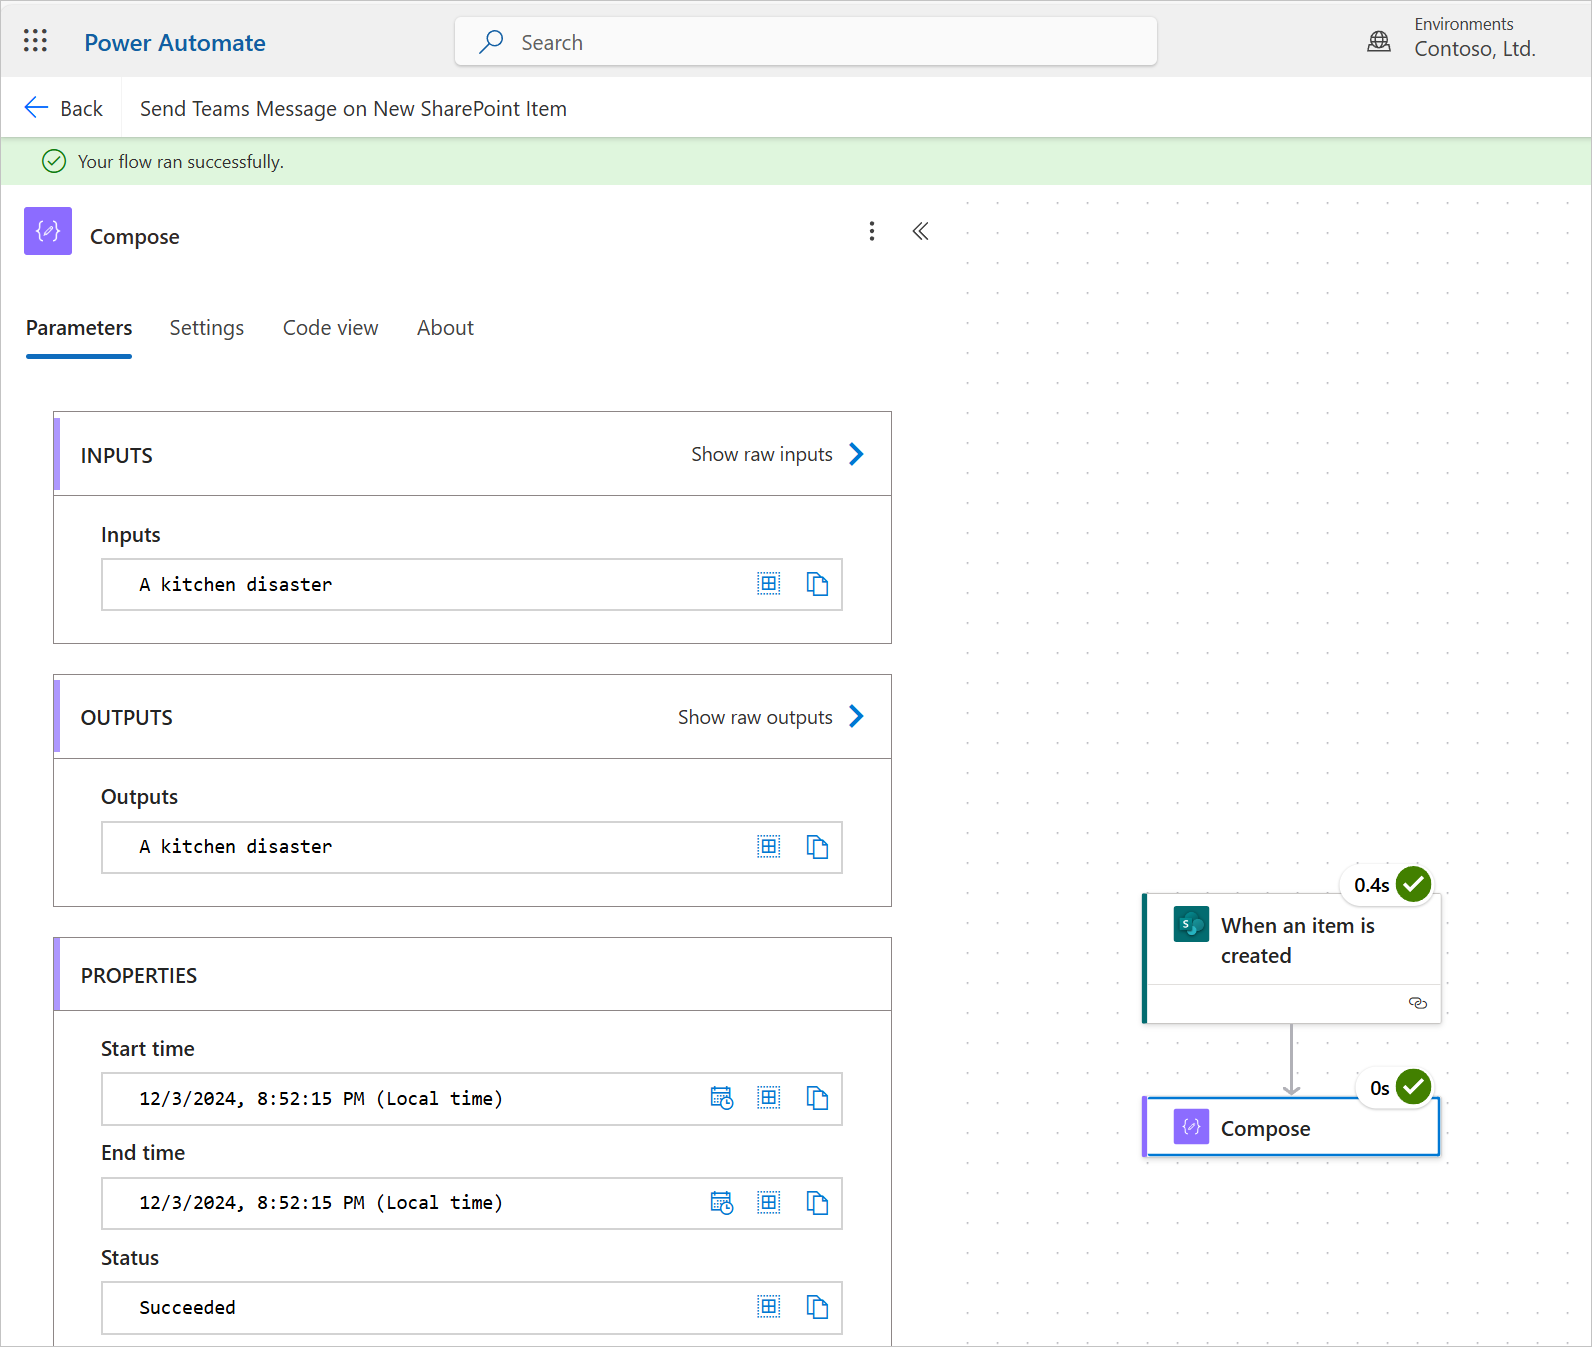
Green checkboxes appear on the trigger and the Compose action, indicating that those actions ran successfully. Select each and then look at the presented data.
- For the trigger, JSON data displays, with the body portion of the OUTPUTS section showing the data that the trigger returned. Scroll down to view the fields, such as Title, Description, and so on.
- For Compose, a single line displays under OUTPUTS, which is the Title field that you selected for the input of the Compose action.


Potential pitfall

Before you continue, you might have noticed a potentially confusing scenario. The column that you selected for your Compose action's input was Title, but the name of the column in SharePoint is Issue. If you're completing this exercise by using your own list, it's possible that the Title column is still named Title, but it's also possible that the system renamed it. This scenario is common and can be surprising to even seasoned developers.
Note
You can rename a SharePoint list column, but its internal name never changes after it's initially created.
The SharePoint Connector for Power Automate identifies columns by their internal name. Because the system automatically creates the Title column with all lists, it often renames the column with a more descriptive title that's appropriate to that particular list. This issue is more in-depth than what's stated in this unit; however, you need to be aware that the column renaming scenario can occasionally present a challenge when you're working with SharePoint lists in Power Automate.
Add a Teams action
After extracting information about the item that you created in SharePoint, you can use a Compose action to test the output of the data and make sure that you're getting the information that you want.
However, for this exercise, you're satisfied with the data, so you return to Edit mode to add a Teams action.
Select Edit in the upper right of the page to enter Edit mode.
Add a new action by selecting the plus (+) icon under the Compose action. Select Add an action.
In the search box, search for and select the Post message in chat or channel action that's part of the Teams connector.
As with setting up the trigger, the system initially prompts you to sign in to create a connection to Microsoft Teams. Select Sign In and then follow the prompts. After signing in, you can create your message.
Decide how you want to send your message, whether it comes directly from you or from a bot. Select the Post As dropdown menu for the following options:
Flow bot - If you select this option, messages from the Flow bot show as coming from workflows in your Teams interface rather than from a specific user. This selection is ideal for system-generated notifications or announcements.
User - Selecting this option results in the message coming from the user who signed in to the connection. The message appears as though the specified user has posted it, adding a personal touch to your automation.
For the purposes of this exercise, select Flow bot.
In the Post In field, select where you want the message to post. The options for Post In are as follows:
Channel - Posts the message to a specific channel of a Microsoft Teams team. You need to specify the team and channel where the message should appear. This option is ideal for team-wide announcements or notifications that are relevant to a specific project or group.
Chat with Flow bot - Each user in Teams can have a personal chat with the Flow bot. Selecting Chat with Flow bot posts the message to the Flow bot chat for the user who's selected in the Recipient field. Typically, you would use this option for personal reminders or notifications that you don't need to share with a group.
Group chat - Posts the message in a group chat with multiple users. You need to specify the recipients of the group chat. This option is useful for discussions or updates that involve a smaller, focused group rather than an entire team.
For this exercise, select Chat with Flow bot.
In the Recipient field, enter your own name and then select yourself so that you receive the message from your flow privately. In real-world applications, it's often a good idea to use Chat with Flow bot when you're testing a Teams automation, and only after you confirm that it's behaving as expected would you post to a group or channel.
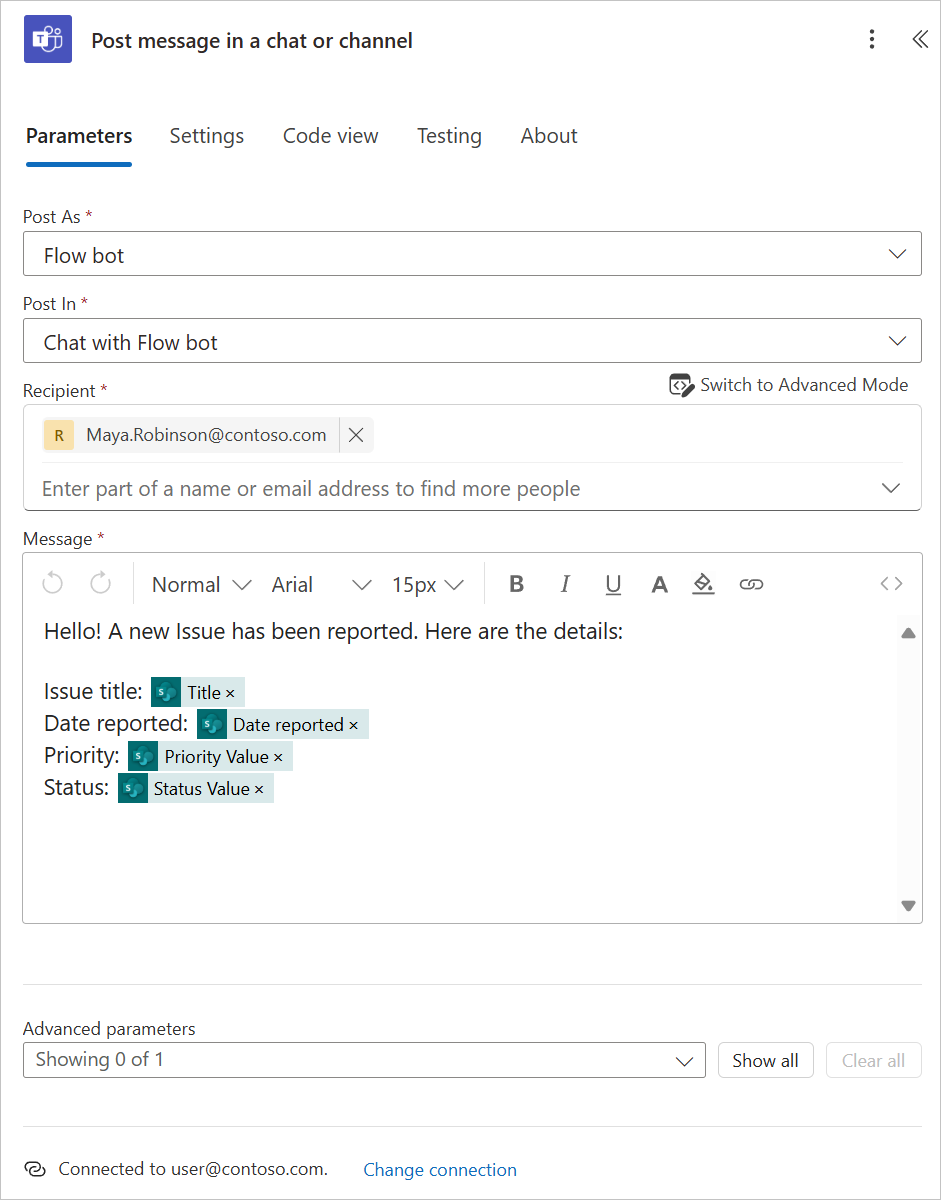
Use the available data from the When an item is created action to send a Teams message with some dynamic information from the Issues Tracker list. Select the message box, and then set up the message with some static text, such as Hello! A new Issue has been reported. Here are the details. Enter a couple of new lines, and then select the lightning bolt icon to access data from the previous steps.
Two actions are now available with data: the output from your Compose action and the data from the When an item is created action.
Select See more to the right of the When an item is created action and then complete the following actions:
- Select a parameter that you think would be important to send with your message, such as Title.
- Place your cursor in front of the Title box that appears in the message, and then provide a descriptive heading, such as Issue title.
- Press the Enter key to create a new line and then repeat the process with the lightning bolt icon a few times to add more data points.
- Enter a descriptor in front of each data point.
The result should resemble the following screenshot.

Test the flow
Now, you're ready to test your flow. Before you do so, make sure that Teams is installed and running on your computer or mobile device and that you're signed in to your account. As a result, you can observe the results of your hard work.
Select Save > Test. Then, select Automatically > With a recently used trigger. A beneficial feature of Power Automate is that you don't need to constantly add new items to your list to run extra tests. You can run the flow continually by using the same trigger, which is useful for testing. Select the first option in the list, and then select Test.
Within moments of selecting Test, you should receive a Teams notification from the Flow bot notifying you of the issue.
A real-world use for this exercise would be having a canvas app that employees in your company use to report issues. The app writes to your Issue Tracker SharePoint list, and then the system notifies you or a team/team member whenever an issue is added.