Exercise - Create a meeting request based on a SharePoint list update
In this exercise, you create a flow that automates the process of scheduling a meeting when someone adds a new item to a SharePoint list. The flow uses the Create an event (V4) action in the Office 365 Outlook Connector to add the meeting to your calendar, which dynamically pulls information from the list to populate the event details.
Scenario
Your team uses a SharePoint list to track meeting requests. Each new list item includes a title, description, date, time, and list of attendees. Instead of manually copying this information into your Outlook calendar, you create a flow to automatically schedule the meeting whenever someone adds a new request to the list.

Steps
The steps that you complete in this exercise are:
- Create the SharePoint list.
- Create the flow.
- Configure the trigger.
- Add and configure the Create an event (V4) action.
- Test your flow.
- Verify the results.
Create the SharePoint list
To create the SharePoint list, follow these steps:
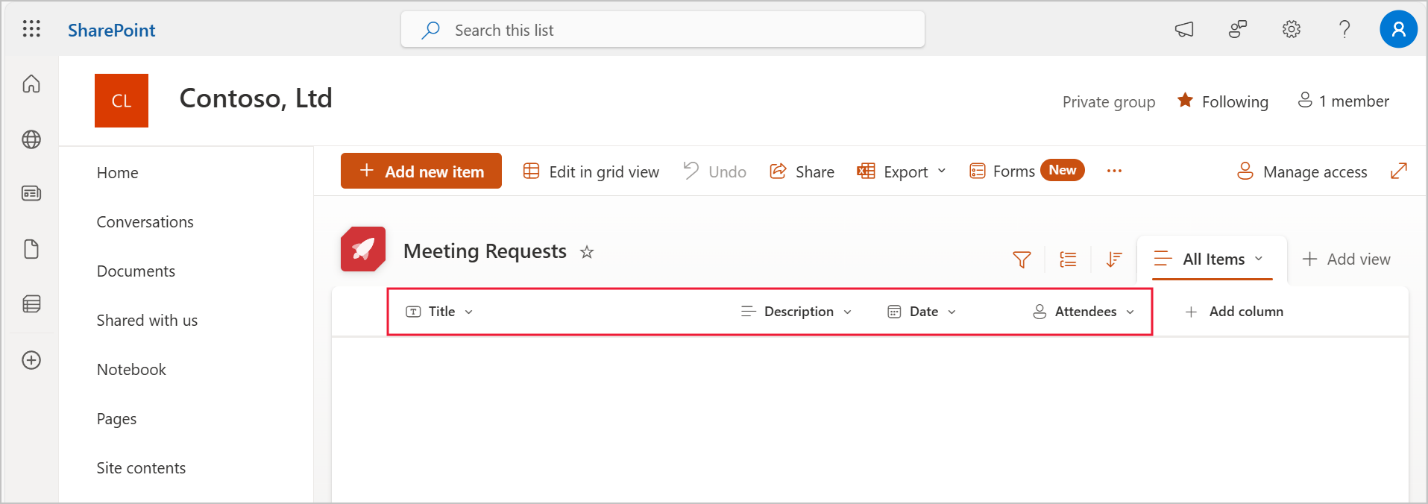
Open SharePoint and go to the site where you want to store meeting requests.
Select New > List > Blank list, name the list Meeting Requests, and then select Create.
The system automatically creates the Title column. Add the following columns to the list:
- Description - Multiple lines of text
- Date - Date and time (set the Include Time toggle to Yes)
- Attendees - Person (leave all defaults)

Create the flow
To create the flow, follow these steps:
Open Power Automate and select Create.
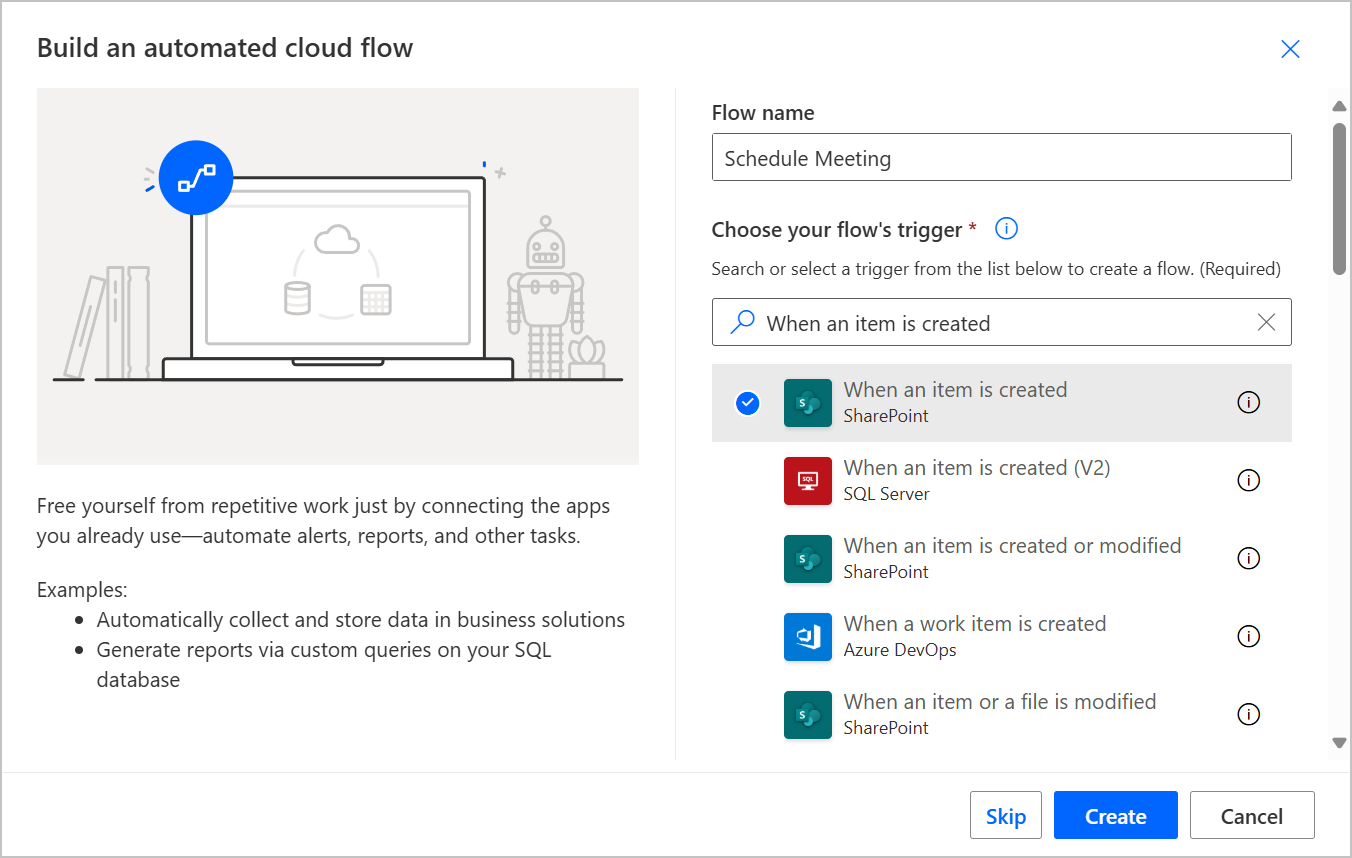
Select Automated cloud flow.
In the Flow name field, enter Schedule Meeting.
For the trigger, search for and select When an item is created under the SharePoint Connector and then select Create.

Configure the trigger
In the When an item is created trigger, configure the following information:
- Connection - The first time that you use this action, you might need to set up a connection. Sign in or select Change connection in the lower part of the action blade and then select the connection that you want to use.
- Site Address - Select the site where your Meeting Requests list resides.
- List Name - Select Meeting Requests.
Add and configure the Create event (V4) action
To add and configure the Create event (V4) action, follow these steps:
Select the plus (+) icon under the trigger, select Add an action, and then search for and select Create event (V4) under the Office 365 Outlook Connector.
Configure the action as follows:
Calendar - Select your desired Outlook calendar (the default for most accounts is Calendar).
Subject - Select the lightning bolt icon and then select Title under the When an item is created heading.
Start Time - The Create event (V4) action requires that you submit the date and time in a specific format, for which you can use the formatDateTime() expression to transform the SharePoint DateTime value to the format that the action requires.
Select the fx icon and then enter the formatDateTime() expression.
Place your mouse cursor between the parentheses, select Dynamic content, and then select Date under the When an item is created heading.
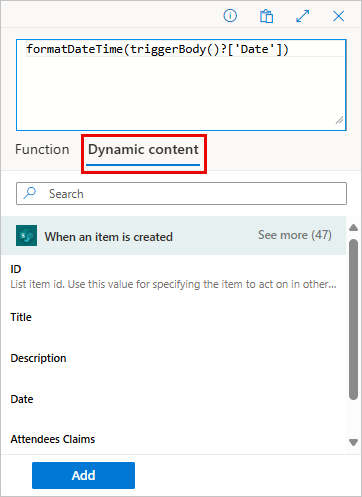
In the expression box, after the triggerBody()?['Date'] expression, add a comma and the 'yyyy-MM-ddTHH:mm:ssZ' format string.
The complete expression should be: formatDateTime(triggerBody()?['Date'],'yyyy-MM-ddTHH:mm:ssZ')
Select Add.
End Time - For this exercise, you add one hour to the Start Time for the End Time. In a real-life scenario, you could also include an End Time column in your SharePoint list. Add an hour to the Start Time by using the addHours() function.
Select the fx icon and then enter the formatDateTime() expression.
Place your mouse cursor between the parentheses, and then enter the addHours() expression.
Place your mouse cursor between the parentheses after addHours, select Dynamic content, and then select Date under the When an item is created heading.
In the expression box, after triggerBody()?['Date'], add a comma and the number 1, indicating that you want to add one hour to the date that the triggerBody()?['Date'] expression supplies.
Immediately before the final closing parenthesis, enter a comma and then enter the 'yyyy-MM-ddTHH:mm:ssZ' format string.
The complete expression should be: formatDateTime(addHours(triggerBody()?['Date'],1),'yyyy-MM-ddTHH:mm:ssZ')
Select Add.
Time Zone - Select your time zone.
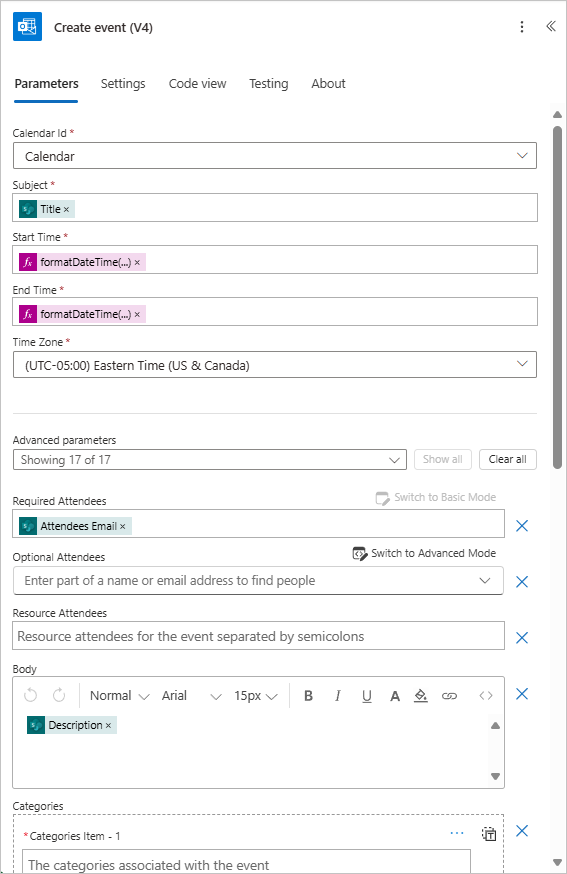
Required Attendees - Find this parameter by selecting Show all next to the Advanced Parameters dropdown menu. Next to Required Attendees, select Switch to Advanced Mode and then select the input field for the parameter. Select the lightning bolt icon and then select Attendees Email under the When an item is created heading.
Body - Select the lightning bolt icon and then select Description under the When an item is created heading. The completed Create event (V4) action should now resemble the following image.


Test your flow
To test your flow, follow these steps:
- Select Save.
- Select Test > Manually > Test.
- Return to your Meeting Requests list in SharePoint.
- Add a new item with the following details:
- Title - Project Kickoff Meeting
- Description - Discuss project goals and deliverables.
- Date - Select tomorrow's date and a time of 2:00 PM
- Attendees - Add yourself as the attendee
- Save the item.
Verify the results
Your last step in the exercise is to verify the results by following these steps:
Allow a few moments for the flow to run. You can check your flow screen to determine whether it's still waiting or if it runs successfully. It could take a few minutes for the flow to pick up the change in SharePoint.
After the flow runs, open your Outlook calendar.
Check that the meeting is scheduled with the correct title, description, date, time, and attendees.
Tip
If you're not getting the correct time to post on your calendar, check the regional settings for your SharePoint site. If your SharePoint site is in a different region, you might need to adjust your offset in your flow, or you can adjust your SharePoint site to your time zone.
By completing this exercise, you learned how to automate a common business process, and you explored the power of integrating SharePoint and Office 365 Outlook with Power Automate.