UI testing considerations
TFS 2017
When running automated tests in the CI/CD pipeline, you may need a special configuration in order to run UI tests such as Selenium, Appium or Coded UI tests. This topic describes the typical considerations for running UI tests.
Note
Applies only to TFS 2017 Update 1 and later.
Note
In Microsoft Team Foundation Server (TFS) 2018 and previous versions, build and release pipelines are called definitions, runs are called builds, service connections are called service endpoints, stages are called environments, and jobs are called phases.
Prerequisites
Familiarize yourself with agents and deploying an agent on Windows.
Headless mode or visible UI mode?
When running Selenium tests for a web app, you can launch the browser in two ways:
Headless mode. In this mode, the browser runs as normal but without any UI components being visible. While this mode is obviously not useful for browsing the web, it is useful for running automated tests in an unattended manner in a CI/CD pipeline. Chrome and Firefox browsers can be run in headless mode.
This mode generally consumes less resources on the machine because the UI is not rendered and tests run faster. As a result, potentially more tests can be run in parallel on the same machine to reduce the total test execution time.
Screenshots can be captured in this mode and used for troubleshooting failures.
Note
Microsoft Edge browser currently cannot be run in the headless mode.
Visible UI mode. In this mode, the browser runs normally and the UI components are visible. When running tests in this mode on Windows, special configuration of the agents is required.
If you are running UI tests for a desktop application, such as Appium tests using WinAppDriver or Coded UI tests, a special configuration of the agents is required.
Tip
End-to-end UI tests generally tend to be long-running. When using the visible UI mode, depending on the test framework, you may not be able to run tests in parallel on the same machine because the app must be in focus to receive keyboard and mouse events. In this scenario, you can speed up testing cycles by running tests in parallel on different machines. See run tests in parallel for any test runner and run tests in parallel using Visual Studio Test task.
UI testing in visible UI mode
A special configuration is required for agents to run UI tests in visible UI mode.
Visible UI testing using Microsoft-hosted agents
Microsoft-hosted agents are pre-configured for UI testing and UI tests for both web apps and desktop apps. Microsoft-hosted agents are also pre-configured with popular browsers and matching web-driver versions that can be used for running Selenium tests. The browsers and corresponding web-drivers are updated on a periodic basis. To learn more about running Selenium tests, see UI test with Selenium
Visible UI testing using self-hosted Windows agents
Agents that are configured to run as service can run Selenium tests only with headless browsers. If you are not using a headless browser, or if you are running UI tests for desktop apps, Windows agents must be configured to run as an interactive process with auto-logon enabled.
When configuring agents, select 'No' when prompted to run as a service. Subsequent steps then allow you to configure the agent with auto-logon. When your UI tests run, applications and browsers are launched in the context of the user specified in the auto-logon settings.
If you use Remote Desktop to access the computer on which an agent is running with auto-logon, simply disconnecting the Remote Desktop causes the computer to be locked and any UI tests that run on this agent may fail. To avoid this, use the tscon command on the remote computer to disconnect from Remote Desktop. For example:
%windir%\System32\tscon.exe 1 /dest:console
In this example, the number '1' is the ID of the remote desktop session. This number may change between remote sessions, but can be viewed in Task Manager. Alternatively, to automate finding the current session ID, create a batch file containing the following code:
for /f "skip=1 tokens=3" %%s in ('query user %USERNAME%') do (
  %windir%\System32\tscon.exe %%s /dest:console
)
Save the batch file and create a desktop shortcut to it, then change the shortcut properties to 'Run as administrator'. Running the batch file from this shortcut disconnects from the remote desktop but preserves the UI session and allows UI tests to run.
Provisioning agents in Azure VMs for UI testing
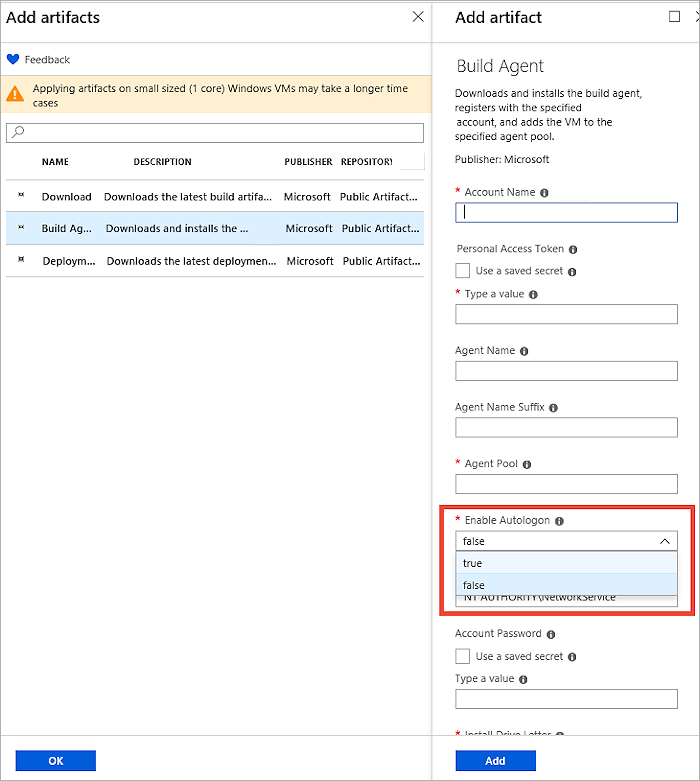
If you are provisioning virtual machines (VMs) on Azure, agent configuration for UI testing is available through the Agent artifact for DevTest Labs.

Setting screen resolution
Before running UI tests you may need to adjust the screen resolution so that apps render correctly. For this, a screen resolution utility task is available from Marketplace. Use this task in your pipeline to set the screen resolution to a value that is supported by the agent machine. By default, this utility sets the resolution to the optimal value supported by the agent machine.
If you encounter failures using the screen resolution task, ensure that the agent is configured to run with auto-logon enabled and that all remote desktop sessions are safely disconnected using the tscon command as described above.
Note
The screen resolution utility task runs on the unified build/release/test agent, and cannot be used with the deprecated Run Functional Tests task.
Troubleshooting failures in UI tests
When you run UI tests in an unattended manner, capturing diagnostic data such as screenshots or video is useful for discovering the state of the application when the failure was encountered.
Capture screenshots
Most UI testing frameworks provide the ability to capture screenshots. The screenshots collected are available as an attachment to the test results when these results are published to the server.
If you use the Visual Studio test task to run tests, captured screenshots must be added as a result file in order to be available in the test report. For this, use the following code:
First, ensure that TestContext is defined in your test class. For example:
public TestContext TestContext { get; set; }
Add the screenshot file using
TestContext.AddResultFile(fileName); //Where fileName is the name of the file.
If you use the Publish Test Results task to publish results, test result attachments can only be published if you are using the VSTest (TRX) results format or the NUnit 3.0 results format.
Result attachments cannot be published if you use JUnit or xUnit test results. This is because these test result formats do not have a formal definition for attachments in the results schema. You can use one of the below approaches to publish test attachments instead.
If you are running tests in the build (CI) pipeline, you can use the Copy and Publish Build Artifacts task to publish any additional files created in your tests. These will appear in the Artifacts page of your build summary.
Use the REST APIs to publish the necessary attachments. Code samples can be found in this GitHub repository.
Capture video
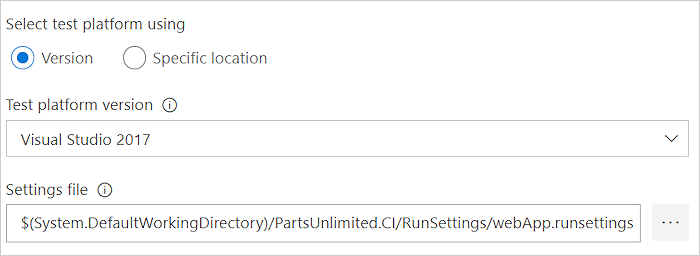
If you use the Visual Studio test task to run tests, video of the test can be captured and is automatically available as an attachment to the test result. For this, you must configure the video data collector in a .runsettings file and this file must be specified in the task settings.

Help and support
- See our troubleshooting page
- Get advice on Stack Overflow, and get support via the Developer Community