Connecting Splunk to Office 365 - Part 1: Add-On for Microsoft Cloud Services
I've had a number of customers ask me about configuring their monitoring systems to Office 365. So, rather than repeating the same information and re-issuing the same links (most of which contain outdated information), I'm going to put together a series on how to connect a few systems to Office 365. Since Splunk is "free" (both as in speech and as in beer), I decided that I would start with it.
Splunk has add-ons that can connect to the Office 365 Management Activity API, as well as pull data from the message trace logs. In this first look, we're going to configure the Add-On for Microsoft Cloud Services.
Prepare Splunk
- From your Splunk server dashboard (in this example, I'm using Splunk Enterprise 7.0.3), click on Splunk Apps.

- In the search box, type Office 365, and then click the Install button next to the Splunk Add-on for Microsoft Cloud Services.

- If prompted, confirm credentials and terms, and then select Login and install.

- Wait while the plugin is installed.

- Click Restart Later. You can also click Restart Now if you're jonesing to wait around. You'll most likely have to restart at the end of the configuration as well, so it's up to you.

- Select Open App for the Splunk Add-on for Microsoft Cloud Services app.

- Select the Configuration tab.

- Select Add account.

- On the Add O365 Account page, copy the Redirect URL. It will be used for the Reply URL value when we configure an application account in Azure.

- Leave the page open. We'll come back to it.
Prepare Office 365 and Azure AD
In order to extract data from Office 365, you'll need to do a handful of tasks, such as creating an application ID in Azure that has access to read data, as well as enabling auditing data logging in Office 365.
Create an Azure Application ID
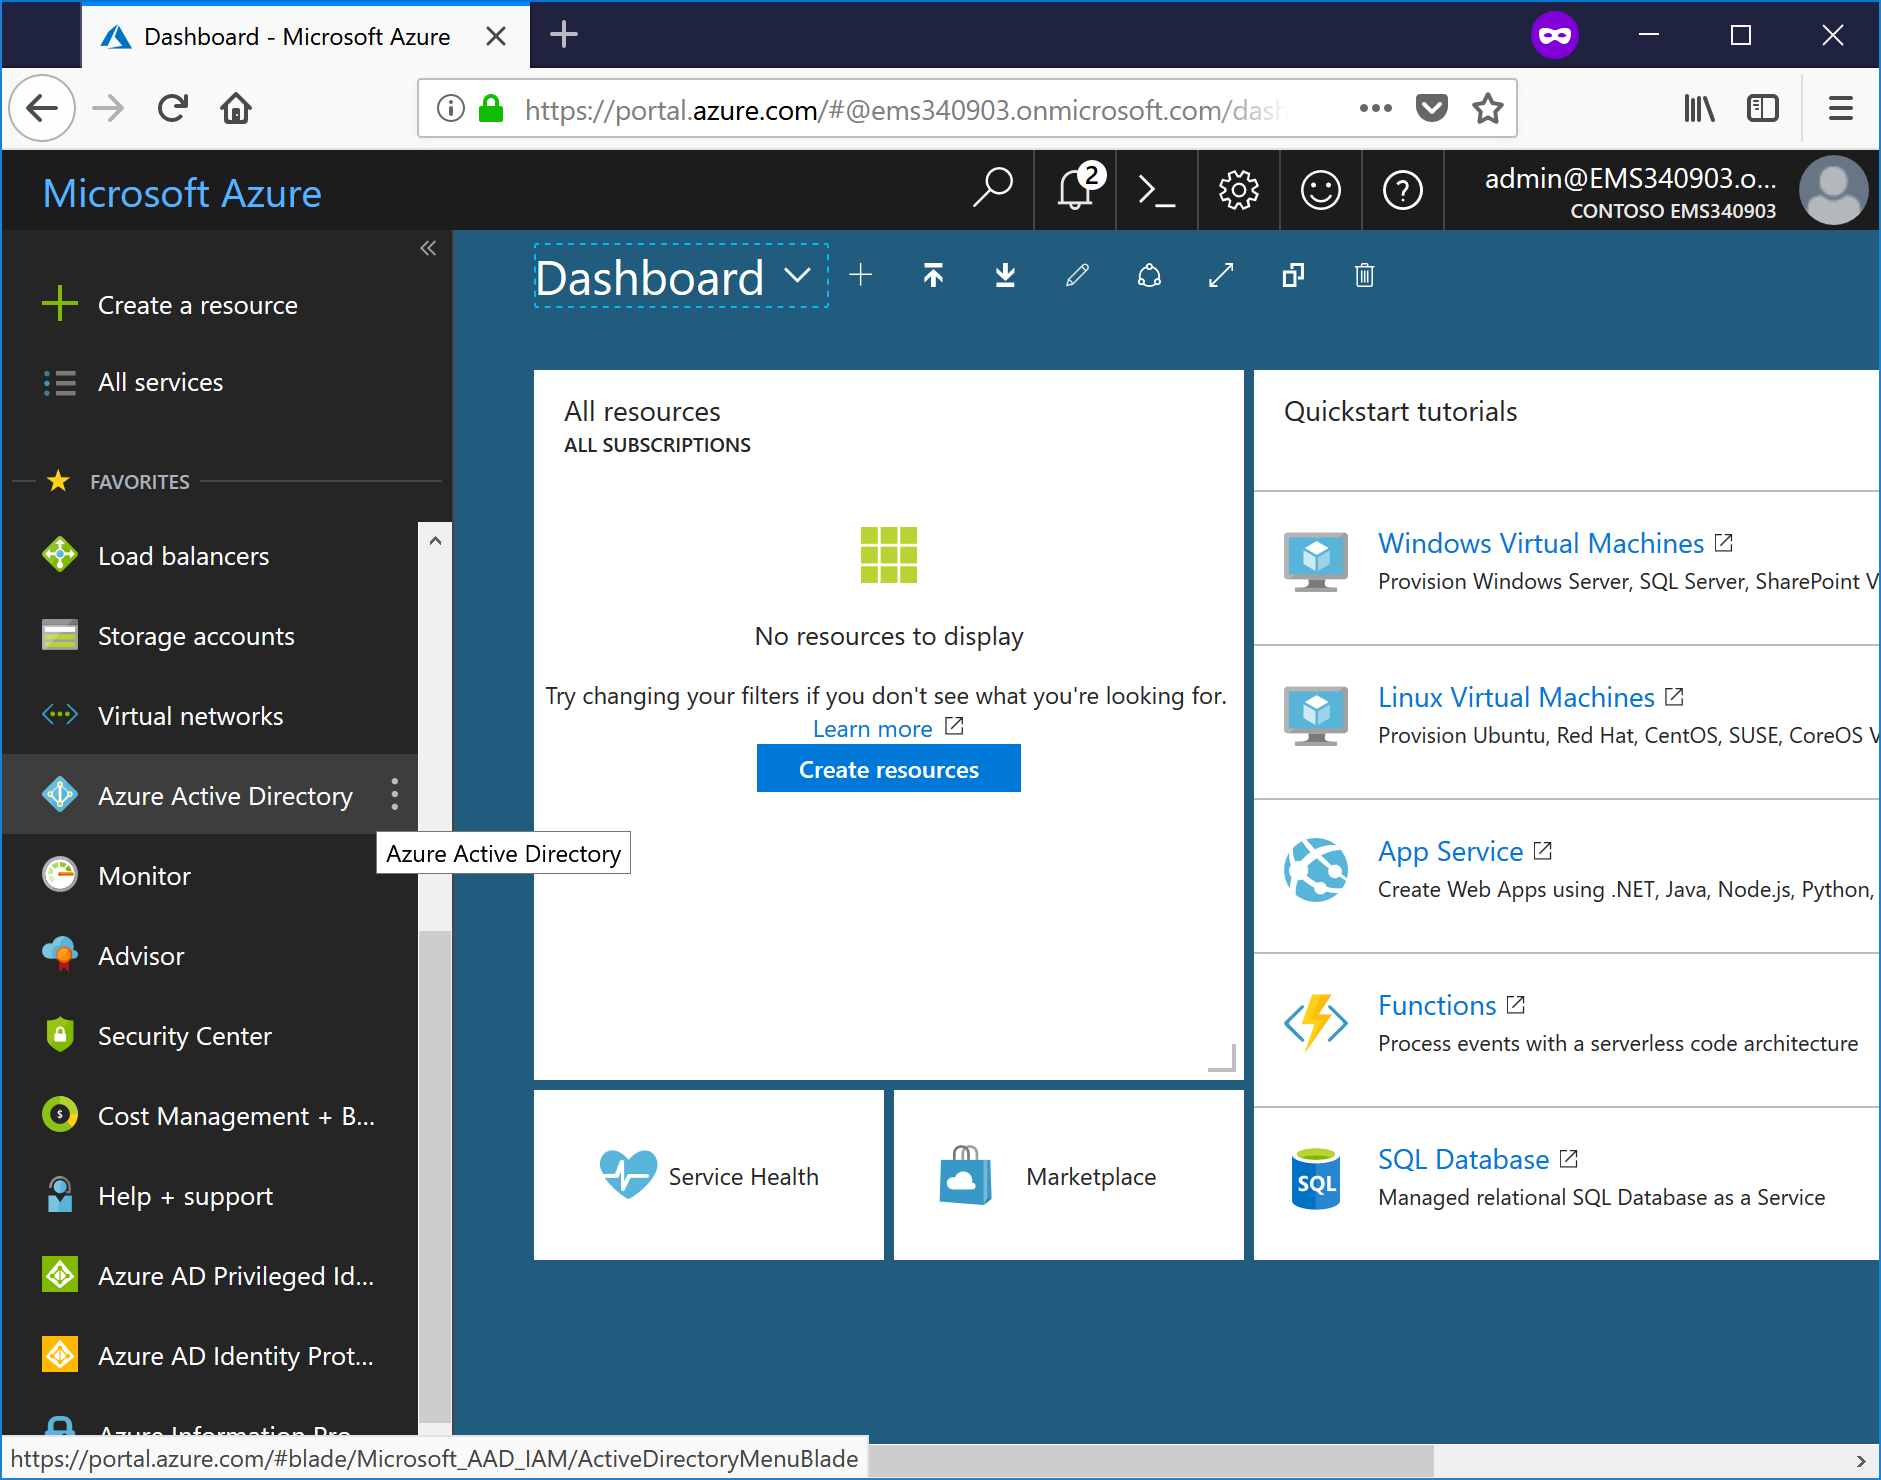
- Log in to https://portal.azure.com.

- Select the Azure Active Directory menu blade.

- On the Azure Active Directory blade, select App Registrations.

- Select New Application Registration.

- Enter a value for Name, leave the default Application type set to Web app / API, and enter a value for Sign-on URL, and then click Create. The sign-on URL does not have to accessible--you just need to dot the t's and cross the i's and such for the form.

- Copy and save the Application ID, as it will be used during the Splunk add-in configuration.

- Select the Settings gear icon on the App registration page.
- Select Reply URLs.

- Paste the URL from the Splunk O365 Add Account page and click Save.

- Close the Reply URLs window to return to Settings.
- On the Settings blade, select Keys.

- Enter a Description, select an expiration from the drop-down, and then click save to generate a key value.

- Copy the value and save it for later. Once you close the Keys blade, the value will be no longer displayed.

- Close the Keys blade.
Assign permissions to the application ID
After you have created the application ID that you'll use, you need to grant it the permissions necessary to access the properties exposed by the Office 365 Management Activity and Microsoft Graph APIs.
- From the Settings blade, select Required Permissions.

- Click Grant Permissions.

- Confirm by selecting Yes.

- Click the + Add button.
- Click Select an API.

- Click Windows Azure Service Management API, and then click the Select button.

- Select the checkbox next to Access Azure Service Management as organizaiton users (preview) and then click the Select button.

- Select Done.

- Click the + Add button.
- Click Select an API.
- Select Office 365 Management APIs and click Select.

- On the Select Permissions page, choose (under both Delegated and Applications permissions) and then click Select:
Read activity reports for your organization
Read activity data for your organization
Read service health information for your organization
- Click Done.

- Click Grant Permissions, and then confirm the choice.
A - Close the Required permissions blade.
- Close the Settings blade.
- Close the App registrations blade.
- Click All services in the navigation pane, select the filter box, type Subscriptions, and then select the subscriptions object shown with the yellow key. Note: If you haven't registered for an Azure subscription, you won't be able to complete this next section. You can register for a pay-as-you-go subscription. You'll only be charged for the resources you use.

- Select your subscription from the list.

- On the Overview blade, select the Subscription ID and save it. You'll need it later to configure the Azure Audit input.

- Click Access control (IAM) to open the Identity and Access Management blade.

- Click the + Add button.
- Under Role, select Reader. Under Assign access to, select Azure AD user, group, or application. Begin to type the application name you created previously, and then select it from the list. Click Save when finished.

- Inside the Azure Active Directory blade, select Properties.

- Select the Directory ID. It's the same as your Office 365 Tenant ID, which you can also retrieve via PowerShell with Get-AzureADTenantDetail (where it's listed as objectID) or as TenantID when you first execute Connect-AzureAD. Copy it and save it for when we configure Splunk.

- Close the properties page.
Back to configuring Splunk
Once you have created and granted permissions, it's time to switch back to the Splunk interface configuration.
Add the accounts
- Armed with your Application name, Application ID, and API key, go back to the Splunk Add Account dialog box. Fill in the details, and then click Add.

- Enter credentials for an Azure AD administrator when prompted.

- If you receive the following error, you need to make sure that you have the correct URL (listed on the Add O365 Account page) listed in the application Reply URLs details. You can have more than one URL listed.

- Confirm the permissions that will be used by the application by clicking Accept.

- After the application account has been added, it should show up in the console.

- Select the Azure App Account tab.
- Click Add Azure App Account.

- On the Add Azure App Account page, fill in the details, including the friendly name (Application Name), Client ID (Application ID), Key (API Key), and Tenant ID (Directory Object ID). Click Add when finished.

- After it has been successfully added, it should show up on the Azure App Account configuration tab.

Configure a certificate
A certificate is necessary to enable inter-service calls. Having a certificate in-place will allow you to not have to manage authorization token expiration or events (though, you may at some point, have to manage a certificate rollover).
- From the Splunk app configuration page, click the Certificate tab. If you already have a certificate that you can use (such as a wildcard certificate for your domain), click option 1. We're going to proceed with Option 2: using a self-signed or auto-generated certificate.

- When the green Generate button appears, click it.
- Wait while the certificate is generated.

- Right-click the text box and select Copy to copy to the clipboard.

- Switch back to the Azure portal, and navigate to Azure Active Directory | App Registrations | <Application created for Splunk>.
- Click the pencil icon next to Manifest.

- Select the text "keyCredentials": [] (be sure to include the beginning quotes and the square brackets, but leave the comma in place).

- Press Ctrl-V to paste the JSON certificate content over it (the JSON text contains the keyCredentials property object).

- Click the Save button.
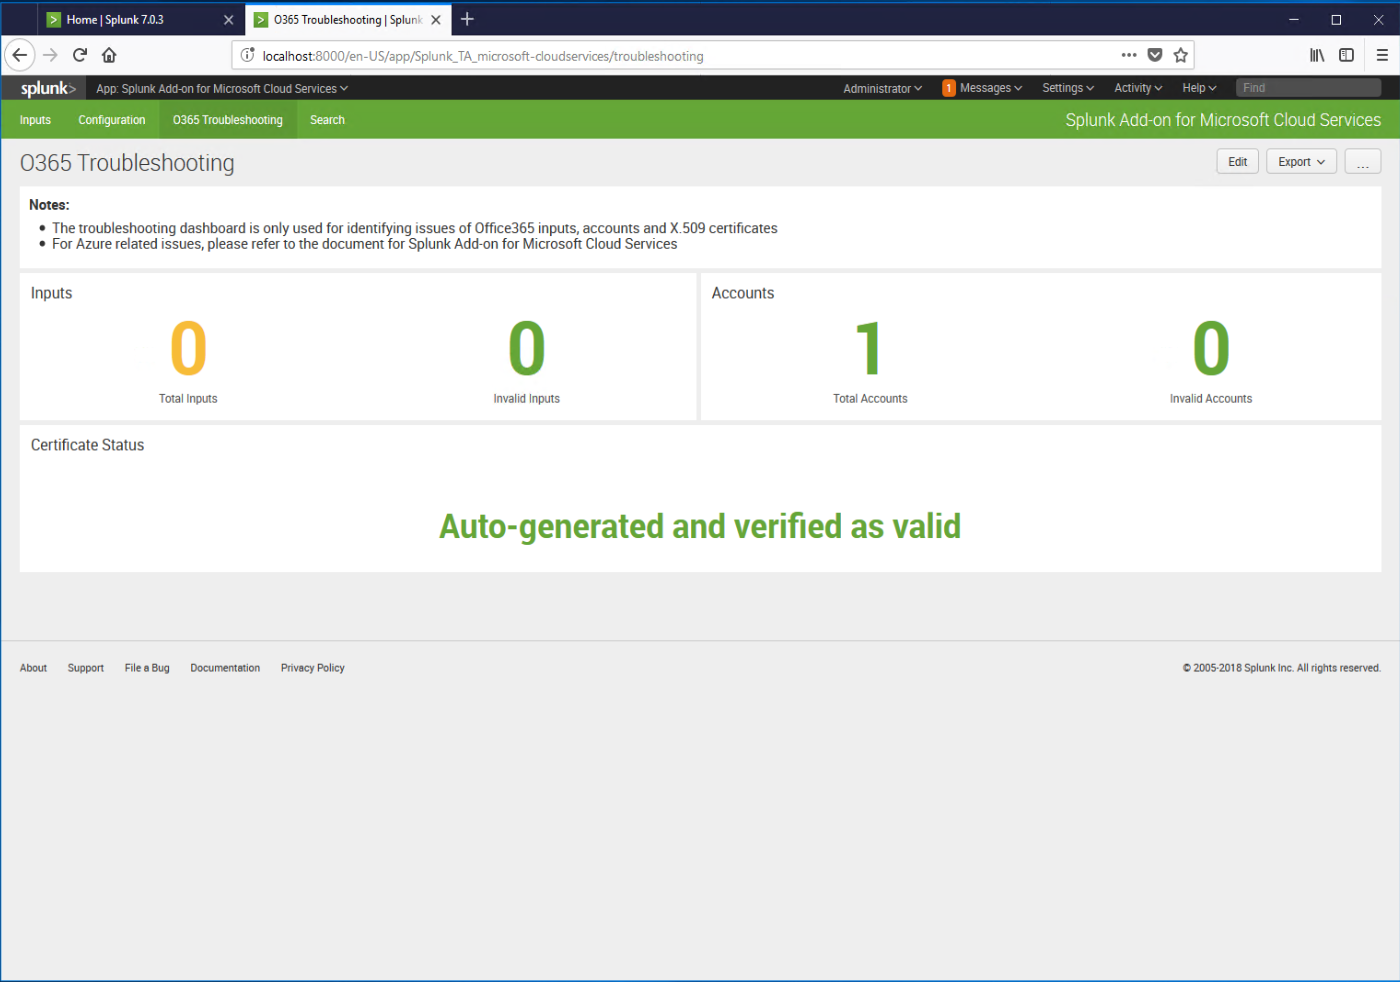
- Go back to the Splunk app configuration page, and click the O365 Troubleshooting tab in the Splunk app.
- If you see the an error such as Auto-generated but invalid, check the app manifest in Office 365 to make sure it was copied and pasted correctly and the syntax is correct.

- Restart the Splunk service (Settings | Server Controls | Restart Splunk).

- After Splunk restarts, verify that your configuration is working by navigating to Splunk | Splunk Apps | Splunk Add-On for Microsoft Cloud Services | O365 Troubleshooting.

Configure data inputs
Now that Splunk can communicate with the Azure and Office 365 APIs, it's time to start collecting data.
- Click the Inputs tab, and select the Create New Input drop-down, and select Office 365 Management APIs.

- Enter a name for the input and select the account you previously configured from the Account drop-down. If you need to collect data from multiple Office 365 tenants, you can go repeat the previous sections for creating accounts in each of the tenants, add their accounts on the Configuration tab, and then create the inputs here. The default collection interval is 3600 seconds (1 hour) for each data source; if necessary, click the blue link next to each data source to adjust the collection interval. Click Add when finished.

- Click the Create New Input drop-down, and then select Azure Audit.

- On theAzure Audit Input page, enter a name for the input, select the account from the drop-down, and enter a Subscription ID (this Azure subscription tied to your account that we copied earlier. If you don't have a separate Azure subscription, you should probably add a Pay-as-you-go subscription and then go back and grant reader permissions to it). Click Add.

Make sure you see data
Now, for the good stuff. After the accounts, permissions, and inputs have been configured, you should be able to see if you've got data coming in. Let's go check!
- From the Splunk Add-on for Microsoft Cloud Services app, click Search.

- Under What to Search, click the Data Summary button.
- Select the Sourcetypes tab. You should see a source type for each kind of input configured. If you were able to configure both an Office 365 Management Activity API and an Azure Audit, input, you'll see two Sourcetypes listed, and values under Count (that indicate how many events have been imported).

That's ooh-gobs of configuration stuff for this post. We'll continue diving into Splunk and the management API in the next post in this series.
Happy Splunking!
Comments
- Anonymous
July 03, 2018
Nice, detailed article. Will this lead to Azure cost, due to the app registration and network traffic?- Anonymous
July 08, 2018
Since it's being pulled from the Office 365 Management Reporting API, no. It's just an app registration so you can grant permissions via Graph.
- Anonymous