Using MSBuild to deploy your AppFabric Application
As the hosting of applications moves from our local staging environments to the cloud, one of the areas that needs to improve is the ability to include deployment in our automated build processes. Using the June CTP AppFabric bits, Visual Studio does an excellent job of enabling developers to design, build, and deploy AppFabric applications. However, the current tools do not provide a way to integrate these tools into a standard, repeatable build process. The goal of this post is to outline the steps necessary to integrate automated AppFabric deployment into your build process, and show off some of the REST API features we’ve built into the Application Manager.
Before we get started, let’s run through a list of tools I’m using for this sample:
- Visual Studio 2010 with the .NET Framework 4.0
- The Windows Azure AppFabric SDK CTP – June Update
- AppFabric Samples
- AppFabric SDK
- AppFabric Tools for Visual Studio
- Sample code on GitHub
Since the goal of this post is to use MSBuild to deploy our AppFabric Application, you’re going to need to register for an account over at our labs site. To request access to the CTP follow these steps:
- Sign in to the AppFabric Management Portal at https://portal.appfabriclabs.com/.
- Choose the entry titled “Applications” under the “AppFabric” node on the left side of the screen.
- Click on the “Request Namespace” button on the toolbar on the top of the screen.
- You will be asked to answer a few questions before you can request the namespace.
- Your request will be in a “pending” state until it gets approved and you can start using the CTP capabilities.
Using the REST API
The AppFabric Application Manager provides a useful RESTful API to automate most tasks available in the Application Manager. We are going to take advantage of the application lifecycle methods (start, stop, deploy, etc) to write our custom task. To help you get started with the API, we’ve put together a ResourceAccessor.cs class to abstract some of the calls we’re making using the AtomPub protocol. For example, to get the details for an application you would instantiate the class using your namespace and management key:
 // create a new instance of the Application Manager REST API wrapper
 ResourceAccessor appManagerAPI = new ResourceAccessor(this.Namespace, this.ManagementKey);

 // get some details about our application
 ApplicationResource ar = appManagerAPI.GetApplication("myApplicationName");
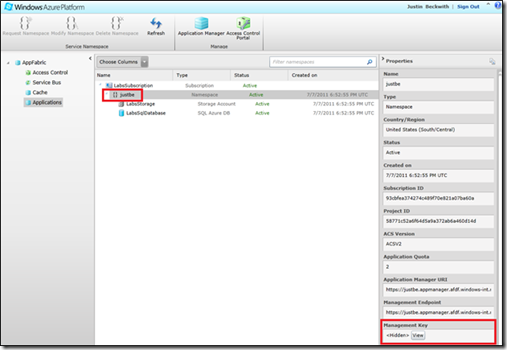
This sample assumes you have an existing account on https://portal.appfabriclabs.com, and that you have already created a namespace. To get the management key for your namespace, click on the ‘View’ button located in the properties panel on the right side of the portal, then copy the key to your clipboard:
For our purposes, we’re mostly interested in automating the shutdown, un-deployment, import, deployment, then re-starting of the application. For example, to start the application we can issue a SendCommand call:
 // attempt to start the application
 Log.LogMessage(MessageImportance.Normal, "Starting the application ...");
 appManagerAPI.SendCommand(this.ApplicationName, LifecycleCommand.Start);
If you’re interested in automating other application commands, the samples we’ve included should give you a head start.
Building the MSBuild Task
Now that we’re comfortable with the REST API, it’s time to start working on our custom MSBuild Task. This is relatively easy, and very well documented:
https://msdn.microsoft.com/en-us/library/t9883dzc.aspx
We need to create a new .NET Class Library project for our custom task. For this sample, I chose to implement a class that inherits from ‘Task’, and overrides the Execute method:
 public class AppManagerDeploy : Task
 {
     public override bool Execute()
     {
         ...
     }
 }
To deploy our custom package, the Execute method uses the REST API Wrapper to stop the running application, un-deploy the application, and then upload the new package:
 /// <summary>
 /// This is the main function that executes when creating a custom MSBuild Task. This
 /// function is responsible for uploading the given *.afpkg file to the Application
 /// Manager API.
 /// </summary>
 /// <returns></returns>
 public override bool Execute()
 {
     // output debugging information to the MSBuild console
     ...

     // create a new instance of the Application Manager API
 ResourceAccessor appManagerAPI = new ResourceAccessor(this.Namespace, this.ManagementKey);

     // check to see if the requested application is in a valid state for the upload
 // operation (stopped, undeployed)
     ...

      // upload the given *.afpkg file to the Application Manager deployment service
     appManagerAPI.UploadPackage(this.ApplicationName, this.PackagePath);

     // attempt to deploy the application
     Log.LogMessage(MessageImportance.Normal, "Deploying the application ...");
     crResult = appManagerAPI.SendCommand(this.ApplicationName, LifecycleCommand.Deploy);

     // attempt to start the application
     Log.LogMessage(MessageImportance.Normal, "Starting the application ...");
     crResult = appManagerAPI.SendCommand(this.ApplicationName, LifecycleCommand.Start);

     Log.LogMessage(MessageImportance.High, "Deployment Complete!");

     return true;
 }
For the full source, please visit our GitHub.
Attaching the MSBuild Task to the Azure AppFabric Application
After the custom MSBuild task is complete, we now attach the task to our current application *.csproj file. I chose to use the Stock Ticker Application available in the June CTP Samples, and the modified version of this solution is available with the source code for this post. To modify the *.csproj file, you need to:
- Open your AppFabric Application solution file (Ex. StockTickerApp.sln)
- Right click on the AppFabric Project containing App.cs, and unload the project
- Right click on the unloaded project and edit the *.csproj file
- Scroll to the bottom of the *.csproj file, and add this target just above the </project> tag:
 <UsingTask TaskName="AppManagerDeploy"
     AssemblyFile="C:\>Path to Samples>\AFDeployTask\bin\Debug\Microsoft.Samples.AppFabric.MSBuildTask.dll"
 />

 <Target Name="DeployToAppFabric" AfterTargets="Build" Condition=" '$(Configuration)|$(Platform)' == 'Release|AnyCPU' ">

 <Message Text="Deploying Project to AppFabric Portal" Importance="high" />
     <AppManagerDeploy
         Namespace="justbe"
         ManagementKey="jmjMPi0GvG97U/eISgswcdt/K3zlrr+MyPS8+DQhlqk="
         ApplicationName="stockticker"
         PackagePath="$(MSBuildProjectDirectory)\bin\release\publish\StockTickerApp.afpkg"
     />
 </Target>
If you choose to implement this task as part of your build and deployment strategy, you could register the Microsoft.Samples.AppFabric.MSBuildTask.dll assembly in the GAC to avoid referencing the path to the *.dll each time. The UsingTask command attaches the new assembly to the build, and ensures we can use the AppManagerDeploy task we just created. The AppManagerDeploy task accepts the following fields:
- Namespace – The application namespace generated in the Azure portal
- ManagementKey – The namespace Management key accessible in the Azure portal
- ApplicationName – the name of the application in the AppFabric Application Manager
- PackagePath – the relative path to the *.afpkg file generated during the build
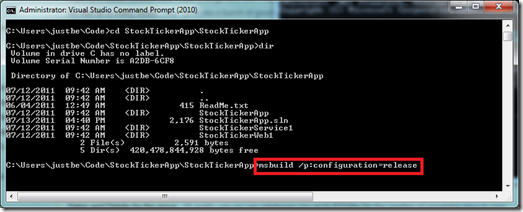
This target is configured to only execute when using the Release mode configuration. We now have two ways of executing our build with a deploy command: by building in Visual Studio using release mode, or by issuing an MSBuild command at the command prompt. Since the point of the exercise is to create an MSBuild task for automated builds, let’s step through executing our build at the Visual Studio command prompt. First navigate to the path where your application *.sln file is stored. Then execute the command to build your project:
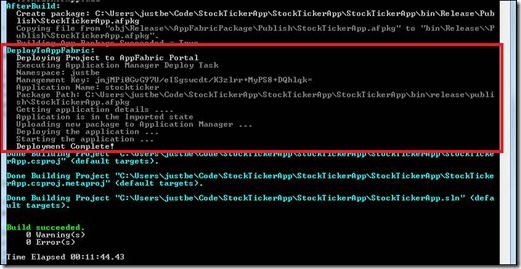
Keep in mind; this will likely take some time to execute. However, once the deployment is complete you should get a success message in the console:
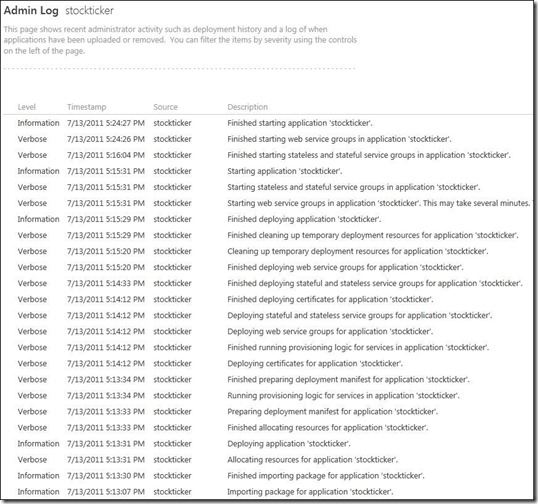
After allowing the deployment task to execute, check out the Admin Log in the Application Manager to review all of the commands that were executed:
Other Examples
For other examples of using the Windows Azure AppFabric Application Manager REST API, be sure to check out our PowerShell sample in the June CTP. For other great resources on using Azure AppFabric, please visit our blog at https://blogs.msdn.com/b/appfabric/.


