Deploy bacpac With Active Geo Replication
This post will show you how to use an ARM template to deploy a data application as a .bacpac file and to enable active geo replication to a second region. This is a follow-on from the previous post, Deploy bacpac to Azure SQL Database Using ARM.
Background
As our team has traveled around the world working with the lead architects from our top global systems integrators (GSIs), I always try to show things that would be impossible or incredibly difficult on-premises. One such scenario is the ability to create a writeable primary and to replicate the data to readable secondaries to enable a global solution. To show this, I usually just use the portal. I create an Adventureworks database using the Basic tier, then I scale it up to a P1 to show the ability to scale up. Next, I configure active geo replication to a second region to demonstrate scaling out. All of this is really easy using the portal. What I haven’t seen is the ability to do this with an ARM template.
If you want to skip the discussion and just look at the final results, the full project source code is available at https://github.com/kaevans/DeployDataApplication-GeoReplication.
Our Starting Point
We will use the previous post as a starting point.
Download the starting project from https://github.com/kaevans/DeployDataApplication.
I showed in the previous post how to deploy a data application as a bacpac file from your local machine to a new Azure SQL Database as part of an ARM template. In the interest of brevity, I will often refer back to that post for details on how to achieve a task. We saw in the previous post that the key to deploying a bacpac file from your local machine was using the _artifactsLocation and _artifactsLocationSasToken dynamic parameters and marking the .bacpac file as Content in Visual Studio so it will be uploaded to blob storage. We’ll rely on those same techniques, using the previous template as a starting point.
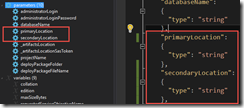
Our starting template deploys a database to a single location, where we need two locations, which I named primaryLocation and secondaryLocation.
That causes a lot of red squigglies that you will need to go back and find/replace from “location” to “primaryLocation”. Similarly, I need to be able to name each server, so I create variables “primaryServerName” and “secondaryServerName”.
I chose to use the convention “sqldemo-<uniqueid>-<location>”, and I use the uniqueString() function to generate a unique string based on the resourceGroup ID. The server name has to be lower case, so we use the toLower() function.
Unique Server Names
- "primaryServerName": "[tolower(concat('sqldemo-', uniqueString(resourceGroup().id), '-', parameters('primaryLocation')))]",
- "secondaryServerName": "[tolower(concat('sqldemo-', uniqueString(resourceGroup().id), '-', parameters('secondaryLocation')))]",
So far, so good. We know the data we want to ask the consumer of our template about.
Again, the finished product is available at https://github.com/kaevans/DeployDataApplication-GeoReplication.
I’ll Have Another
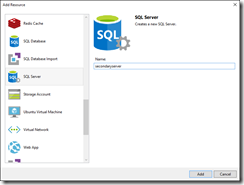
Right-click the Resources tab and choose “Add New Resource”. Add another server and name it secondaryServer. The server name has to be lower-case.
You’ll want to do some editing to use your parameters. I chose to use the same administrator name and password for each server. It’s your choice if you want to make these parameters or just use the same value for each. I decided to delete the generated parameters and just use the existing “administratorLogin” and “administratorLoginPassword” parameters, which means you have to edit the values in your template as well.
Visual Studio generates a location using the resourceGroup().location function. You want to change that to use the location parameter you created previously.
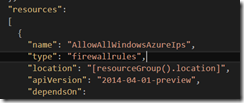
You also need to change this value for the firewall rule.
It also generates a variable for the new server’s name. You’ve already created that variable previously, so you can replace that value with the one you’ve already created.
You’ve created a server, which includes the firewall rule to enable Azure services to access the server. We now need a database. If you look at the properties for Create-Database, you will see that there is a “createMode” property that tells it to create a database as an online secondary.
createMode
String
Optional. Specifies the type of database to create. The default value is Default. The acceptable values are:
Copy : Indicates that a copy of the specified source database is created.
Default : Indicates that a new database is created with no data.
NonReadableSecondary : Indicates that a secondary database is created as a non-readable geo-replica of the specified source database. For more information about configuring a geo-replicated secondary database, see Geo-Replication.
OnlineSecondary : Indicates that a secondary database is created as a geo-replica of the specified source database. For more information about configuring a geo-replicated secondary database, see Geo-Replication.
PointInTimeRestore : Indicates that a database is created by restoring the specified source database.
Recovery : Indicates that a database is created by recovering the latest full and differential backups of the specified source database.
Restore : Indicates that a database is created by restoring the specified dropped source database.
[Source: https://msdn.microsoft.com/en-us/library/azure/mt163685.aspx]
Further, creating a secondary requires a sourceDatabaseId. That database ID must be in the form:
/subscriptions/<subscription ID>/resourcegroups/<resource group ID>/providers/Microsoft.Sql/servers/<server name>/databases/<database name>
To get the first 4 parts, we can use the resourceGroup().id function. The resourceGroup().id function will return:
/subscriptions/<subscription ID>/resourcegroups/<resource group ID>
Then we need to concatenate the rest of our values together to form the required string, filling in the server name and database name for the sourceDatabaseId parameter. We also need to make sure to update the dependsOn section since this database cannot be created until its server, the primary server, and the primary database have all been created.
Create an Online Secondary
- {
- "apiVersion": "2014-04-01-preview",
- "dependsOn":
- [
- "[concat('Microsoft.Sql/servers/', variables('secondaryServerName'))]",
- "[concat('Microsoft.Sql/servers/', variables('primaryServerName'))]",
- "[concat('Microsoft.Sql/servers/', variables('primaryServerName'), '/databases/',parameters('databaseName'))]"
- ],
- "location": "[parameters('secondaryLocation')]",
- "name": "[parameters('databaseName')]",
- "tags":
- {
- "displayName": "secondaryDatabase"
- },
- "properties":
- {
- "createMode": "[variables('secondaryServerCreateMode')]",
- "sourceDatabaseId": "[concat(resourceGroup().id,'/providers/Microsoft.Sql/servers/', variables('primaryServerName'), '/databases/',parameters('databaseName'))]",
- "requestedServiceObjectiveName": "[variables('requestedServiceObjectiveName')]"
- },
- "type": "databases"
- }
That’s really it… we needed to add a new server and a new database where the database simply refers to an existing database.
Testing…Is This Thing On?
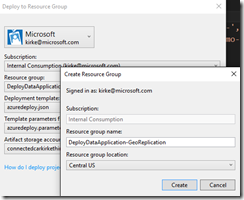
Create a resource group. The location doesn’t matter as the location of the resource group is not used in our template. When I am working with location-dependent resources, I prefer to make the resource group location somewhere unrelated so I can catch where I’ve inadvertently left a resourceGroup().location reference in my template. I put mine in Central US.
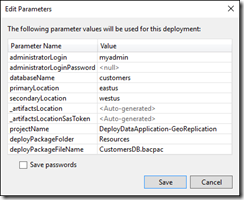
Edit the template parameters file by clicking the Edit button. I don’t enter the administratoLoginPassword value here, and I never click that “Save passwords” checkbox, so my secrets aren’t stored accidentally in source control.
Something to note is the projectName, deployPackageFolder, and deployPackageFileName parameters. I explained those in my previous post, but make sure the projectName matches the name of the resource group you are deploying to (Visual Studio defaults this to the same name as the project). The folder should be “Resources” because that’s where we store the .bacpac file in our Visual Studio solution, and the file name is obviously the name of our .bacpac file.
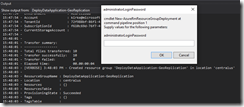
Click Save. Then click Deploy. The same window appears again, this time because we didn’t add the administratorLoginPassword value. I choose to leave it null, you’ll be prompted for it again in a moment.
Watch the output window in Visual Studio. You will see that the files are uploaded to the storage account that you chose in the Edit Parameters window. You’ll also see that you are prompted for the password because you left it null before.
Once the template finishes, you will see a thing of beauty… a message with ProvisioningState = Succeeded.
In case you missed it, the finished product is available at https://github.com/kaevans/DeployDataApplication-GeoReplication.
The Big Reveal
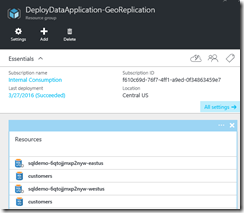
OK, now to check on our work. Go to the portal and verify there are two servers and two databases, and the databases have the same name.
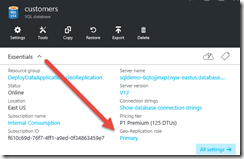
Click on the primary database (in my case, that was the one in East US). Notice the geo-replication role is “Primary”.
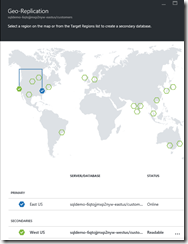
Click on the word Primary to bring up the geo-replication blade. You’ll see the replication relationship represented graphically, but more important you see that the database in West US is an online readable secondary.
For each server, go add the firewall rule for your client IP.
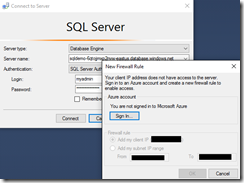
Now open SQL Server Management Studio and connect to each server. Something that is cool in the latest SQL Server Management Studio version is that it will prompt you to sign in and add the firewall rule if you’ve forgotten this step (it used to just throw an error).
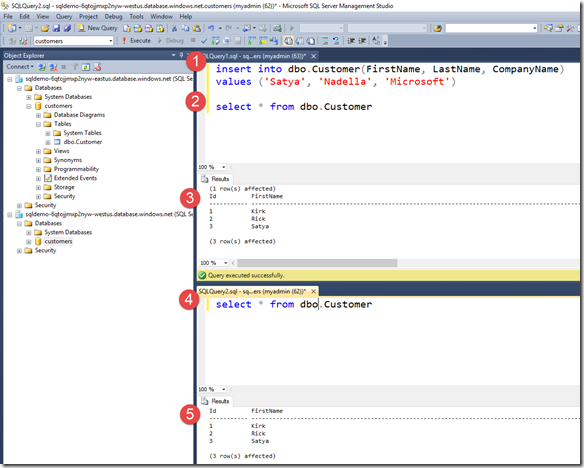
Connect to both servers. I changed the results to output to text instead of a grid. To make it easy to see, I created a horizontal tab group.
- Insert a new value into the Customer table.
- Select all the rows to show the new row was added.
- The results are displayed.
- Select all the rows from the secondary server to show that the row was also added to the secondary server.
- Show the results are the same as in step 3.
Very cool… you now have active geo-replication with a readable secondary, all deployed from a .bacpac file on your local machine to two different regions in the cloud. Think for a moment how difficult this would have been on-premises… I have two servers in two different parts of the world, with a writeable primary in one and a readable secondary in another. Setting this up using virtual machines would have been a monumental task, instead I was able to do it with a bit of JSON code using an Azure SQL Database.
Download the Code
The entire project, including a sample database, is available at https://github.com/kaevans/DeployDataApplication-GeoReplication.
For More Information
Azure Resource Manager template functions
Overview: Cloud business continuity and database disaster recovery with SQL Database
Azure SQL Database REST - Create or Update Database
Deploy bacpac to Azure SQL Database Using ARM
https://github.com/kaevans/DeployDataApplication-GeoReplication
