Deploy bacpac to Azure SQL Database Using ARM
This post will show you how to deploy a .bacpac file to an Azure SQL Database using an Azure Resource Manager Template.
Background
The way I develop most solutions is to build resources locally on my machine, debug them locally, then deploy to Azure. That means I create web applications and databases locally. I wanted a way to take the database from my local machine and deploy it to Azure as part of an Azure Resource Manager (ARM) template. It has been difficult to find information on deploying databases using ARM templates, so I thought I would save someone else the frustration and show how to do this.
This post is just as much about telling you how to use Visual Studio to author ARM templates as it is about showing you how to achieve a specific task. If you just want to download the code and skip all the discussion, the entire project is available via GitHub at https://github.com/kaevans/DeployDataApplication.
Export the BACPAC File to Local Disk
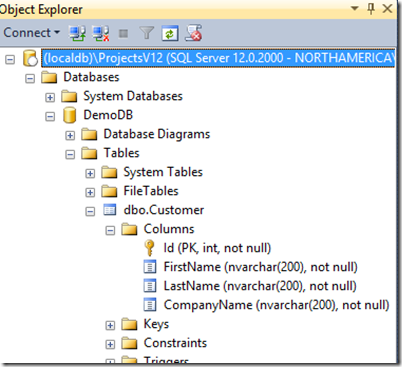
The first bit to understand is the .bacpac file. The .bacpac (and its sibling, .dacpac) have been around for awhile. In short, .bacpac contains the schema and data necessary to deploy your database. To create a .bacpac file, I open the database in SQL Server Management Studio. Notice here that I am connected to LocalDB, which is the version of SQL Express on my local machine. I created a database, “DemoDB” with a single table, “dbo.Customer”.
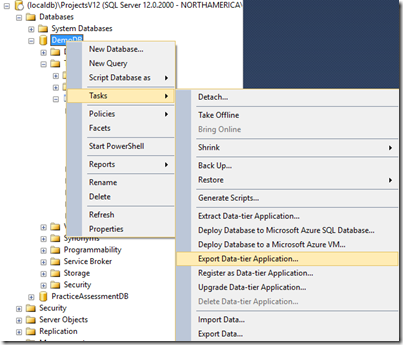
Right-click on the database and choose “Tasks / Export Data-tier Application…”.
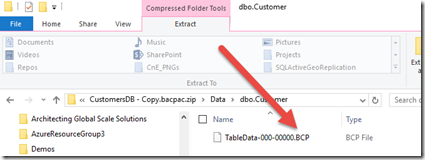
On the Export Settings page, choose “Save to local disk” and give it a name. Once the file is created, make a copy of the file and then rename the copy with a .ZIP extension to look at the contents. Notice it uses the BCP format to represent the table data.
Again, make sure not to make changes to the original file, but you can play around with the copy all you want.
Create a Project
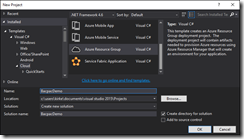
Visual Studio makes it really easy to create ARM templates, and even has a wizard to use a database import. To see this in action, open Visual Studio 2015 and create a new project (File / New / Project / Azure Resource Group).
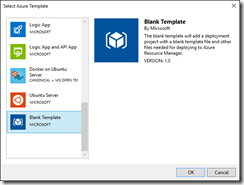
When prompted, choose a Blank Template to start from.
Add the BACPAC File
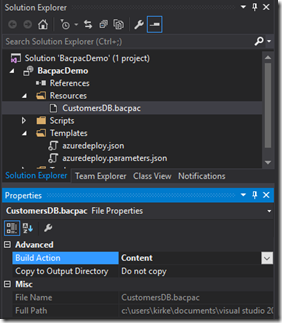
We now need to add our BACPAC file to the project so that it will be deployed as part of our template deployment. Right-click the project and add a new folder, "Resources”. The name doesn’t have any special significance, we could have called it “Packages” or “DeploymentFiles” or whatever we wanted. Add the .bacpac file to that folder in Visual Studio. In the properties pane, change the Build Action to “Content”.
Before I go further, you may be wondering where in the world I got some of this “magic” from. Just like we just did a database import wizard, there is another wizard for a WebDeploy for a web site. That gave me the key to some of the “magic” you’ll find in the follow steps.
What the Default Wizard in Visual Studio Does
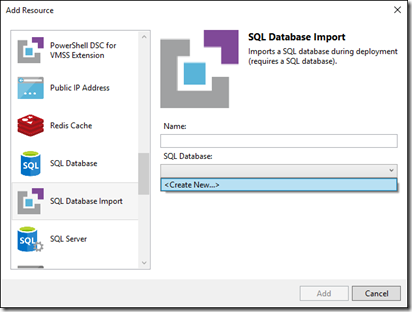
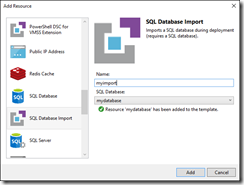
Open the azuredeploy.json file that was created as part of your project, and the JSON Outline window in Visual Studio should be shown. Right-click on the “resources” node and choose “Add New Resource”. Notice one of the choices is SQL Database Import.
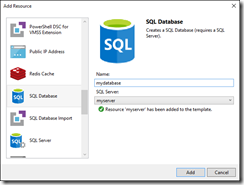
At this point, we don’t have a database or a server, so the drop-down to choose a database prompts us to create a new database. Similarly, the prompt to create a new database will ask us to create a new server. Simply provide a name for the server and the database, such as “myserver” and “mydatabase”.
For simplicity (you can refine this later once you see how all this works) name the import “myimport” just so you can see easily in the template where you can replace this later.
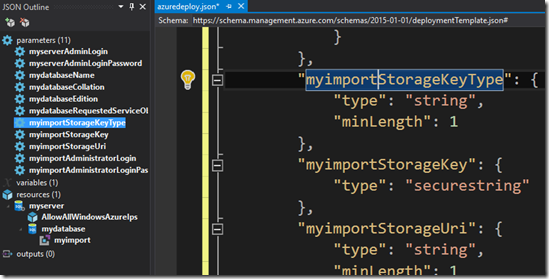
The result is a template that provisions a server, a database, and lets you provide the information for a pre-existing storage account that contains a bacpac file.
There are two things I don’t like about this template. First, whoever uses this template has to know the correct value for the collation, edition, requestedServiceObjectiveName, and storageKeyType. My deployment needs to be simple, not flexible, so I want to hide as many details like this as I can. I prefer to change these things to variables so that someone using the template doesn’t have to know all the values, but someone editing the template knows where to make the changes. Second, I don’t like that you need to have uploaded the .bacpac file to a storage account prior to using this template. Visual Studio should take care of that for you. One nitpicky thing is that it hard-codes the maxSizeBytes parameter into the database resource, I prefer to make that a variable so someone can easily find it and change it later. We’ll make some changes here in a bit in the section “We Can Improve on That”.
We Can Improve on That
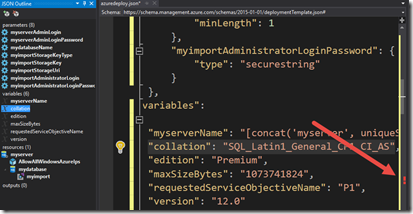
I’d like to change to make our template easier to consume and have less parameters for the end user to have to enter. Parameters are exposed to the end user while variables are static but can be changed later if someone edits our template and decides to make it a parameter instead. I first create some variables, then when I am sure I have created a variable for each parameter I will delete, I delete the parameters. That causes a red mark in the editor.
This is a quick way for me to know where in the template the parameter was referenced so I can change it to reference my variable instead. When I correct all the missing values with the correct variable reference, the red marker disappears.
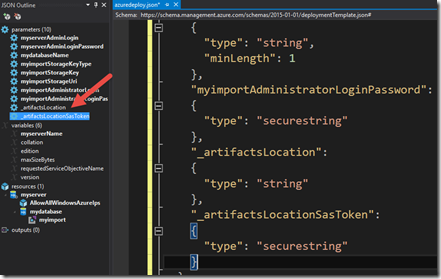
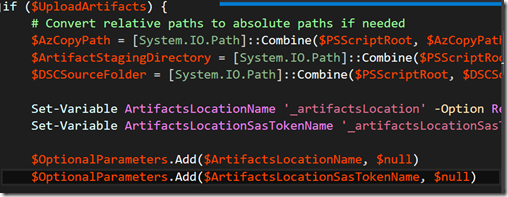
The reason I bring this up is because we need to add two special parameters that Visual Studio knows about: _artifactsLocation and _artifactsLocationSasToken. The _artifactsLocation parameter refers to the Azure Storage account where Visual Studio will upload our project’s contents to. The _artifactsLocationSasToken is a shared access signature value that allows our template read access to the blob container for 1 hour.
In case you are wondering where in the heck this comes from, it’s kind of easy to find. Just look in the “Deploy-AzureResourceGroup.ps1” file and you’ll see where it sets these optional parameters.
The beauty about these parameters (and the generated Powershell cmdlet) is that we can replace the stuff that the template generated that required the end user to have uploaded the .bacpac file and generated a SAS token prior to calling our script. Our script will upload the .bacpac file to a pre-existing storage account, generate a read-only SAS token, and use that with our template. We can now delete the “myimportStorageKeyType”, “myimportStorageKey”, and “myimportStorageUri” parameters so that the end user is no longer concerned with those. That causes red-squigglies.
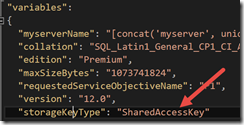
The myimportStorageKeyType becomes a variable, “storageKeyType”.
The values are replaced in the template.
Because I am really particular about reducing the amount of work on the end user, I also see redundancy in the generated “myserverAdminLogin”, “myserverAdminLoginPassword”, “myimportAdministratorLogin”, and “myimportAdministratorLoginPassword” parameters. I consolidate those to “adminLogin” and “adminPassword”, replacing all references in the template.
Now for some weirdness that bears explanation. When you deploy from Visual Studio, it will copy everything from the root directory to your Azure Storage account into a container named “<your resource group name>-stageartifacts”. You can see I’ve played around with this a few times.
Measure Twice.
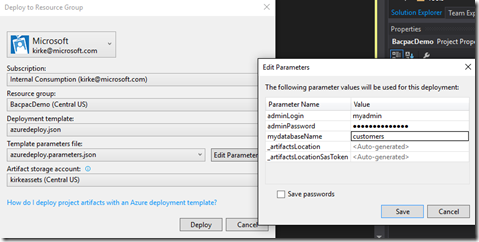
Just for educational purposes, let’s try to deploy so that we can understand why it fails. Right-click on the project and choose “Deploy”. That pops up a wizard. Choose or create a new resource group, provide a location, and provide a pre-existing storage account where the project contents will be uploaded. You can click the Edit Parameters button to provide values for the parameters in the template, which are saved to the “azuredeploy.parameters.json” file.
Save the parameters (don’t save the passwords, leave that unchecked… if you put this in source control, you’d be in a world of hurt because you stored account secrets in source control and someone could get them later. Just say no.), then choose Deploy. You will see in the Output window that 10 files were uploaded successfully.
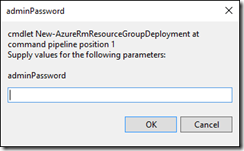
You are then prompted for the password (only if you’re doing this right… if you save the password locally, you are doing it wrong… stop that).
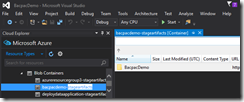
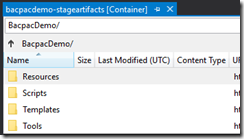
Give it a minute, and then it fails. The key to understanding why is to look at the storage account. A new container, “bacpacdemo-stageartifacts” is created, which contains a folder “BacpacDemo”.
That folder, in turn, contains folders that are the same as what our project has.
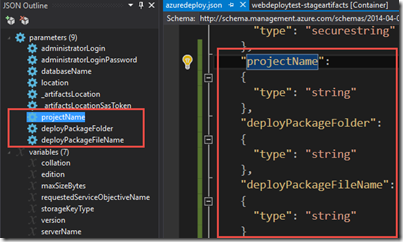
That means we need to account for the container name and the “Resources” folder that we created previously in the demo. Add a few new parameters to the template.
I then change the “storageUri” property of the import task to use these 3 new parameters as part of the URI.
See It In Action
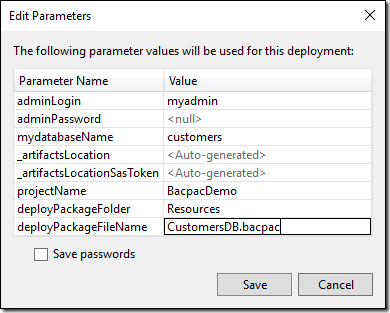
We now right-click and deploy again, editing the parameters:
We finally see the payoff from all our hard work.
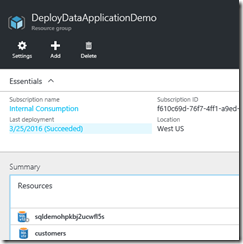
Go to the portal and make sure you see your pretty new database.
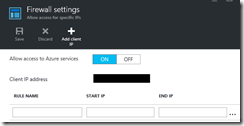
Go to the server and update the firewall settings, adding your client IP.
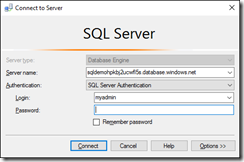
Now open the database in SQL Server Management Studio.
Open the table and select the top 1000 rows just to show that the schema was uploaded and the data is there, too.
Boo yah. You just deployed a .bacpac file from your local machine to a new Azure SQL Database as part of an ARM template.
Seems like a lot of work, but that’s just because I am long-winded. You really just used the wizard in Visual Studio, added a file, and changed a few parameters. Done.
Download the Code
The entire project is available via GitHub at https://github.com/kaevans/DeployDataApplication.
Special thanks to my colleague Rick Rainey (https://www.rickrainey.com, and @rickraineytx on Twitter) for helping me debug this mess and get it working.
Comments
- Anonymous
March 28, 2016
Awesome post, Kirk. We are discussing database DevOps with a new client and this directly addresses one of the concerns. Nice job working this out. - Anonymous
October 06, 2016
This is very good and helpful. Thank you :) One thing I have been struggling with is to not get an error on the second deployment of the .bacpac file. Is there a way around this like skipping the deployment if the database exists or is non-empty?- Anonymous
October 06, 2016
The comment has been removed- Anonymous
October 06, 2016
@Kirk, thanks for your answer and a good suggestion. I will look into this.
- Anonymous
- Anonymous
