Windows Azure AppFabric Caching Service - soup to nuts primer
Introduction
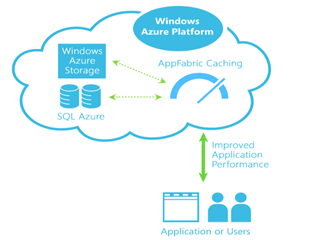
One of the important reasons to move an application to the cloud is scalability (outside of other benefits that the cloud provides). When the application is deployed to the cloud, it is critical to maintain performance - the system needs to handle the increase in load and importantly maintain low latency response times. This is currently needed for most applications, be it a website selling books or a large social networking website or a complex map reduce algorithm. Distributed Caching as a technology enables applications to scale elastically while maintaining the application performance. Previously, Windows Server AppFabric enabled you to use distributed caching on-premises. Now, distributed caching is available on the cloud for Azure applications!
Here are some scenarios to leverage the Windows Azure AppFabric Caching Service:
ASP.NET application running as a web role needing a scalable session repository
Windows Azure hosted application frequently accessing reference data
Windows Azure hosted application aggregating objects from various services and data stores
Windows Azure AppFabric Caching is Microsoft's distributed caching Platform As A
Service that can be easily configured and leveraged by your applications. It provides elastic scale, agile apps development, familiar programming model and best of all, managed & maintained by Microsoft.

At this time, this service is in labs release and can be used for development & test purposes only.
Configuring the Cache endpoint
Go to https://portal.appfabriclabs.com/ and login using your Live ID
Create a Project and then add a unique Service Namespace to it, for instance 'TestAzureCache1'.

When you click on the Cache endpoint, you should see the service URL and the authentication access token as follows:

At this point, you are done setting up the cache endpoint. Comparing this to installing and configuring the cache cluster on-premises shows the agility that cloud platforms truly provide.
Developing an application
Download the Windows Azure AppFabric SDK to get started.
Copy the app.config or web.config from the portal shown above and use it from your client application

In your solution, add references to Microsoft.ApplicationServer.Caching.Client and Microsoft.ApplicationServer.Caching.Core from C:\Program Files\Windows Azure AppFabric SDK\V2.0\Assemblies\Cache
Add the namespace to the beginning of your source code and develop the application in a similar manner to developing on-premises application
using Microsoft.ApplicationServer.Caching;
* At this point, Azure AppFabric caching service does not have all the features that Windows Server AppFabric Cache supports. . For more information, see https://msdn.microsoft.com/en-us/library/gg278356.aspx.
If you are developing the application via code instead of config, here are set of code for accessing the caching service. Only the statements highlighted need to be modified as per your configured endpoint.
private
void PrepareClient()
{
// Insert the Service URL from the labs portal
string hostName = "TestAzureCache1.cache.appfabriclabs.com";
int cachePort = 22233;
List<DataCacheServerEndpoint> server = new
List<DataCacheServerEndpoint>();
server.Add(new
DataCacheServerEndpoint(hostName, cachePort));
DataCacheFactoryConfiguration config = new
DataCacheFactoryConfiguration();
//Insert the Authentication Token from the labs portal
string authenticationToken = <To Be Filled Out>;
config.SecurityProperties = new
DataCacheSecurity(authenticationToken);
config.Servers = server;
config.IsRouting = false;
config.RequestTimeout = new
TimeSpan(0, 0, 45);
config.ChannelOpenTimeout = new
TimeSpan(0, 0, 45);
config.MaxConnectionsToServer = 5;
config.TransportProperties = new
DataCacheTransportProperties() { MaxBufferSize = 100000 };
config.LocalCacheProperties = new
DataCacheLocalCacheProperties(10000, new
TimeSpan(0, 5, 0), DataCacheLocalCacheInvalidationPolicy.TimeoutBased);
DataCacheFactory myCacheFactory = new
DataCacheFactory(config);
myDefaultCache = myCacheFactory.GetCache("default");
}
Performance data
By now, you must be thinking if this is indeed this easy, what is the catch? :) :) There is none. Here are some performance numbers that I ran, hopefully this makes you feel at ease.
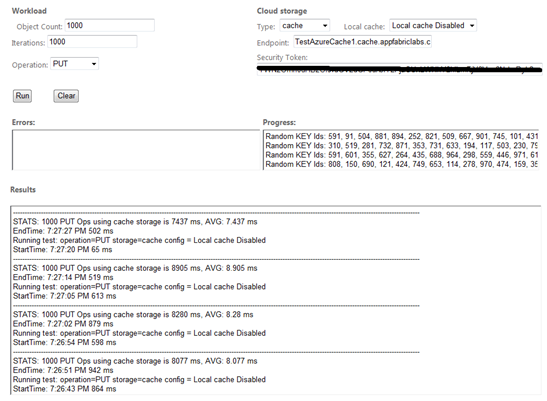
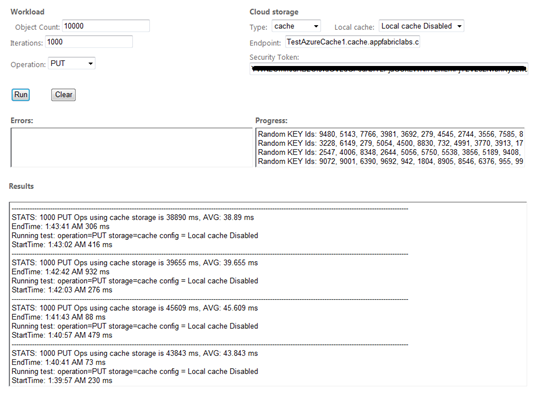
This is an ASP.NET application running as a web role in Windows Azure accessing the cache service. The Object count parameter is used to instantiate an object which has an array of int[] and string[]. For example, when Object count is set to 100 the application will instantiate int[100] and string[100] with each array item is initialized to a string ~6 bytes. So approximately, the parameter 'Object count' * 10 is the pre-serialized object size. When storing the object in the caching service, the KEY is generated using RAND and then depending on the Operations dropdown, the workload is run for a set of iterations based on the 'Iterations' parameter. Finally, the average latency is computed. The web role is running in South Central US data center in the same DC where the caching service is also deployed in order to avoid any external network latencies. For all these tests, the local cache feature is disabled.
Operation |
Object Size (pre-serialized) |
Avg Latency (ms) |
PUT |
~1KB |
4.5 - 6.5 |
GET |
~ 1 KB |
4.8 - 5.1 |
PUT |
~10 KB |
7.4 - 8.9 |
GET |
~10 KB |
7.6 - 10.3 |
PUT |
~100 KB |
38.9 - 45.6 |
GET |
~100 KB |
4.6 - 7.3 |


Now that you have some cache in the cloud, get your apps going!
Authored by: Rama Ramani
Reviewed by: Christian Martinez, Jason Roth
Comments
- Anonymous
January 03, 2011
This is one in a series of posts on a Windows Azure Learning Plan. You can find the main post here .