Continuing with the Windows Phone applications–.NET Serialization
The Chronometer application I have been building for Windows Phone 7 is coming along nicely! This has mostly been a weekend project, as I don’t find time to get to it during the working days. The Stopwatch functionality is almost complete. In the last post I introduced the concept of data binding and persistence. I can now record a series of Stopwatch events, name the events, and when I exit (or tombstone) the application, I can persist them into a file.
In this post I will incrementally refine the application in a few different areas. The first one is to make the code for saving / loading the timings to and from the file lot simpler, by leveraging the power of .NET serialization.
If you remember, I had stored the timings from the Stopwatch in an in-memory data structure defined as follows:
This is essentially an ObservableCollection object which represents the collection of timings. The object itself takes care of providing notifications when items get added, removed, or when the whole list is refreshed. The definition above takes a template for the class <Timings> which represents individual elements in the collections. The definition of the “Timings” class is shown below. Each element essentially is a tuple of two strings “EventName” for the name of the Stopwatch event, and “timingsinms” representing the time for the event.
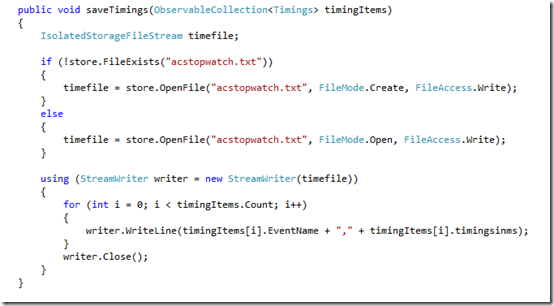
The code to then save and load the in-memory collection object into a persisting file was explicitly written as:
Leveraging .NET Serialization
.NET provides the System.Xml.Serialization namespace that contains objects to help serialize objects into XML documents which can then be saved in files. Likewise, it provides classes for the deserialization too. You can read all of the details about .NET serialization here.
There are two options I can take - either to do an XMLSerialization or BinarySerialization. I am choosing XML since I could have a look at the file I need to and also tweak to choose the elements to be stored.
Since we are using an ObservableCollection which is part of System.Collection and types in System.Collection and System.Collection.Generic are by default Serializable. So it’s east just to serialize the entire collection with one line of code.
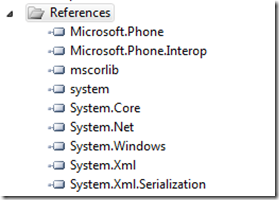
We first add System.Xml.Serialization as a reference, and include the name space in our project
We then create an instance of the XmlSerializer class using the type of the object we want to serialize.
With this, the saving and loading of the in memory collection to the file become a lot easier.
To serialize to the file, the code now looks like the snippet shown below. We simply create a StreamWriter object for the file we have opened or created, and then serialize the instance of the XmlSerializer object (which has already been created of the write type), by calling the Serialize method, passing in the writer and the actual in memory collection as the parameters.
Loading the collection back in to memory is equally simple.
Note that the ObservableCollection does not fire the NotifyPropertyChanged when the whole collection is deserialized. So we overcome that by setting the Itemsource of the TextBox to the Collection once again.
Handling the Application state during Deactivate and Closed events
For the Main Application you will see there are four events that need to be handled and you can see the event handlers stubs already written for you in App.Xaml.cs. In our case we want to handle the case where when the user presses the back button or when the Windows button is pressed or when the user powers off the mobile when the app is in use, we want to store what we have in in memory list.
Currently we just have one screen and we will handle the Deactivated and Closed events when the main screen is being tombstoned.
Let’s first add the event for handling the de-activation. This is also an opportune time to show off a Visual Studio short cut mechanism to define and add these event handlers. Simply type:
“PhoneApplicationService.Current.Deactivated +=”
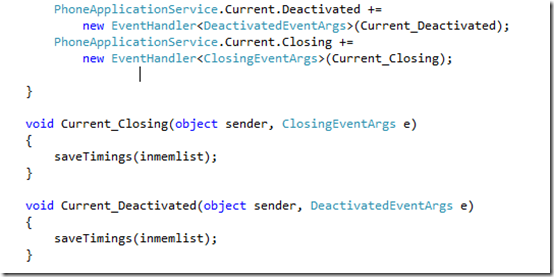
Then hit the <tab> key twice. The code automatically expands to defining a default handler and setting the above event to the handler. See below
We will replace the default implementation with a call to “saveTimings” and likewise define and do the same for the Current.Closing event. The code for both is shown below.
Since we are loading the timings when the application loads, and saving them when the application is deactivated, we no longer need to save the timings when the “Save” button is clicked – we will simply let the data structure build up in memory.
Formatting the time
Earlier we were calculating the time down to seconds and milliseconds by dividing the elapsedmilliseconds. We will now write it to the TImeSpan class and find out the Hours, minutes, seconds and milliseconds in one line of code.
Fixing the font size and color of the timings
Finally some aesthetic changes. I had noticed that the display style of the event name and that of the timings string were not quite the same. I have fixed that by appropriately defining the foreground brush for the TextBlock and its font size too – as shown in the XAML snippet below
That completes the Stopwatch functionality.
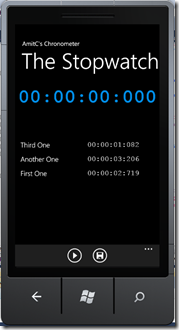
A quick test shows that the displays are looking much better, and the functionality is all intact
Hitting the back button or hitting the “windows” button to tombstone button and getting back to the application also shows that the timings data is correctly being persisted and restored back
My goal for the next session and next post is to add another feature to the Stopwatch – that of a count down timer. That will need me to add another page to the application or perhaps a panoramic view – that will be fun!
Cheers!


