“Quick” Tips for Gamemaker (Part 4- Start/End Screen)
In my last “Quick Tips” gamemaker blog post, I covered how to keep and display a score for the user during your game. Today, I will show you how you can add simple start and end screens. This is not a complex idea but is very important as almost every game out there, whether it be super simple or super complex, has some sort of start and end screen. The start screen typically includes some sort of button that allows the user to start playing the game. It might also have a button for an about page or something similar, but today, we are going to focus on adding simply a “play” button. As far as the end screen, we will add two buttons, “quit” and “restart”, that will allow the user to either go back to the start screen or restart their game.
In gamemaker, the idea here is to basically have three different rooms, one for start menu, one for playing the game, and one for after the player loses or finishes the game. The play button will be added to the start screen and the restart and quit buttons will be added to the end screen. We will start by creating the three individual buttons that will be added to your rooms. For this part, choose a simple image that relates to your game. For example, in my game Rain Dodge game, I chose a cloud.
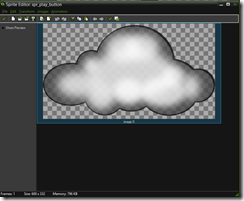
We will use this image to create the following three sprites: spr_play_button, spr_quit_button, and spr_restart_button. I will lay out the steps for creating the first one, and the second two will follow suit. First, create a sprite named “spr_start_button”, and load the image that you chose to use for these buttons. Now, we need to set a couple of the properties for this sprite. Under “origin”, click on “center” to set the origin for this image at its center. Secondly, click on “modify mask”, and then under “shape”, click on “precise”. It should look similar to the below snapshot.
Now, you want to add some text on top of your image. Click “edit sprite”, and you should see this screen.
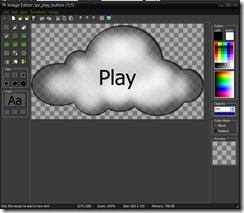
Double click on your image, and another screen should pop up. This is where we are going to add the text. Click the “T” symbol (see the first arrow"), and then you should see “Font” box like the one below.
You can click on the font box (second arrow) to bring up your choices for font, size, and style. Make those choices and add the word “Play” by clicking on the image. You might have to play around with the size a couple of times to get the best fit, but once you do, go ahead and center the text. You should see something like this.
Very nice. Now you can save this and create the second two sprites (quit and restart) in the same manner. Just follow the above steps but obviously change the names out. ":)
Now, we need to create the objects for each of these sprites. This is actually pretty simple. For the play object, create an object called obj_play_button, and load the corresponding sprite. Save, close, and do the same for the other two sprites, again, changing the names appropriately.
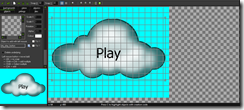
Alright, so we now have the three buttons, but we need our two additional rooms, start and end. I’m assuming you have already created your game room. That said, let’s start with the start room (no pun intended). Create a room and call it, yep…you guessed it, “start_room”. Click on “background” and then choose a color that suits your app. Lastly, add your play button here. Save and close. Should look similar to the below screen.
Similarly, we are going to the same thing for the end room, but we are going to add two objects, the restart and quit buttons. Because you are adding two buttons here, they might need to be resized a little to make them both fit. Should look something like this when you are done.
Alright, we are down to the last few steps. Here, we need to do add the event handler for each of the buttons. So, open back up the three button objects. For each, we are going to add the mouse->left pressed event, and for the event we will add the “go to room” action. It can be found under the “main1” tab and under the “rooms” category. It is the room with the down arrow, shown below. For the start and restart buttons, we want to go to the “game_room”, but for the quit button we want to go to the “start_room”. Make sense?
Now, you’re probably asking how to get from the game to the end room? Well, that part is up to you. It might happen when your player collides with something or runs out of time. Whatever the scenario may be, simply add another “go to room” action under that event, and choose to go to the end_room.
Ok…LAST STEP. We just need to make sure that your start screen is the first screen that appears when you start the game. To do this, ensure that start_room is the first listed under Rooms on the left. You can just drag start_room above game_room. Should look like this.
Alright we are done. Whew! Now you have a game that has movement, score, and start and end screens. We are making progress. Feel free to go back and look at any of the previous walkthroughs. As always, comment with any questions, concerns, or suggestions!


