Construct 2 - Global High Scores for Windows 8.1 with Windows Azure Plugin
One of the quintessential pieces of a good game is having global high scores. Users love to be able to see their time spent in your game rewarded with a high score. Regardless of how many scores you choose to display to the user, it gives them something to aspire to and gives them more reason to continue to play your game. That said, let’s take a look at incorporating high scores into a Construct 2 game using Azure Mobile Services.
To get started, you need to know a little bit about Azure Mobile Services and how to create a leaderboard table. Follow these two articles.
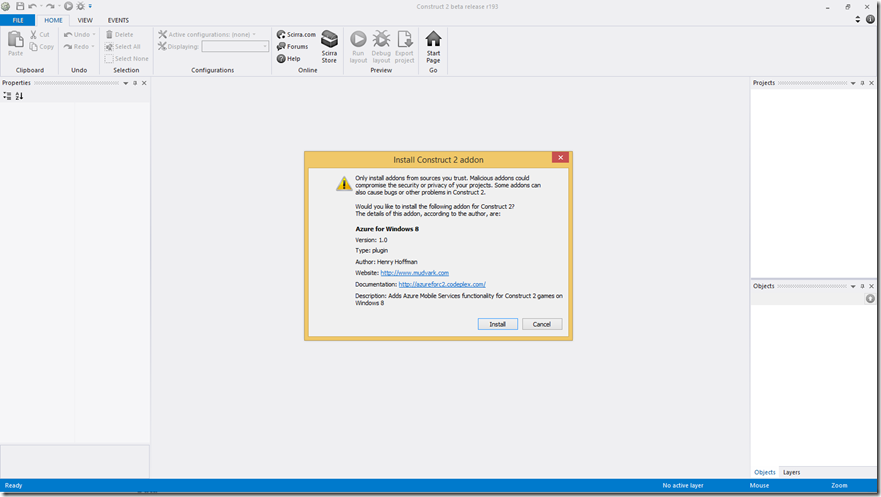
Next, you will need to install the Windows Azure Plugin to Construct 2. You can find the plugin download, here. After you download the plugin, you can simply drag it onto the Construct 2 screen. Once you do so, the following screen will appear.
Click Install and then restart Construct 2. After restarting we should be able to get started with a sample game. One thing to note before we do is where your Application Key and your Mobile Service URL. If you need to remember where to find them you can refer back to the following article, Intro and Creating Your First Azure Mobile Service.
I have provided a started project for you to use. You can find it here, Azure For Windows 8 Starter.
Once you open that project take a look around. You will see there is a ScoreTable Layout and Event Sheet. This Event Sheet has the logic to read scores from an array and display them to the screen. I won’t cove that here because I have a post dedicated to Displaying High Scores Table. Notice that there is also an additional event sheet called “Azure For Windows 8 Helper”. This Helper Event Sheet is where we are going to add all of our logic to Query our Azure Mobile Service table and Insert records into it. This Event Sheet is referenced by the ScoreTable Event Sheet and will be called using the QueryTable and InsertScore functions as below.
Now that we are familiar with the sample, select the Azure For Windows 8 object from the Object Types Folder. On the left hand side you should see in its properties two fields, App URL and App Key. These are the two I mentioned a second ago. If you need to remember where to find them you can refer back to the following article, Intro and Creating Your First Azure Mobile Service. Go ahead and fill those two properties in.
Now let’s hop over to the Helper Event Sheet and notice the Global Variables that I have already defined. They are pretty self explanatory. You can change these as you see fit, but ensure that TableName matches exactly the name of your table in the mobile service.
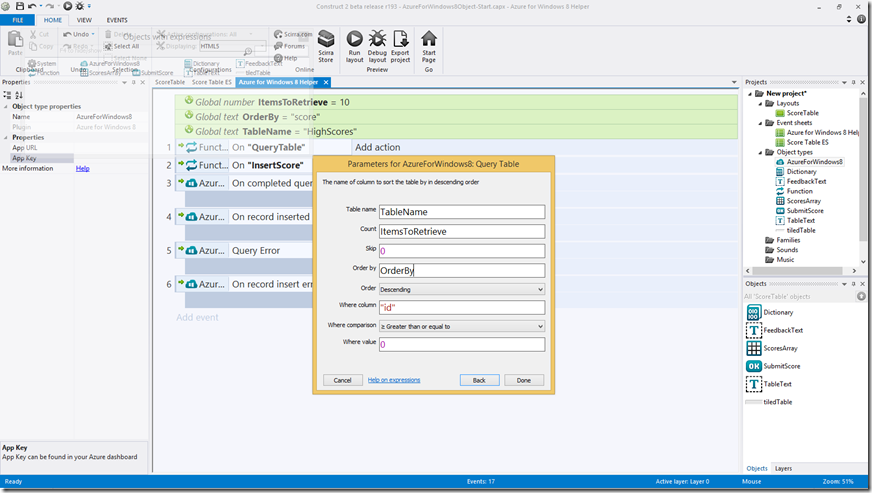
Now, we can add the logic that actually queries the table. Add an action next to the function QueryTable and choose AzureForWindows8->QueryTable. Then populate the parameters with the three global variables we just looked at. Should look like this.
Similarly, let’s add the logic for inserting a score into our table. Now add an action next to the function InsertScore and choose AzureForWindows->Insert New Record using the TableName global variable. The JSON string will actually be the first parameter we receive in this function, Function.Param(0). I have already taken care of passing that parameter in. Your action should look like this.
Now we need to take the response from the query and put into our array/ Next to the “On Completed Query”, add the following action ScoresArray->Load->AzureForWindows8.LastData.
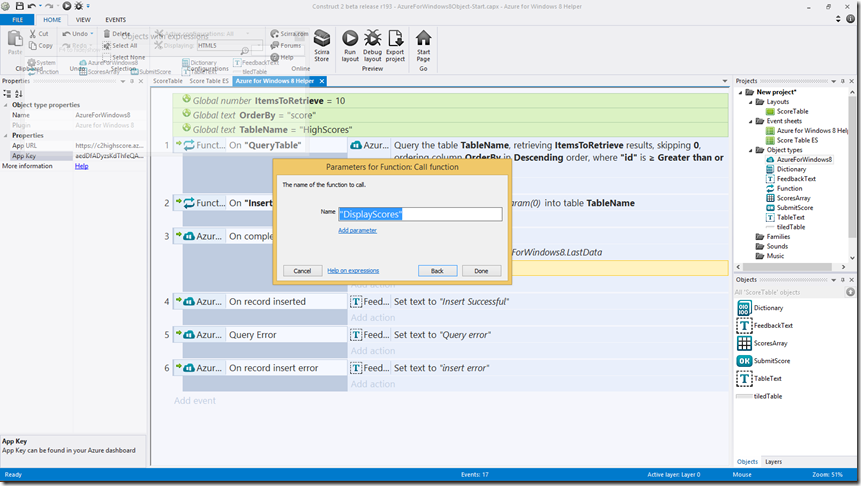
We now have our scores in our array. Lastly, let’s call the DisplayScores function just below the previous action.
All in all, your helper Event Sheet should look like this.
Now comes the tedious part. We need to export our project as a Universal App, and then make some changes to the source code. Take a look here for my post on Exporting a Construct 2 Project to Windows. You should export your project as a Universal App. After you export, open up your Visual Studio solution file (.sln). After opening up your solution, you will need to create a test certificate to run your game. If you do not know how to create a test certificate for your game, you can follow my post here, Creating a Test Certificate For Windows Apps.
In the source code, we will need to make the following changes.
-
- Add Nuget package for Azure Mobile Services for WinJS
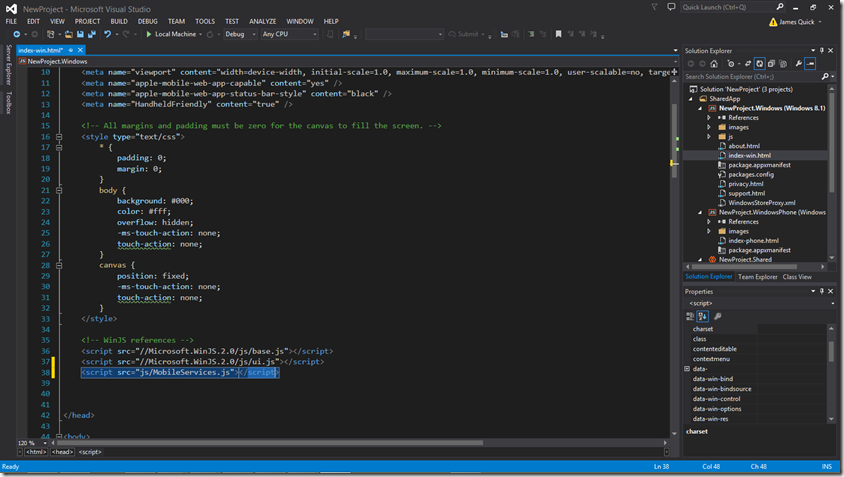
- Add reference to Azure mobile Service script in index.html
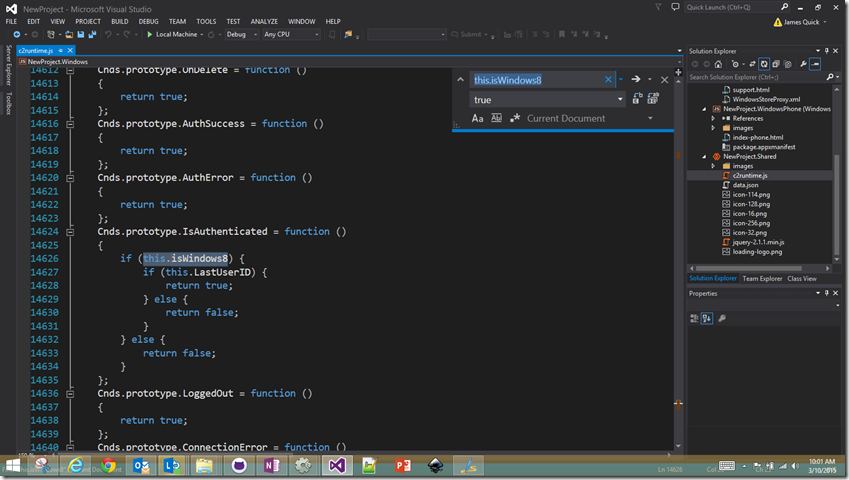
- Replace this.iswindows8 with true or delete the condition - search "this.iswindows8 =" in C2Runtime.JS
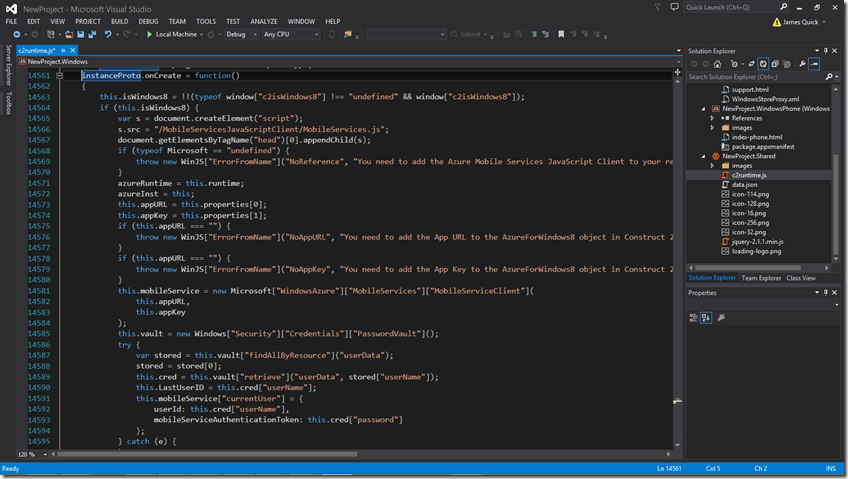
- Replace Azure Mobile Service Constructor script in C2Runtime.JS
1. Add Nuget Package
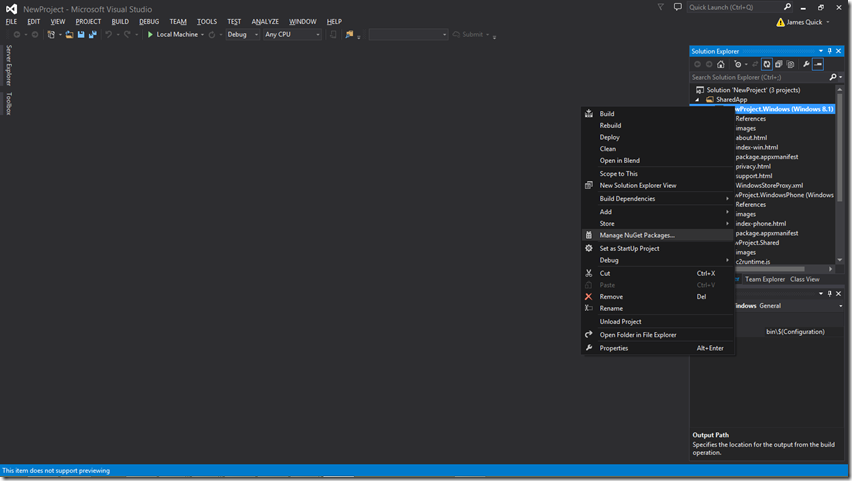
Right click on Windows project and choose Manage NuGet Packages.
Search Azure Mobile Services and click to install Windows Azure Mobile Services for WinJS
After installing you should see a check mark next to the package. Close this window.
2. Add reference to Azure mobile Service script in index-win.html
Open you index-win.html and add a reference to the Azure Mobile Services JS file as below.
3. Replace each this.iswindows8 condition with true in C2Runtime.JS
Open the C2runtime.js. Use Control-F to open the search box.
Find each condition for this.isWindows8 as below.
Replace each of these conditions with true as below.
4.Replace Azure Mobile Service Constructor script in C2Runtime.JS
Find the follow function. I search for Azure and it comes up pretty quickly.
Replace it with this.
instanceProto.onCreate = function()
{
azureRuntime = this.runtime;
azureInst = this;
this.appURL = this.properties[0];
this.appKey = this.properties[1];
this.mobileService = new WindowsAzure.MobileServiceClient(
this.appURL,
this.appKey
);
};
Should look like this.
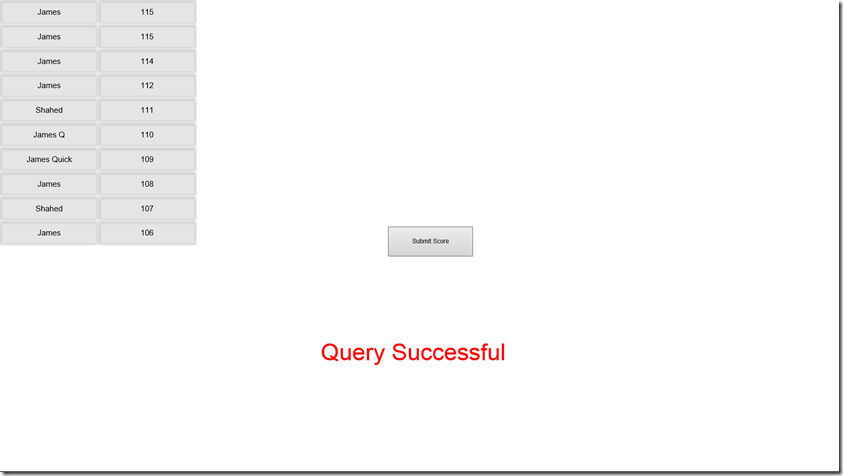
Your end result should look something like this :)
Ok, that was a decent amount of work, but you should have successfully been able to add high scores from Azure Mobile Services. Yes, I know the changes in Visual Studio are definitely tedious, but it comes quicker the more you do it. I am just waiting on an updated Azure object that doesn’t require us to make those changes!
As always comment below or find me on twitter @jamesqquick with any questions, comments, or concerns!
