Getting started with Azure Mobile Services
It is a very basic post (perhaps was meant to be in TechNet wiki) and is in reference to a couple of queries from students who were struggling to get started with Azure Mobile Services while creating their own table and connecting a Windows Store/Phone application with the service.
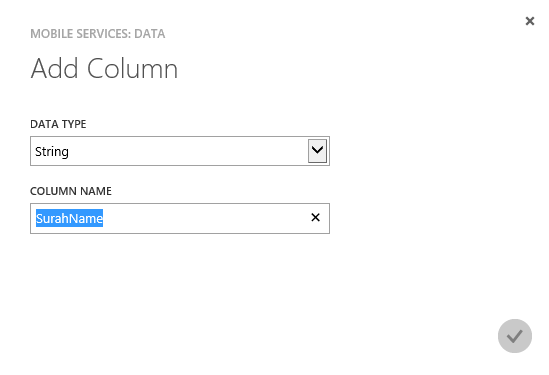
After creating a mobile service in Azure portal (choose either JavaScript or .NET as backend), go to Data tab and add a table (we’ve named it Surahs with rights given to everyone). Go to Columns tab and you’ll find that Mobile Service automatically adds index for primary key and other important fields which are self-explanatory. Click add column at the bottom of the page and new String type column named ‘SurahName’.
Now our table is ready and we need to create a new application (Windows Store, Phone or Universal app depending upon your choice) in Visual Studio to connect with this app. For this purpose navigate to Start page on Azure portal and expand the section ‘Connect an existing Windows or Windows phone app’. Follow the 1ststep and add NuGet package reference of WindowsAzure.MobileServices in your app along with using statement and paste the MobileServiceClient code in App.xaml.cs file,
Now let’s add a class in your app exactly of the same name as that of your table (in our case that will be called Surahs.cs and contained in Shared project) with following two properties,
 public class Surahs
 {
 public string Id
 {
 get;
 set;
 }

 public string SurahName
 {
 get;
 set;
 }
 }
To add a new item in our database, we’ll introduce a TextBox, a progress bar a Button on our MainPage.xaml as follows,
  <Grid Background="{ThemeResource ApplicationPageBackgroundThemeBrush}">
 <StackPanel Margin="100">
 <ProgressBar IsIndeterminate="true" Name="progressbar"
 Visibility="Collapsed"></ProgressBar>
 <TextBox Name="TextBoxSurahName" TextAlignment="Right"></TextBox>
 <Button Click="Button_Click">Add Surah</Button>
 </StackPanel>
 </Grid>
On button click, we’ll create a new instance of Surahs class and insert using table reference,
  private async void Button_Click(object sender, RoutedEventArgs e)
 {
 try
 {
 progressbar.Visibility = Windows.UI.Xaml.Visibility.Visible;
 IMobileServiceTable<Surahs> tableSurahs = App.MobileService.GetTable<Surahs>();

 await tableSurahs.InsertAsync(new Surahs() { SurahName = TextBoxSurahName.Text });
 }
 catch (Exception ex)
 {
 MessageDialog dialog = new MessageDialog(ex.ToString());
 dialog.ShowAsync();
 }
 finally
 {
 progressbar.Visibility = Windows.UI.Xaml.Visibility.Collapsed;
 }
 }
For reusability purposes you can add reference of tableSurahs at page level as well. Now run the app and enter some text in text box and press enter and given everything goes fine, you’ll see the progress bar progressing and operation succeeding without exception.
You can then move to Azure dashboard and under Data tab, upon clicking the table Surahs, you’ll see the inserted records (note that our created String type table SurahName handles Unicode characters well).
I'm leaving the retrieval part as an exercise but as a key it will makes use of MobileServiceCollection<> reference. Something like private MobileServiceCollection<Surahs, Surahs> Surahs;
Comments
Anonymous
November 18, 2014
Thanks for Post !Anonymous
November 24, 2014
I was finding it quite difficult, but this post is really very helpful. Thanks You!Anonymous
February 22, 2015
Very Informative...


