Windows AutoPilot Azure AD Branding
When you use Windows AutoPilot to deploy new devices, you want the process to be friendly and familiar for the users going through the process. One of the ways that is done is by customizing the logon experience to include logos and company-specific text. This leverages an Azure Active Directory Premium feature called company branding, describe at https://docs.microsoft.com/en-us/azure/active-directory/customize-branding. The basic steps:
- Sign into the Azure Portal as a tenant admin.
- Navigate to Azure Active Directory –> Company branding.
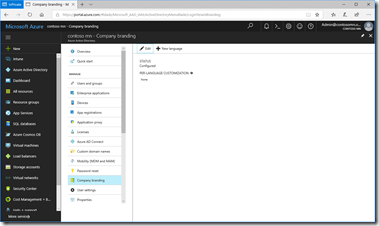
- Click Edit to configure the needed settings.
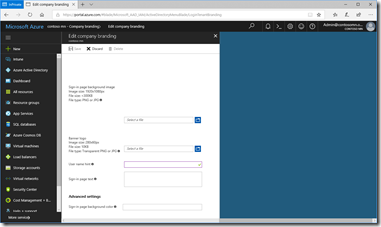
- Fill in all the customizations.
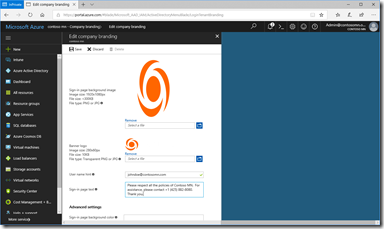
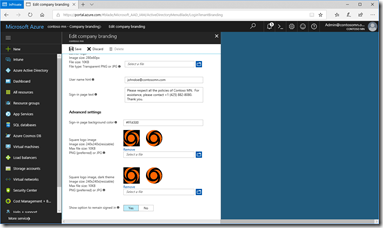
You will need some bitmaps to do this:
- A square logo, 240 pixels by 240 pixels, PNG or JPG, 10KB or smaller.
- A banner logo, 280 pixels by 60 pixels, PNG or JPG, 10KB or smaller.
- A background image, 1920 pixels by 1080 pixels, PNG or JPG, 300KB or smaller.
If you need to resize existing bitmaps, or reduce the size of existing bitmaps by reducing the color pallet, you may need to use something like Paint.NET.
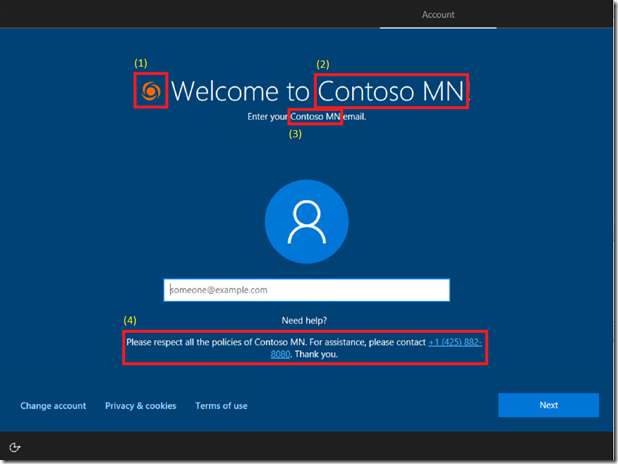
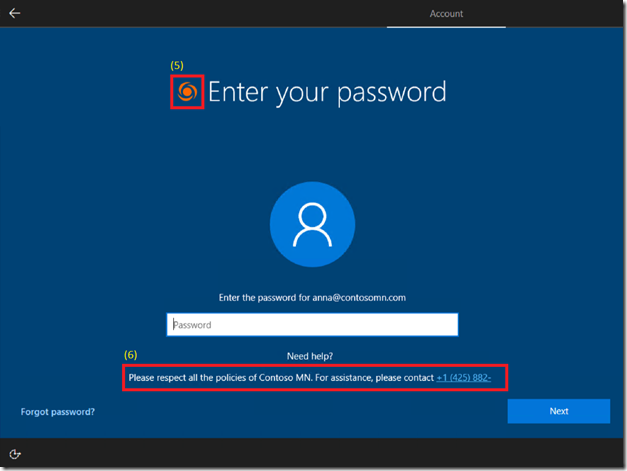
So then you just need to figure out where those values are used, so let’s look at the resulting Windows AutoPilot screen captures:
So let’s look at the mapping from each of the highlighted and numbered items in the screenshots above:
- (1) and (5) correspond to the “square logo image” (240x240px).
- (2) and (3) don’t come from the company branding. Instead, you can set that value in the “Name” field of the Azure AD tenant properties:
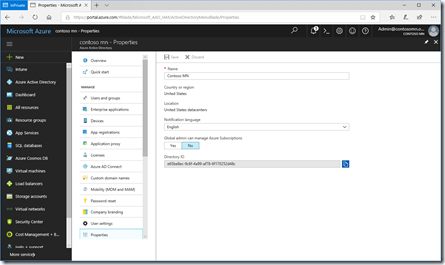
(Watch out if you include special characters in the text, e.g. accented characters, as they may not display properly. That’s being investigated.) - (4) and (6) come from the “sign-in page text” field. (You might notice a bug in the above screenshot: The text, which can be up to 256 characters, wraps on the username screen, but not on the password field. I’ll check on getting that fixed.)
- Notice that the “user name hint” property specified in AAD is ignored. (I’ll check on that too.)
Some of you might have noticed a different password screen too. If you are using ADFS, you’ll be presented with a web view to specify the password (since it’s the ADFS servers verifying the password for Azure AD). ADFS has its own customization capabilities, described at https://docs.microsoft.com/en-us/windows-server/identity/ad-fs/operations/ad-fs-user-sign-in-customization, which includes this useful sample:
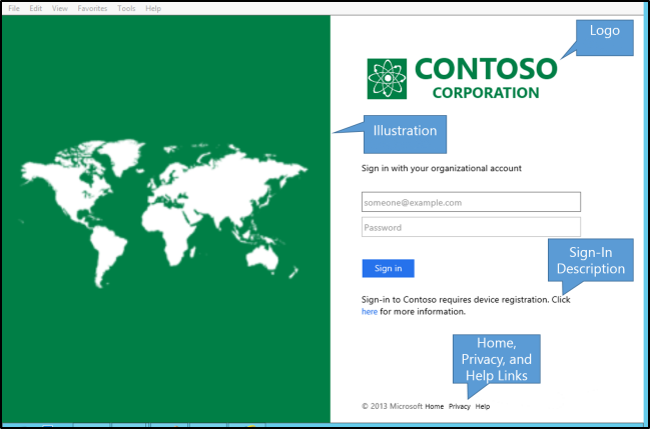
Also note that you can have Intune present a “terms and conditions” page (presented in a web view as part of the MDM enrollment process). See https://docs.microsoft.com/en-us/intune/terms-and-conditions-create for details on how to set that up.
Comments
- Anonymous
December 23, 2017
Thanks been searching everywhere to find where i can find the ‘name’ field. - Anonymous
December 27, 2017
Awesome.
