Backing up a MacBook Running Both Windows 7 and Mac OS X
I have a MacBook on which I use Boot Camp to dual-boot to Windows 7 and Mac OS X Snow Leopard. I would like to back up both systems to a single 500 GB USB drive. I poked around a bit to figure out how to do this, and didn’t find anything (the closest is this post which explains how to do it to a Windows Home Server) so I figured I’d explain how I got this to work.
The problem is that Windows wants the volume to be NTFS for its built in Windows 7 backup program to work, and Mac OS X wants the volume to be a formatted Mac HFS volume – so when I booted into Mac OS X after connecting the volume under Windows 7 and running the first Windows backup, Time Machine saw the volume and prompted me to reformat it as a HFS to be used with Time Machine (the Mac OS X backup program). Of course, that’s not what I wanted.
The trick is to create two separate volumes on the single external drive – one will be NTFS for Windows 7, one will be HFS for Mac OS X. You may be able to do this under Mac OS X, but I know the Windows tools better so I did it that way. Here’s how.
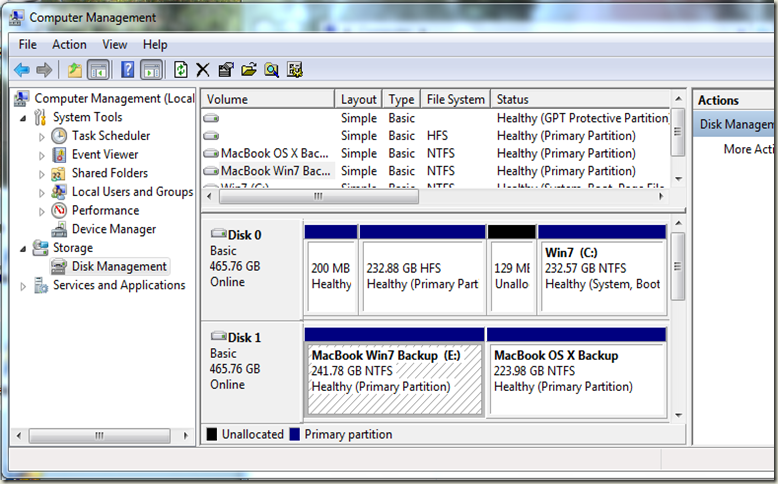
First, attach the drive and boot up to Win7. Log in to an Administrator account. Right click on Computer in the Start Menu and select “Manage”. Click on “Disk Management” in the right panel and you will see a list of disks on your computer. The first one is probably the built-in MacBook hard drive, which you can see below I have partitioned into one HFS partition which MacOS X runs on and one NTFS partition which is for Windows 7. The second disk is the USB drive. Initially, I had a single 465 GB partition. I right clicked on that, selected “Shrink Volume…” and shrunk the volume down to about half it’s size – this is the portion that will be used for Windows backup and will be an NTFS volume. Initially, this will show as “Unallocated Space” – basically, it is just free space on the disk now. I right clicked in the free space portion and selected “New Simple Volume…” which runs a wizard that helps you create a volume in that free space. I formatted it as NTFS but did not assign a drive letter to it since it won’t be used by Windows, only Mac OS X.
You can see I gave the two separate volumes reasonable names – one is Win7 backup, the other is MacOS X backup.
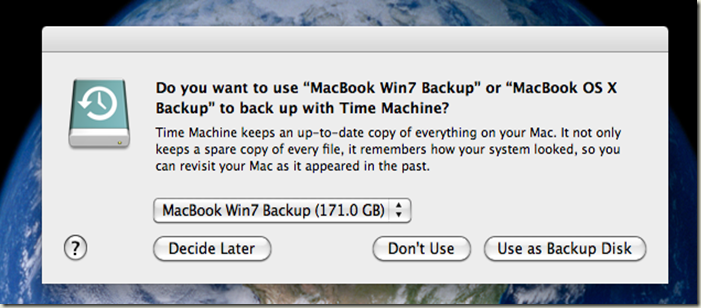
Now reboot the machine, and hold down the Option key to select to boot up Mac OS X rather than Win7. This time, Time Machine will see the disk as two separate volumes and will prompt you which one to use for Mac OS X backups:
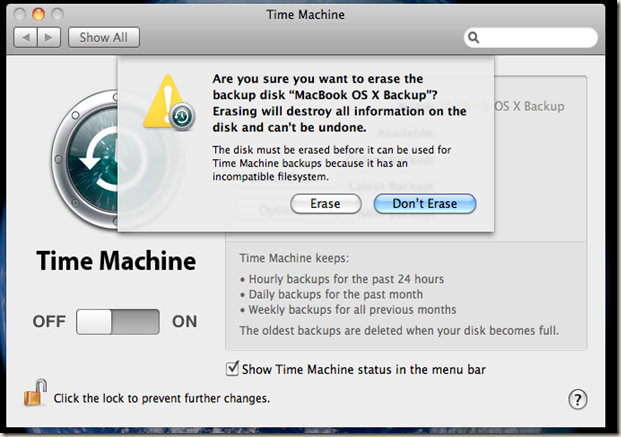
Select the MacBook OS X Backup partition you created (which is now empty) and click “Use as Backup Disk”. Time Machine will prompt you if you’re sure you want to erase it – since it has nothing on it right now, that’s fine – click “Erase”:
Time Machine will reformat it as HFS and will start using it for backups.
You just have to remember to keep the USB cable for the external drive plugged into the MacBook when it is on your desk at home so that backup will run. Remember that Windows backup will run only when Windows is running on the Macbook, and on the schedule you’ve set – so mine runs at 7 PM every Sunday. I just boot into Windows on the MacBook Sunday afternoon and leave it running on my desk overnight so that it runs the Windows backup for that week.
Comments
- Anonymous
March 11, 2013
Exactly the solution I was looking for. Thanks!


