Running Memcached in Windows Azure
Memcached is a distributed cache used to help speeding up large scale web applications by taking pressure off the database. Memcached is used by many of the internet’s biggest sites.
A distributed cache is one of the things that I’ve been hoping to see released for Windows Azure for quite a while, and I am hoping that AppFabric Caching will make the move to the cloud in the coming year. However, until that happens I was determined to find a way to get a distributed cache and this great Windows Azure Memcached sample showed me how.
After installing and setting up Memcached you will be able to cache any data, including data that is retrieved from your database so that the next time you need it you can get it from cache and not need to re-query your database. Thereby reducing the pressure on the database.
Azure Memcached sample
You can download the sample code for Windows Azure from the codeplex download page. You then need to download a Windows friendly version of Memcached (here is one). With the sample code from codeplex just add the memcached exe to your worker roles. You will now be able to run the sample code either on the dev fabric or in the cloud.
One thing to watch out for, the memcached exe’s seem to take an age to get up and running. I actually left mine to set up overnight as the Memcached Worker Roles were all showing busy for a long time, during which the sample would not work correctly.
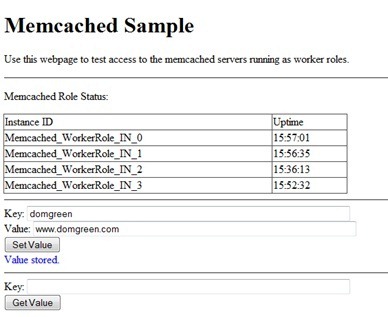
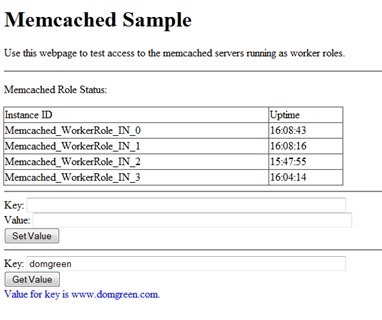
After the servers have started up you can easily set and retrieve values from the cache as shown in the screenshots below.
Now that we have got our distributed cache working let’s have a look how the sample code works.
Memcached Server
On the server side we set up an internal endpoint that will be used to connect the clients to the Memcached server. When the node is created we launch the Memcached server that we downloaded before, passing in the nodes cache size and endpoint as arguments.
string arguments = "-m " + cacheSize +
" -l " + endpoint.Address +
" -p " + endpoint.Port;
ProcessStartInfo startInfo = new ProcessStartInfo();
startInfo.CreateNoWindow = false;
startInfo.UseShellExecute = false;
startInfo.FileName = "memcached.exe";
startInfo.WindowStyle = ProcessWindowStyle.Hidden;
startInfo.Arguments = arguments;
This node is now exposing a Memcached server, which can be used by the client nodes to cache data.
Utilizing Memcached – Clients
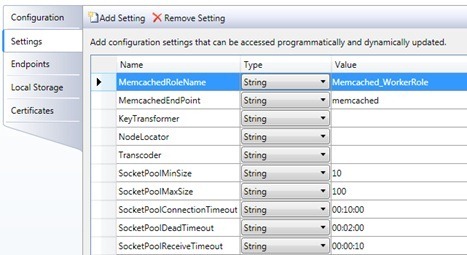
The client node in the example looks a lot more complicated that it actually is. The most important part is adding the configuration for our memcached client within the settings tab of the node.
Then comes the interesting bit, using the Enyim caching library (others libraries are available), and creating a MemcachedClient object, allows us to get and set objects in the cache.
Each time a new Memcaced Client is needed the program loads a configuration based upon the data within the settings (picture above). The client then loops through all of the instances of memcached server’s nodes that we are running in our hosted service getting their endpoint, to add this to the configuration of available servers.
_endpoints = new Dictionary<string ,="" ipendpoint="">();
foreach (var endpoint in RoleEnvironment.Roles[_memcachedRoleName].Instances)
{
foreach (var epi in endpoint.InstanceEndpoints)
{
if (epi.Key == "memcached")
{
_endpoints.Add(epi.Value.RoleInstance.Id.ToString(),epi.Value.IPEndpoint);
}
}
}
Now that the connection is made to our memcached nodes we can use the caching library to set and get values in the cache.
AzureMemcached.Client.Store(StoreMode.Set, key, value);
AzureMemcached.Client.Get(key);
With this code we now have distributed caching on Windows Azure, and one can use the example to build out much bigger applications.
Written by Dominic Green


