Enabling Vamp on Azure Container Service (DC/OS)
Vamp is an open source, self-hosted platform for managing microservice oriented architectures that rely on
container technology. It help us to enable auto-scaling, canaly releasing, blue-green deployment, self-healing,
and auto-configration of application gateway.
Enabling these functions are tough. You need to configure a lot of things. However, Just installing vamp on DC/OS, it will help you to configure all of them!
On this blog post, I'd like to share how to enable Vamp.io for Azure Container Service (DC/OS).
This article follow the installation instruction, and offical tutorial of vamp.
https://vamp.io/documentation/installation/azure-container-service/
But sometimes, it can be little bit confusing for ACS user. So I'd like to share some tips for the setup.
https://vamp.io/documentation/tutorials/deploy-your-first-blueprint/
1. Deploy Azure Container Service (DC/OS)
Before installing Vamp, you need to deploy Azure Container Service (DC/OS). Please refer this instruction.
/en-us/azure/container-service/container-service-deployment
Also, please make sure to connect ACS cluster. Please refer this instruction, as well.
/en-us/azure/container-service/container-service-connect
I recommend you to download and install dcos cli.
https://docs.mesosphere.com/1.8/usage/cli/install/
Also, I recommend to install ab(apache benchmark). You can use bash for Mac, Windows 10, and Linux.
Install ab command.
sudo apt-get install apache2-utils
If you already done DC/OS deployment and SSH tunnel, let's get started!
2. Deploy Vamp on DC/OS
You can deploy Vamp by following instruction. However, it won't work.
https://vamp.io/documentation/installation/dcos/
For ACS, you need to use magneticio/vamp:0.9.1-dcos insead of magneticio/vamp:katana-dcos. (8th Dec. 2016)
It will be fixed in near feature, I recommend you to refer latest version of Vamp.
https://hub.docker.com/r/magneticio/vamp/tags/
You need to change vamp.json (STEP2: DEPLOY VAMP) like this.
 {
 "id": "vamp/vamp",
 "instances": 1,
 "cpus": 0.5,
 "mem": 1024,
 "container": {
 "type": "DOCKER",
 "docker": {
 "image": "magneticio/vamp:0.9.1-dcos",
 "network": "BRIDGE",
 "portMappings": [
 {
 "containerPort": 8080,
 "hostPort": 0,
 "name": "vip0",
 "labels": {
 "VIP_0": "10.20.0.100:8080"
 }
 }
 ],
 "forcePullImage": true
 }
 },
 "labels": {
 "DCOS_SERVICE_NAME": "vamp",
 "DCOS_SERVICE_SCHEME": "http",
 "DCOS_SERVICE_PORT_INDEX": "0"
 },
 "env": {
 "VAMP_WAIT_FOR": "https://elasticsearch.marathon.mesos:9200/.kibana",
 "VAMP_PERSISTENCE_DATABASE_ELASTICSEARCH_URL": "https://elasticsearch.marathon.mesos:9200",
 "VAMP_GATEWAY_DRIVER_LOGSTASH_HOST": "elasticsearch.marathon.mesos",
 "VAMP_WORKFLOW_DRIVER_VAMP_URL": "https://10.20.0.100:8080",
 "VAMP_PULSE_ELASTICSEARCH_URL": "https://elasticsearch.marathon.mesos:9200"
 },
 "healthChecks": [
 {
 "protocol": "TCP",
 "gracePeriodSeconds": 30,
 "intervalSeconds": 10,
 "timeoutSeconds": 5,
 "portIndex": 0,
 "maxConsecutiveFailures": 0
 }
 ]
}
If you use this vamp.json, you will success the installation. If you failed to deploy once because of you deploy magneticio/vamp:katana-dcos, you need remove elasticsearch container which you have alrady deployed. Because it store vamp configuration. Then re-install elasticsearch and vamp by following vamp installation document.
https://vamp.io/documentation/installation/dcos/
3. Open your public agent port for your application
Then you can deploy your first application. Follow the official tutorial.
https://vamp.io/documentation/tutorials/deploy-your-first-blueprint/
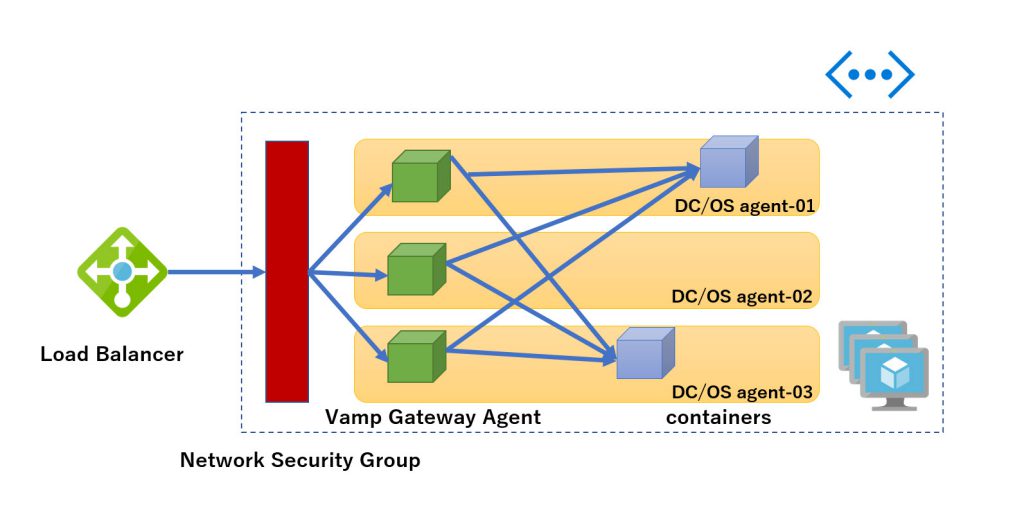
Deployment is fine. However, where can I access the application? Your application is deployed on the DC/OS agent nodes. You need to configure Azure Load Balancer to route vamp gateway agents, which is deployed on DC/OS public agent nodes.
Vamp deploys the vamp gateway agents on every DC/OS agent nodes. Also, you need to configure network security group inbound rules.
Let's get started.
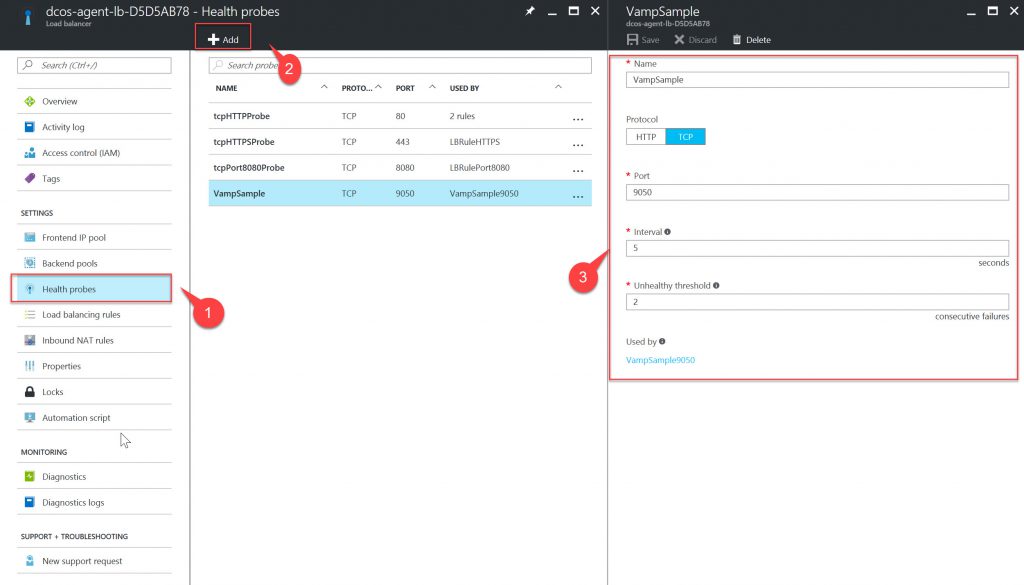
3.1. Configure Health proble
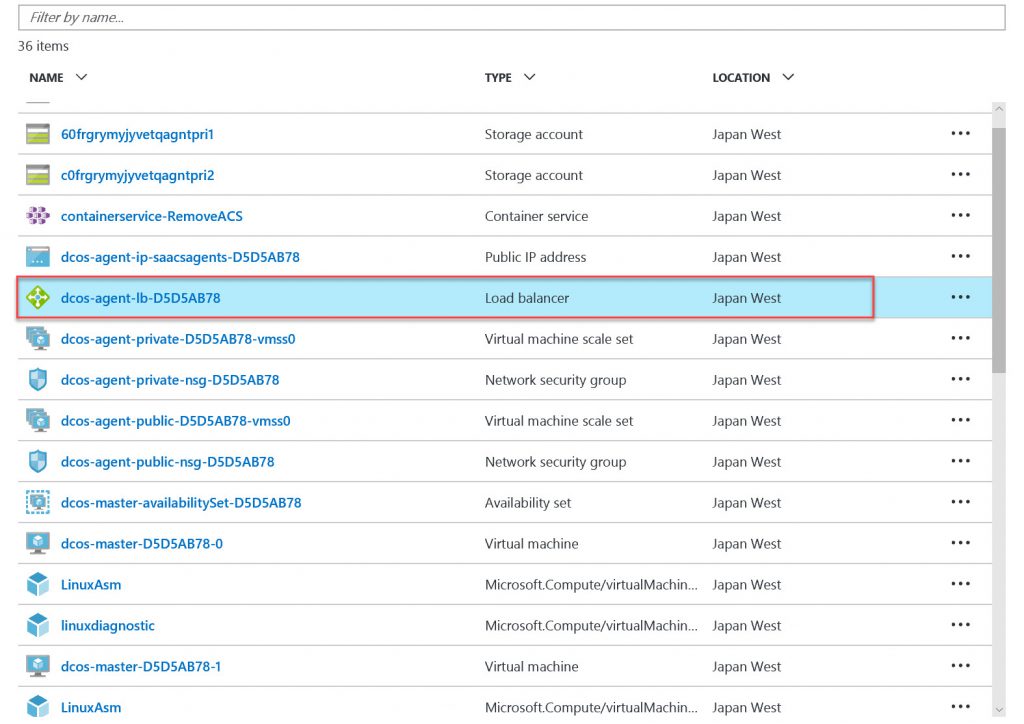
Click DC/OS agent load balancer.
Then Configure health probes to health check your application.
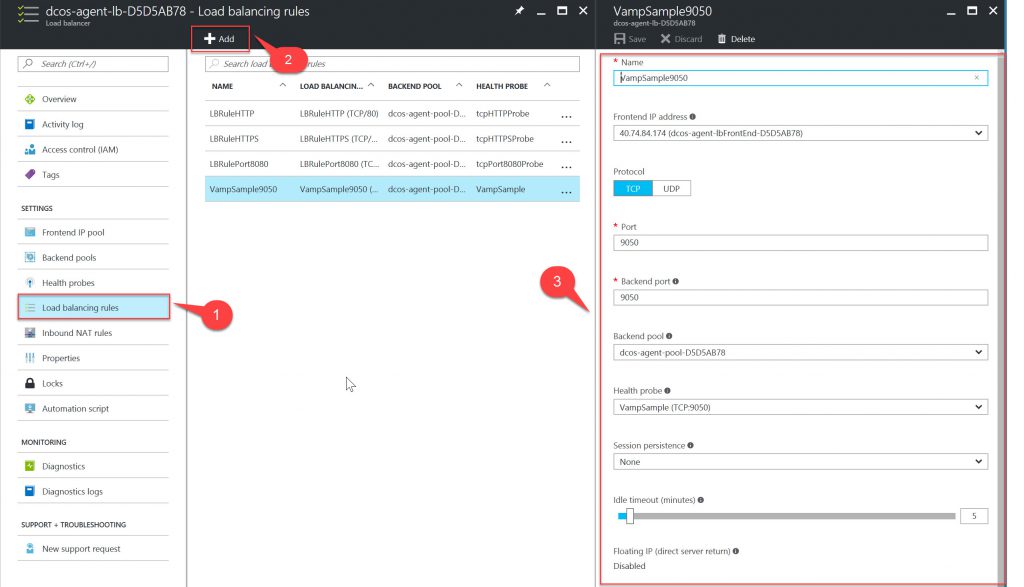
3.2. Configure Load Balancing rules
Then Configure Load Balancing Rules. You need to specify the LB port and backend port.
Select the health proble which you configured before.
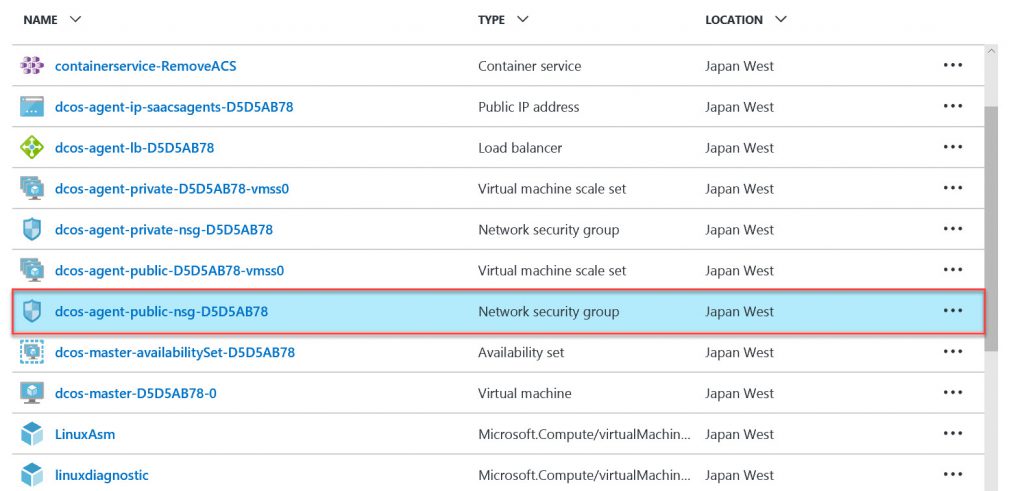
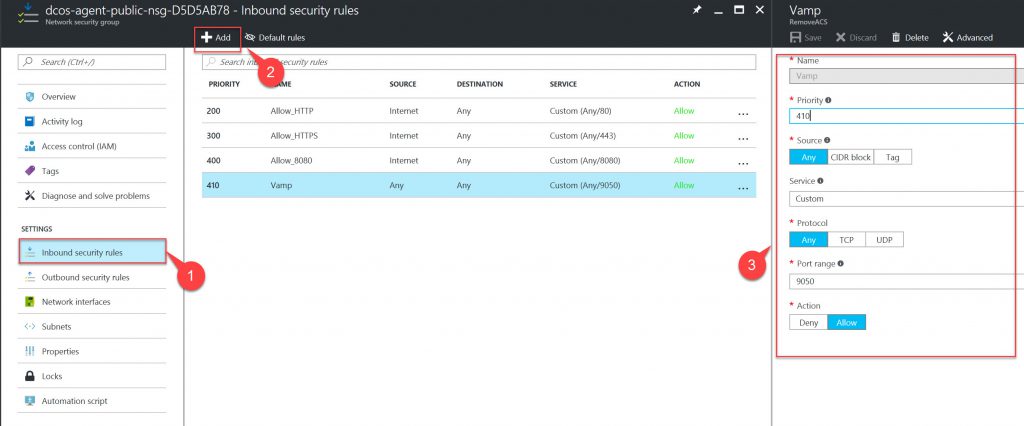
3.3. Configure Network Security group
You need to open the port of Network Security Gorup.
That's it. You can find your external IP address which you can access through your browser.
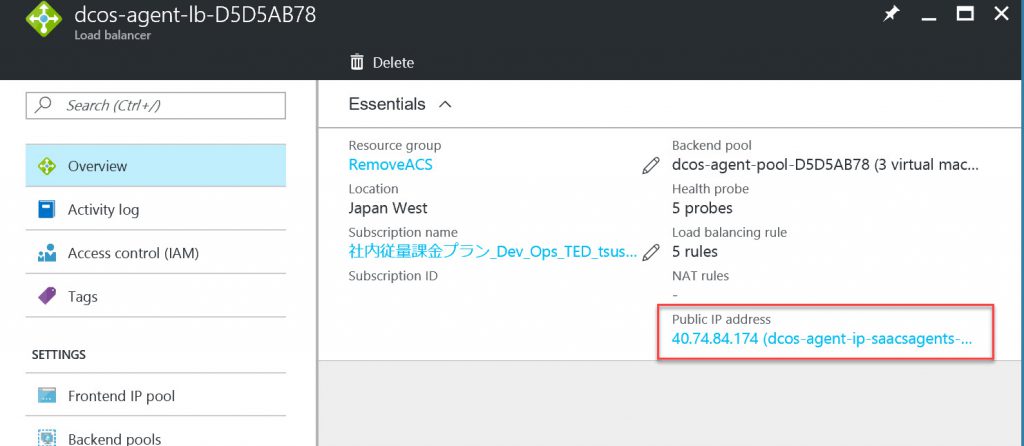
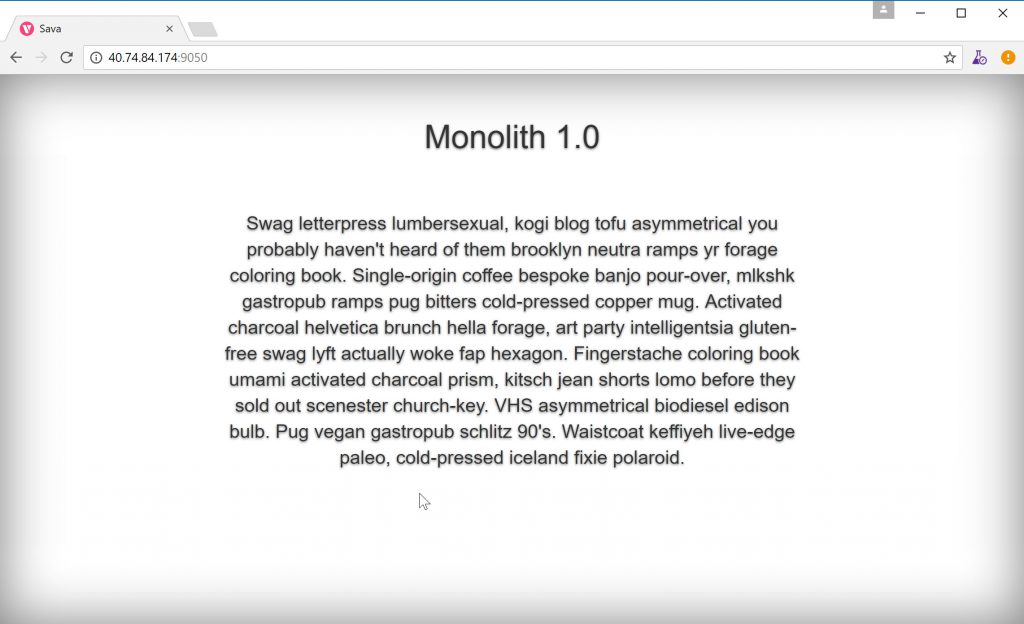
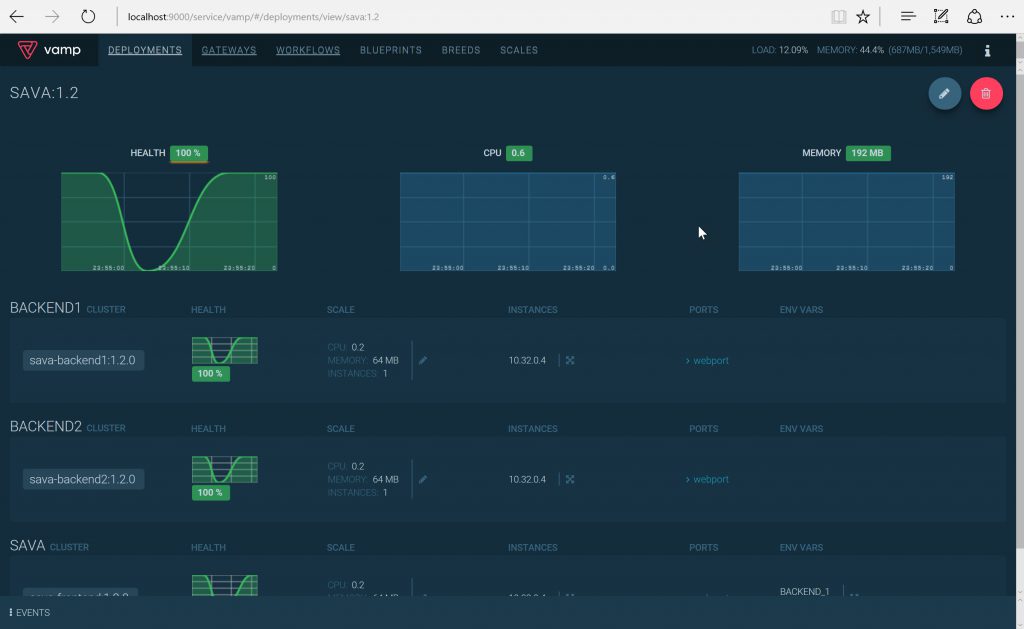
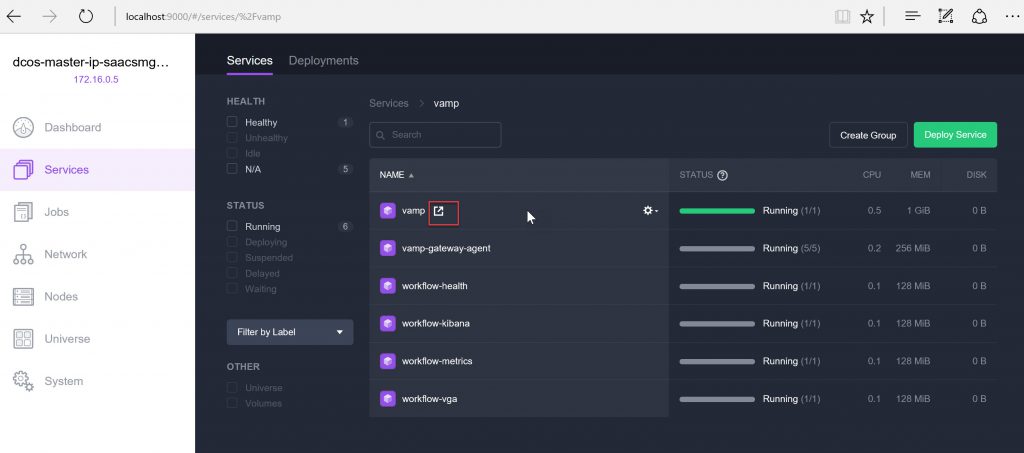
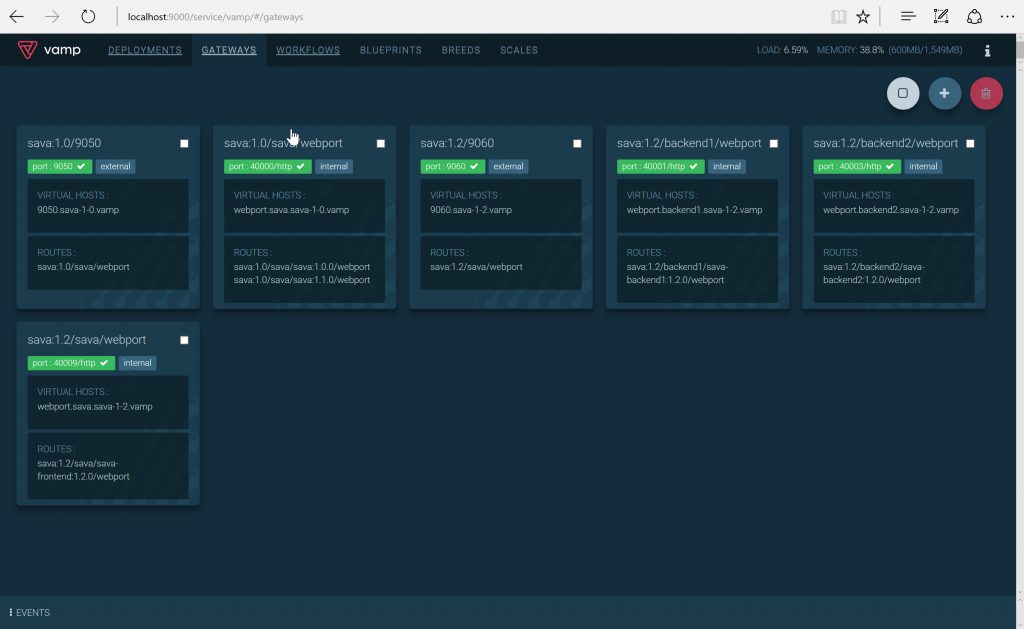
Also, You can find Vamp console, on the marathon dashboard. (I use 9000 for SSH port forwarding)
Enjoy your deployment!
