Step-By-Step Integration of Remote Desktop Services with SharePoint Server 2010
One of the first things that an IT administrator (and even an end user) dreams for is “Integration”. For an administrator, integration of multiple technologies in your environment, consolidation of various products, management of everything from one single place, provision of data in a secured manner; are a few reasons. While for an end user, single point of access, anytime consumption of data and Single Sign-On; pops up to one’s mind.
Remote Desktop Services:
One of the prime technologies used by IT administrators for virtualization is Remote Desktop Services, previously known as Terminal Services. The TechNet article, Remote Desktop Services Overview, gives a great beginning to understanding this technology. As the link mentions, the major advantages of adopting this technology are:
- Application deployment: You can quickly deploy Windows-based programs to computing devices across an enterprise. Remote Desktop Services is especially useful when you have programs that are frequently updated, infrequently used, or difficult to manage.
- Application consolidation: Programs are installed and run from an RD Session Host server, eliminating the need for updating programs on client computers. This also reduces the amount of network bandwidth that is required to access programs.
- Remote access: Users can access programs that are running on an RD Session Host server from devices such as home computers, kiosks, low-powered hardware, and operating systems other than Windows.
- Branch office access: Remote Desktop Services provides better program performance for branch office workers who need access to centralized data stores. Data-intensive programs sometimes do not have client/server protocols that are optimized for low-speed connections. Programs of this kind frequently perform better over a Remote Desktop Services connection than over a typical wide area network.
SharePoint Server 2010:
SharePoint Server 2010 is not just viewed as a content sharing and accessing product any more, but as a Business Collaboration Platform for the Enterprise and the Internet. With features like content management, workflows, search, SharePoint Server 2010 helps you to connect with colleagues and information; manage and govern enterprise content; balance user experience with policy and process; and help users find the content, information, and people. A great guide for understanding SharePoint Server 2010 is found in TechNet, SharePoint Server 2010.
Integration of Remote Desktop Services with SharePoint Server 2010
Integration of these 2 technologies opens up great avenues for consolidation. The Remote Desktop Web Access server role can be taken over by the already present SharePoint Server 2010 in the environment. This provides the possibility such as:
- Single Website: As the SharePoint website is already present; this can be leveraged to publish the RemoteApps that are hosted on the Remote Desktop Session Host server. This reduces the URLs that the end user has to remember to access company data and applications.
- Customization: The SharePoint Website, unlike the Remote Desktop Web Access default web portal, can be customized as per company needs. This gives the company freedom to brand, color code, provide additional links or shortcuts as required.
- Accessing content through RemoteApps: If the content in SharePoint needs a particular RemoteApp to run, you can make a connection to the RemoteApp and then open the doc in it. This gives you the capability of accessing this data over the internet as well, without having to worry about security.
Steps to integrate Remote Desktop Services with SharePoint Server 2010
The integration of SharePoint Server 2010 (from now on, we will call it SPS) with Remote Desktop Services (from now on, we will call it RDS), is divided into 5 steps:
1. Installation of RDS Session host server role
2. Installation of SPS
3. Installation of RDS Web Access server role on SPS
4. Configuration of the Terminal Services Web Part
5. Publishing of RemoteApps
1. Installation of RDS Session host server role
Perform these steps on the RDS Session Host server:
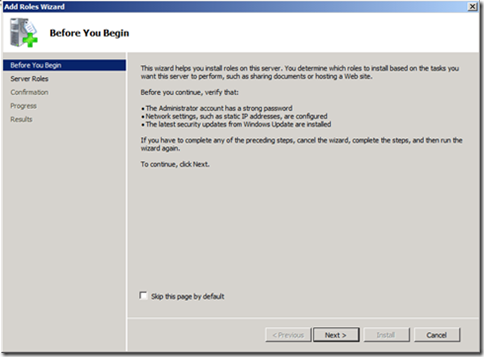
a. Go to Server Manager -> Roles -> Add Roles. This will take you to the Add Roles Wizard. Click Next.
Figure 1: Add Roles Wizard
b. Select Remote Desktop Services. Click Next.
Figure 2: Role Selection
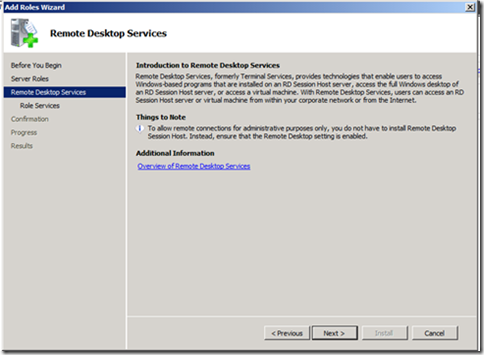
c. Click Next.
Figure 3: Introduction to Remote Desktop Services
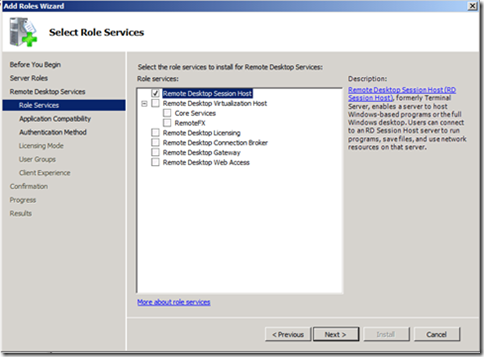
d. Select Remote Desktop Services Session Host role. Click Next.
Figure 4: Role Service Selection
e. Click Next.
Figure 5: Uninstall and Reinstall Application for compatibility warning
f. Select Require Network Level Authentication. Click Next.
Figure 6: Network Level Authentication Selection
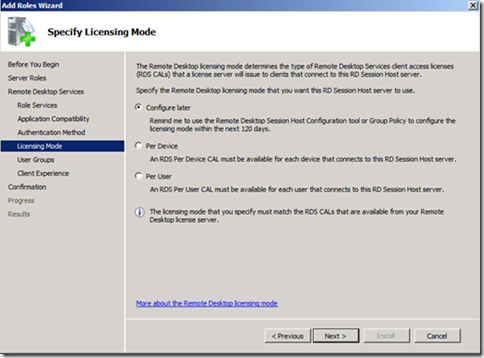
g. Select the appropriate licensing scheme. Click Next.
Figure 7: Licensing Mode Selection
h. Select the appropriate users you want to give access to the RDSH server. Click Next.
Figure 8: User Group Definition
i. Select any of the features that you want to include in the Desktop Experience. Click Next.
Figure 9: Enabling Desktop Experience
j. Click Install. Reboot the server.
Figure 10: Installation summary
2. Installation of SPS
Perform these steps on the SPS server:
a. Install SPS 2010.
Figure 1: SharePoint Installation
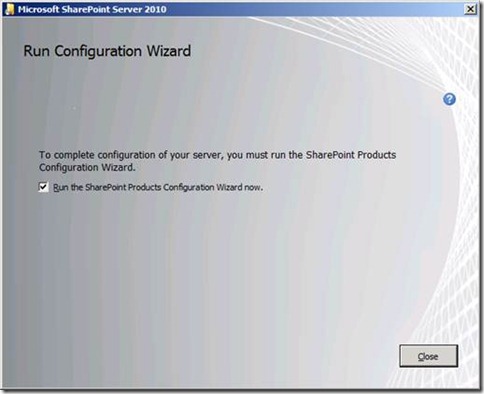
b. Check mark Run the SharePoint Products Configuration Wizard now. Click Close.
Figure 2: SharePoint Installation completion and Run Configuration Wizard
c. Click Next.
Figure 3: Configuration Wizard
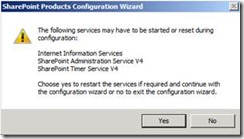
d. Click Yes to restart the services.
Figure 4: Restarting of Services
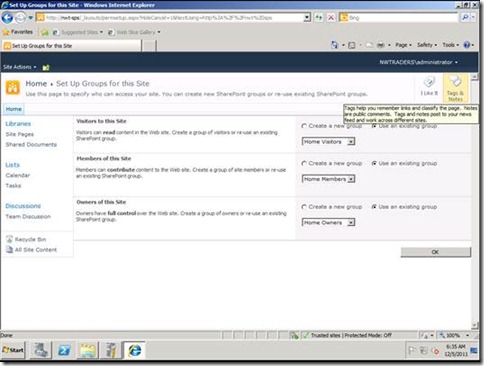
e. Go to the SPS website by typing the following URL: https://<servername>/ , to check if the SharePoint site is working fine or not.
Figure 5: SharePoint Website Home Page
3. Installation of RDS Web Access server role on SPS
Perform these steps on the SPS server:
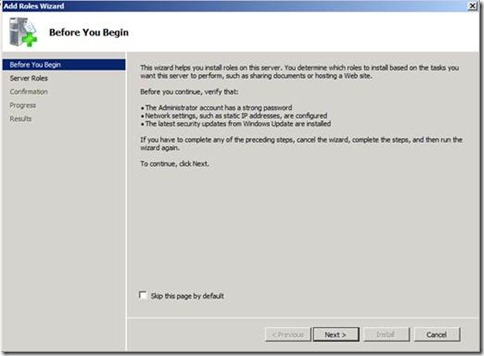
a. Go to Server Manager -> Roles -> Add Roles. This will take you to the Add Roles Wizard. Click Next.
Figure 1: Add Roles Wizard
b. Select Remote Desktop Services. Click Next.
Figure 2: Selection of Role Services
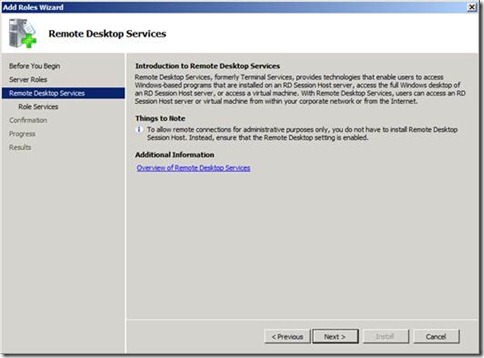
c. Click Next.
Figure 3: Introduction to Remote Desktop Services
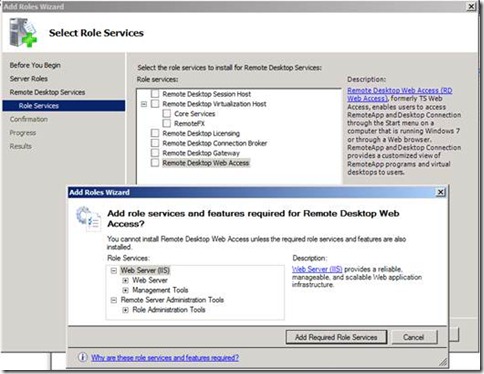
d. Click on Add required role services.
Figure 4: Add required Role Services
e. Click on Next.
Figure 5: Introduction to IIS
f. Click Next.
Figure 6: Add role services
g. Click Finish to finish installation.
4. Configuration of the Terminal Services Web Part
Perform these steps on SPS server:
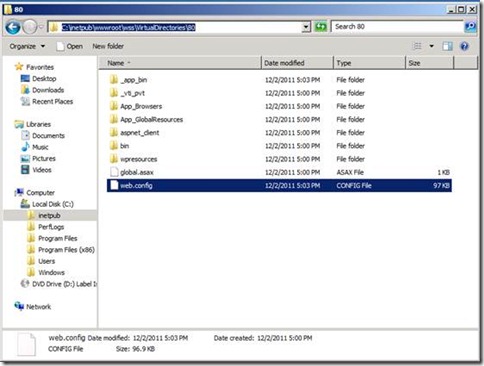
a. Go to %SystemDrive%:\inetpub\wwwroot\VirtualDirectories\80. Right click Web.config and edit it in wordpad.
Figure 1: Editing web.config file
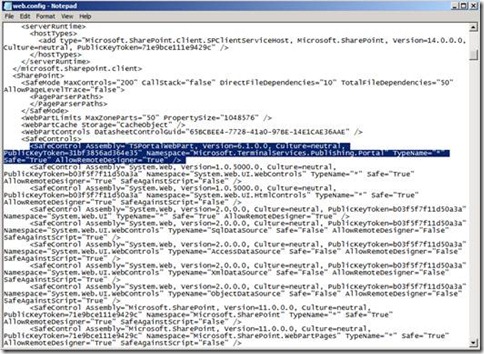
b. In the <SafeControls> section, add the following line under the other SafeControl Assembly entries (as a single line):
<SafeControl Assembly="TSPortalWebPart, Version=6.1.0.0, Culture=neutral, PublicKeyToken=31bf3856ad364e35" Namespace="Microsoft.TerminalServices.Publishing.Portal" TypeName="*" Safe="True" AllowRemoteDesigner="True" />
Figure 2: Adding SafeControl Assembly
c. Open an elevated command prompt. To do this, click Start, right-click Command Prompt, and then click Run as administrator:
- Type mkdir "%SystemDrive%\Program Files\Common Files\Microsoft Shared\Web Server Extensions\wpresources\TSPortalWebPart\6.1.0.0__31bf3856ad364e35\images" and then press ENTER.
- Type mkdir "%SystemDrive%\Program Files\Common Files\Microsoft Shared\Web Server Extensions\wpresources\TSPortalWebPart\6.1.0.0__31bf3856ad364e35\rdp" and then press ENTER.
- Type cacls "%SystemDrive%\Program Files\Common Files\Microsoft Shared\Web Server Extensions\wpresources\TSPortalWebPart\6.1.0.0__31bf3856ad364e35\images” /T /E /P NetworkService:F and then press ENTER.
- Type cacls "%SystemDrive%\Program Files\Common Files\Microsoft Shared\Web Server Extensions\wpresources\TSPortalWebPart\6.1.0.0__31bf3856ad364e35\rdp” /T /E /P NetworkService:F and then press ENTER.
Figure 3: Adding files to the Web Parts
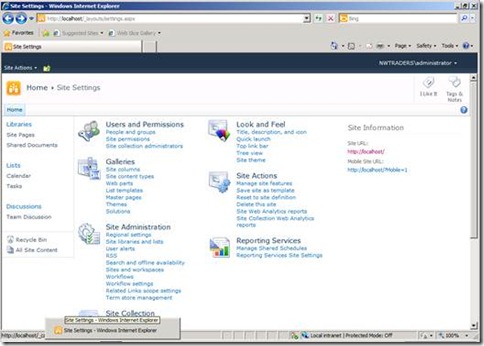
d. Go to the SharePoint website as an administrator. In the upper-right corner, on the Site Actions tab, click Site Settings .
Figure 4: Editing the Site Settings
e. Under Galleries, click Web Parts.
Figure 5: Adding Web Part to the Gallery
f. Under the Web Part Gallery heading, click New .
Figure 6: Adding the TSPortalWebPart to the list
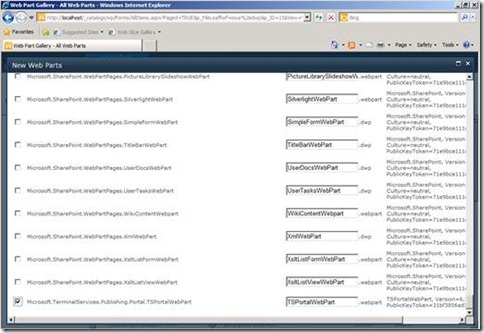
g. Select the check box next to Microsoft.TerminalServices.Publishing.Portal.TSPortalWebPart, and then click Populate Gallery.
Figure 7: Adding the new Web Part
5. Publishing of RemoteApps
Perform these steps on the SPS server:
a. On the Site Actions tab, click Edit Page.
Figure 1: Edit Web Page
b. Choose the location on the website where you want to add the Web Part, and then click Add a Web Part.
Figure 2: Adding the Web Part to the site
c. In the Add Web Parts -- Webpage Dialog dialog box, under the All Web Parts heading, select the TSPortalWebPart check box, and then click Add. The TSPortalWebPart Web Part will appear on the page.
Figure 3: Select the TSPortal Web Part
At times you may face errors while integrating RDS with Companyweb (like in SBS). One example is jotted down below:
Failed to render “Wiki Content” column because of an error in the “Multiple lines of text” field type control. See details in log. Exception message: The Handle is invalid.
The resolution for that is to change the Application Pool Account for Companyweb to NetworkService. You can try this for any general errors in publishing the webpart as well.
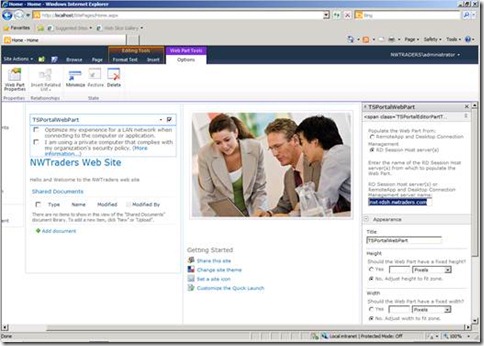
d. To configure the Web Part, click edit in the upper-right corner of the Web Part, and then click Modify Shared Web Part.
Figure 4: Editing the Web Part
e. In the RD Session Host server(s) or RemoteApp and Desktop Connection Management server name box, type <RDSservername> and then click OK.
Figure 5: Adding the RDS Session Host Server
f. Click Save icon in the top left corner of the website.
Figure 6: Saving the Web Part to the site
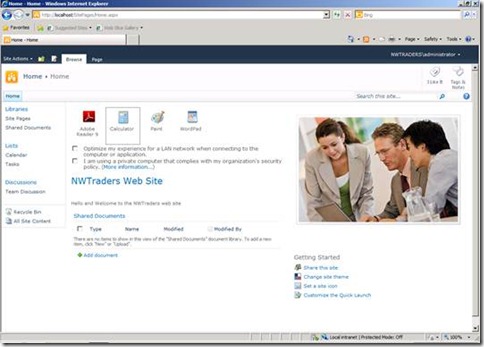
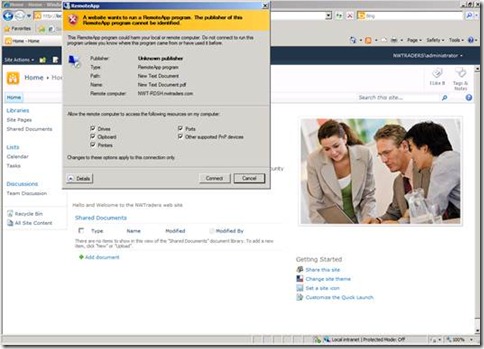
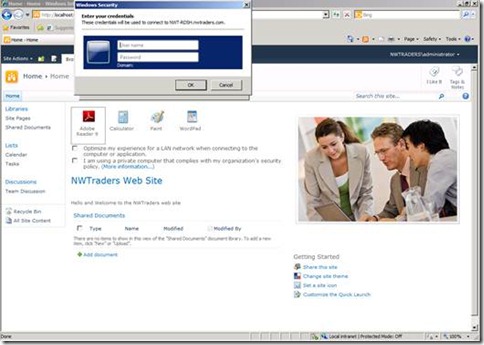
g. Test the application by running a RemoteApp.
Figure 7: Selecting the RemoteApp
Figure 8: Connecting to the RemoteApp
Figure 9: Providing credentials
Figure 10: Using the RemoteApp
In this way, you can leverage your already existing environment and integrate it for a single website for the users to log into and get their RemoteApps. This combined with the search and content sharing capabilities gives the user a seamless experience.
Happy Reading!
Reference Links:
Customizing Remote Desktop Web Access by Using Windows SharePoint Services Step-by-Step Guide
Comments
Anonymous
June 14, 2012
The demonstration uses pass through windows authentication to enemurate remote applications in the sharepoint web part but single sign on (SSO) is not performed when launching the remote application. When the native Remote Desktop Web Site (RDWeb) is implemented using forms based authentication (FBA) SSO is enabled when launching remote apps. Can sharepoint be configured to perform both pass through windows authentication to enemurate remote applications in the sharepoint web part AND single sign on (SSO) when launching the remote application?Anonymous
April 24, 2013
Is it possible to use SSO from the webapp to the RemoteAppAnonymous
December 12, 2013
Does this work with SharePoint 2013 as well?Anonymous
January 05, 2014
TSPortalWebPart is not found in Webpart gallery. I am using SharePoint 2010 with Windows Server 2012 r2. Can you please help me on the same? Regards Gaurav GoyalAnonymous
April 15, 2015
The comment has been removed
