Data Explorer and Office 365 - Create a report from an Azure SQL Database source
This post shows how to create an Excel task report from a “Data Explorer” query connected to a Windows Azure SQL Database instance provisioned with Access 2013. In Access 2013, you can create an Access web app. When Access 2013 provisions the web app to Office 365, it creates a complete Windows Azure SQL Database instance for you. Once the SQL Database instance is provisioned, you can create a Data Explorer query to import data from an Access app into Excel. In this blog post, I will use the Access 2013 Project management web app template to show you how to create a Data Explorer query that imports a task report. This post assumes that you have an Office 365 Small Business Premium or above account with the Access 2013 Project management web app template provisioned onto your Office 365 service. For more information about how to provision an Access 2013 app, see Create custom apps fast without being a developer and Create an Access app from a template. To sign up for a free Office 365 Small Business Premium account, see Office 365 Small Business Premium free 1-month trial.
For more information about the Microsoft “Data Explorer” Preview for Excel, see https://www.microsoft.com/en-us/bi/Products/Office.aspx.
How to create the task report with an advanced query
Microsoft “Data Explorer” Preview for Excel enables you to create advanced queries with the Data Explorer formula language. The Data Explorer Formula Language provides a wide variety of formulas that are used to build expressions. To create an advanced query, you start with a blank query and add query steps that contain Data Explorer formulas. To create a query to shape a task table from the Access 2013 Project management web app, you can use the Project Task Query listed below. You need to replace the Server name and Database name in the Sql.Database formula parameters to connect to the SQL Database instance.
Project Task Query
let
Source = Sql.Database(" {Server name} .database.windows.net", " {Database name} "),
Access.Projects = Source{[Name="Access.Projects"]}[Data],
HiddenOtherColumns = Table.SelectColumns(Access.Projects,{"Project Name",
"Access.Tasks"}),#"Expand Access.Tasks" = Table.ExpandTableColumn(HiddenOtherColumns, "Access.Tasks",
{"Task Title", "Description", "Start Date", "Due Date", "Percent Complete"},
{"Access.Tasks.Task
Title", "Access.Tasks.Description", "Access.Tasks.Start Date", "Access.Tasks.Due Date",
"Access.Tasks.Percent Complete"}),RenamedColumns = Table.RenameColumns(#"Expand Access.Tasks",{{"Access.Tasks.Task
Title", "Task Title"}, {"Access.Tasks.Description", "Description"}, {"Access.Tasks.Start Date",
"Tasks Start Date"}, {"Access.Tasks.Due Date", "Tasks Due Date"}, {"Access.Tasks.Percent
Complete", "Task Percent Complete"}})in
RenamedColumns
Parameters to replace
In the Project Task Query, you must replace the Sql.Database {Server name} and {Database name} parameters. You get the SQL Database instance connection information from the Access 2013 SQL Server Connection Information dialog box.
To get the SQL Database instance connection information for your Access app:
1. Open your Access 2013 app.
2. Click the FILE ribbon tab.
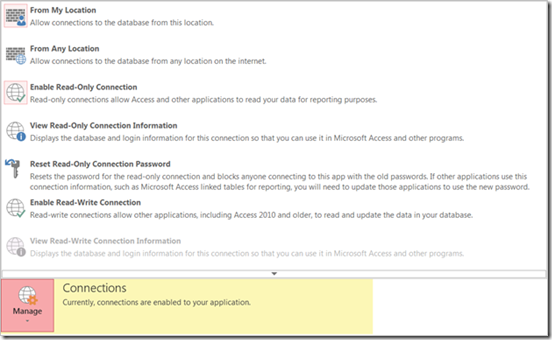
3. Click Manage > Enable Read-Only Connection.
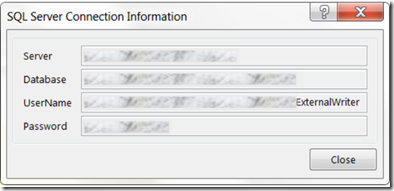
4. Click Manage > View Read-Only Connection Information. The SQL Server Connection Information dialog box displays the SQL Database instance Server, Database, UserName, and Password.
5. In the Access app Project Task Query, change {Server name} .database.windows.net to the Server name, and change {Database name} to the Database name.
To create the advanced query
With the SQL Server connection information, you can now create the Data Explorer query to import a task report into Excel.
To enable advanced query editing
1. In the DATA EXPLORER ribbon tab, in the Options group, click Settings.
2. In the Settings dialog box, click Enable Advanced Query Editing.
Once you enable advanced query editing, you can create an empty query by using the Write Query option in the From Other Sources ribbon menu.
To create an advanced query
1. In the DATA EXPLORER ribbon tab, click From Other Sources > Write Query.
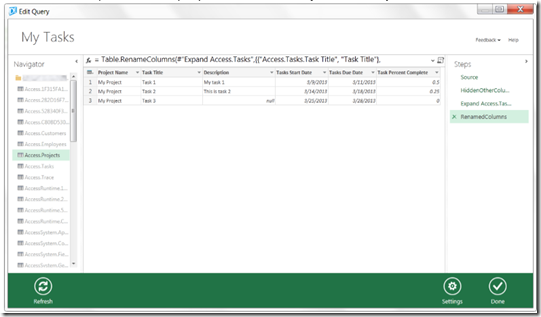
2. In the Edit Query dialog box, add query steps that contain Data Explorer formulas by using the formula bar or click the query script icon ( ) to display the Edit Query formulas dialog box.
3. In the Edit Query dialog box, replace the default query with the Project Task Query.
4. Click Edit credentials. In the SQL Server Connection Information dialog box, enter the SQL Database instance UserName and Password.
5. In the Access a Microsoft SQL Database dialog box, enter the SQL Database instance UserName and Password.
6. Click Save. Data Explorer builds a query from the custom Project Task Query.
7. Click Done.
After you click Done, Data Explorer executes the query and inserts a task report. To update the task worksheet, you simple click Refresh in the QUERY ribbon tab.


