Provisioning Windows Azure
In this post, I will show you how to sign-up for Windows Azure. To complete this, you will require: a physical address, a telephone number, a Windows Live ID and a valid credit card.
The top-level post with a table of contents to all the related posts is here.
1. Go to www.azure.com – it will resolve to https://www.microsoft.com/windowsazure/ but I find it easier to remember.
2. Windows Azure is a paid service, which means it costs money to use it. There are essentially two pricing models: pay-as-you-go or commitment. Hover over the Pricing tab and select Offers from the drop-down menu to view the pricing packages.
3. Pick a suitable package for your needs and click the Buy button. I picked the Windows Azure Platform Introductory Special, since it is a no commitment pay-as-you-go plan and is free until the end of January 2010.
4. The purchase is processed through the Microsoft Online Services Portal, which is another website that loads automatically. You will need to select your location and proceed through the pretty straightforward wizard.
5. You will need to sign in using your Windows Live ID. The Sign in link is a little concealed – see below.
6. Enter your Windows Live credentials and sign in.
7. Next, you will be presented with a four step wizard in which you will need to enter (1) your contact information, (2) your company information and (3) your service usage address. First your contact information (fields with a red asterisk are required):
8. After clicking Next, you will see the company information form:
9. Next comes the service usage address. This may be different to your contact information and determines which services are available to you and the tax calculation. It is important to note that once selected, the country or region can never be changed.
10. Finally, a confirmation screen appears. Click Close to return back to the Microsoft Online Services Portal services page.
11. On the Microsoft Online Services Portal services page, click Windows Azure Platform in the Services Filter.
12. A list of Windows Azure services will be displayed. As I said in step 3, I will pick Windows Azure Platform Introductory Special. Click on the Buy Now button to place the package in your shopping cart.
13. Your shopping cart will be displayed. You must check the acknowledgement box in order to proceed to the checkout. Once you have read and acknowledged the information, click the Checkout button. Note that on this screen, you have an opportunity to change the service usage address. As stated in step 9, the region or country cannot be changed.
14. This is part where we take your money! You will most likely not have a credit card setup in the Microsoft Online Services Portal and will need to add one by ensuring that the button next to New credit card is selected and then click on Next.
15. For security, you need to sign in again to enter your credit card information.
16. Once signed in, you are presented with a four step wizard in which you must enter your credit card account information, read and accept the agreement and review your order. For US customers, Visa, Master Card, American Express and Discover are all valid forms of payment. Acceptable forms of payments in other regions may vary. Once you have entered the required information, click on Next.
17. You will then be presented with the Microsoft Online Subscription Agreement, which you should read. In order to accept it, you must check the box, enter your full name and (optionally) your job title. Once you have done all this, click on I Accept.
18. Now you must review your order. Click Confirm Order to continue. Note that if you click Cancel, you will be taken back to the shopping cart screen and will need to start the checkout process all over again, however, your credit card information will have been saved.
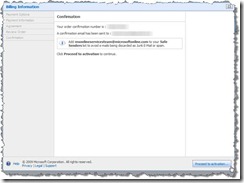
19. Finally, you are presented with the confirmation screen where your order confirmation number is displayed. You will receive a copy of this information by email. This concludes the payment aspects. Now the service must be activated. Click on Proceed to activation to continue.
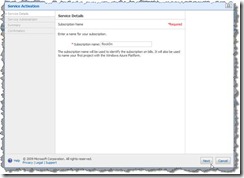
20. The service activation has four steps. In it, you will name your subscription and set the administrative contact. First, enter a subscription name. This is primarily used to identify your subscription on your bill. Once you have entered a name, click Next.
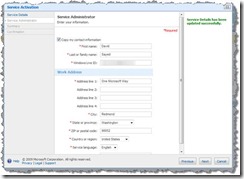
21. Next, enter the administrative contact information. These fields are pre-populated with the contact information entered for the service usage address. Click on Next to continue.
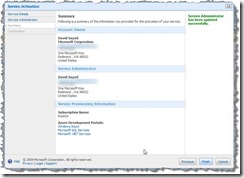
22. The service activation summary is displayed. Nothing to do here except click on Finish.
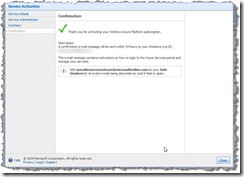
23. Finally, a confirmation screen is displayed. Click on Close to continue.
24. The Microsoft Online Services Portal is displayed with a list of your subscriptions. The one that you just setup will appear here with “Activation in Progress” as its status. After a few moments, you can refresh this page and the subscription status should be “Active”.
Now you’re ready to move on to setting up Windows Azure for storing your videos.


