Exemplo de Script em PowerShell para auxiliar a criação de Collections para o Configuration Manager 2012 e/ou Posterior
Neste post temos um exemplo de script PowerShell para auxiliar a criação de multiplas Collections para administração Configuration Manager 2012 e/ou posterior. Vamos utilizar um arquivo .CSV auxiliar para a nomenclatura das collections e queries utilizadas.
IMPORTANTE: Faça a execução sempre em um ambiente de testes, homologação e após sua total validação programe sua execução.
Copie o código abaixo e salve o mesmo como exemplo MSFT-Collections.ps1
##########################################################################
# SAMPLE POWERSHELL SCRIPT #
##########################################################################
# Removes all text from the current display
Clear-Host
# Type the path from CSV file
$SourcePath = Read-Host -Prompt "Type the path from CSV file"
$SourceFile = Read-Host -Prompt "Type the filename using CSV extension"
# Import the Configuration Manager PS Module (You must have the Admin Console installed for this to work)
Import-module ($Env:SMS_ADMIN_UI_PATH.Substring(0,$Env:SMS_ADMIN_UI_PATH.Length-5) + '\ConfigurationManager.psd1') -force
# Get ConfigMgr Provider
$PSD = Get-PSDrive -PSProvider CMSite
# Open ConfigMgr Site
CD "$($PSD.Name):\"
# Get current date and time
$Date = Get-Date -Format g
# Set Update Schedule for Collections
$Schedule = New-CMSchedule -Start $Date -RecurInterval Days -RecurCount 1
# Create Default limiting collections
$LimitingCollection = "All Systems"
# Create Defaut Folder
$DefaultFolderName = "MSFT"
if (!(Test-Path "$($PSD.Name):\DeviceCollection\$DefaultFolderName")){
New-Item -Name $DefaultFolderName -Path "$($PSD.Name):\DeviceCollection"
}
# Import Collections from CSV List
Import-Csv -Path $SourcePath\$SourceFile | ForEach-Object {
# Create device collections
$getCollection = Get-CMDeviceCollection -Name $_.CollectionName
# Check if collection exists
if ($getCollection -eq $null){
New-CMDeviceCollection -Name $_.CollectionName -LimitingCollectionName $LimitingCollection -RefreshSchedule $Schedule -RefreshType Periodic
# Create device collections
Add-CMDeviceCollectionQueryMembershipRule -CollectionName $_.CollectionName -QueryExpression $_.Query -RuleName $_.CollectionName
# Move the collection to the right folder
$FolderPath = "$($PSD.Name):\DeviceCollection\$($DefaultFolderName)"
Move-CMObject -FolderPath $FolderPath -InputObject (Get-CMDeviceCollection -Name $_.CollectionName)
$cont = $cont+1
$cont
}
}
##########################################################################
##########################################################################
Aqui parte do texto do arquivo auxiliar para a criação das collections e suas queries. No exemplo temos os campos CollectionName, Query separados por vírgula. Aqui apenas uma linha, para o exemplo completo faça o download do arquivo mais abaixo.
CollectionName,Query
All Clients Not-Approved,"select SMS_R_SYSTEM.ResourceID,SMS_R_SYSTEM.ResourceType,SMS_R_SYSTEM.Name,SMS_R_SYSTEM.SMSUniqueIdentifier,SMS_R_SYSTEM.ResourceDomainORWorkgroup,SMS_R_SYSTEM.Client from SMS_R_System inner join SMS_CM_RES_COLL_SMS00001 on SMS_CM_RES_COLL_SMS00001.ResourceId = SMS_R_System.ResourceId where SMS_CM_RES_COLL_SMS00001.IsApproved <> 1"
Siga os passos abaixo:
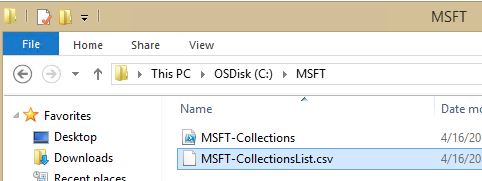
Passo 1: Criar uma pasta na unidade exemplo "C:\MSFT" e copie os 2 arquivos para dentro desta pasta
Passo 2: Executar o arquivo "MSFT-Collections.ps1" com o PowerShell para iniciar a criação das Collections
Você poderá receber uma mensagem semelhante a tela abaixo, digite Y para continuar
Passo 3: Digite o caminho e o nome do arquivo CSV, em nosso exemplo para pasta "C:\MSFT" . Ao digitar o nome “MSFT-CollectionsList.csv” do arquivo não esqueça de colocar a extensão.
Se o script PowerShell iniciar com sucesso, teremos uma tela semelhante ao print abaixo
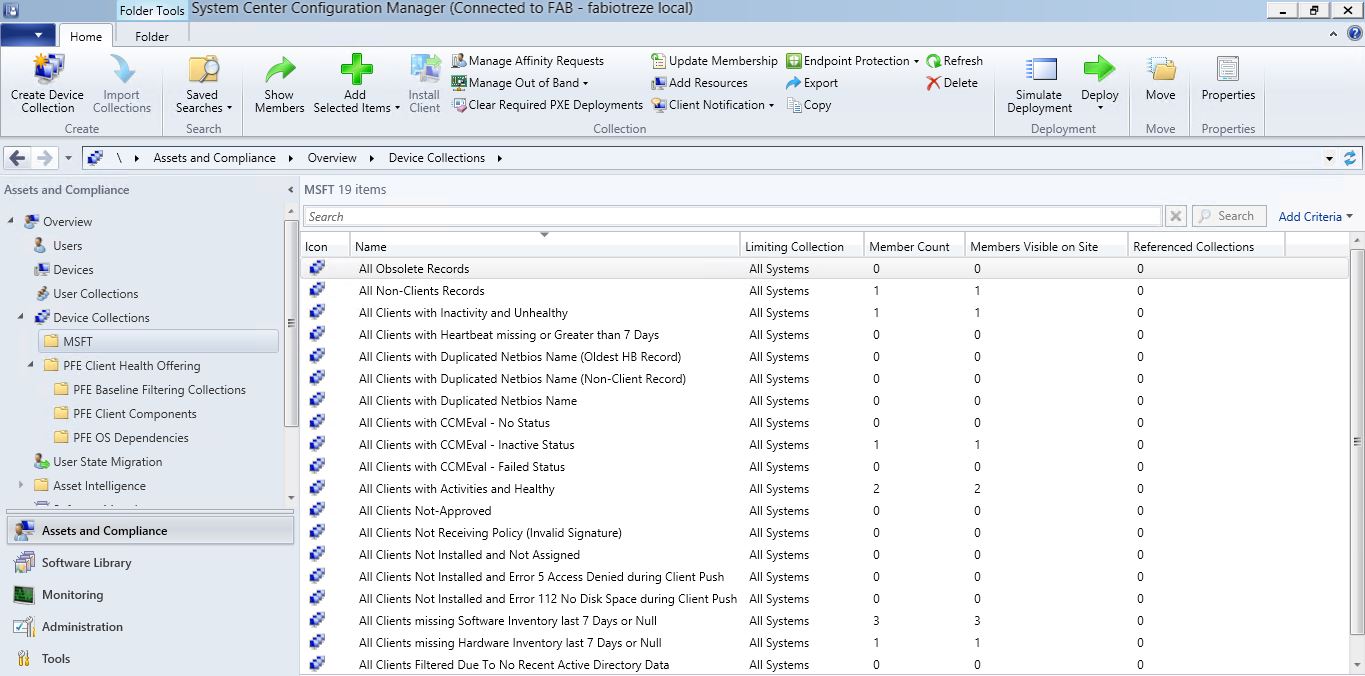
Passo 4: Como resultado devemos ter uma pasta chamada "MSFT" e no painel da direita a estrutura de Collections
Para o download do exemplo utilizado neste post, clique aqui.
Abs!


