Quickstart: Prepare your lab environment
In this quickstart, you prepare the technician PC to then install a basic Windows IoT Enterprise image onto a reference device sample. At the end of this quickstart, you have a technician PC ready to start building Windows IoT Enterprise images, and a reference device sample with Windows IoT Enterprise installed.
The lab environment created during this exercise is used in the successor quickstarts:
- Quickstart: Customize a reference device in Audit mode
- Quickstart: Sysprep and capture the reference device image, and deploy to a new device.
In this series of quickstarts, you can opt by using a Virtual Machine as your reference device sample. In a true development or production environment, you would start by choosing a Physical Device that meets the Minimum System Requirements for Windows IoT Enterprise.
Tip
You can also use the lab environment created during this exercise, to complete other tutorials under Customization, Optimization and Deployment.
Prerequisites
To prepare your technician PC (your work PC), you need:
- Windows 11 with the latest updates.
- Have at least 15 GB of free space for installing the software and for modifying Windows IoT Enterprise images.
- Have Windows Assessment and Deployment Kit (ADK) with Deployment Tools, Configuration Designer, and the Windows PE add-on installed.
- Have a Windows 11 IoT Enterprise Long-Term Servicing Channel (LTSC) 2024 ISO.
Note
Windows 11 IoT Enterprise LTSC 2024 is now available for OEMs building new devices, enterprise customers upgrading existing system through volume licensing. and evaluation.
- If you are an OEM, contact your authorized Windows IoT Distributor for assistance with Licensing.
- If you are an enterprise customer looking to upgrade fixed function devices through volume licensing, see Windows Desktop Operating System Volume Licensing Terms and Windows IoT Enterprise LTSC in Volume License for deployment guidance.
- To evaluate Windows 11 IoT Enterprise LTSC 2024, download the 90-Day Evaluation.
- If you have a Visual Studio Subscription, and Windows IoT Enterprise is available with your subscription, you can download previous versions of Windows IoT Enterprise LTSC from Visual Studio Subscriptions - Downloads.
To prepare your reference device sample, you need:
- A physical device that meets the Minimum System Requirements for Windows IoT Enterprise.
- An external keyboard, mouse, and a monitor (depending on the device).
- A USB key that's at least 8 GB in size and that can have all information removed from it.
Create a bootable Windows IoT Enterprise installation media
The typical way to install Windows in a physical device is to create a bootable USB flash drive, and then copy the Windows installation files onto the flash drive. Once you have the files on the flash drive, you can insert it into the device and boot from the flash drive. To learn more, see Install Windows from a USB flash drive.
Follow these steps to prepare the installation flash drive:
Insert a flash drive into your Technician PC.
Open Command Prompt with Administrator privileges and run
diskpart:diskpartUse
diskpartto list the disks so you can identify the flash drive:list diskYou should see something like:
Disk ###  Status         Size     Free     Dyn  Gpt
--------  -------------  -------  -------  ---  ---
Disk 0    Online          238  GB     0 B        *
Disk 1    Online          8192 MB     0 B
In this example, Disk 1 is our flash drive, because the size represents the size of the flash drive that we're using.
When you identify the disk number of your flash drive, use
diskpartto prepare the drive so you can use it as a bootable installation drive:Warning
The following commands will erase everything on the flash drive.
Enter the following commands from within
diskpart, where Disk 1 is the flash drive:Select disk 1 clean create partition primary select partition 1 active Format fs=fat32 quick assign exitMount the Windows IoT Enterprise ISO on your Technician PC by double clicking the ISO and copy the entire contents onto the root of the flash drive. You can use File explorer to manually copy the files.
Boot the device to Windows Setup:
- Move the USB flash drive from the technician PC to the powered down physical device.
- Turn on your physical device and enter the device's boot menu. Your device has a specific button combination or keyboard key to press to get to the boot menu. You might need to consult your hardware documentation if you aren't familiar with how to get to your device's boot menu.
- From the boot menu, select the flash drive to boot from. Your device boots from the flash drive and enter into the Windows Setup.
Install Windows IoT Enterprise on your reference device sample
This section covers how to install Windows IoT Enterprise on your reference device sample using Windows Setup. The steps apply to both physical device and virtual machine.
Tip
We recommend not having your device connected to any network during Windows Setup. Network connectivity could cause it to come out of the deferred activation state.
Install Windows with Windows Setup:
Step through the Windows Setup menus, providing the requested information. Choose the settings, such as language, time and currency, and keyboard options that apply to your device and proceed to the next screen.
Select Install Windows 11.
On the Activate Windows screen, insert a valid product key. This screen doesn't show if you're using an evaluation or volume license edition.
On the Applicable notices and license terms screen, select Accept if you agree with the terms.
On the Select location to install Windows 11 screen, if the device has existing partitions, we recommend deleting the partitions so you have a single block on unallocated space to start from, then select Next to start the installation.
Your device restarts a couple of times during the operating system installation. Wait until the device enters Out Of Box Experience (OOBE) and is showing a screen that says Is this the right country or region?.
Important
When at the Is this the right country or region? OOBE screen don't continue the setup as you will need to enter Audit mode at this point. In the event that you started the setup of an account by mistake, you can open Command Prompt with Administrator privileges and run
C:\Windows\System32\Sysprep\sysprep.exe /auditto enter Audit mode and continue the steps.
Enter Audit Mode
Windows is installed on your reference device sample and you have a basic image that's ready to be customized in Audit mode.
From the first OOBE screen that says Is this the right country or region?, use the Ctrl+Shift+F3 combination on your keyboard to enter Audit mode.
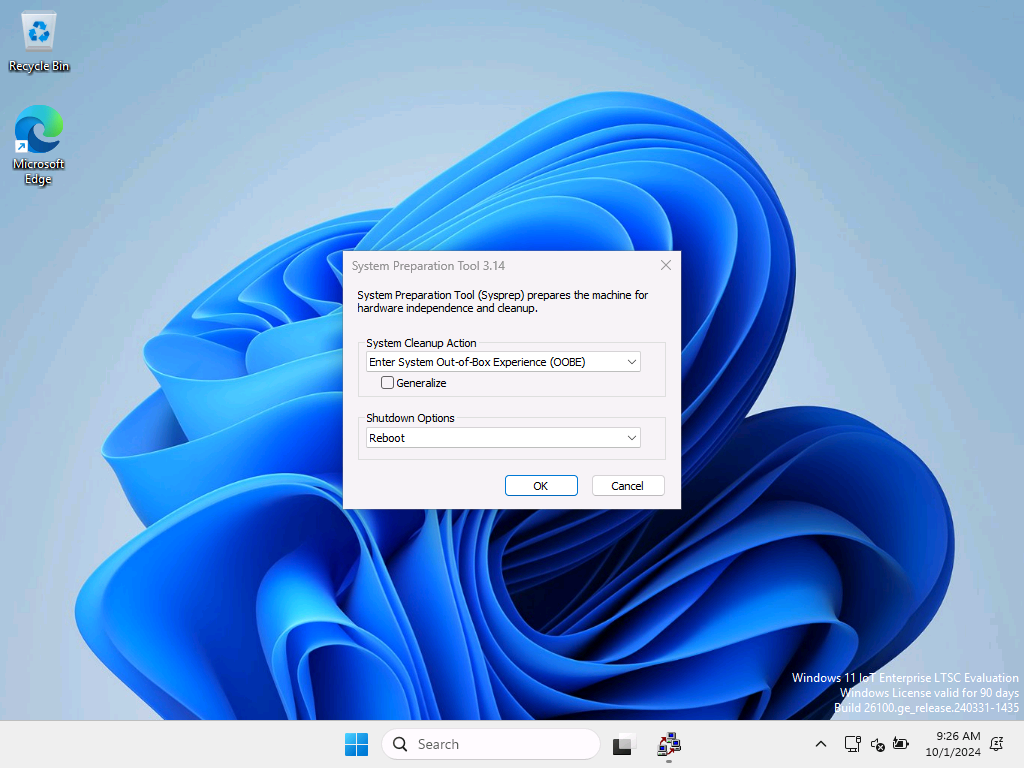
Your device should restart in Audit mode. You know you're in Audit mode when you see a System Preparation Tool window.
Every time you reboot the system you see the System Preparation Tool, also called Sysprep. Sysprep can be hidden behind the start screen, so you might need to minimize the start screen to see it. Select Cancel on the System Preparation Tool to close it.

Tip
If you're in Audit mode and a password-protected screen saver starts, you can't log back on to the system. The built-in administrator account that's used to log on to Audit mode is immediately disabled after logon. Disable the screen saver by either changing the power plan in the Settings app, or configure and deploy a custom plan. For more information, see Create a Custom Power Plan.